
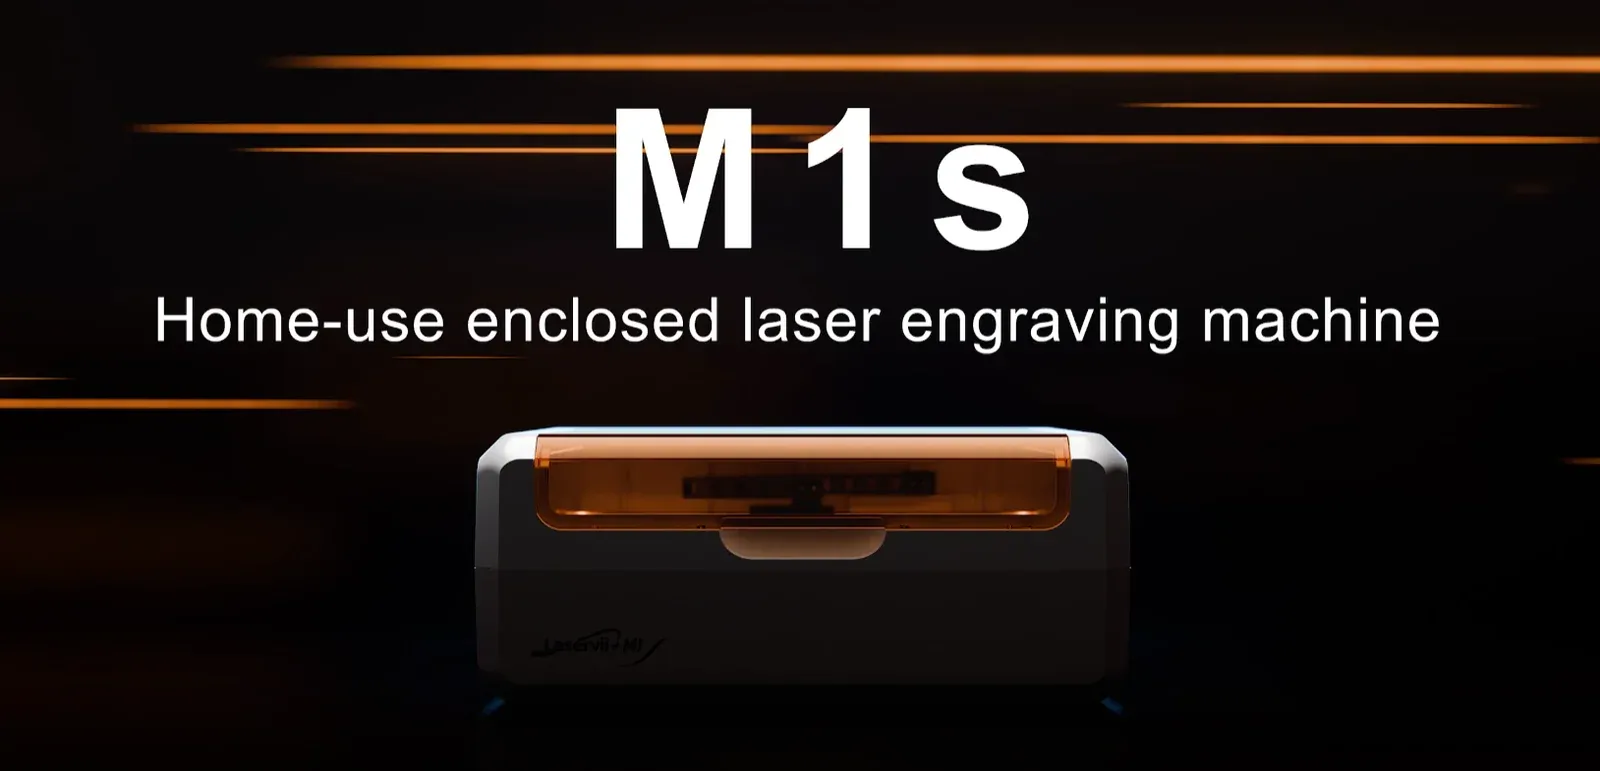

At 3Dwork we keep a close eye on the entry-level laser cutter segment, where every so often a new brand appears promising to solve the big problem of open diode lasers: smoke, odor and lack of containment. The Laservii M1s enters that territory with a clear proposal: a diode laser with an enclosed cabin, CoreXY kinematics and a head that can be swapped for another one at an affordable price.
The unit that went through the workshop arrived in a very basic configuration, and we have cross-checked it against the manufacturer’s official spec sheet and its wiki. In this review we carefully separate what Laservii says from what we have verified ourselves, so you get the most honest picture possible.
Before you go on, remember that you can join our community on the 3Dwork Telegram channel, full of makers passionate about laser, 3D printing and CNC. You can also find us on Instagram, YouTube and TikTok.
Laservii M1s: what it is and who it is for
The M1s is an enclosed diode laser engraver and cutter. On paper, its main selling point is packing an enclosure with smoke extraction, a lid-open sensor, a key lock and an emergency stop into a desktop machine. Laservii offers three modules for the same chassis: two blue diode ones (12 W and 24 W) and one 2 W infrared.

It suits someone who already knows they want a desktop laser, is willing to complete it with accessories and to spend time getting it dialed in. It is not a plug-and-forget machine, as you will see throughout the review. The safety of the enclosure is a good starting point but, as we detail below, the smoke handling on our unit is clearly something that could be improved.
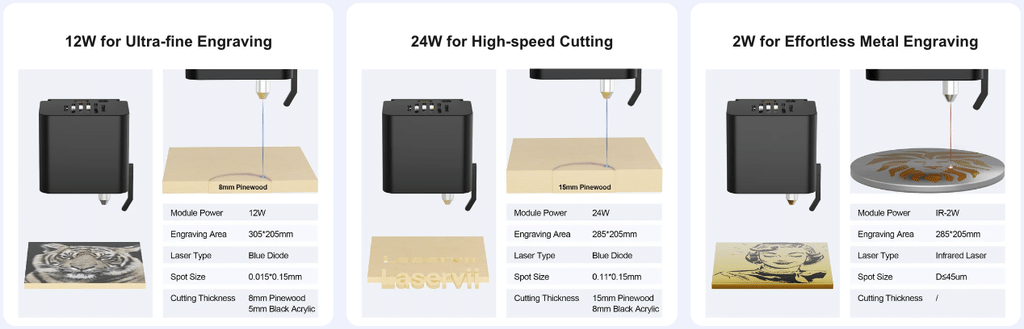
This is the spec sheet with the manufacturer’s data, comparing the three modules:
| Specification | M1s 12 W | M1s 24 W | M1s IR 2 W |
|---|---|---|---|
| Laser type | Blue diode, 450 nm | Blue diode, 450 nm | Infrared, 1064 nm |
| Continuous optical power | ≥ 9 W | ≥ 19.5 W | ≥ 2 W |
| Spot size | 30 × 170 µm (typical) | 110 × 150 to 150 × 200 µm | ≤ 45 µm diameter |
| Work area | 305 × 205 mm | 285 × 205 mm | 285 × 205 mm |
| Engraving accuracy | ±0.1 mm | ±0.15 mm | ±0.1 mm |
| Power consumption / adapter | 72 W (24 V / 3 A) | 120 W (24 V / 5 A) | 96 W (24 V / 4 A) |
| Machine weight | 7.0 kg | 7.2 kg | 7.2 kg |
It is worth clarifying that “12 W” and “24 W” are commercial designations, not the actual optical power coming out of the lens. The spec sheet declares a continuous optical power of at least 9 W for the first and at least 19.5 W for the second. This is common practice with diode lasers, not something exclusive to Laservii, but keep it in mind when comparing figures with other brands that publish the optical power directly.
| General specification | Value according to the manufacturer |
|---|---|
| Kinematics and maximum speed | CoreXY, 36,000 mm/min (600 mm/s) |
| Positioning accuracy | ±0.1 mm |
| Focus | Manual, with a calibration ruler; fixed focal distance of 21±0.5 mm |
| Camera | Not included; optional accessory |
| Software | LightBurn and LaserGRBL (open-source GRBL firmware); Laser Maker Space own software (PC) and WeCarver (mobile) |
| Connectivity | WiFi, USB, SD card; no Bluetooth or USB flash drive |
| Physical dimensions | 485 × 375 × 200 mm |
| Supported workpiece height | 0-50 mm with any module (removable base to gain height or fit the rotary) |
| Enclosure | ABS + PC housing, tinted hinged lid, pause sensor when opened |
| Smoke extraction | Built-in fan + exhaust hose included |
| Safety | Emergency stop, key lock, air assist port, protective glasses included |
| Certifications | CE-MD, CE-RED NB, FCC SDoC, FCC ID, EN 60825-1, FDA, UL 62368-1, CAN/CSA 62368-1 |
The third head is different in technology: 1064 nm infrared instead of blue diode. This points it toward fine marking of metals (stainless steel, titanium, iron, aluminum, copper, brass and zinc) and of opaque acrylic.
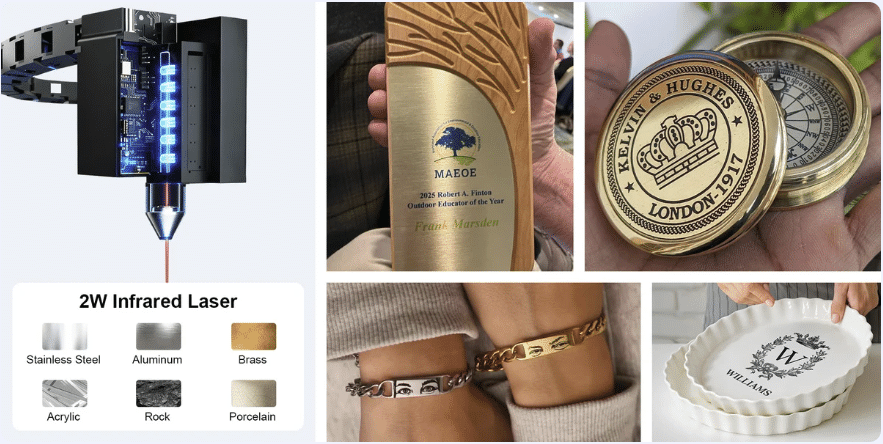
We have not tested this module, so we cannot comment on its real performance in this case, although we have tested one on other machines, and if you are looking for this kind of metal engraving it is a perfect accessory.
As we have already mentioned, the modules are interchangeable on the same chassis, so you can start with one and expand later instead of changing machines, which makes this Laservii M1s a very versatile machine.
Regarding the materials we can work with, taking into account the different heads available:
| Module | Compatible materials (official spec sheet) |
|---|---|
| Diode 12 W / 24 W | Plywood, MDF, solid wood, paper, kraft paper, coated metal, leather, laser-safe plastics (selected) and bamboo |
| IR 2 W | Fine marking of stainless steel, titanium, iron, aluminum, copper, brass, zinc and opaque acrylic |
The M1s uses CoreXY kinematics: the motors stay fixed on the frame instead of traveling on the gantry, which reduces the moving mass and allows higher speeds without losing accuracy. The manufacturer advertises up to 36,000 mm/min and claims it is three times faster than a conventional diode laser. That is a maximum travel speed, not a real cutting speed with good quality, so take it as a theoretical ceiling rather than a reference for everyday use. The manufacturer does not publish the acceleration (mm/s²) and we have not measured it independently.
The M1s has no autofocus: focus is set by hand with a calibration ruler, until you reach the fixed focal distance of 21±0.5 mm. It is not a complicated process, but it adds a manual step every time you change material or thickness, something machines with autofocus handle on their own.
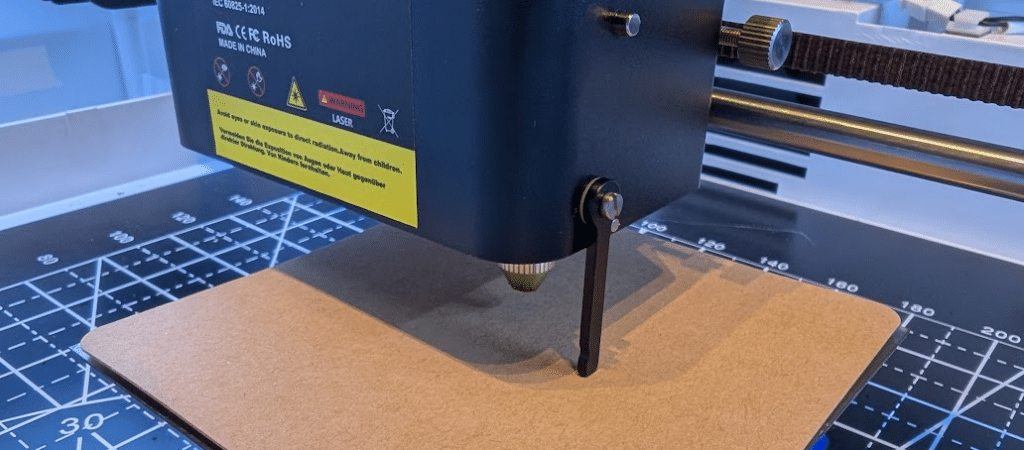
It also has no camera as standard. The spec sheet says there is a rear provision to connect one, but it is sold separately or in bundles. Without a camera, positioning is done by “framing”: the laser traces the outline of the design at low power before running the job. It works, but with the tinted lid visibility is limited and you have to be careful when placing the workpiece.
Our unit arrived with the 24 W laser, without air assist, without a rotary tool and without a honeycomb panel. It is a very basic machine, which makes it hard to see what it would be capable of when properly equipped. This is what the spec sheet says about the equipment:
| Item | Included | Detail according to the spec sheet |
|---|---|---|
| Camera | No | There is a rear provision; the camera is sold separately or in bundles |
| Air assist | No (pump sold separately) | The head comes with a threaded port from the factory |
| Rotary module | No | Rear port for optional cylindrical accessories (TR3, LR1) |
| Honeycomb panel | No | The base is smooth metal with graduation marks; the panel is an optional accessory |
Laservii’s official website offers a catalog of accessories to expand the M1s. We have not tested them: the images come from the manufacturer’s store and are there to help you identify them.
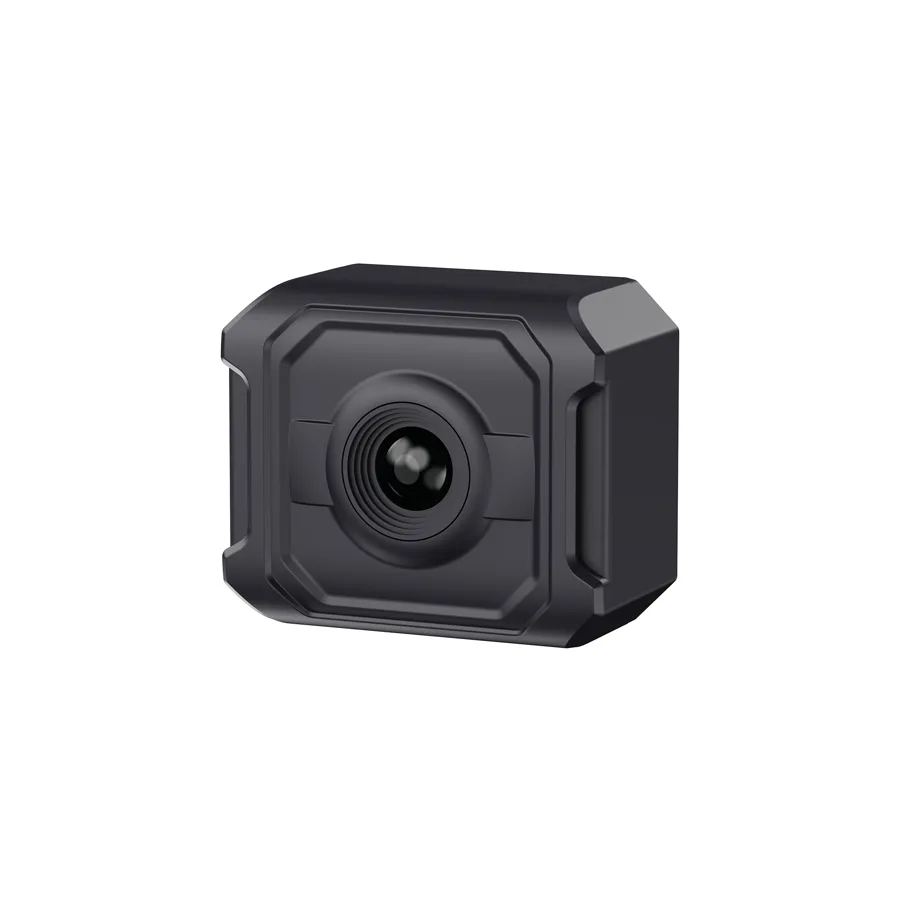
Camera kit. According to the manufacturer, it gives a real-time preview of the material so you can place the design precisely, with reduced edge distortion and a detail mode for text and fine patterns. It connects to a rear port on the control box.
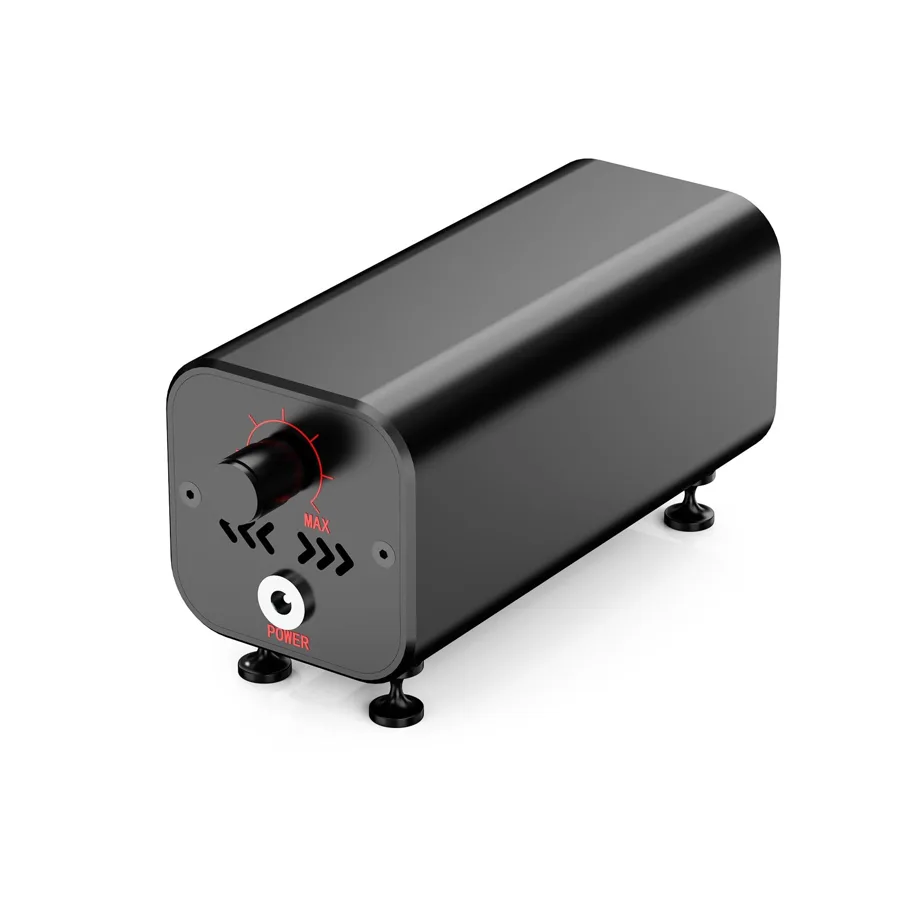
Air assist kit. A 30 L/min air pump that blows over the point where the laser hits. It clears smoke and debris, keeps the lens clean and improves the cut finish. The M1s already has the port; the pump is bought separately.
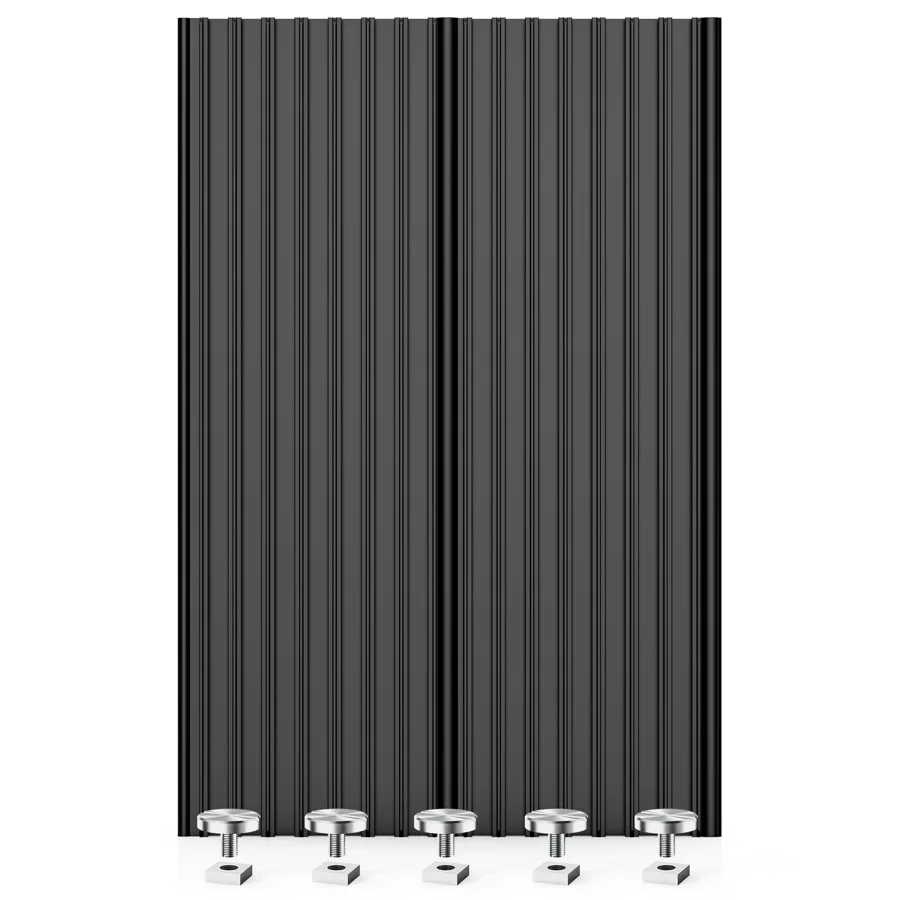
Honeycomb panel. Aluminum work surface that holds the workpiece, protects the base and helps evacuate smoke, which can yellow the material. Includes corner protectors.
Riser kit. Raises the machine to gain working height for thick pieces or to fit the rotary. Laservii also sells a pack of 8 generic 150 mm risers.
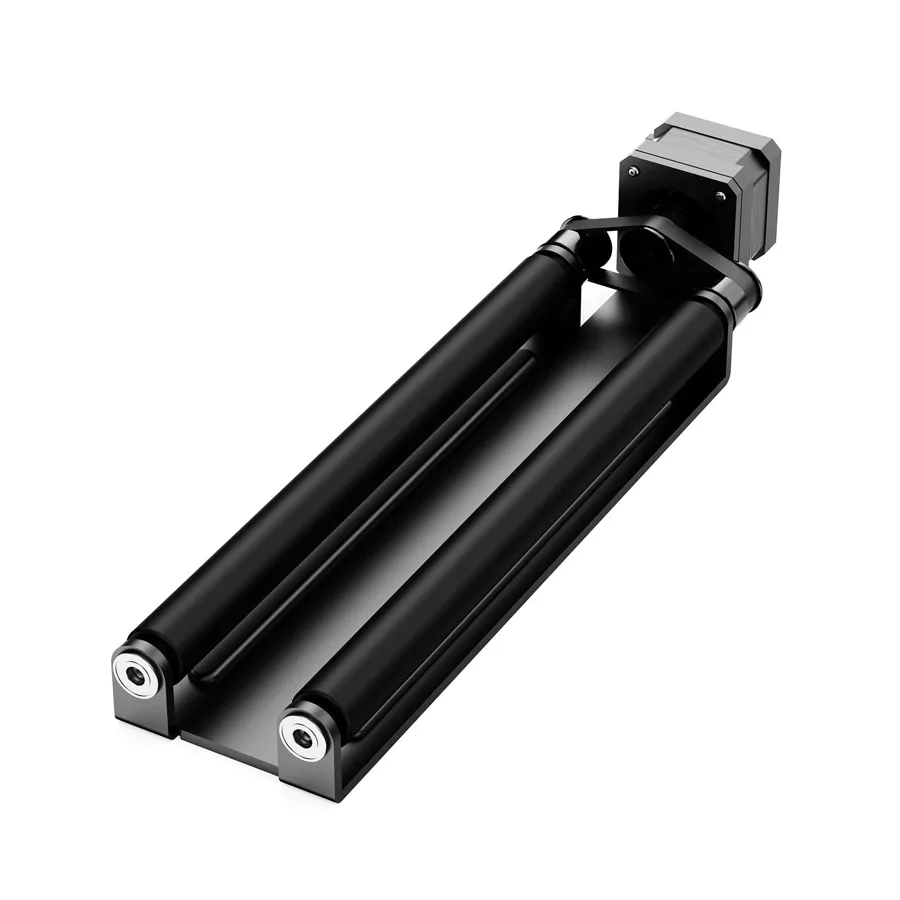
LR1 rotary. Roller rotary compatible with any Laservii engraver. According to the accessory’s spec sheet, it takes pieces from 30 to 200 mm in diameter and up to 280 mm long (other brand texts mention 10 to 180 mm). Designed for bottles, mugs and tumblers.
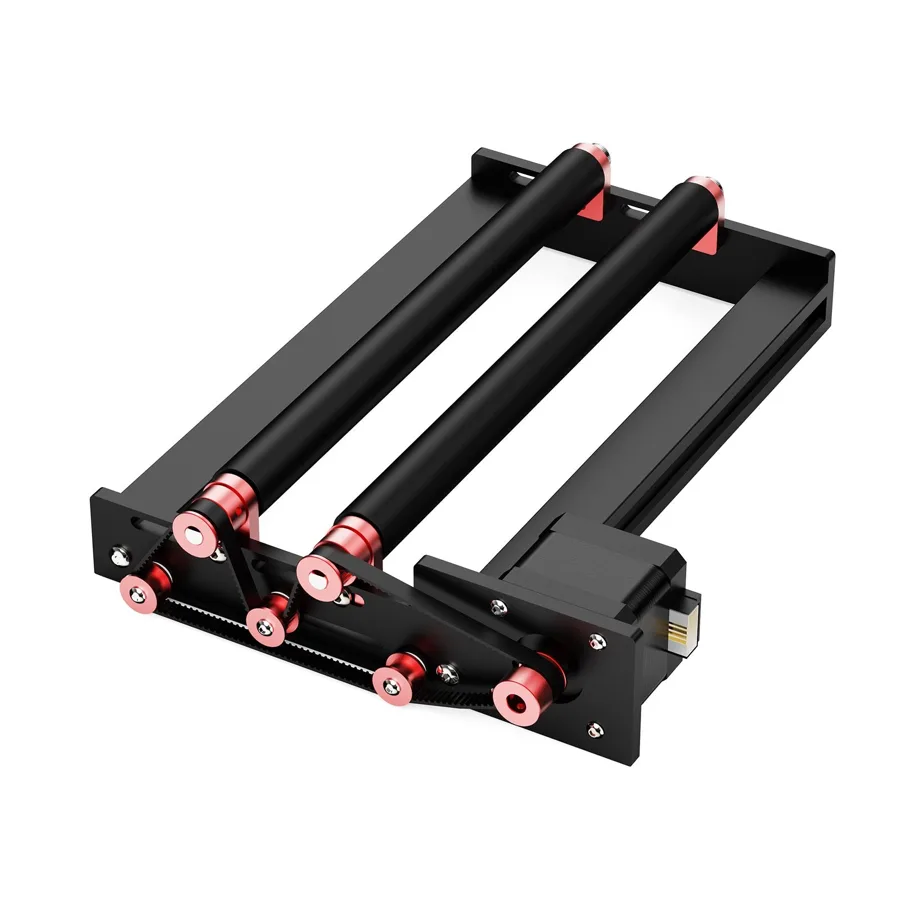
TR3 rotary. Roller rotary assembled at the factory and ready to use, compatible only with LightBurn, with a maximum diameter of 150 mm and adapter cables for several machines.
To understand what the M1s makes you give up, we compare it within Laservii’s own range, which is split into two families: the M1 series, enclosed (the M1s in its three variants), and the L1 series, open-frame, with models such as the L1 mini 3 W, the L1 Pro 7/12/20 W and the L1 Plus 20/24 W with an enlarged area of 500 × 500 mm.
The most striking difference is the equipment: according to the brand’s spec sheet, the open-frame L1 Pro includes autofocus and a red-dot pointer locator as standard, features that on the M1s you have to handle by hand. The trade-off is that the L1 Pro does not have the M1s enclosure. In other words, the M1s bets on containing the beam and the smoke over positioning aids, and on the unit we tested that containment, especially regarding smoke, could be improved.
Within the M1s itself, the choice depends on use: the 12 W has a somewhat larger work area and a finer spot; the 24 W offers more optical power but with a larger spot and slightly lower engraving accuracy; and the IR 2 W is the one specialized in metal marking. We avoid comparing with lasers from other brands because we have not tested them under the same conditions.
Build quality and first impressions
The build is very basic and in line with what you would expect from a machine in this segment: ABS and polycarbonate housing, a single tinted panel and few frills. It does the job, but it does not convey the sturdiness of other machines we have had in the workshop. Since it arrived without air assist, rotary or honeycomb panel, the first impression is of a base to which you need to add things before you can get the most out of it.
Here is the video that goes with this review:
According to the manufacturer’s spec sheet, the hinged lid includes a safety switch: if it is opened during a job, the machine pauses and the laser stops. On top of that there is an emergency stop button on the external control box, a key lock to prevent unauthorized people (for example, children at home) from switching the machine on, protective glasses in the box and a port ready for air assist. The spec sheet also cites certifications such as CE, FCC, FDA, EN 60825-1 and UL 62368-1.
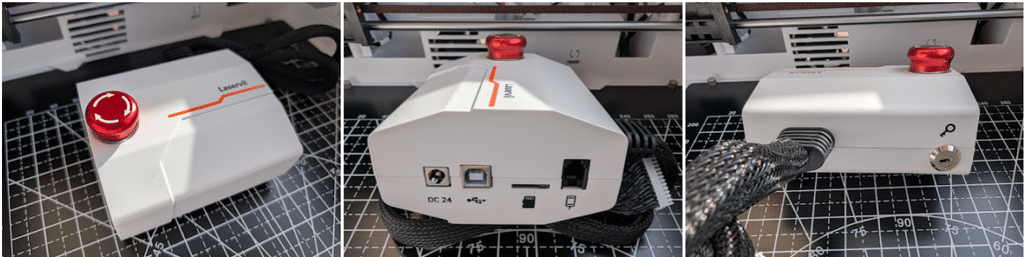
On paper, this is a very different approach from an open-frame laser, where the beam is exposed. But in practice we found a clearly improvable point: smoke management.
The smoke outlet is a simple fan with no filter of any kind, with an exhaust hose, and the cabin seal is not very airtight. In practice, smoke and volatile organic compounds (VOCs) are neither evacuated nor filtered well enough. We have no measurements of our own for these compounds and we are not going to give figures we cannot back up.
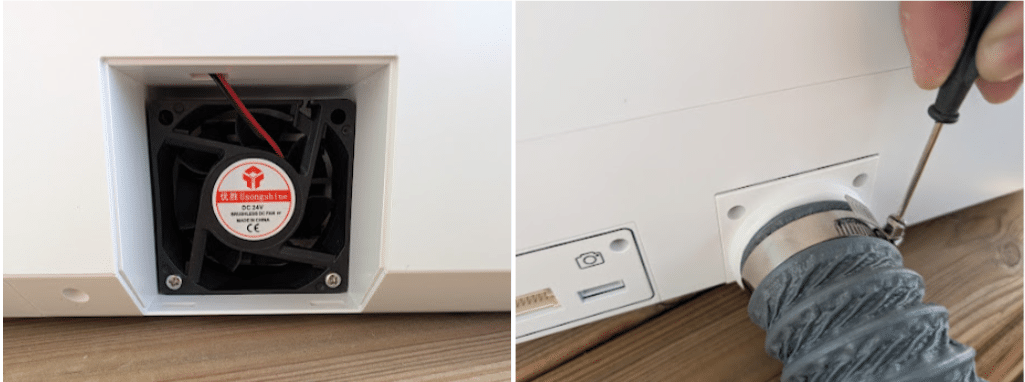
Just because the machine is enclosed does not mean it is safe to use indoors without further measures. Our practical recommendations:
- Work in a well-ventilated space and, if you can, route the outlet air outside with the hose.
- Add an external extraction or filtering system: the stock fan is no substitute for a filter.
- Do not stay in the same room breathing the air while the machine is working.
- Air assist helps clear smoke from the cutting point, but it does not solve evacuation on its own.
- Even if you cut “laser-safe” materials such as plywood or MDF, keep ventilating: MDF, for example, releases formaldehyde from the glue when it burns.
Keep the included glasses at hand for any adjustment with the lid open or the laser exposed. An important caveat with the 2 W IR module: the spec sheet we were able to verify does not state what eye protection the lid offers against each wavelength, the 450 nm of the blue diode or the 1064 nm of the infrared module, and we have not found a specification certifying that the tint blocks IR radiation. Check your unit’s manual before assuming anything and, with the IR module, never look directly at the marking point, not even through the lid.
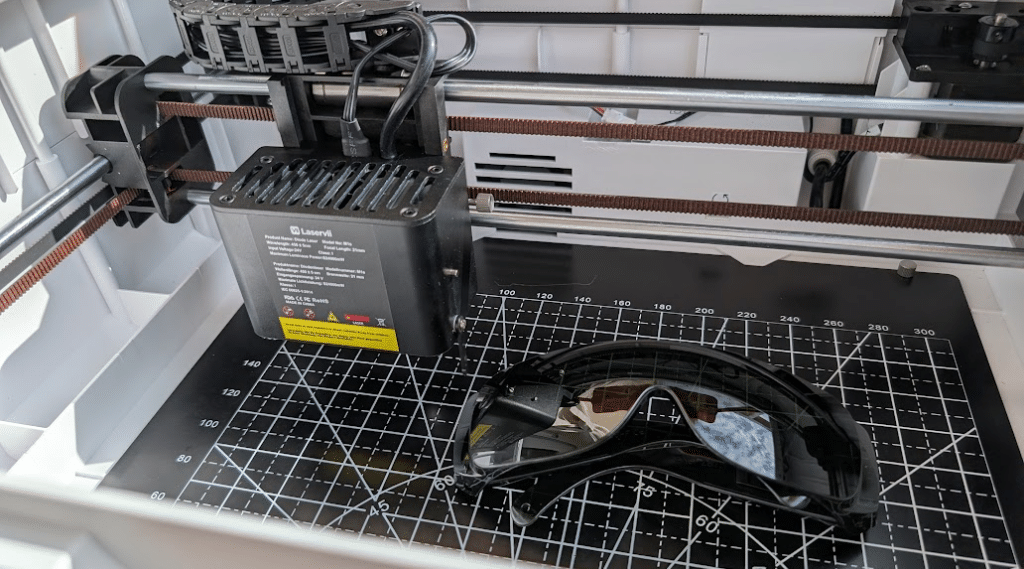
Two rules we always apply and that are not exclusive to this machine: never leave the M1s working unattended, because wood and acrylic can ignite and the enclosure contains the smoke but does not put out a fire, and keep a fire extinguisher at hand. The spec sheet we were able to verify does not detail flame detection or extinguishing systems, so active supervision remains essential.
And the warning we consider most important: there are materials you should never cut or engrave on the M1s or on any diode laser. This is a general laser safety rule, not a test we ran on this machine. The most dangerous is PVC or vinyl (including a good part of synthetic leather and some adhesives): when burned it releases chlorine gas, which is corrosive and toxic to the respiratory tract and can damage the optics and electronics. Add to the list polycarbonate (toxic fumes; it burns and yellows instead of cutting cleanly), ABS (releases hydrogen cyanide and styrene), fiberglass or carbon fiber (particles that are harmful when inhaled) and any chrome-tanned leather or material whose composition you cannot confirm. When in doubt, check the material’s safety data sheet (SDS) before starting the job.
Maintenance
These are general recommendations for a CoreXY diode laser; they are not specific tests on our unit:
- Diode lens. The smoke from each job gradually deposits a thin film on the lens that reduces the effective power reaching the material. Clean it periodically with a cotton swab and isopropyl alcohol, always with the machine off and unplugged.
- X/Y belt tension. In a CoreXY system, a loose belt translates into lost accuracy and misaligned engravings. Check it from time to time, especially if the result starts to look less sharp.
- Fan and extraction hose. Clean the dust that builds up on the rear fan and check that the hose is not bent or blocked. Since smoke evacuation is already the machine’s weak point, it should always be in good condition.
- Tray and work base. Remove cutting debris regularly: besides keeping the machine clean, it prevents a buildup of shavings from feeding a possible fire if a spark jumps.
Software: the area with the most room for improvement
For us, software is the pending homework of the M1s and of many machines in its category: it feels like the experience of the users they are aimed at is not looked after as much as it should be. The M1s runs open-source GRBL firmware and accepts .NC and .Gcode files, so it can be operated with the industry’s standard programs. The manufacturer officially recommends LightBurn and LaserGRBL (the latter for Windows only).
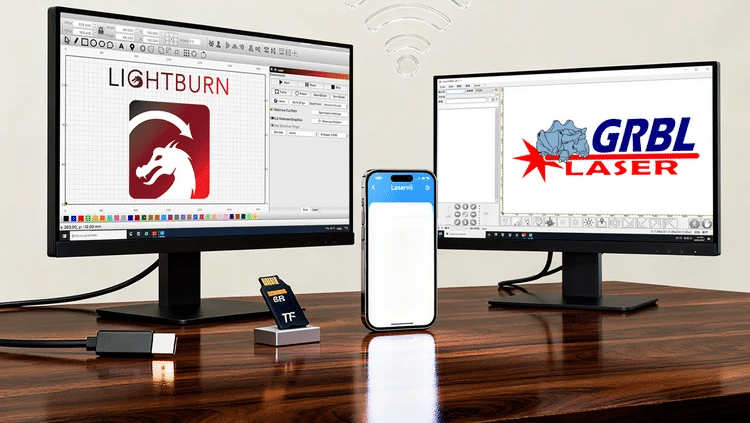
After hours of testing programs, this is what we found:
- LaserGRBL. It is supported, but it can be demanding for a beginner.
- LightBurn. It is paid, and that license may not be worth it depending on how you plan to use it.
- Rayforge. It works, although we found it a still very young solution with some problems.
- Inkscape + UGS. It is also complicated.
- LaserWeb. It works in the browser, but it is not under active development.
After the tests, the general conclusion was that LightBurn is the option to get the most out of our time and the machine, and it is also one of the two the manufacturer itself recommends. In our specific case we focused on Rayforge: although it gave us some random problems, it offers many tools to make use of the machine without paying for extra licenses, it can import the machine configuration from LightBurn and it is updated frequently. If you do not want to deal with bugs, LightBurn is the safest option; Rayforge is for those who accept software still in development in exchange for not paying for a license.
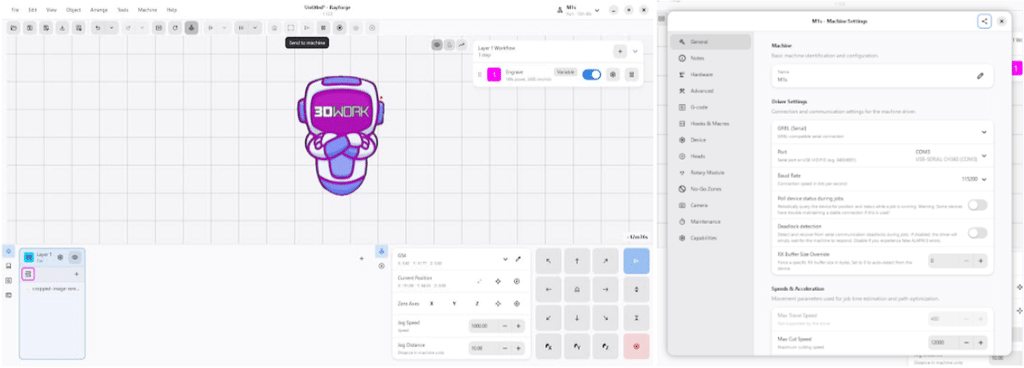
The SD card in the kit includes the CH340 USB driver installer, needed for the computer to recognize the COM port, along with data and firmware files. And, as we verified on our unit, it also carries the LaserGRBL and LightBurn configuration, which can be imported into third-party software that supports it, as is the case with Rayforge. It is a practical detail that saves you from creating the machine profile by hand.
Since it is standard GRBL, other compatible programs should work. On the TwoTrees TS1, which we reviewed some time ago, we ended up using MeerK40t because LaserGRBL seemed too basic to us. We have not tested it with the M1s, so we mention it as a possibility and an alternative.
USB setup, step by step
- Connect the power to the control box and the USB cable to the computer.
- If the computer does not detect the COM port, install the CH340 driver. It comes on the SD card and can also be installed from LaserGRBL.
- LaserGRBL: choose the COM port, select 115200 baud and click Connect.
- LightBurn: with the COM port selected, open the device settings, click Import and load the configuration file from the SD card. That way you do not have to create the profile by hand.
- Before using the SD card, make a copy of its contents on your computer so you do not lose the test files or the configuration.
The M1s supports WiFi, USB and SD card, but not Bluetooth or a USB flash drive. The WiFi does not join your router: the machine creates its own network and the phone connects to it, so in the meantime the phone has no internet. These are the steps according to Laservii’s official guide, which uses the free MKSLaser app (from Makerbase):
- Insert the SD card into the control box: without it the WiFi mode does not work.
- Turn the machine on and, in your phone’s WiFi settings, connect to the network that starts with “Laser_” followed by a number (the wiki guide writes “Lasel”). Each machine has a different number. The password shown in the guide’s screenshots is 12345678; check in your unit’s manual that it is yours.
- If the phone warns that this network has no internet, keep the connection.
- Open MKSLaser, tap Connect, choose WIFI mode and enter the IP 192.168.4.1, which is the one the guide shows. Tap Connect.
- If it does not connect, the real IP can be checked from the computer: with the machine connected by USB to LaserGRBL, type
iin the console and click Send. It will show the network name and the IP.
In the app, for engraving images the guide indicates laser mode M4 and for cutting M3; it suggests an “edge detection” (framing) power of 5% and leaving the air pump disabled if you do not have one. Power and speed depend on the material, and the values in its screenshots are for reference only.
One more detail: the SD card does not work as a standalone reader, because the M1s has no built-in screen and an external screen would be needed. With MKSLaser on the TwoTrees TS1 we had usability and translation problems, and we have not been able to check it with the M1s; for anything beyond basic jobs we recommend a computer with LightBurn or the program you prefer.
Material tests
We would like to go over a bit of vocabulary and key settings before we start:
- Power (%). How much energy comes out of the laser relative to the module’s maximum. More power burns deeper, but also wider (worse detail).
- Speed (mm/min). How fast the head moves. Slower means more energy per point and more depth, but also more risk of burning too much.
- Passes. Repeating the path several times with gentle settings usually gives cleaner edges than a single aggressive pass, especially on thicker material.
- DPI / LPI (lines per inch). Only applies to image engraving: how many scan lines fit in one inch. More LPI means more detail and longer engraving time.
- Air assist. The jet of air that clears smoke and debris from the cutting point. On the M1s it connects to the threaded port on the head.
- Focus. The M1s has no autofocus: readjust the focal distance with the calibration ruler every time you change the material thickness. If you doubt the focus is right, a ramp test (engraving a line on a slightly tilted piece) lets you see at which point the line comes out thinnest and sharpest.
For the MDF we used LaserGRBL’s automatic generator, with the Laser Tools tool and its Material Test Generator, which creates a test grid with different speed and power combinations.
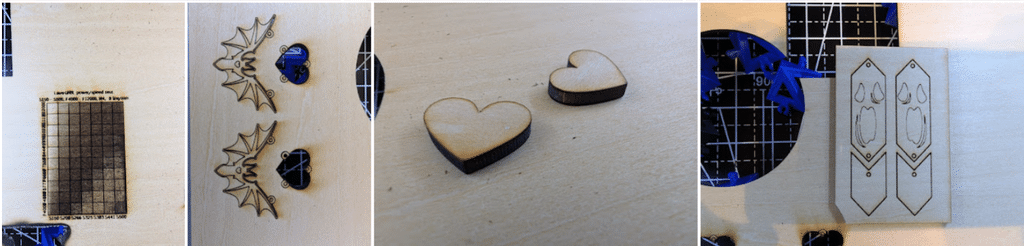
- Material: 3 mm MDF.
- Speed range: from 4,000 to 12,000 mm/min.
- Power range: from 15% (150) to 50% (500).
The Laservii M1s performed excellently, making clean cuts in a single pass, although in this case we missed not having the air assist module, which would have improved the marks on the surfaces much more.
Cardboard is another perfect material to work with on this machine. Engraving on cardboard bags or on any other project with this material, you are going to enjoy it. In any case, and depending on the material, it is important to fine-tune the settings as much as possible and, in this case, to avoid air assist if you have it.
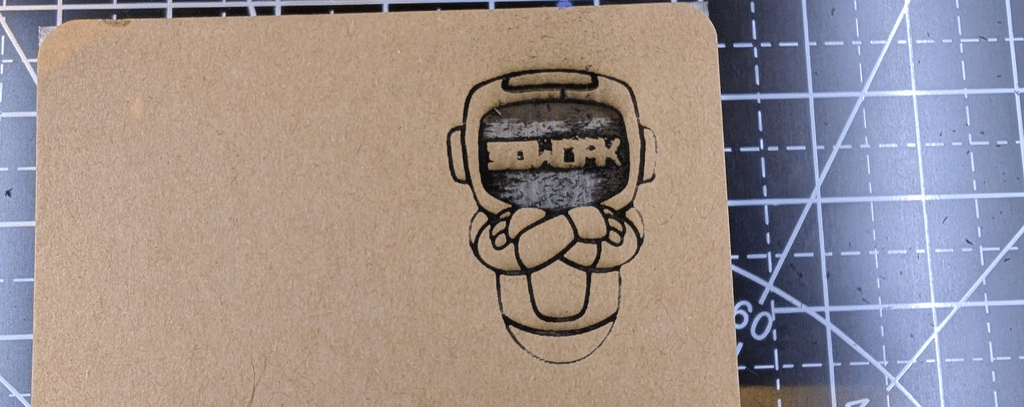
- Material: cardboard.
- Job type: engraving.
- Power: 16%.
- Speed: 3,500 mm/min.
Anodized aluminum is another material that works quite well with this machine. On anodized aluminum you can only engrave: this type of laser cannot cut aluminum.
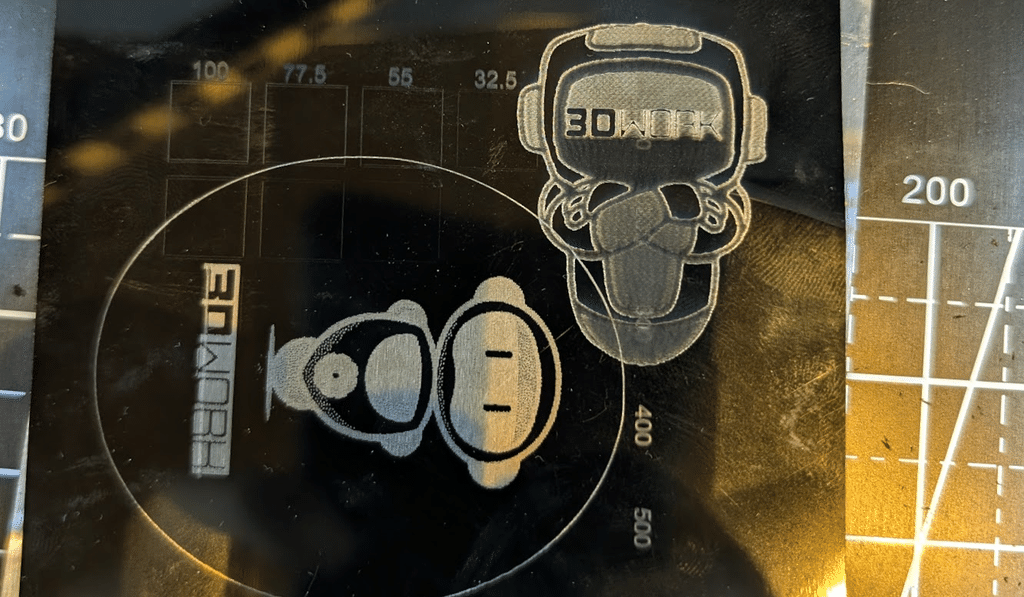
- Material: anodized aluminum cards.
- Job type: engraving.
- Power: 45%.
- Speed: 2,500 mm/min.
We also tested leather; it is a very rewarding material to work with on this machine, for both cutting and engraving:
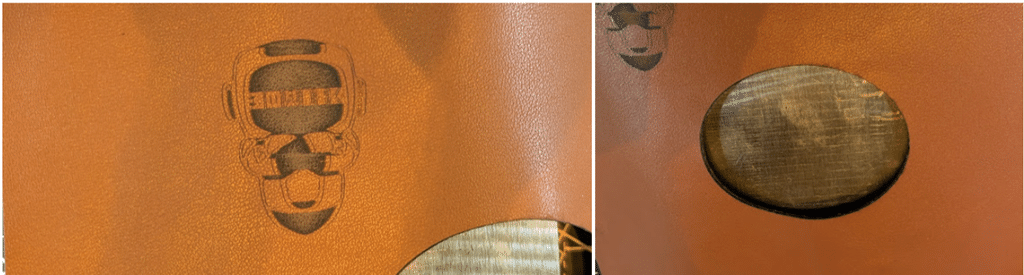
Overall, with all the materials we tested we got good results in both engraving and cutting. We noticed that the lack of air assist slightly affected the finish on wood, something that can be expected to improve with the air assist kit, although we have not verified it. Since we did not run more tests, we cannot extend these conclusions to other materials or other modules.
What convinced us least (and we have to be honest):
- Smoke management. Fan with no filter and a not very airtight seal: smoke and VOCs are neither evacuated nor filtered well enough.
- Basic construction. Simple housing and a single tinted panel. It is in line with what the machine is, but it is not the sturdiest we have had in the workshop.
- No honeycomb panel as standard. The base is smooth metal; the panel is an optional accessory and, in the meantime, you have to improvise something to protect the base.
- No camera or autofocus. Positioning is done by “framing” and focus is manual, with the limited visibility of the tinted lid.
- Software. There are options, but none is a great fit for someone starting out: some demand patience, others a paid license and others are still very young.
Final verdict
The M1s has interesting ingredients: CoreXY kinematics, an interchangeable head with three options, an enclosure with the usual safety measures on paper and, according to the manufacturer, a maximum engraving speed of 36,000 mm/min. With the parameters in our notes we got good results in engraving and cutting. But the unit we received, a 24 W one without air assist, rotary or honeycomb panel, left us with very basic construction, software that demands patience and insufficient smoke extraction.
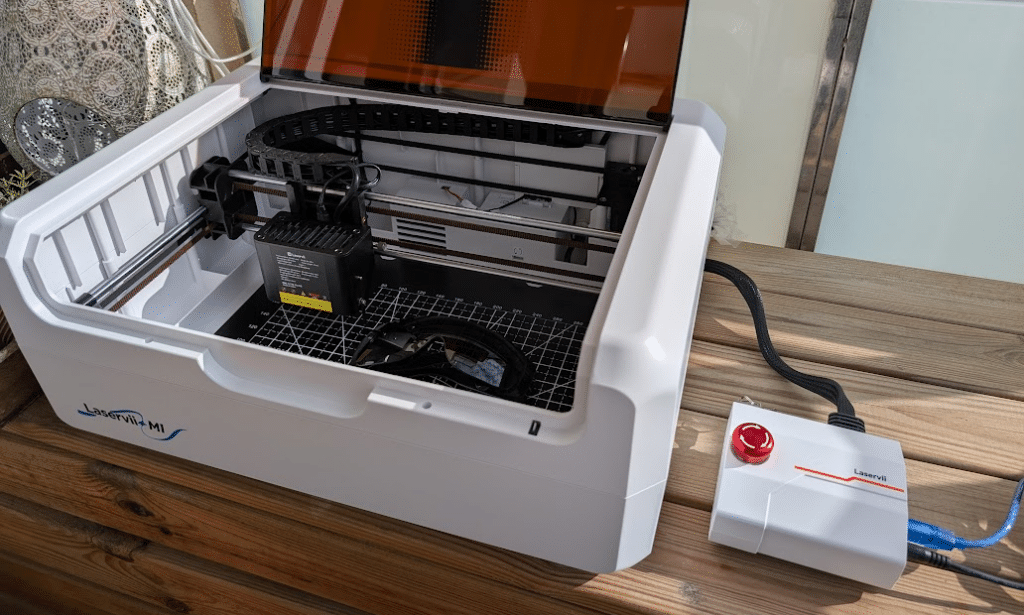
It suits you if you already have experience with lasers, are willing to invest time in the software and will set up your own extraction and filtering, plus whatever accessories you need.
It suits you less if you want a machine that is ready to use straight out of the box, if you are a beginner who wants simple software, or if you will work indoors without being able to ventilate.
There are things we would have liked to test, including the 12 W module, the 2 W IR and the machine with its accessories (above all the air assist), so this review only covers what we were able to verify with the unit we had.
Where to buy the Laservii M1s
Laservii sells directly from its official store, with a version also available from its US warehouse. We do not give price figures here because they change by region and promotions: always check the official store for up-to-date information.
These are the purchase links we use, with the listing for each model.
| Laservii M1s (12 W) |  | — | — |
| Laservii M1s IR 2W | — |  |  |
| Laservii M1S (module to be confirmed) | — | — | |
If you use the purchase links, the price is the same as if you go there directly, but 3DWork earns a small commission. This helps us keep the project going and keep creating content.
Frequently asked questions about the Laservii M1s
Do I need external smoke extraction to use the M1s?
The M1s includes a built-in extraction fan and an exhaust hose, but the fan has no filter and the cabin seal is not very airtight, so on our unit the smoke and VOCs were not evacuated well enough. Run the hose out of a window or connect it to an external filtering system, and ventilate the room well.
Does it come with a camera to position the design?
Not as standard. The machine has a rear provision to connect one and there is a camera kit as an optional accessory, sold separately or in bundles. Without one, positioning is done by “framing”.
Can I cut clear acrylic with the M1s?
With the blue diode (12 W or 24 W) it is not recommended: clear or light-colored acrylic lets a good part of the blue light through instead of absorbing it, and it is not among the compatible materials in the spec sheet. This is a limitation common to most blue diode lasers. We have not tested acrylic on the M1s.
Can aluminum be cut with the M1s?
No. Anodized aluminum can only be engraved, because this type of laser cannot cut it. We engraved anodized aluminum cards with the 24 W module.
Is it compatible with LightBurn?
Yes. The M1s runs open-source GRBL firmware and the manufacturer officially recommends LightBurn and LaserGRBL. The official spec sheet lists Windows, macOS, Android and iOS as supported systems; Linux is not listed, although LightBurn works on it.
What comes on the included SD card?
The CH340 driver installer, data and firmware files and, as we verified ourselves, the LaserGRBL and LightBurn configuration, which can be imported into third-party software that supports it.
Do I need protective glasses with the M1s?
The glasses in the box are for any adjustment with the lid open. With the 2 W IR module, take extra care: we have not found any specification certifying that the tinted lid blocks 1064 nm, so never look directly at the marking point. Check your unit’s manual.
Can the M1s be controlled via WiFi or from a phone?
Yes, via WiFi, USB or SD card; there is no Bluetooth. According to the official guide, with the SD card inserted the machine creates its own network (“Laser_” plus a number): connect the phone to it, open the free MKSLaser app, choose WIFI and enter the IP 192.168.4.1. In the meantime the phone has no internet. We have not verified this on our unit. The manufacturer also has its own app, WeCarver. For anything beyond basic jobs we recommend a computer.
What is the difference between the 12 W and 24 W modules?
Both are commercial figures, not the real optical power: the 12 W delivers a minimum of 9 W optical, and the 24 W a minimum of 19.5 W. The 24 W offers more power, but has a larger spot and slightly lower engraving accuracy (±0.15 mm versus ±0.1 mm), and a somewhat smaller work area (285 × 205 mm versus 305 × 205 mm).
What is the 2 W IR module for?
It is an infrared laser (1064 nm), different from the blue diode, aimed according to the spec sheet at fine marking of metals (stainless steel, titanium, iron, aluminum, copper, brass, zinc) and of opaque acrylic. We have not tested it.
Which rotary module do I need to engrave mugs or bottles?
Laservii has two: the TR3, a roller rotary assembled at the factory but compatible only with LightBurn, and the LR1, a more generic roller rotary that takes pieces from 30 to 200 mm in diameter according to the accessory’s spec sheet and works with any Laservii engraver. Neither comes as standard with the machine.
Does the M1s have autofocus like other lasers from the brand?
No. Focus on the M1s is manual, with a calibration ruler. Within Laservii’s catalog, the L1 Pro (open-frame) includes autofocus and a red-dot pointer locator as standard, but it does not have the M1s enclosure.
Which materials should I never cut on the M1s?
The most dangerous is PVC or vinyl: when burned it releases chlorine gas, which is corrosive and toxic to the respiratory tract and also corrosive to the machine itself. Also avoid polycarbonate, ABS, fiberglass or carbon fiber and chrome-tanned leather. If in doubt about a new material, check its safety data sheet (SDS).
What warranty does the Laservii M1s have?
According to the official store, a 1-year warranty, 30-day returns with a refund and 24/7 chat support. Some authorized distributors apply slightly different terms, so check the policy of wherever you buy.


