


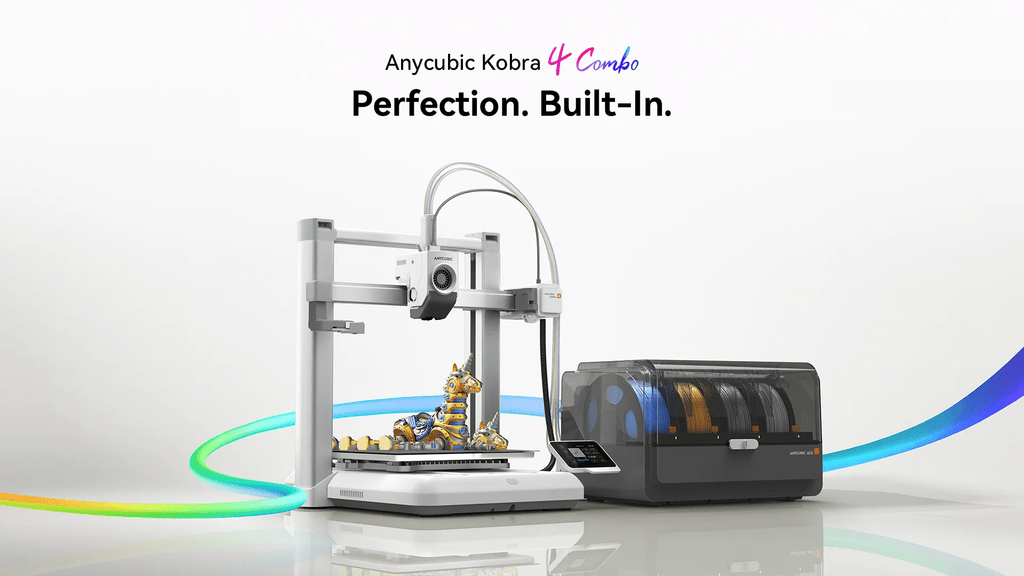
The Anycubic Kobra 4 is the perfect example of where consumer FDM printing is heading in 2026: a fast machine with automatic leveling and one-button calibration that, in its Kobra 4 Combo version, adds the new ACE 2 Pro multicolor and filament drying module. At 3Dwork we’ve had the whole setup on our desk for several weeks. We assembled it, calibrated it, broke it and got it running again, and we printed everything from single-color parts to four-color jobs so we could tell you, with no filter, what it does well and what it does just okay.
This is a long review because the machine has a lot to offer: we cover both versions in a single article (standard and Combo), we dig deep into the ACE 2 Pro because it is the real protagonist, we measure real noise, we show the filament waste exactly as it comes out, we collect the problems other users report, and we add safety and maintenance sections that almost nobody covers. If you were looking for the most complete Kobra 4 analysis, you’ve found it.
As always, before we go on, remember that you can join our community on the 3Dwork Telegram channel, full of makers passionate about 3D printing, laser and CNC. You can also find us on Instagram, YouTube and TikTok.
What is the Anycubic Kobra 4 (and how does it differ from the Combo)?
The Kobra 4 is the FDM printer with which Anycubic pushes speed and automation in its desktop range. Before getting into our tests, it’s worth being clear about what it ships with, because many of its selling points are in the official spec sheet and they explain well what to expect from the machine.
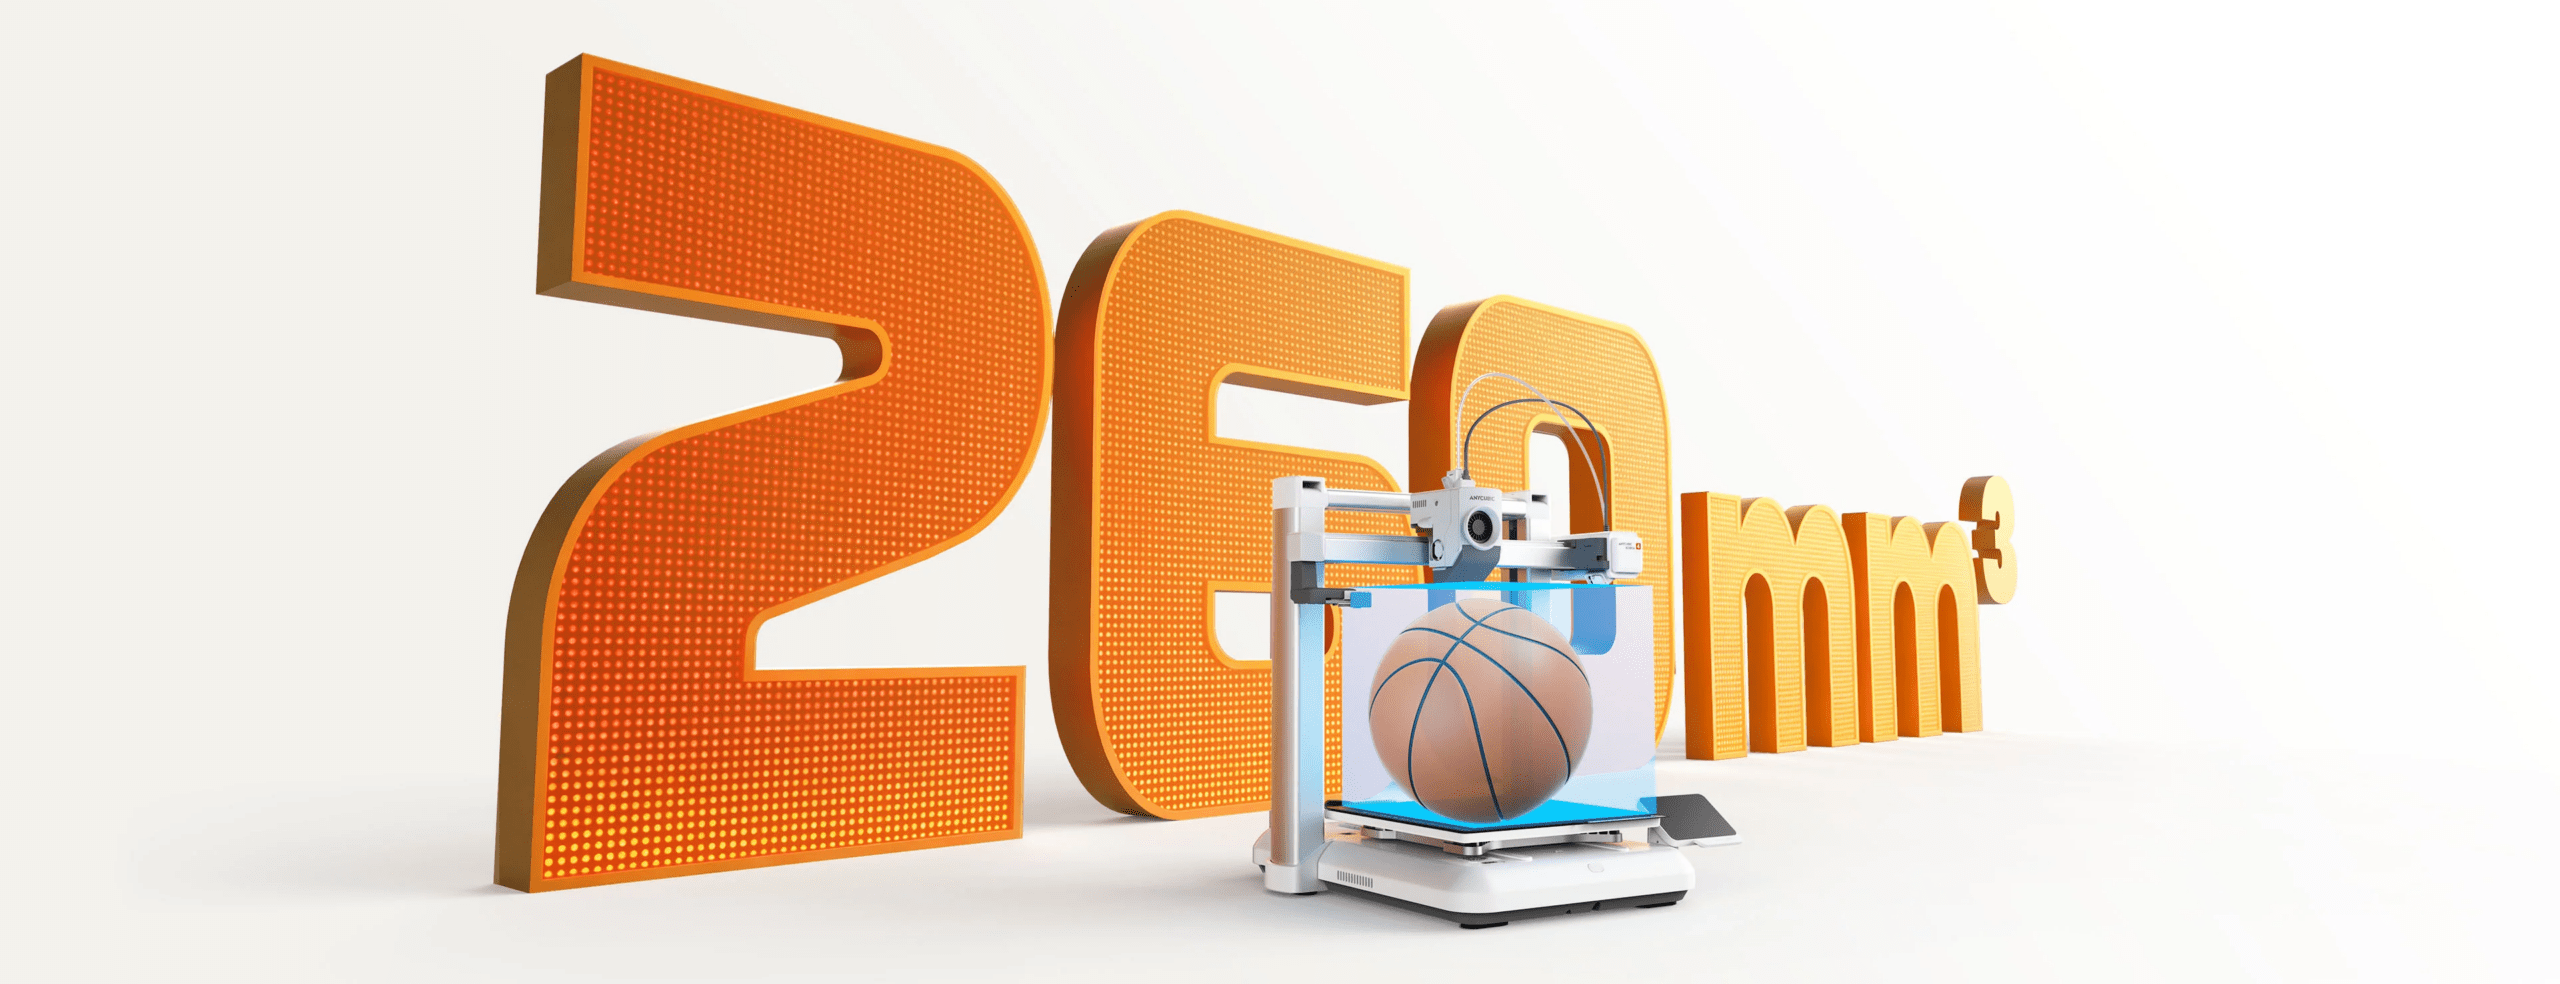
In terms of format, it is a Cartesian bed slinger: the bed moves along the Y axis and the print volume is 260 × 260 × 260 mm. It is built to be genuinely fast, with a recommended speed of 300 mm/s, peaks of up to 600 mm/s and accelerations of up to 20,000 mm/s².
Aesthetically it follows the standard design of this generation: white base, compact toolhead and a touchscreen mounted on the front. It is an open-frame machine, with the ease of assembly and maintenance that comes with that. The chassis is a gantry structure with a brushed aluminum frame and a plastic base. Motion is split like this: the X axis runs on a linear rail, the Y axis uses a dual linear rod setup to move the bed, and the Z axis rests on two guide rods.
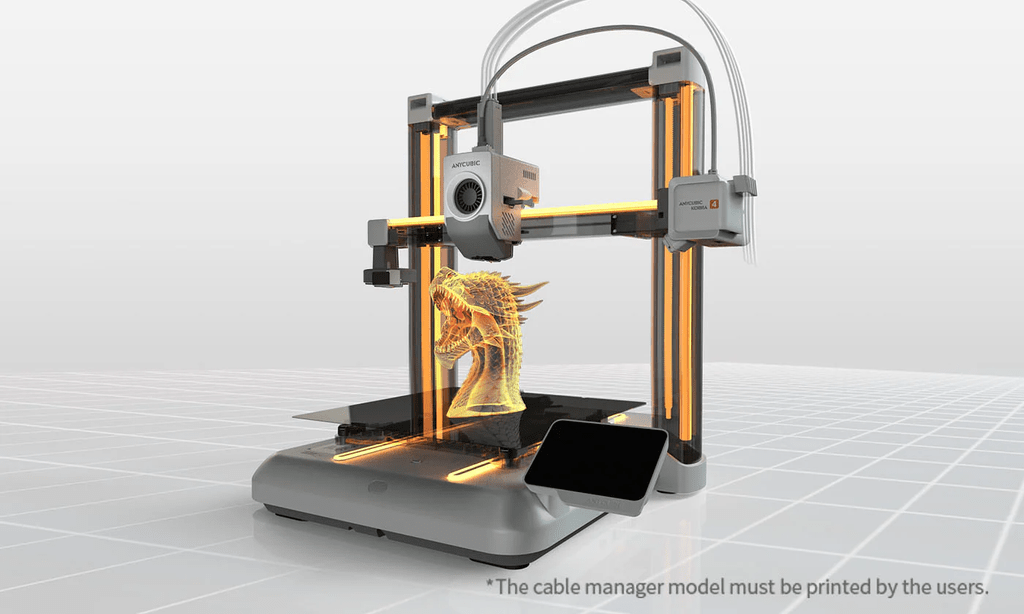
Those two Z-axis guides are driven by a single motor, a detail worth keeping in mind: several machines with similar specs use a dual motorized lead screw, whereas here Anycubic simplifies things and relies on the leveling system for flatness. The extruder is short-path direct drive (direct drive), something you’ll appreciate with flexible filaments, and everything runs on its own firmware, Kobra OS.
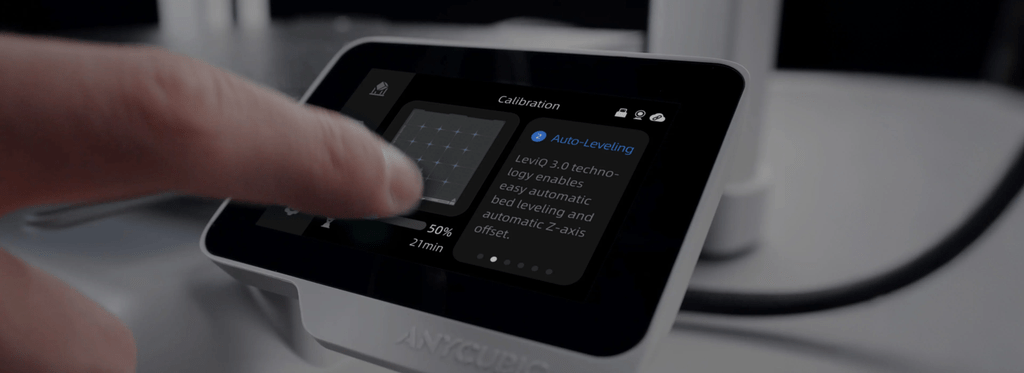
On accuracy, the strong selling point is the LeviQ 3.0 automatic leveling system. Anycubic states a leveling repeatability better than 0.02 mm on the X, Y and Z axes, backed by 49-point probing and multi-point modeling that automatically corrects even the smallest deviations, with no manual compensation needed.
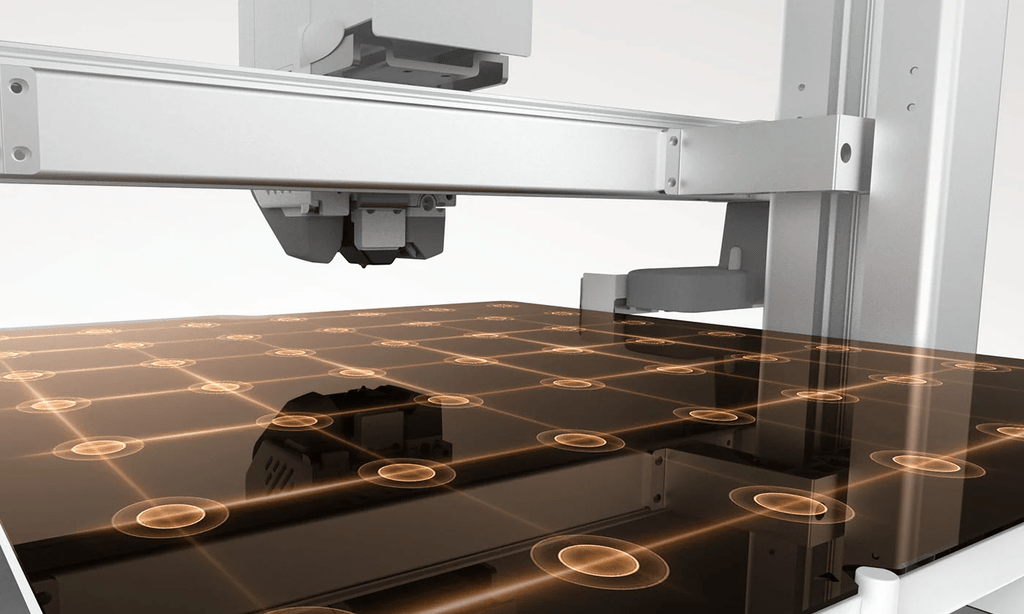
One point that tends to cause confusion deserves a clarification: that 0.02 mm figure is the leveling repeatability, not a dimensional tolerance of the printed part. Anycubic does not publish that last figure and we are not going to make it up; what you can expect from real-world quality we’ll see in the tests.
On top of leveling there is dynamic flow calibration, which coordinates extrusion speed and force in real time to adjust the flow rate and sharpen edges, improving the finish without any user intervention.
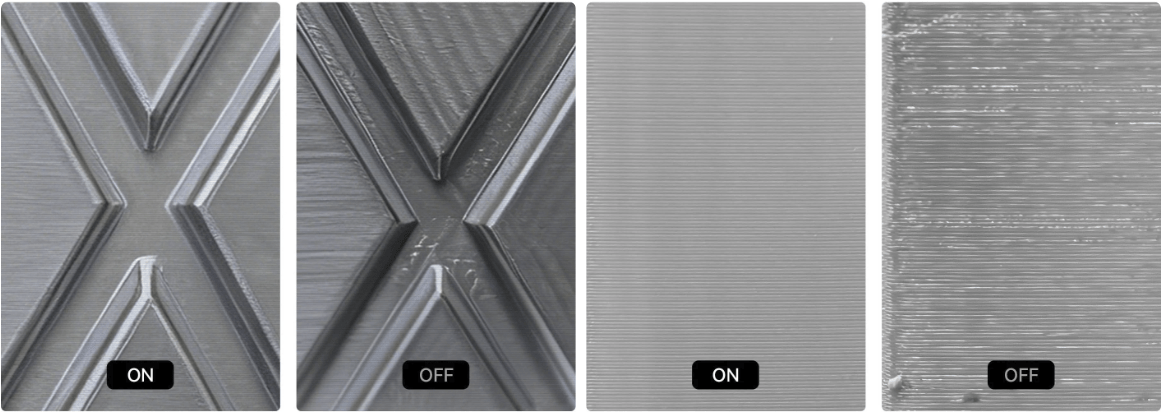
It also includes vibration compensation: using a built-in accelerometer, the system detects resonance frequencies and removes the ghosting (ghosting) that usually shows up on walls when printing at high speeds.
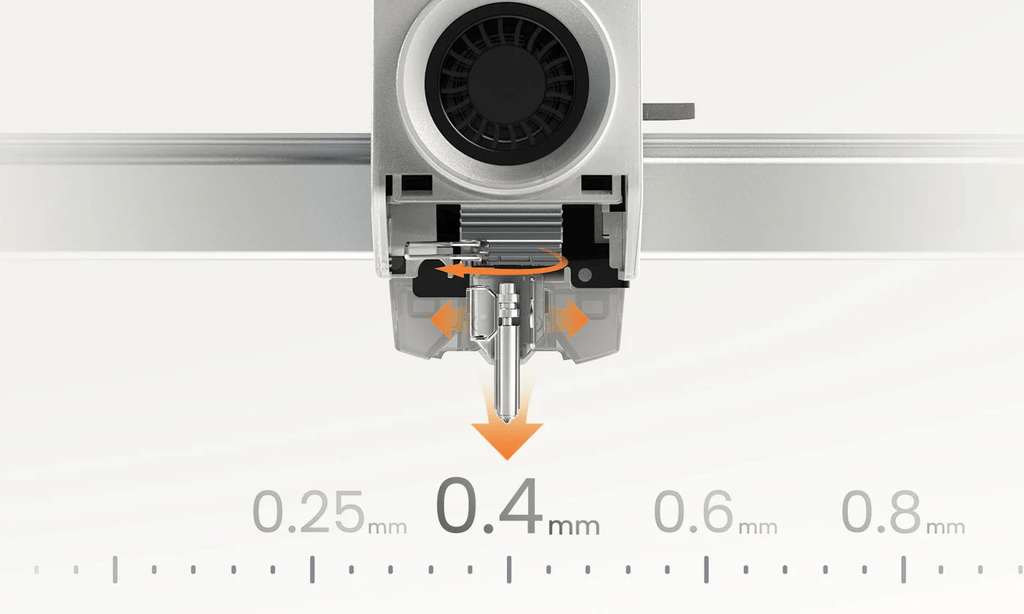
The toolhead uses what Anycubic calls a Quick-Release Hotend, the same design and motion system already used on the Kobra X. The standard nozzle is 0.4 mm hardened steel, with 0.25, 0.6 and 0.8 mm options, and it withstands up to 300 °C. Swapping it is literally tool-free: you remove the silicone sock, release the retaining latch and fold down the heatsink to pull out the whole nozzle assembly, which also makes clearing a clog much faster if one appears. Anycubic does not publish the extruder gear ratio or the exact type of gears, so we won’t invent a figure that isn’t in the official spec sheet; what it does confirm is that it integrates a strain gauge in the toolhead itself, the sensor LeviQ 3.0 uses to measure pressure against the bed during leveling.
The bed is a steel plate with a textured PEI coating on a magnetic base: you remove it and flex it to release the parts, and it reaches a maximum temperature of 100 °C.
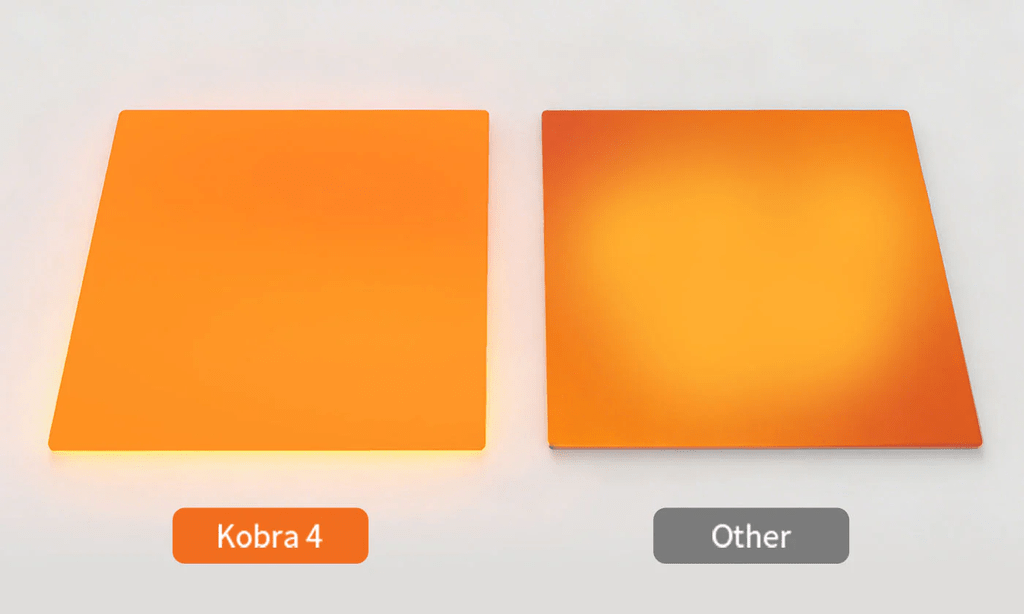
The aspect we most wanted to check is its even heat distribution. Anycubic claims it keeps a constant temperature across the whole surface, edges included, with better overall flatness, and it isn’t just marketing: we’ve seen independent thermal images confirming that heat does reach the edge of the plate. We’ll put it to the test with large parts in the print quality section. Overall, the machine declares a rated power of 1450 W.
On the interface side, the machine is controlled from a 3.5-inch capacitive touchscreen running Kobra OS firmware, although you can also start jobs over USB, from the in-house slicer (Anycubic Slicer Next) or from the mobile app. Connectivity is dual-band Wi-Fi (2.4G/5G) plus LAN, with the option to switch between IoT cloud mode and local mode, each with its own security layer so you don’t depend on external servers if you don’t want to. The menu is available in several languages, including Spanish.
For monitoring it uses a 720p HD camera with a proprietary AI algorithm that watches the print in real time: it mainly detects the classic spaghetti failure (when a part detaches and the hotend keeps extruding over the bed) and foreign objects on the print surface, and it can also record timelapses of every job.

In terms of smart features it adds several layers of protection against failures: power loss resume, filament break detection with automatic resume when you change the spool, filament tangle detection and the object-skip & area leveling function, which lets you mark one of several parts on the same plate as failed and keep printing the rest without losing the entire job.
With the official side on the table, the difference between the two versions is simple to summarize, but important to get right when buying:
- Kobra 4 (standard): the printer on its own. It prints in a single color and shares all the motion hardware, hotend, bed and electronics with the Combo.
- Kobra 4 Combo: adds the external ACE 2 Pro module, which handles up to four spools for multicolor printing and also actively dries the filament while you print. This is the unit we tested in depth.
Unlike the Kobra X, which fed all four filaments directly into the toolhead with a cutter very close to the nozzle, the Kobra 4 goes back to a traditional single-input toolhead and hands all color management to the external ACE 2 Pro. It is a design decision with pros and cons that we’ll look at in detail: it simplifies the toolhead and repairs, but it penalizes filament waste on color changes.
The ACE 2 Pro in depth: multicolor and active drying
The Anycubic Kobra 4 Combo includes the ACE 2 Pro for effortless 4-color printing. Expand your palette to 8 vibrant colors by combining two ACE 2 Pro units.
The ACE 2 Pro (Anycubic Color Engine 2 Pro) is the heart of the Combo and deserves its own analysis. It is an external module that combines two functions that until now were usually separate: multicolor handling of up to four spools and an active filament dryer that works while you print.
The ACE 2 Pro introduces four independent brushless motors, compared with the brushed motors of the first-generation ACE Pro. You notice it in two ways: the feed speed rises to 50 mm/s (double the original’s 25 mm/s) and each full color change drops to about 56 seconds. Anycubic rates these motors for a service life of 5,000 hours or more.
Active drying and humidity control are, for us, the module’s most interesting feature. The ACE 2 Pro dries filament up to 65 °C and, most importantly, can do it during the print itself, not just at rest. It combines active humidity control (a solenoid valve vents the humid air and closes when it’s done) with passive control (a silicone sealing ring on the lid isolates the compartment from the environment). In our tests we left it at 45 °C for PLA, which is more than enough; the internal sensor showed around 44% humidity inside the compartment.
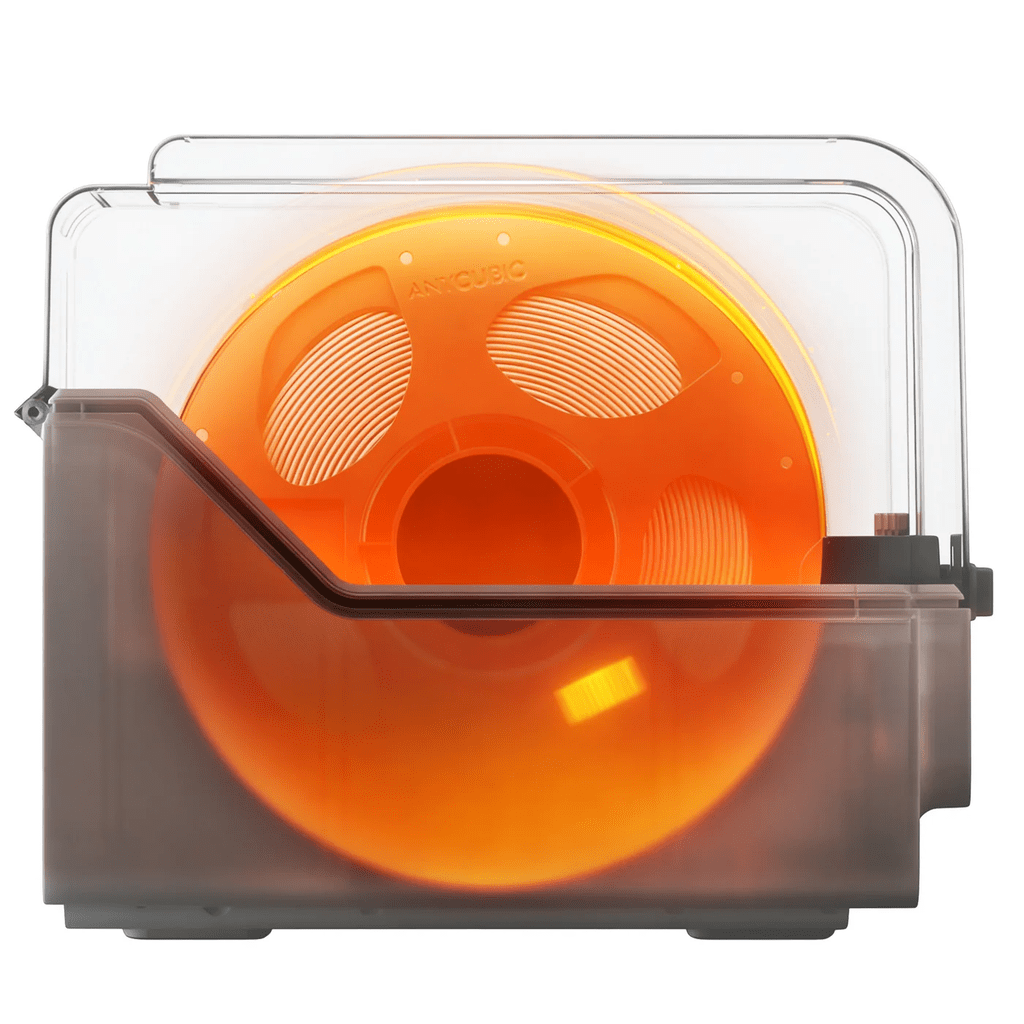
The module detects end of filament and tangles, and includes automatic refill (Auto-Refill): when a spool runs out, it switches to another of the same material and color without stopping the print. With original Anycubic spools with an RFID chip, it also automatically identifies material and color (requires an internet connection) and estimates the remaining filament on each spool on screen.
ACE 2 Pro specifications:
| Parameter | Value |
|---|---|
| Spools | 4 (up to 8 by chaining 2 units with a hub) |
| Feed speed | 50 mm/s |
| Color change time | ≈ 56 s |
| Active drying | Up to 65 °C, also during printing |
| Humidity control | Active (solenoid valve) + passive (silicone seal) |
| Sensors | End of filament, tangle, temperature and humidity |
| Material identification | RFID with Anycubic spools (requires connection) |
| Automatic refill | Yes (Auto-Refill when a spool runs out) |
| Noise level | 48 dB (55 dB with active drying) |
| Motors | 4 independent brushless (≥ 5,000 h) |
| Dimensions / weight | 368 × 291.5 × 236.5 mm / 3.7 kg |
| Drying power draw | 30–50 W additional, continuous |
A note for anyone who wants to go big: the system supports chaining up to two ACE 2 Pro units with an 8-channel hub to print in eight colors. That said, you cannot mix a first-generation ACE Pro with an ACE 2 Pro in the same setup.
Technical specifications: Kobra 4 vs Kobra 4 Combo
The whole mechanical base is identical between both versions. What changes is the ACE 2 Pro module that comes with the Combo. These are the official figures we were able to cross-check against Anycubic’s documentation and the machine itself:
| Specification | Kobra 4 | Kobra 4 Combo |
|---|---|---|
| Technology | FDM / FFF, Cartesian (bed slinger), open frame | Same |
| Print volume | 260 × 260 × 260 mm | 260 × 260 × 260 mm |
| Recommended / maximum speed | 300 / 600 mm/s | 300 / 600 mm/s |
| Maximum acceleration | 20,000 mm/s² | 20,000 mm/s² |
| Extruder | Direct drive | Direct drive |
| Nozzle | Quick-change hardened steel, 0.4 mm (optional 0.25 / 0.6 / 0.8 mm) | Same |
| Max. hotend temperature | 300 °C | 300 °C |
| Bed | Spring steel with textured PEI, magnetic and flexible | Same |
| Max. bed temperature | 100 °C | 100 °C |
| Leveling | Automatic LeviQ 3.0, 49-point mesh, automatic Z-offset | Same |
| Display | 3.5″ capacitive touch | 3.5″ capacitive touch |
| Connectivity | Wi-Fi (2.4 / 5 GHz), LAN and USB | Same |
| Camera | 720p with AI detection and physical privacy shutter | Same |
| Multicolor system | No (single color) | Yes, ACE 2 Pro: 4 colors, expandable to 8 |
| Active filament drying | No | Yes (ACE 2 Pro, up to 65 °C) |
| Dimensions | Approx. 455 × 445 × 461 mm | Same printer + ACE 2 Pro 368 × 292 × 237 mm |
| Weight | Approx. 9.9 kg | Approx. 9.9 kg + 3.7 kg (ACE 2 Pro) |
| Software | Anycubic Slicer Next (Orca-based); compatible with Cura/PrusaSlicer/Orca via G-code | Same |
As you can see, in essence we’re dealing with the same printer. The whole debate around the Combo version revolves around the ACE 2 Pro, so we’ve dedicated an entire section to it further down.
The Kobra range, with the addition of this Kobra 4, has become broad and it’s easy to get confused. Here is a summary of where the Kobra 4 sits against its siblings that we’ve already reviewed at 3Dwork:
| Kobra 4 Combo | Kobra X Combo | Kobra 3 Combo | |
|---|---|---|---|
| Volume | 260 × 260 × 260 mm | 260 × 260 × 260 mm | Previous generation |
| Speed / acceleration | 300–600 mm/s / 20,000 mm/s² | 300–600 mm/s / 20,000 mm/s² | Slower |
| Multicolor system | External ACE 2 Pro (4, expandable to 8) | 4 filaments inside the toolhead (ACE 2 Pro to expand) | ACE Pro 1st gen (brushed motors) |
| Cutter / waste | High cutter: more purge | Very low cutter: reduced purge | Standard purge tower |
| Active filament drying | Yes (up to 65 °C) | With external ACE 2 Pro | Not on the original ACE Pro |
| AI camera | Yes, 720p | Yes, 720p | Depends on version |
In short: the Kobra 3 was the one that introduced Anycubic’s multicolor with the first-generation ACE Pro. The Kobra X took a leap by putting all four filaments inside the toolhead with a very low cutter, cutting waste dramatically. And the Kobra 4 simplifies the toolhead again (a single input tube, easier to repair) and bets on the external ACE 2 Pro with active drying, at the cost of more waste on color changes. If you also want an enclosed machine, the Kobra S1 is the family’s enclosed option.
You can read our full reviews of each one here:
- Anycubic Kobra X review
- Anycubic Kobra 3 Combo review
- Anycubic Kobra 3 Combo V2
- Anycubic Kobra S1 Combo review
Unboxing and first impressions
The Kobra 4 arrives practically assembled in one piece. The packaging is classic Anycubic: the machine protected with high-density foam and a plastic bag, with the gantry and some accessories securely fixed in place, plus the ACE 2 Pro module. Nothing moved during shipping and everything arrived complete and undamaged.
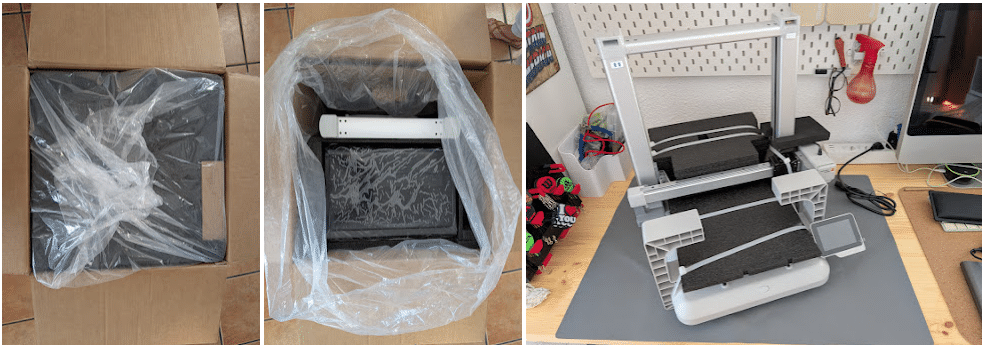
In the box of the standard Kobra 4 we find the gantry structure, the bed and the base, a power cable, a spool holder, the waste wiper (purge wiper), PTFE tube, filament samples, lubricating grease, nozzle cleaner, a magnetic Allen key set, an applicator brush, decorative covers and the manual. The Combo adds the ACE 2 Pro unit, a second power cable, the signal cable and four PTFE tubes to connect the module to the toolhead.
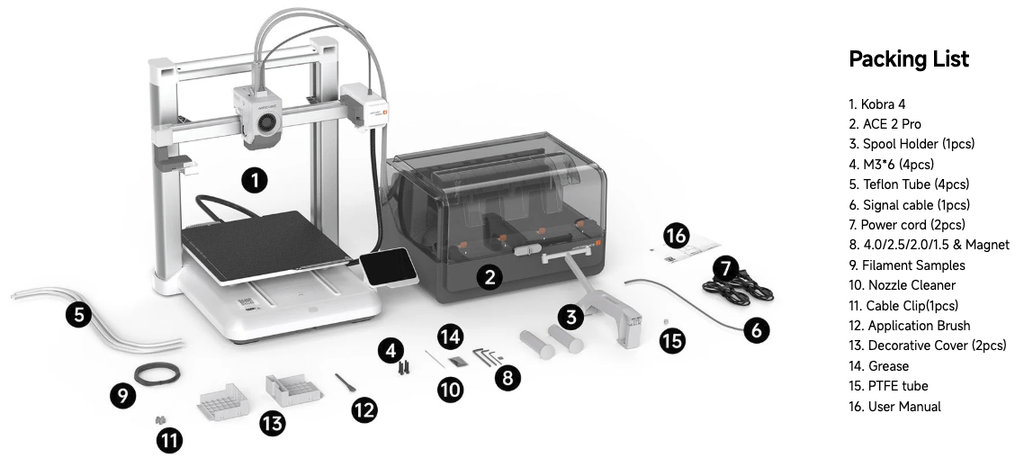
Assembly is among the simplest we’ve seen. It comes down to removing the zip ties and the metal transport brackets that hold the bed, screwing the toolhead onto the X-axis carriage and installing the purge wiper in the rear corner. On the Combo you also need to connect the four PTFE tubes from the back of the ACE 2 Pro to the hub on top of the toolhead, and the signal cable to the side of the printer. In fifteen or twenty minutes it’s ready.
And honestly there’s little more to add: assembly is very simple because the machine arrives almost pre-assembled. Below is a video of the process from Anycubic itself for reference.
Setting up the Anycubic Kobra 4 Combo
When you power it on, the initial setup wizard starts. The interface is available in Spanish (among many other languages), which is appreciated, and it guides you step by step through region, network and calibration.
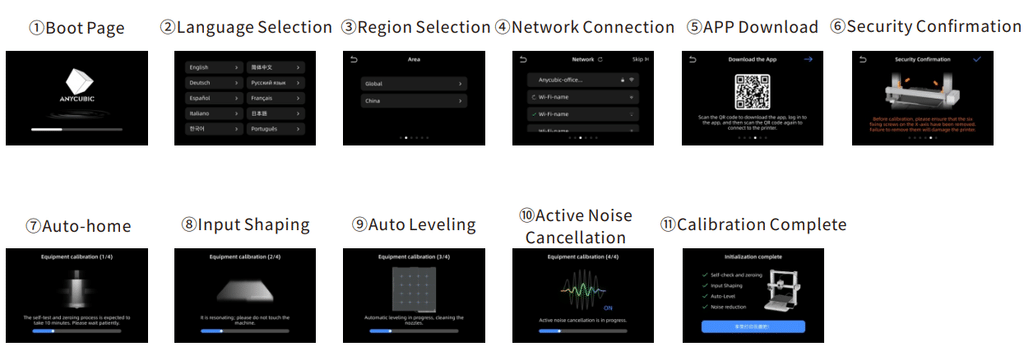
It’s a simple process, although it takes several minutes to complete, longer than assembling the machine itself.
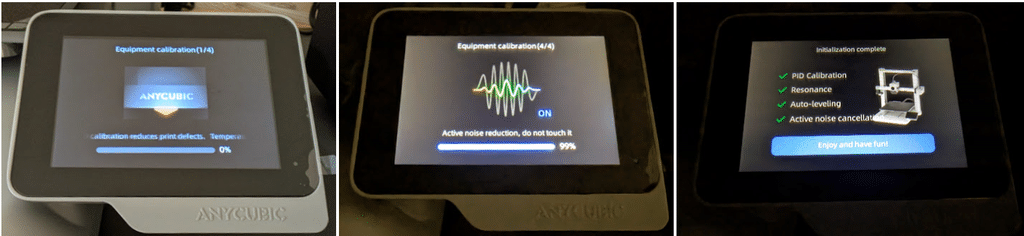
Automatic calibration is one of its strong points. With a single command, the machine runs a four-step routine: PID temperature calibration, resonance compensation (input shaping) with the built-in accelerometer, LeviQ 3.0 automatic leveling with a 49-point mesh and automatic Z-offset, and an active noise cancellation phase. All without touching a screw, and genuinely convenient.
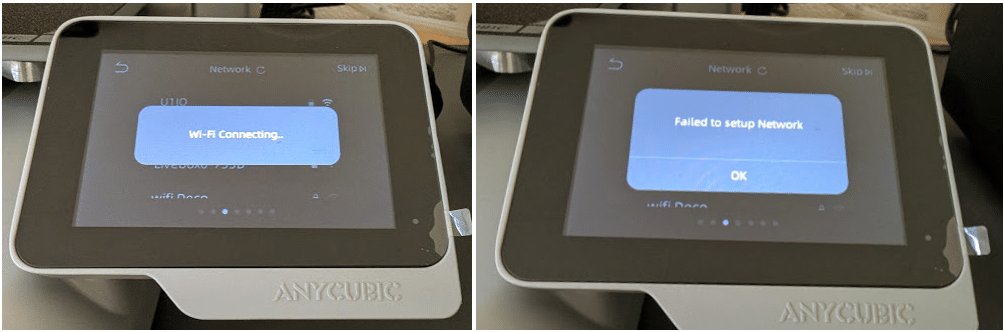
Not everything was perfect: on our unit the Wi-Fi connection failed the first time with a Failed to setup Network message and we had to retry for it to connect. One day we also ran into an on-screen error (CODE 10002) that forced us to restart the machine manually. These were one-off issues that resolved without further trouble, but we mention them because they are part of the real user experience.
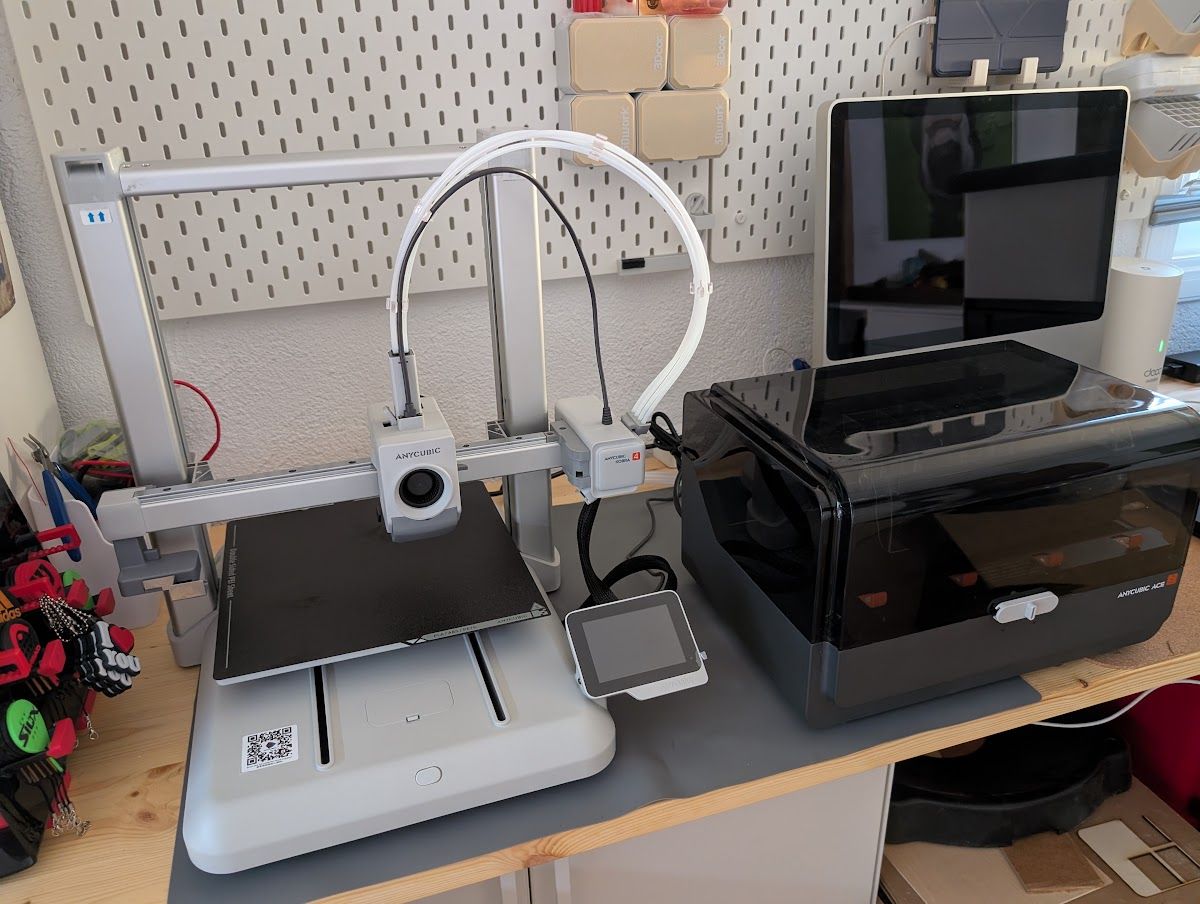
Once the whole process is finished, our Kobra 4 Combo is ready to burn some filament!!!
Print quality and user experience
In single color, the Kobra 4 performs as we’d expect from a modern fast machine. The first layer sticks well to the textured PEI sheet and the automatic Z-offset means we rarely have to fight with the initial height.
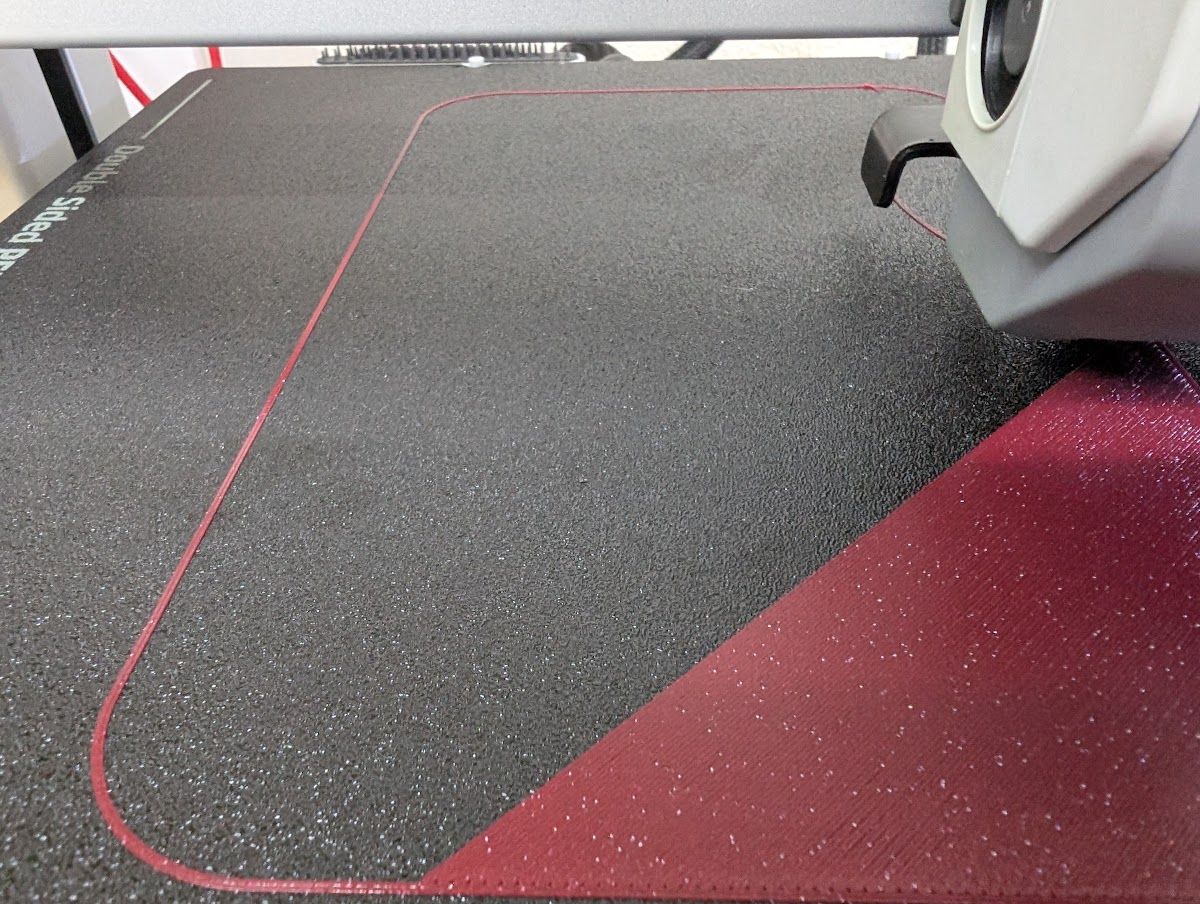
On speed, let’s be realistic: 600 mm/s is a theoretical peak. In normal printing, with decent quality, it comfortably runs around the recommended 300 mm/s, which is already very fast for everyday use. In our tests, the real average speed was around 160 mm/s in multicolor PLA and around 90 mm/s in PETG. Pushing to the maximum makes sense on specific parts with profiles designed for it, not as a regular regime. Each material also has its own ceiling: the sensible approach is to run your own speed and acceleration tests per filament type (PLA, PETG, TPU…) and keep the profile that holds quality. Our calibration guide on labs.3dwork.io walks you through the tests step by step, including the input shaper and acceleration one.
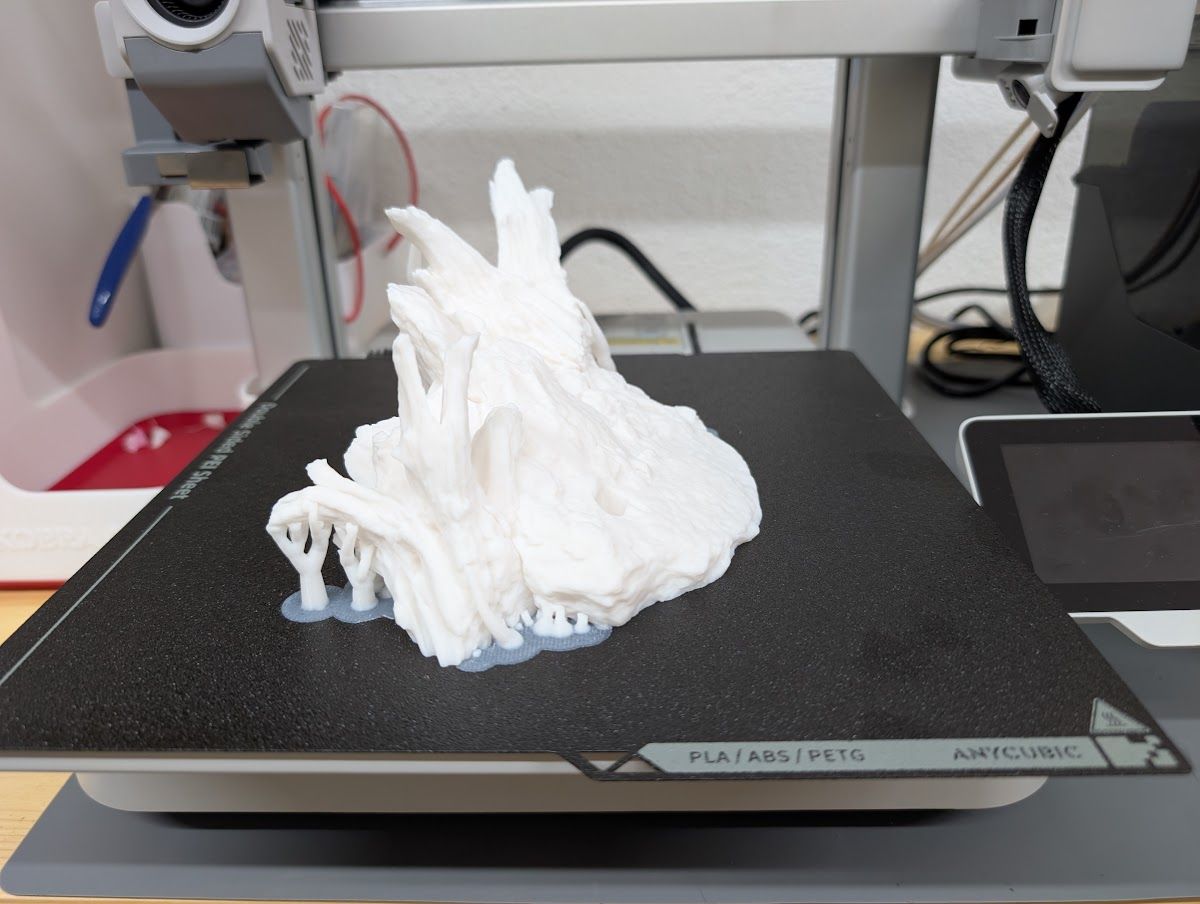
Not everything came out perfect, and we show it: we had a failed print or two with the classic spaghetti effect. It’s part of the game with any printer, but it’s a reminder that supervision (and the AI camera, even if it isn’t 100% reliable) has its uses.
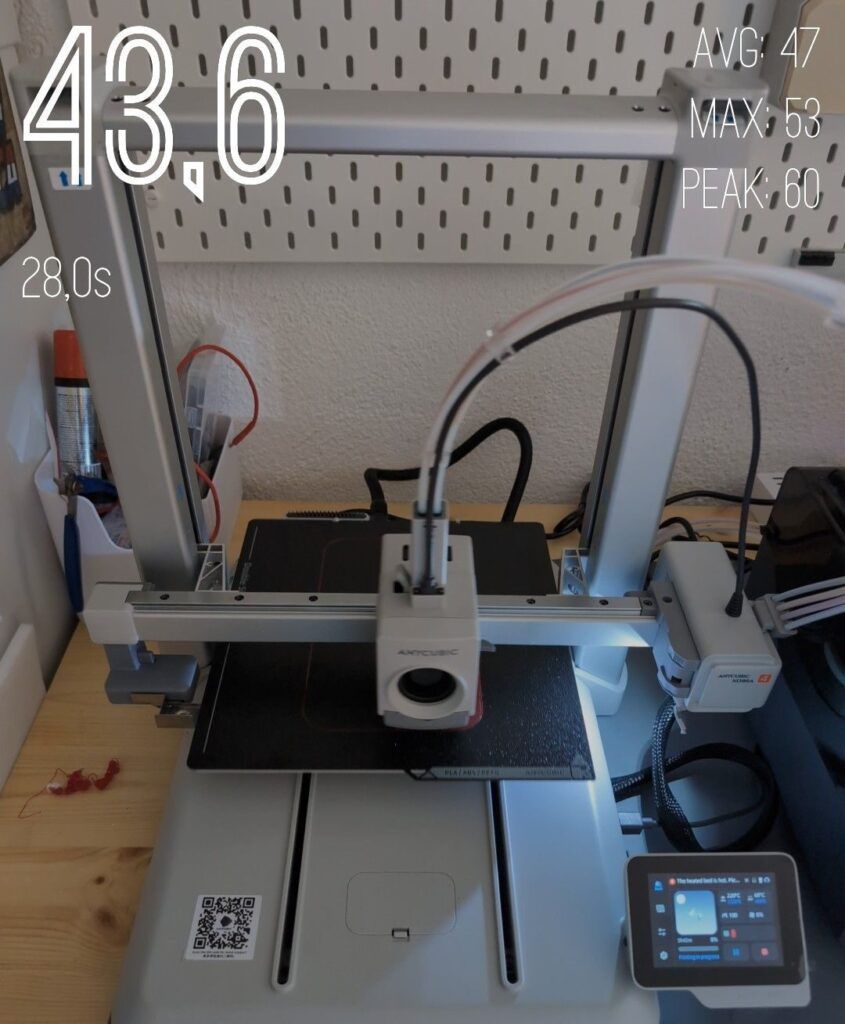
Anycubic quotes under 48 dB in standard mode (and up to 45 dB in silent mode). We measured it ourselves with the Decibel X app one meter from the machine while printing, and we got an average of around 47 dB, with peaks of 53 dB and an occasional spike of 60 dB during abrupt movements. In other words, the official figure is credible for normal operation. However, when the ACE 2 Pro’s drying is active during printing, the whole setup rises to around 55 dB, more noticeable in a quiet room.
The Kobra 4, with its 300 °C hotend and hardened steel nozzle, is quite versatile. But once you bring the ACE 2 Pro into the equation, some important nuances appear that you should know about before buying filament:
- Official compatibility: Anycubic’s spec sheet for the Kobra 4 lists PLA, PETG and 95A TPU (the latter fed straight into the toolhead). Use of PVA, rigid engineering TPU (68D type) and carbon-fiber composites such as PLA-CF, PETG-CF or PAHT-CF with the ACE 2 Pro is also mentioned, but those materials are not on the Kobra 4 spec sheet: try a short run first before starting a long job.
- Flexible TPU (95A and softer) does NOT go through the ACE 2 Pro: it jams in the rollers and internal drivers. To print flexible TPU you have to feed it straight into the toolhead from an external spool holder. If you do, remove the tube hub from the toolhead so the flexible filament has a more direct path, and print slowly.
- ABS and ASA: they can be printed, but they aren’t ideal for drying in the ACE 2 Pro, since they require drying temperatures of 70–80 °C, above the module’s 65 °C. Also, because it is an open-frame machine, ventilation and draft control are advisable.
When it comes to multi-filament printing, that’s when the Combo shows its two faces. On one hand, the multicolor quality is very good: clean color transitions and two- and four-color parts that come out with no noticeable bleeding thanks to the purge tower and the nozzle wipe handled by Anycubic Slicer Next.
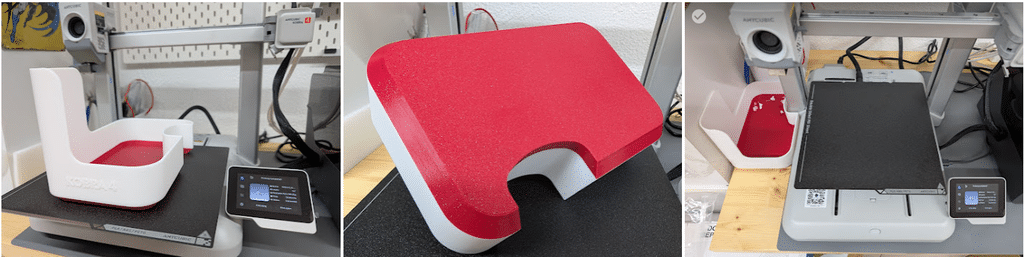
We printed several multicolor jobs back to back: two-color keychains, an organizer tray with the “KOBRA 4” logo in white and red (757 layers, around 190 g of PLA and 5 h 39 min according to the machine itself) and a functional stand in red and white. The finish in every case was clean, with no color-mixing defects.
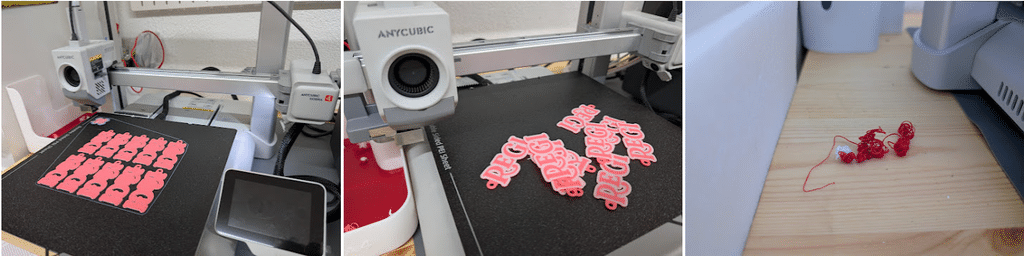
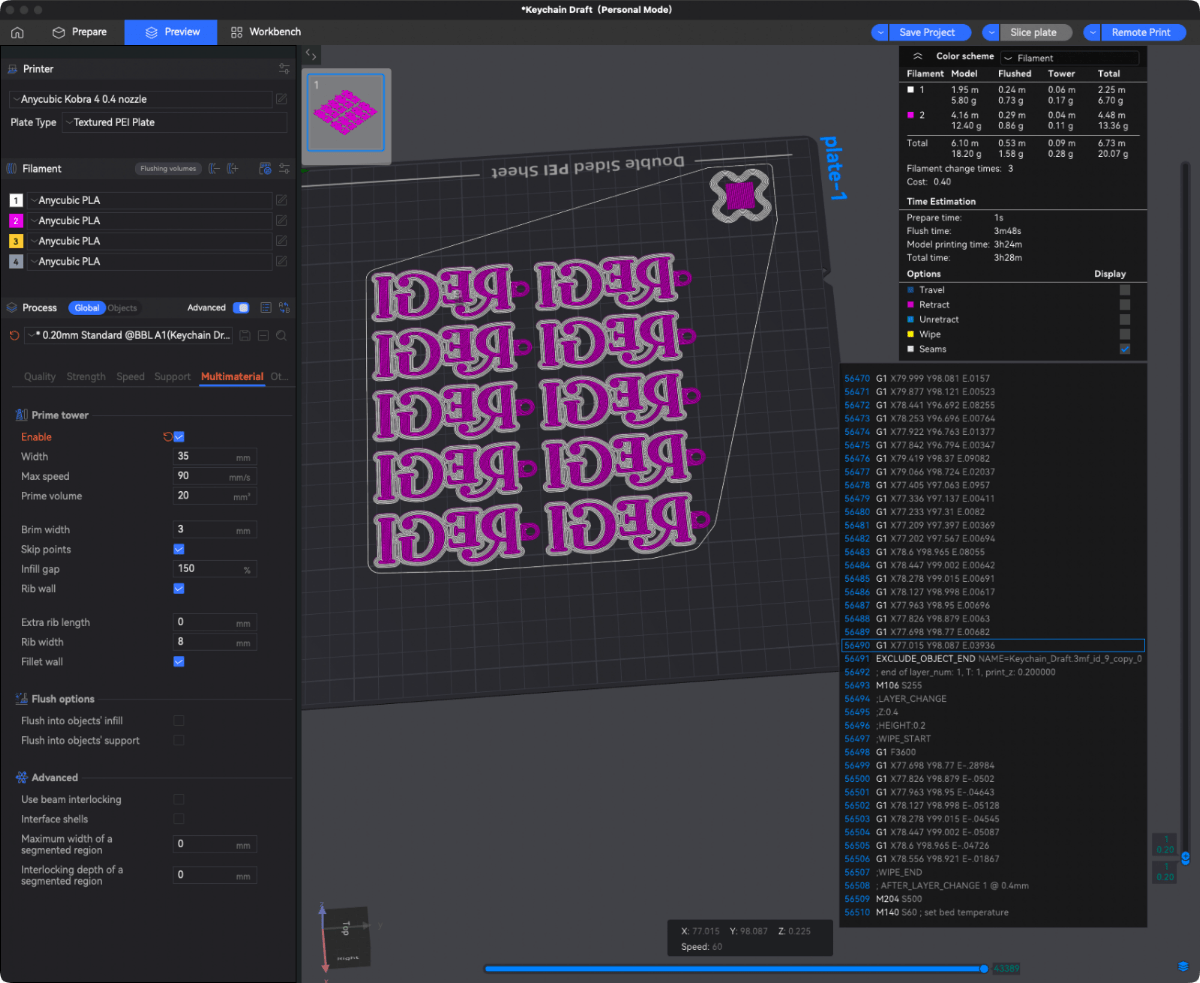
On the other hand, we have to talk about waste. Because the Kobra 4’s filament cutter sits quite a bit higher in the toolhead than on the Kobra X, the dead distance that has to be purged on each color change is longer. The result: it generates quite a lot of waste (the famous filament “poop”) on multicolor jobs.
On small parts we’re talking about tens of grams; on long multicolor projects, purges can exceed 400 g, almost half a spool. The changes also noticeably lengthen the total duration of a multicolor print.
That’s why, and it’s something we usually do with every printer that has a multi-filament purge system, it’s a good idea to print a tray to collect that waste, since we can always give it a second life and it also stops it from piling up and falling into areas where it could affect the prints.
A practical tip: on some models Anycubic Slicer Next miscalculates the purge volume and can even show negative values. If the result doesn’t add up, check and adjust the purge volumes by hand, and if you want to waste less filament, purge into the infill of the part itself or onto another object on the plate.
We also took the chance to test the “backup” feature, which basically means that when a spool runs out, it uses another with the same characteristics to keep printing automatically. Even though you can see two colors, that’s because we “tricked” the printer by telling it both filaments were the same.
The official software is Anycubic Slicer Next, built on Orca Slicer (which in turn inherits from Bambu Studio and PrusaSlicer). It comes with pre-tuned profiles for Anycubic materials, handles ACE 2 Pro synchronization, allows remote control over Wi-Fi/LAN and shows the 720p camera. Its workspace (“Workbench”) is convenient: from there you control temperatures, drying, humidity and automatic refill, and watch the print live.
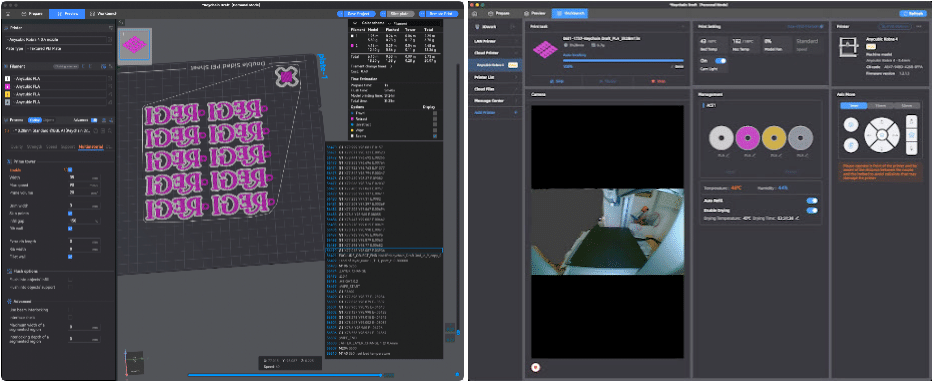
If you’re an Orca, Cura or PrusaSlicer user, you can use them by generating G-code and transferring it over USB, but the fine real-time multicolor functions and remote control are designed to live inside Anycubic Slicer Next. The firmware update (Kobra OS) is OTA: it’s done from the screen itself, under Settings, Printer information, Firmware version. Our unit arrived with version 1.2.1.3. If the OTA update fails, you can also update manually from a USB stick following the procedure on Anycubic’s official wiki; it does happen, and in our Telegram community we helped a user with this very problem.
The Kobra 4 integrates a 720p HD camera with a physical privacy shutter. Beyond watching the print from your phone, it is used for AI detection: it identifies the spaghetti effect, foreign objects on the bed and parts that have come loose, and alerts you so you can stop in time. It also records time-lapses.
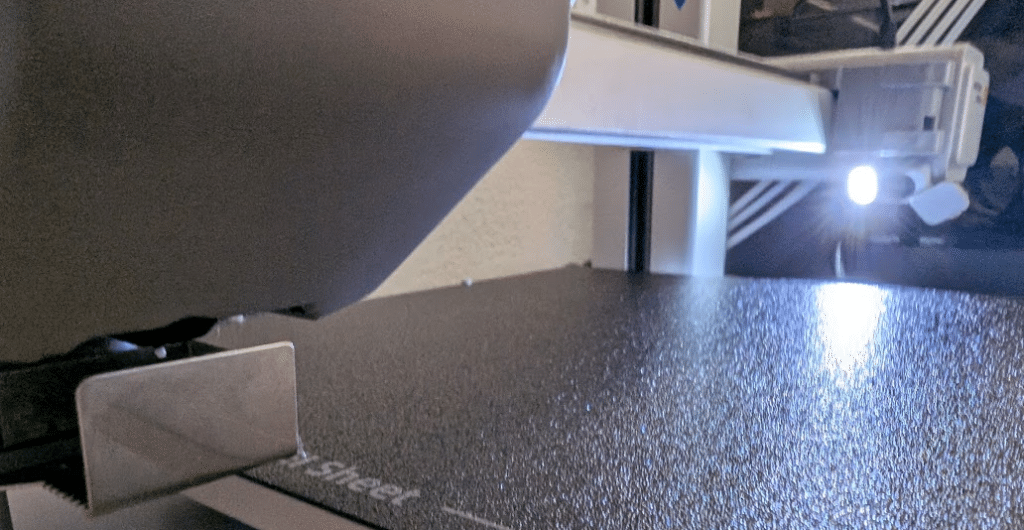
Three honest gripes: first, the camera sits at a fixed position and angle, which is very frustrating, since especially in the first few centimeters of the print it is practically unusable; the AI detection gives false positives from time to time (it happened to us in our Kobra 4 tests) and can stop a print that was going fine, so you have to calibrate how much you trust it. And second, time-lapses can’t be downloaded remotely; you have to physically take out the USB stick to transfer them to the computer, which is awkward in 2026.
No machine is perfect and this Anycubic Kobra 4 isn’t either. Here we honestly collect what we’ve experienced ourselves and what other users and reviews report repeatedly, so you can buy with your eyes open:
- High waste in multicolor: because of the cutter’s raised position, every color change generates quite a bit of purge. It’s the Combo’s biggest drawback.
- Limited flexible TPU: soft TPU doesn’t go through the ACE 2 Pro and the first batches of the Combo didn’t include the external holder needed.
- Variable ACE 2 Pro reliability: we had loading failures (error 11850, which showed up on channel 1, when the filament doesn’t advance), jam-sensor false positives that force you to disable it, and an occasional case of the printer locking up when connecting the module that required a factory reset.
- Drying that softens certain PLA+: as we mentioned, an incorrect temperature setting or mixing filament types can be too much for some filaments with additives.
- It takes up a lot of space: the external module and the bundle of PTFE tubes (the “octopus effect”) need quite a bit of desk.
The Kobra 4 is a simple-to-use home machine aimed at people getting started in this world, but it works with high voltage, heat and moving parts. These precautions are common sense, but they’re worth repeating:
- Mains power: it is a fairly high-power device (the system can draw high peaks when heating the bed). Plug it into a socket in good condition and avoid power strips and flimsy extension cords. If you need to replace the internal fuse, use exactly the specified one.
- Burns: the nozzle reaches 300 °C and the bed 100 °C. Don’t touch the hotend or a freshly printed part with bare hands; use heat-resistant gloves when handling hot areas.
- Moving parts: the bed and the toolhead move fast. Keep hands, hair and cables away during printing.
- Ventilation: with PLA/PETG the smell is contained, but if you print ABS or ASA, ventilate the room well because of the compounds they emit when melting.
- Long prints: don’t leave jobs of many hours completely unsupervised. The AI camera and print resume help, but they don’t replace a periodic check.
- Camera privacy: if it worries you, the camera’s physical shutter lets you cover it when you’re not using it.
A bit of regular maintenance keeps quality up and extends the machine’s life. This is what we recommend, in line with Anycubic’s guides:
- Nozzle: check the silicone wiper (purge wiper) in the rear corner and use the included nozzle-cleaning needle if you notice uneven flow. The nozzle is a lever-operated quick-change type, so replacing it or changing diameter takes seconds. If it clogs, the recipe is to raise the nozzle to 250 °C, clear it with the needle and, if it won’t budge, remove the nozzle and check the heatsink and the extruder.
- Belt tension: check the axis belt tension from time to time; a loose belt introduces artifacts and lost steps.
- Lubrication: apply light oil to linear rails, guide rods and idler pulleys, and grease to the Z-axis lead screw and the extruder gear assembly. Prevent rust on metal parts.
- PTFE and wiper: periodically inspect the PTFE tubes and the silicone wipes, and replace them when they show wear or deformation.
- ACE 2 Pro care: check that the humidity vent valve isn’t blocked and look after the silicone seal on the lid; don’t open it more than necessary so you don’t speed up its wear. Keep an eye on the desiccant if your unit uses it.
Final verdict on the Anycubic Kobra 4
The Kobra 4 is a fast FDM printer, very easy to set up, with automatic calibration that genuinely works. As a single-color machine it is an easy recommendation for anyone who wants speed and zero hassle. The Combo version with ACE 2 Pro adds a very capable multicolor system and, above all, active filament drying, which is among the most useful parts of the package.
That said, as with every machine, we can always find things to improve, and the vast majority, as we’ve been telling you throughout the review, relate to two components… the ACE multicolor system and its built-in camera.
Regarding the ACE, and as with other similar systems from other brands, these multi-filament systems generate quite a lot of waste unless we fine-tune things, and they also lengthen prints considerably. And although this new version of the ACE improves in some respects, we still run into random loading errors, jams or false jams.
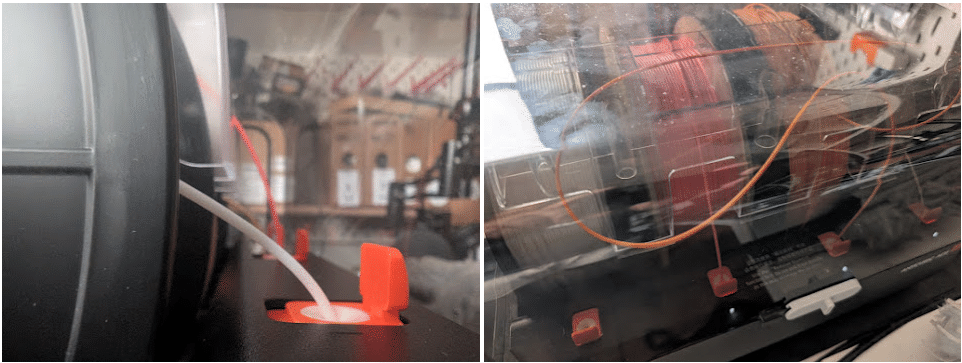
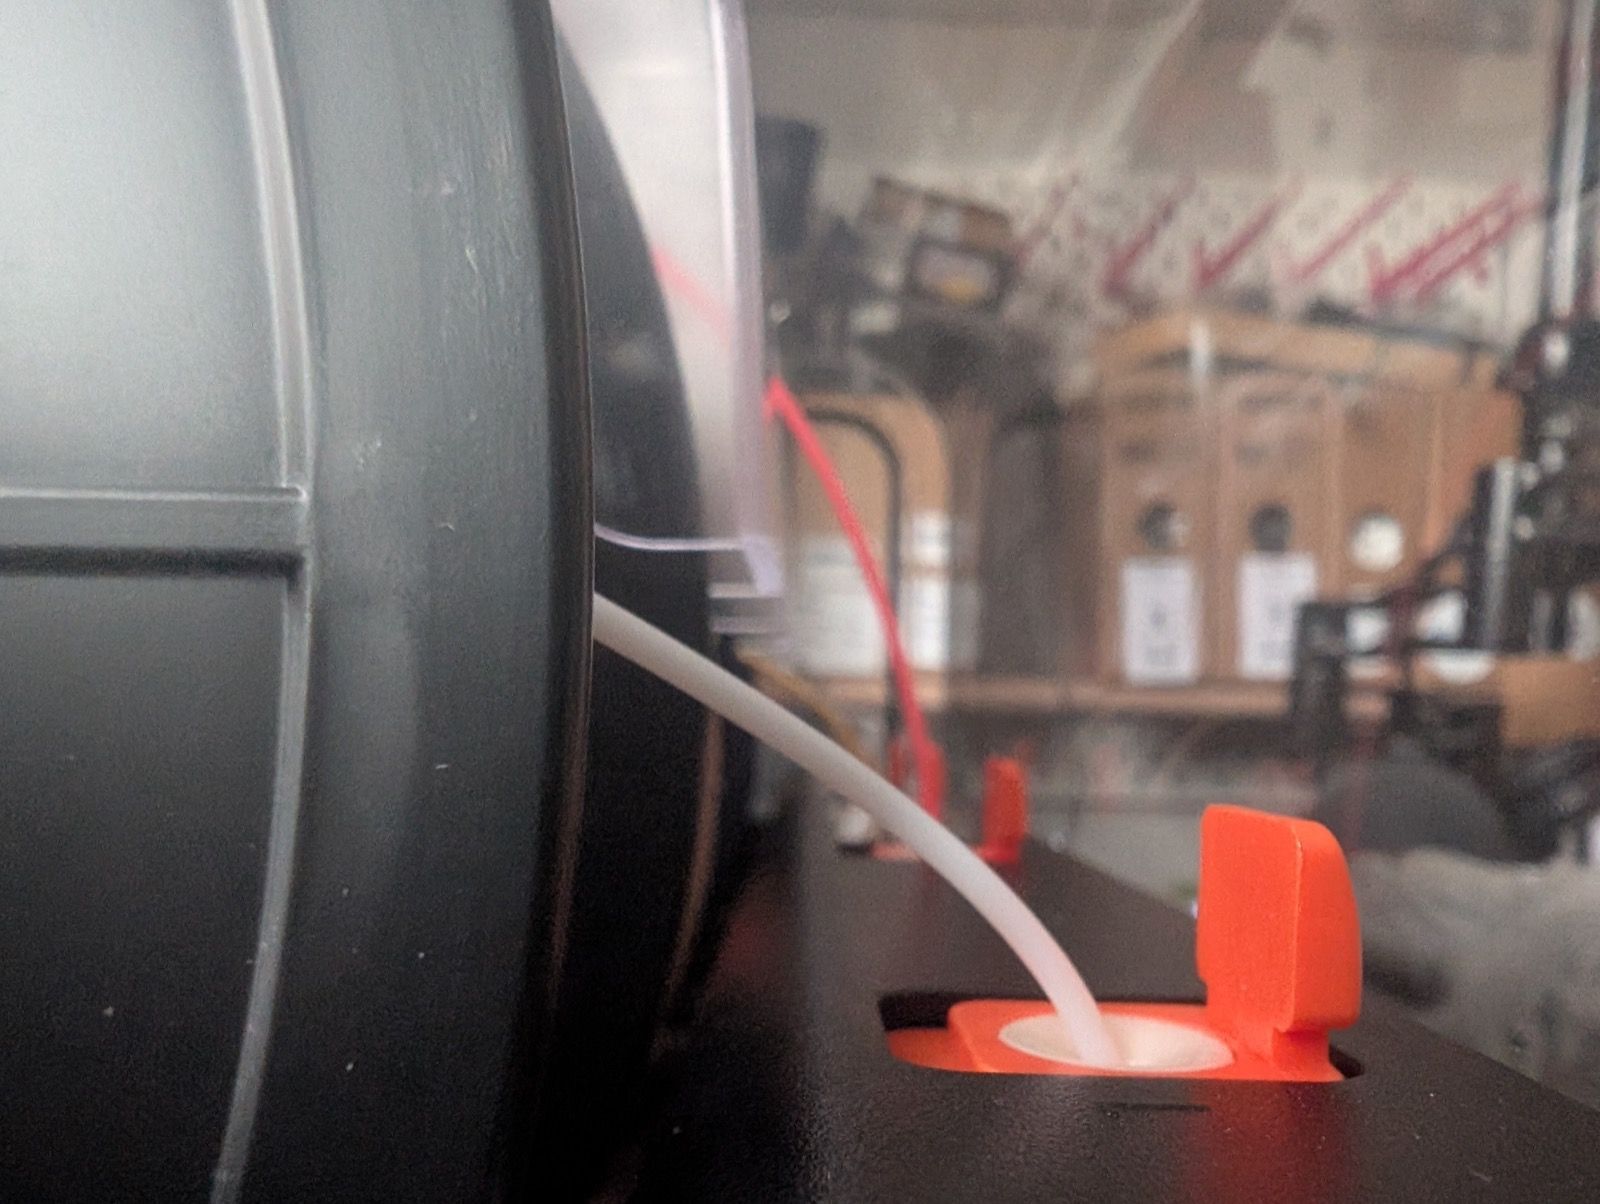
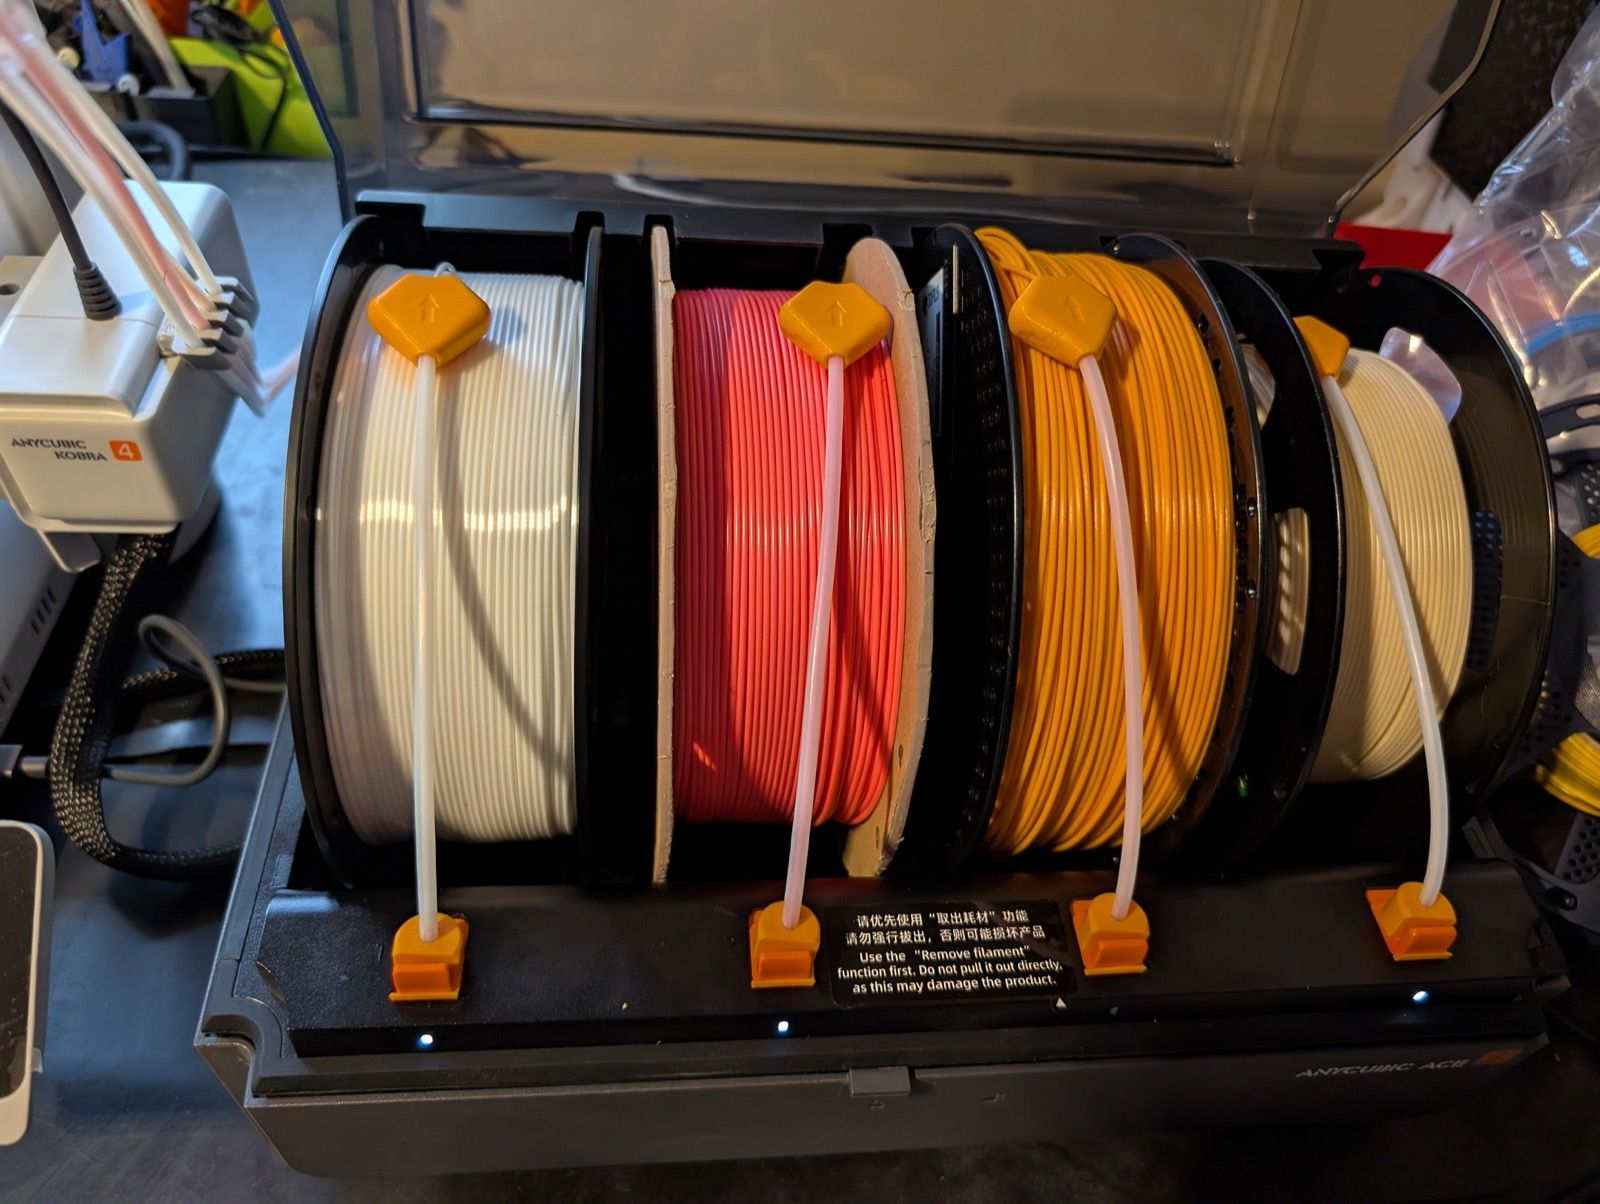
For the filament entry angle we have published a design on Printables, Anycubic ACE 2 Pro Filament Saver & Alignment. According to the published design, the ACE 2 Pro works very well but can sometimes give false feed alerts or jams, and with cardboard spools or nearly empty ones the problem can drop to almost zero. You fit it by cutting 8–10 cm of PTFE and screwing it to the filament guide; a new version of the spool guide acts as a stop. On older ACE 2 Pro units, the design suggests double-sided tape.
The photos show the guide with the tube fitted and the ACE with its four spools.
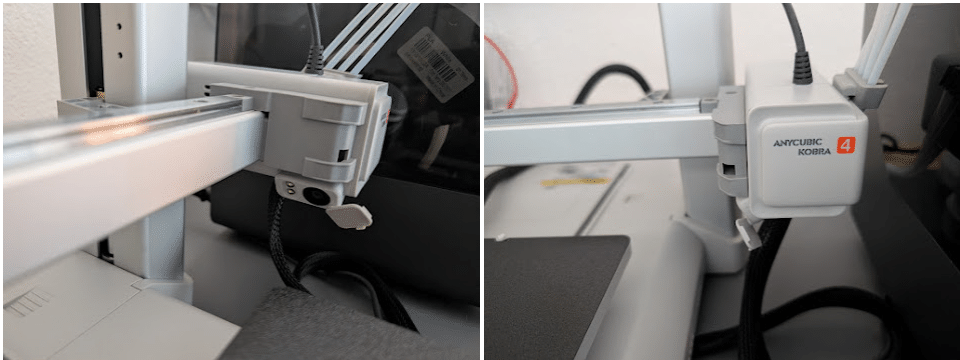
The other point is the camera, which is only fair in quality, and because of its location and lack of position adjustment it is of little use under some conditions, so some of its functions don’t shine as they should.
The standard Kobra 4 is a well-rounded buy for anyone who wants speed and simplicity in a single color. The Combo makes sense if you’re going to make the most of occasional multicolor or active drying; if not, stick with the standard version. In both cases, this is one of the easiest and fastest FDM printers in its range.
One last note: within Anycubic’s own range there is also the Kobra X, which, with its four filaments inside the toolhead and a very low cutter, produces much less purge. That is why the Kobra 4 Combo is justified mainly by the ACE 2 Pro’s active drying and a toolhead that is simpler to repair. If you want multicolor with little waste, it is worth reading our Anycubic Kobra X review first.
Where to buy the Anycubic Kobra 4
As usual at 3Dwork, we don’t include specific prices because they change frequently between campaigns and regions, and we don’t want this review to become outdated. Our recommendation is to check the official Anycubic store for the current price of the Kobra 4 and the Kobra 4 Combo, as well as any current promotions. By buying through official channels you make sure you get warranty and support.
Anycubic sells both the Kobra 4 and the Kobra 4 Combo (with the ACE 2 Pro) in its online store, where you’ll also find accessories, spare parts and consumables. Here is the direct link to each version in the official store, Amazon and AliExpress:
| Anycubic Kobra 4 |  |  |  |
| Anycubic Kobra 4 Combo | | | |
Frequently asked questions about the Anycubic Kobra 4
Is the Combo version with ACE 2 Pro worth it, or is the standard Kobra 4 better?
It depends on how you’ll use it. If you’ll never print in multiple colors or need to dry filament, the standard Kobra 4 gives you the same speed and single-color quality. The Combo pays off if occasional multicolor or active drying genuinely matters to you.
Can I print flexible TPU with the Kobra 4 Combo?
Soft flexible TPU (95A and below) can’t go through the ACE 2 Pro because it jams. You print it by feeding it straight into the toolhead from an external spool holder (ideally without the tube hub on the toolhead and at low speed). Stiffer engineering TPU (68D type) is compatible with the module.
How much filament is wasted in multicolor prints?
Quite a bit more than on the Kobra X, because the cutter sits higher. On small parts we’re talking about tens of grams; on long multicolor projects, the purge can exceed 400 g. It is the system’s main drawback.
How many colors does it support? Can it be expanded?
Four colors with one ACE 2 Pro unit. By chaining two units with an 8-channel hub you get up to eight colors. You can’t mix a first-generation ACE Pro with the ACE 2 Pro.
Is it very noisy?
No. In normal mode we measured an average of around 47 dB, consistent with the under 48 dB that Anycubic quotes. When the ACE 2 Pro dries filament during printing it rises to around 55 dB.
What materials can I dry in the ACE 2 Pro?
It works very well with PLA and PETG. ABS and ASA need higher drying temperatures (70–80 °C) that exceed the module’s 65 °C, so it isn’t the ideal dryer for them. Be careful with some PLA+ that soften at 65 °C.
Can I use Orca or Cura instead of Anycubic Slicer Next?
Yes, by generating G-code and transferring it over USB. But real-time multicolor features, remote control and camera are built into Anycubic Slicer Next, which is also based on Orca.
Does it need an internet connection?
To print locally, no, but automatic material identification via RFID and some remote functions do require a connection. Firmware updates are OTA over Wi-Fi or LAN.
Is it good for beginners?
Yes. Assembly is minimal, calibration is automatic and the interface is available in Spanish. The standard version is one of the easiest options to get started quickly; the Combo adds complexity that a beginner may not need at first.
Do you have the Kobra 4 or the Combo and want to share your experience, or are you torn between this and another machine in the family? Drop by our Telegram channel and we’ll talk it over. We will keep expanding this review with more material tests and projects.


