Today we are going to introduce you to the new Anycubic machine, the Anycubic Kobra Plus. It’s been a long time since we assembled a “commercial” printer and the truth is that it has been a gratifying process to have a machine working in less than 30 minutes thanks to the great work of Anycubic with this machine.
Anycubic has sent us this new Kobra Plus days before it was launched and the truth is that they have done a great job adding this format to the Kobra series.
Anycubic, which is already a veteran in the 3D world, has a wide range of both FDM and SLA models that we invite you to discover on its website. As always, before continuing with the article, I remind you that you can join 3DWork on our Telegram channel full of people who are upset by 3D printing, or on our social networks Facebook, Twitter, and Instagram.
Anycubic Kobra Plus Printer
The Anycubic Kobra Plus comes to cover the gap between the Anycubic Kobra and the Anycubic Kobra Max, being for our taste the most balanced in terms of print size.

The main difference with its sisters is the print volume which rises from the Kobra to a perfect 13.8 x 11.8 x 11.8 inches. / 35 x 30 x 30 cm (HWD).
On the other hand, and among the most important, it continues to maintain some perfect functions that simplify and improve the operation and use of the machine:
- Large print size
- Anycubic LeviQ Self-Leveling System
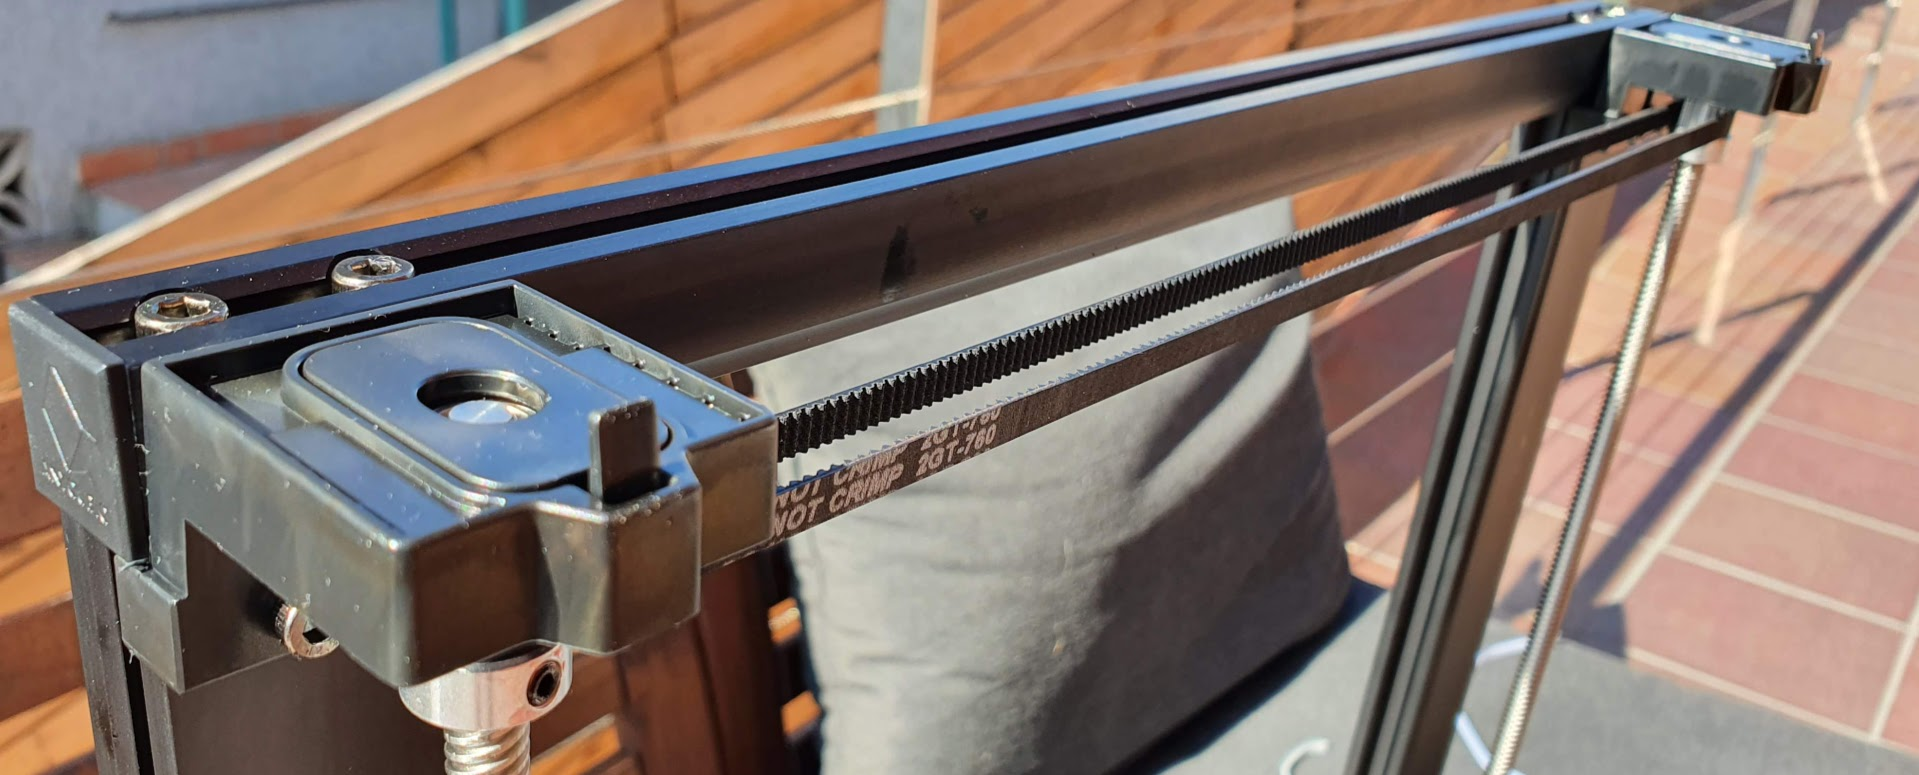
- Double Z-axis synchronized by belt
- Filament sensor
- Ease of assembly and commissioning
- Color touch screen with a simple and friendly interface
Also, the inclusion of the instruction manual, a test object, or profiles for Cura (we would have liked it to have been added for others) in the SD along with the rest of the tools and assembly supplies make this printer a sensational printer kit, especially for those who are just starting out in 3D printing and want a range of great features and print size.
Technical specifications
- Leveling: Automatic, 25 point leveling
- Filament sensor: included
- Printing materials: PLA / ABS / PETG & TPU
- Nozzle size: ø 0.4 mm Volcano style (replaceable)
- Maximum hotend temperature: ≤ 500°F/260°C
- Maximum heated bed temperature: ≤ 230 °F/110 °C
- Print speed: 2.0 – 3.1 in/s / 5 – 8 cm/s
- Control panel: 4.3-inch LCD touch screen
- Electronics: Trigorilla Pro A v1.0.4
- Double Z-axis with a belt synchronization system
- Print Size: 13.8″ x 11.8″ x 11.8″ / 35 x 30 x 30cm (HWD)
- Machine dimensions: 48.6 x 43 x 48.6cm
Where to buy the Anycubic Kobra Plus?
Today if you want to get the Anycubic Kobra Plus it will only be possible from its website since it has not yet been launched on the market.
Finally, you can use our search engine called Markets.sx. In this way, you will literally search different online marketplaces with one click (Amazon, Aliexpress, Gearbest, etc.) and it will show you the results in a single search.
Anycubic Kobra Plus Package Contents
Anycubic has done a great job and the printer comes practically pre-assembled from the factory the start-up process, which we detail later, is very simple, it will take you between 15 to 30 minutes to assemble and start printing the example test.

Content included in the Anycubic Kobra Plus:
- Base Anycubic Kobra Plus
- Z Frame Anycubic Kobra Plus
- Carborundum glass platform 30 x 30 cm with anchoring clamps
- 4.3 touch screen
- Filament support and a sample of filament for the test
- Replacement V6 Volcano Style Nozzle
- Tool kit, screws, and a bottle of lubricating oil
- USB and power cables
- SD card and USB adapter including manuals, laminator profiles, the test piece
Unboxing and initial installation
As we already anticipated, this Anycubic Kobra Plus is going to make life much easier for us in its assembly since we will only need to mount the Z bridge that holds the X-axis, fix the screen, and connect the cables that come perfectly labeled and ready in 15-30m we will have our machine running!!!
The manual included on paper will assist us throughout the assembly process. Once our machine is fully assembled, we will proceed to turn it on, and following the on-screen wizards and documentation, we will adjust and level the bed with its Anycubic LeviQ system and load the filament.
Components and mechanics
The Anycubic Kobra Plus is made with 4020, 4040, and 2020 aluminum profiles depending on the axis. It should be noted that its base includes a perfectly protected and ventilated space for cable management, its power supply, and electronics… taking advantage of the remaining space to include a small drawer that can be very useful.


Kinematics
This printer uses traditional Cartesian kinematics where it is the bed that moves on the Y-axis. In this aspect and given the size of the bed, we believe that it would have been a great improvement to include a magnetic PEI surface that lightens the assembly and can give us more play when it comes to obtaining better performance in the machine.
Continuing with the bed, it is anchored to the axis by 6 eccentric wheels that make it firm, on the other hand, it has lower protection to maintain the temperature, a detail that is always appreciated.
We also have a double motor on the Z-axis with a synchronizer between both stepper motors.
Electronics
As usual in their machines, Anycubic mounts a board manufactured/designed by them, specifically the Trigorilla Pro A v1.0.4 about which unfortunately we do not have much information, this being something that can limit us if we think about making mods to the machine.

It has an HC32F460 MCU from 32b to 200Mhz with which it has more than enough power so that, at least at the level of electronics and calculation, it has no limitations. We have to say that it comes cooled with a large fan that will prevent us from overheating.
As usual, we have a USB port to connect our electronics to other devices and an SD port to be able to transfer/print our pieces.
Hotend, extruder and bed
The Anycubic Kobra Plus has a BMG type extruder and a Volcano style hotend in Bowden configuration that gave a good performance in our tests, theoretically and on paper without taking into account possible chassis / kinematic limitations we could reach about 180mm / s with mounting nozzle 0.4 and layer height 0.2.
At the entrance of the BMG type extruder, we can find a filament sensor that is always very useful to prevent our prints from failing due to lack of filament.
Related to this type of “protection” also comment that we have a printing resumption system in case of failure.

Regarding the hotend, as we have mentioned, it is Volcano style, it is protected by a very stylish casing where inside we can find the hotend fan and two-layer fans that give a fairly good flow and are not excessively noisy.

It is interesting to mention that we have the Anycubic LeviQ self-leveling sensor within the set and lighting LED that is always helpful to be able to follow our impressions.

With respect to the hot bed, it behaves adequately, although it is not particularly fast in reaching working temperatures. On the other hand, it seems that it is limited to 110º, so if we plan to work with some technical materials we may have some limitations.
Display and printer management interface
The Anycubic Kobra Plus has a 4.3-inch rectangular full-color touch screen display with a simple interface.

And it is here in this component where we see that this printer has some limitations or improvement points that although they are not critical and Anycubic will surely correct in future firmware versions, we miss some adjustment functions during printing, such as the preview of the thumbnail of the parts to print, not being able to display M117 notifications or not being able to adjust the flow or other relatively advanced values from it.
Print quality
To check the default settings, which is what 90% of people normally do when using a new printer, especially if you are just starting out in 3D printing, the first thing we did was launch the example object that the SD card carries.
It caught our attention that Anycubic, both in its test object and in the Cura profiles that it also includes as an example in the SD, recommends using relatively high speeds of about 80mm/s. In any case, the test owl came out very well and we used the excellent Anycubic PLA Silk silver filament that usually enhances any artifact.

Once we printed our owl to see that everything seemed correct, we did two more tests, the first was to print with Cura’s profile included a piece of 1 day of printing time:

After our previous stress test we decided to port the Cura settings to our beloved Prusaslicer where we launched a test piece to see how it behaves on vase print mode without supports…again and to make no adjustments to the result. It was good, although some artifacts are seen in Z, some of them related to the current and filament failure tests, which disappeared with some subsequent fine-tuning of the profile!

We also carried out some power cut and filament tests working perfectly and allowed us to recover our prints in both cases!!!

We still have to do some tests with TPU, PETG, or ASA/ABS to see how our Anycubic Kobra Plus behaves.
Is the Anycubic Kobra Plus Worth It?
We believe that the Anycubic Kobra Plus is an excellent printer for those users who want quality without having to overcomplicate their lives, in addition to wanting to have printing aids such as a leveling system, and print recovery assistant in case of power failure. or the filament sensor.
On the other hand, it has a printing size, which for us, is the perfect one since it allows us to make large projects without having a bulky machine.
We believe that the system and control options of the printer through the display should be improved.





Déjanos un comentario