A few months ago came to us the great Elegoo Neptune 3, perfect to start at a really affordable price.
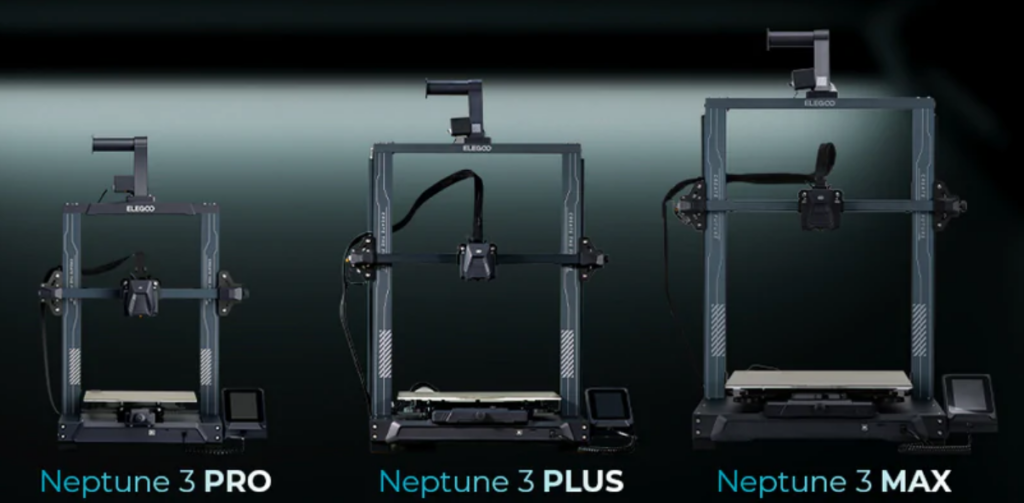
Now Elegoo has improved its Neptune 3 series with the sensational Pro, Plus and Max that we are going to show you in this article and that are a significant leap over the Neptune 3 improving most aspects of this.
As always before continuing with the article, remind you that you can join 3DWork in our Telegram channel full of deranged by 3D printing, or in our social networks Facebook, Twitter, Instagram.
Elegoo Neptune 3 Pro, Plus y Max
All models have a common base:
- Direct extruder for perfect extrusion control, we also have a dual layer ventilation system
- Dual motor on the Z axis
- PEI magnetic bed, in Cartesian machines where the Y axis moves ideally to reduce weight and obtain better speeds and quality
- 4.3″ touch screen for easy machine management
- Automatic leveling and sensor-assisted manual leveling assistants
- Filament sensor, so as not to lose an impression due to lack of filament
- LED lighting that goes sensational to illuminate our printing area
- Recovery from power failures
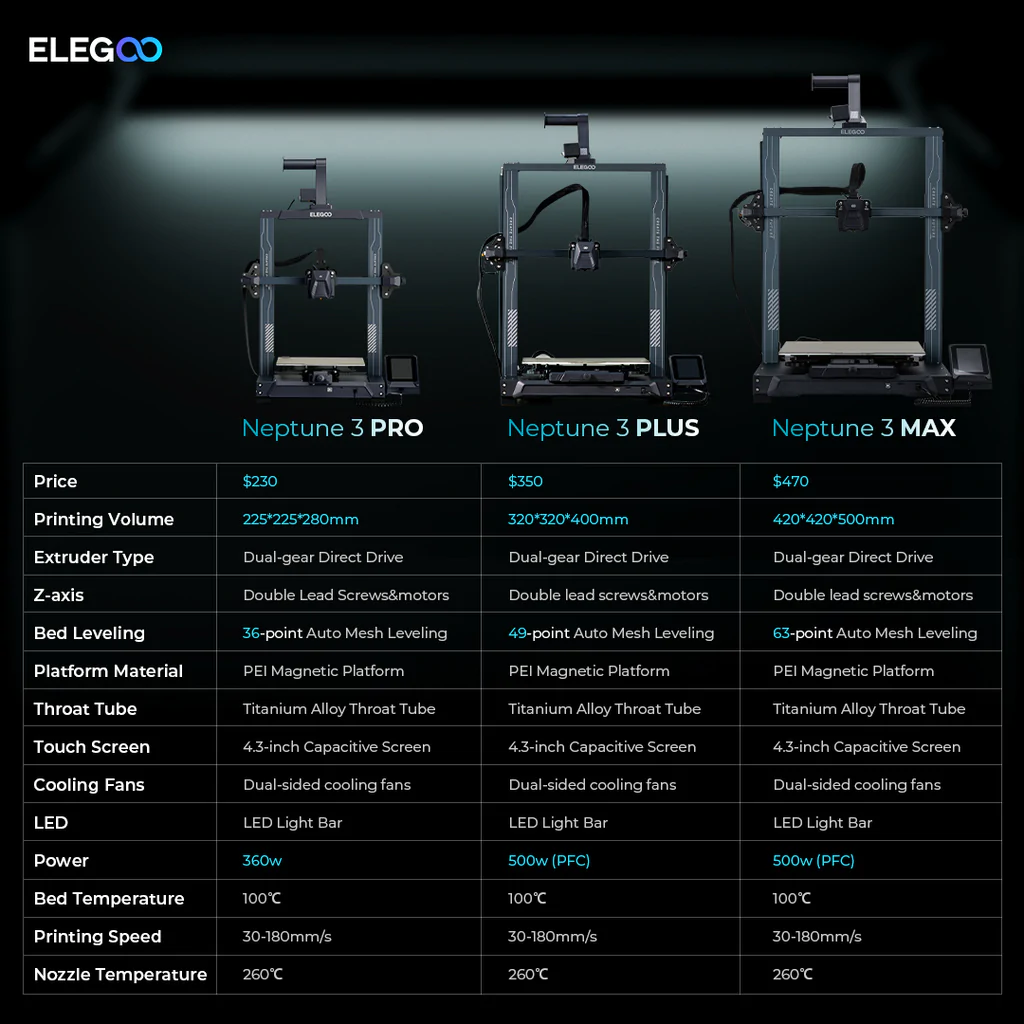
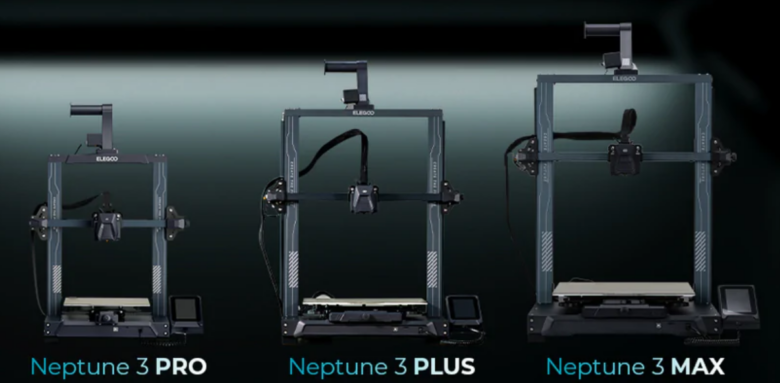
Pro, Plus and Max three different versions that use the same base where the biggest difference is in their size:
- Pro, with a print surface of 225x225x280mm
- Plus, increases to a great 320x320x500mm
- Max, a real beast of 420x420x500mm
Below you have a table with the detail of the three models:
Where to buy the Elegoo Neptune 3 Pro/Plus/Max?
Elegoo has its online store where you can buy these great printers that, as we have already mentioned, include at a very competitive price some standard functions that we do not have in other printers of the same price range.

What’s in the kit?
Elegoo pays a lot of attention to the quality of its kits and in the Pro, Plus and Max range they have done a job at the height of these great machines. The kit comes well protected, as well as including everything you need for the assembly and commissioning of the printer.

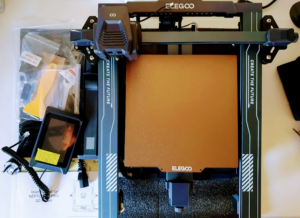
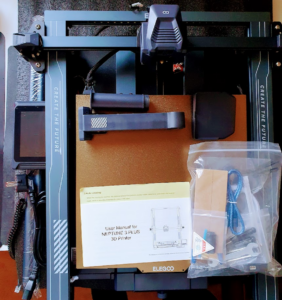
- Elegoo Neptune 3 Pro Printer
- PEI Printer Dock
- Power cord
- Complete tool kit for assembly and maintenance
- Manuals
- Filament sample
- Filament sensor and support to place the coil in our printer
- Micro-SD with its USB adapter to connect it to our computer in addition to a USB cable
- 4.3″ touch screen
Start up…
The Elegoo Neptune 3 Pro / Plux / Max are practically assembled from the factory and following the assembly manual included or the videos on your Youtube channel we have the machine working in 15-30 minutes.
Once we have our machine assembled, the start-up process is very simple, largely because of the simple instructions that we will have on the screen.
The first step to perform, after loading our filament, is the automatic leveling of our machine that we have easily accessible from the screen menu. The instructions provided by the on-screen wizard are very simple to execute.

Once the leveling is finished, we will have to adjust our Z-Offset, distance from our nozzle to the bed in the activation of the leveling sensor, which we will do again following the instructions. We can finish adjusting this Z-Offset by performing for example a leveling test or the example object included in the SD.

Components and mechanics
Elegoo has designed a very robust machine with a chassis made of aluminum profiles, where the v-slot is available in the kinematic parts, which allows the machine to be very robust and prevents dirt from being stored in our machine.
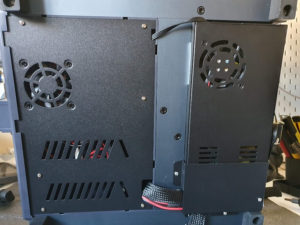
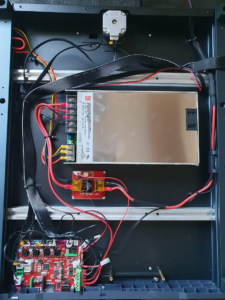
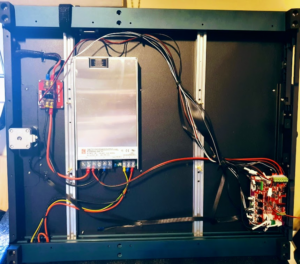
On the other hand, all electronics and wiring are hidden, protected and well ventilated at the base of the printer
Kinematics
The Elegoo Neptune 3 Pro/Plus/Max uses a Cartesian kinematics where the bed moves on the Y axis. The wise decision by Elegoo to use a PEI magnetic surface allows to lighten the mass of this and allow to obtain a better overall performance with the machine.

Referring to the bed and its kinematics it is interesting to note that in the Plus / Max models we have 6 wheels allowing a firm, safe, and low vibration movement.
Also appreciated is the inclusion of tensioners for the X and Y belts to, in a very simple way, be able to adjust the tension of these optimally and effortlessly.
To reinforce the set, in the Plus / Max models, we have some pillars / tensioners to improve the stability of our Z axis bridge.
Continuing with the Z axis, and this time available in the Pro / Plus / Max version, we have double Z motor along with a belt synchronization system that allows us to improve the synchrony between both motors.

Electronics
Elegoo has chosen for its Pro / Plus / Max an electronic ZNP Robin Nano (MKS) with an MCU of 32b in addition to silent drivers that are always appreciated.
The wiring is correctly fixed and labelled, in addition we have a socket for a 5th driver that is always appreciated

Although we do not have much specific information about electronics, we advise you to go through the repository of the NARUTOfzr companion where we can find firmware, and its sources, both electronics and the very updated screen to keep our printer always up to date..
In our case we chose as always to update the firmware of both, electronics and screen, to provide some troubleshooting or add some extra function. In both cases simply enter the new firmware using the SD.
As usual, we have a micro-SD slot and a USB port.
Hoted, extruder and bed
Elegoo has mounted the same system at the extrusion level in all three models, something that is appreciated at the level of mod design by the community and, on the other hand, to provide the three machines with a very capable direct extrusion system.
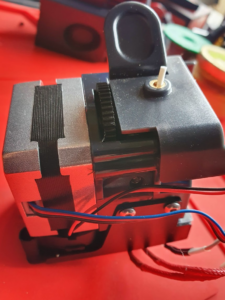
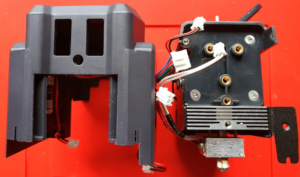
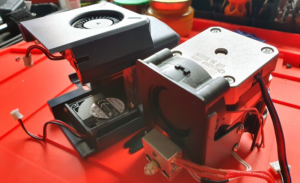
Continuing with the extruder / hotend we have easy access to the gear and pressure lever of the filament very useful to manipulate the loading and unloading of this. The ventilation of the hotend works very well launching prints of several days without a single jam, on the other hand, the layer ventilation, and for our taste, it stays a little fair.
The leveling sensor, with an Elegoo’s own design, has worked for us in a very correct and precise way… Something to be thankful for given its important function.
Other sensors related to extrusion, Elegoo includes in the Pro / Plus / Max a filament sensor that is always of great help to not lose a print due to filament problems.
We also have LED lighting integrated into the chassis, upper part of the Z bridge, which we can manage from our screen and that will allow us to illuminate the printing area to visualize the progress and details of our parts.

With respect to the bed and as we mentioned before we have a PEI magnetic base that lightens the set and in the Plus / Max versions we have 6 wheels to manage the movement on the profiles
In the case of these two models and given their size, we have to tell you that they require some time to reach the target temperatures, even using a MOSFET external to the electronics for its management.

Display and printer management interface
Again Elegoo has been quite practical in this section using the same screen for all three models, a 4.3 “colour touch screen with a menu system and very simple options for an initiation / medium user, but that can fall short in options available for an advanced user.
It is important to highlight the usability when managing it, not only for its options on the screen, but for not being a fixed screen, being on a magnetic support and that we can manipulate comfortably in our hands.

It is interesting how Elegoohas included several assistants that will make life much easier when performing certain processes with our printer. As we mentioned before, you can find firmware updates to add, improve and solve problems with the screen in the NARUTOfzr companion repository.
Although we usually criticize this part of the printers that pass through our hands, in this case we can say that Elegoo has done a great job between ease and simplicity of use, in addition to advanced options available for management from your screen.
Print quality
It shows the love and improvements made in these Pro/Plus/Max on their sisters that is reflected in the quality of the prints made with these machines.
Elegoo suggests the use of Cura, or a customized version by them, but as always we are very fans of using other laminators, and in this case, we decided to create our profile using OrcaSlicer we love its functions and workflow. Using a profile of a similar machine and performing a few tests to refine / customize our machine profile, we will have the profile ready in any other laminator.
In the companion’s own repository NARUTOfzr has a repository for PrusaSlicer/SuperSlicer profiles that we can use as a basis to create our own.
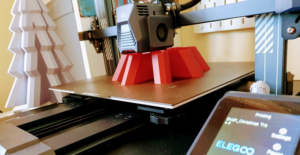
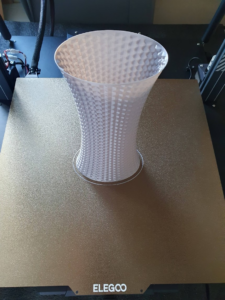
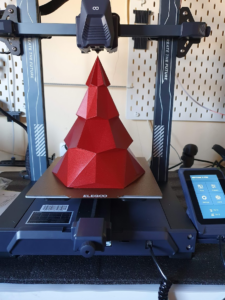
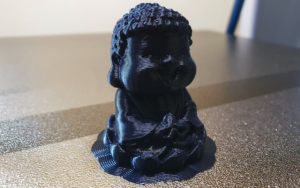
Although as always we print the Buddha of rigor included as a test in the SD … We immediately launched to make prints with various types of filaments, as well as with pieces of different sizes, complexities and even several days of printing … We have to say that the result was excellent in practically all of them!
Regarding types of filaments we did tests with PLA of different types, PETG and some piece in TPU … It shows the great work of the hotend / extruder that mount these machines.
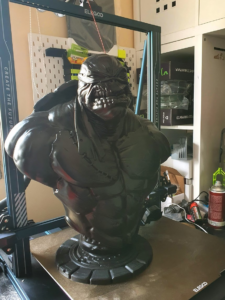
In the larger models Plus/Max we made several pieces of busts, reaching almost the maximum size allowed in them. Being prints that lasted just over three days where we took the opportunity to test filament changes manually or by activating the sensor. Again the machines behaved excellently.
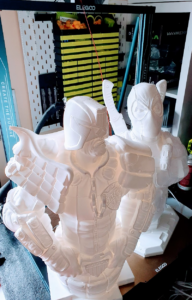
As more negative points we could say that the layer ventilation, despite being correct, limited us a little in extra speed that we are sure we can obtain with these large machines.
We also found high vibrations, bust Deadpool, when using the default profiles that with some adjustments and extras explained below allowed us to reduce these to the minimum expression, leaving incredible figures.
Oner more thing 🙂
As we always like to add something more different to our review, in this case and although we already advise you how to keep the original firmware updated both in the electronics, we will add some very interesting mods that have allowed us to greatly improve our Elegoo.
Silicone blocks
The silicone blocks are a fairly simple modification that we can implement in almost any machine and that normally allow a greater rigidity of our bed while avoiding vibrations … something that with the typical springs is not always achieved.

In this case we changed the springs for silicone blocks in the three machines to improve this aspect.
E3D Hemera Revo
Through our friends from 3D-Informatik we got the great E3D Hemera Revo extrusion system, one of the best extrusion systems we have worked with.

Its excellent quality of materials, performance and power of the original Hemera version enhanced with the use of Barrel / Nozzle Revo system that, honestly, we love.
We decided to adapt our Elegoo Neptune 3 Max to be able to mount this excellent extrusion system and the results were sensational giving a great leap in quality, performance and versatility in options.
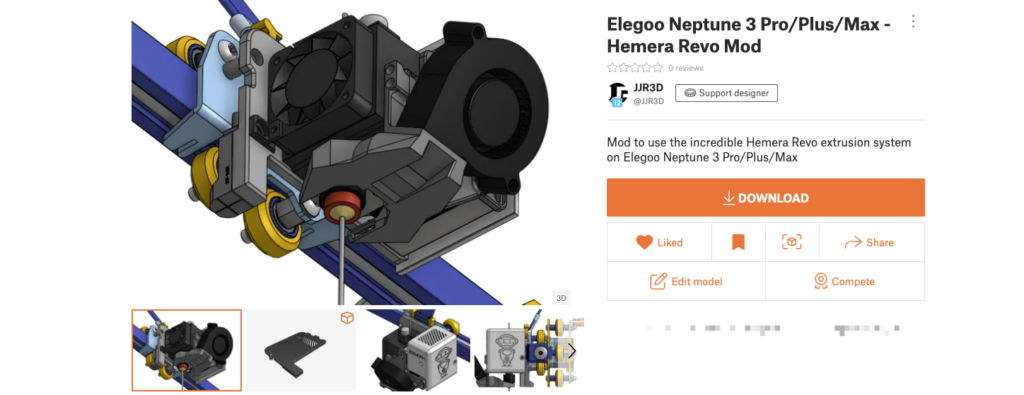
Taking advantage of this mod, trying to keep certain parts such as the leveling sensor and its connection plate, we decided to improve the bed ventilation system with a 5015 that together with the designed nozzle greatly improved the performance of this part that limped a little in the original head of the Elegoo.

We also tried to keep the offsets of the nozzle as much as possible so that the adjustments were minimal. In addition, we try to make the support as robust as possible to anchor the extrusion system well to avoid vibrations and we add an extra anchor for possible improvements such as other leveling sensors, accelerometers, LEDs, etc.
If you plan to improve your machine to get more out of it, it is a very advisable mod!!!
Klipper
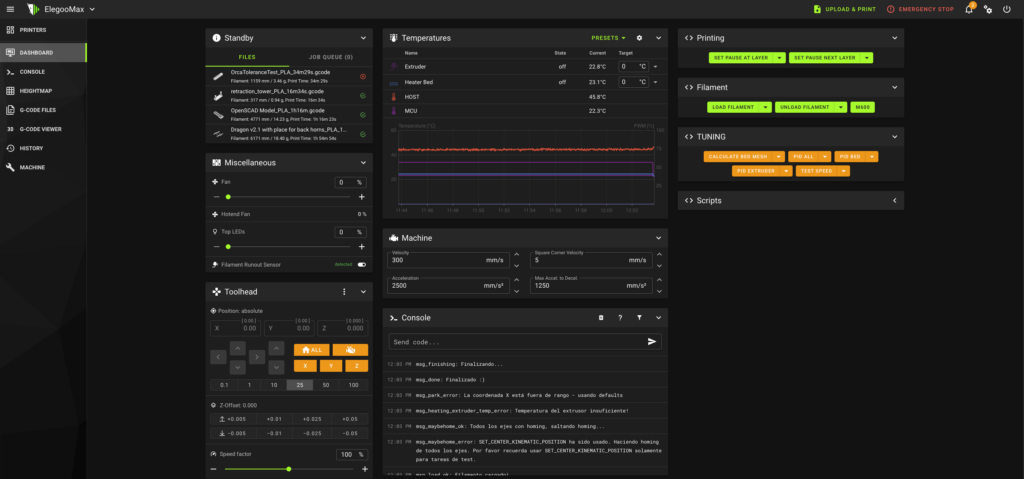
As a last mod, for now since this Elegoo Neptune 3 Max is going to be one of our reference printers, but no less important is the transformation to Klipper.
Klipper is a firmware for printers that has transformed the world of 3D printing by its architecture, versatility and power in a relatively short time. Given the popularity that Klipper enjoys lately, thanks to being an excellent printer management system, we can tell you that the Elegoo Neptune 3 Pro/Plus/Max range is supported..

It is important before continuing with the Klipper theme that you keep in mind some things… Klipper is a very powerful system, but understand that installing Klipper on your printer requires some experience with 3D printers, hardware and software. It may not be a trivial task for people who have just started in 3D printers or who do not have a minimum of knowledge. Also, certain steps could damage your printer.
Klipper is based on an architecture that uses the power of a host, usually a Raspberry Pi, to control the electronics of your printer.
By doing this we can make it work faster and more accurately depending on the system and hardware we have.
Something that Klipper will allow us in any case is to be able to have a lower level control of our machine, which will also require extra knowledge / efforts, greater speed when applying any change, in addition to a first class remote control of the machine.
If we decide to take the leap we can start with getting the printers.cfg an example thanks to our colleague TheFeralEngineer who has in his Github repository for our Elegoo Neptune 3 Pro / Plus / Max.
You have information on how to install Klipper on your host here, we will not go into the detail of how to do these steps since it is not the objective of this review. In our case as a host we chose to use our Bigtreetech Pad 5 that in a compact set we have a powerful MCU (CB1) and a 5 “touch screen where Klipper looks great.
Once we have our Klipper system working and our printer.cfg as an example we only have to compile our Klipper firmware with the following options for our ZNP Robin Nano DW 2.2 electronics that mount the Elegoo Neptune 3 Pro / Plus / Max:
- Select as processor STM32F401
- In bootloader we select 32KiB
- For communication with our Klipper host we have two options depending on the connection method:
- By USB cable, advisable, select in Serial USART1 PA10/PA9
- Through USART, using the pins of the Wifi connector and requires configuration in our host, USART2 PA3/PA2

Once we have the firmware configuration we save changes and launch a make that will create our firmware in /out/klipper.bin which we will pass to an SD renaming klipper.bin for ZNP_ROBIN_NANO.bin to apply it to our electronics.
When Klipper firmware has been applied, we will return to our host to find the serial mount point that we will find with the ls /dev/serial/by-id command again from SSH.

This connection string is the one that we will put in our printer.cfg which in previous steps we downloaded as an example:

It is important to comment that when using Klipper the screen of our Elegoo will no longer work for us, at least currently. Klipper has web administration that we can use from any device that has a browser and is on the same network as our host.
Anyway, if having a screen is essential, we advise you to connect a screen to your Klipper host and install, if you do not already have it, KlipperScreen.

If everything has gone correctly our Klipper will connect with our electronics and we will already have temperature readings and motion controls and other components of our printer. We advise you to follow our first steps guide to verify that everything works correctly and… to enjoy your printer with Klipper!!!








Déjanos un comentario