
Finally we got the new ELEGOO Saturn 3, which includes several very interesting improvements over the ELEGOO Saturn 2. The ELEGOO Saturn 3 is a high-resolution resin 3D printer that offers excellent print quality and ease of use.
ELEGOO with its Saturn range thanks to its great relationship between quality, price, and size has always been a benchmark in this segment of machines. Being a printer that allows you to perform jobs of almost any size, as well as perfect for both new or advanced users or looking to renew their current machine.
As always before continuing with the article, remind you that you can join 3DWork on our Telegram channel full of deranged by 3D printing, or on our social networks Facebook, Twitter, Instagram and YouTube.
ELEGOO Saturn 3 and 3 Ultra Printer
ELEGOO has once again improved its excellent previous Saturn 2 model, improving several of its technical aspects, especially the resolution of its screen, going to an impressive 12K resolution.
In addition, it has launched two versions of this model, the Saturn 3 and 3 Ultra with some significant differences between them.
 We leave you the following official video of ELEGOO where you can see the presentation of the ELEGOO Saturn 3, in its Ultra version, and its brand new Neptune 4 PRO … Soon we will have a review of its version, Neptune 4.
Below you can see a table of its characteristics, along with those of its sister Saturn 2:
| Saturn 3 Ultra | Saturn 3 | Saturn 2 | |
|---|---|---|---|
| LCD resolution | 12K (11520×5120) | 12K (11520×5120) | 8K (7680×4320) |
| LCD size | 10″ | 10″ | 10″ |
| Pixel Size (xy) | 19 x 24 μm | 19 x 24 μm | 28.5 μm |
| Print Size | 219 x 123 x 260 mm3 | 219 x 123 x 250 mm3 | 219 x 123 x 250 mm3 |
| Velocity | up to 150 mm/h (with ELEGOO Speed resin) | up to 70 mm/h | up to 70 mm/h |
| Protector LCD | Tempered Glass 9H | Tempered Glass 9H | Tempered Glass 9H |
| VAT Film | ACF | PFA | PFA |
| Light Source | COB + Retractive Light Source | COB + Fresnel Collimating Light Source | COB + Fresnel Collimating Light Source |
| Kinematics Z | Double linear guides with ball rod | Double linear guides | Double linear guides |
| Touch screen | 4″ IPS capacitive color, 800×480 resolution, new UI | 3.5″ resistive color | 3.5″ resistive color |
| System | Linux | Single-chip System | Single-chip System |
| Laminated Software | ChiTuBox, Lychee Slicer, Voxeldance Tango Formato GOO | ChiTuBox, Lychee Slicer, Voxeldance Tango Formato GOO | ChiTuBox, Lychee Slicer, Voxeldance Tango |
| Other | WiFi Air Filter Exclusive design | Air filter | Air filter |
As always with ELEGOO the Saturn 3 and 3 Ultra come perfectly packaged, including everything necessary for the start-up and maintenance of our printer.


Where can I buy the ELEGOO Saturn 3?
Today if you want to get the ELEGOO Saturn 3, or Saturn 3 Ultra, you will only be able to do it with pre-reservation through their website and take advantage because they have an interesting discount for those who opt for pre-reservation!!

Finally you can use our search engine called Markets.sx. This way you will literally crawl different online marketplaces in one click (Amazon, Aliexpress, Gearbest, etc.) and show you the results in a single search.
Analysis and user experience
We loved the ELEGOO Saturn 2 its performance and quality, so our expectations with the Saturn 3 were very high, especially with the great jump in resolution of its screen.
In our case the friends of ELEGOO provided us with the Saturn 3 version, remember that the Saturn 3 Ultra version has some changes with respect to the Saturn 3 model that we will detail later.

We’ll start with the design of the machine… the Saturn 3 has an identical design to its younger sister. In the case of the Saturn 3 Ultra is where we find novelties in this aspect with dark colors that, and for us, give it an imposing presence.

In the cinematic section again, we have differences between the Saturn 3 and the Saturn 3 Ultra. While the first has the system used in the Saturn 2 of a double linear guide with standard rods that leave a consistent set.
The Saturn 3 Ultra has improved by adding a rod with bearings that provide even more precision and consistency, which allows us to reach the promised speeds of up to 150mm / h.

ELEGOO continues to bet, for the Saturn 3, for the use of PFA instead of the traditional FEP that basically improves light transfer, has greater thermal stability, and will reduce adhesion stress, significantly minimizing possible failures in our prints.
And we can assure you that it works perfectly!!
Again, the Saturn 3 Ultra differs in this section by using ACF instead of PFA. This new material improves even more by reducing the adhesion tension, something that, together with the rest of the improvements introduced in the Saturn 3 Ultra, can allow us up to about 150mm / h using the ELEGOO Rapid resin.

In both models we have an imposing printing platform in size and finish. With engraved laser patterns that improve adhesion and minimize failures during our prints.
Again we have some differences between the Saturn 3 model that has the typical fixing/leveling ball joint of 2 anchor points. Meanwhile, the Saturn 3 Ultra, has a different system with 4 fixing/levelling screws.

One of the big improvements in the Saturn 3 series is the inclusion of a 12K display with a 10” screen format similar in size to the Saturn 2. That increase in resolution to 12K allows us an impressive 19 x 24 μm pixel size xy… If we have not been confused!! Use a rectangular pixel size instead of the typical square that we will talk about later in detail.
Important today that both models of the Saturn 3 have 9H tempered glass, replaceable, which will protect our screen by increasing its useful life in the event that we have an accident.
Another relevant aspect when evaluating a resin printer is its light source. In this case, ELEGOO has chosen for the Saturn 3 to continue with the FCSL system, already used in the Saturn 2, which through the use of Fresnel lenses improves the diffusion of UV light.

On the other hand, the Saturn 3 Ultra has improved in this aspect using a system similar to the previous one, but adding a refractive surface to improve the distribution of light, baptized as COB + RLS, also improving the dimensional accuracy of our parts.

We also have a connector to install the included air purifier that uses activated carbon that will reduce the typical odors of resins. On the other hand, and as we already had in the Saturn 2, we have an opening in the hood to install an external purifier / heater.
In this case, ELEGOO has launched its Mars Mater Air Purifier, which is sold separately, and specially designed for use with its printers. This allows to significantly reduce the odour and has a purification efficiency of up to 95% TVOC… VOC with the acronym for Volatile Organic Compounds or volatile organic compounds that are emitted in the form of gases and that can be harmful to human health.

While the Saturn 3, again, uses a screen and interface similar to the Saturn 2… in the Saturn 3 Ultra we have a new 4 “capacitive IPS screen, with a resolution of 800×480 and renewed interface.
Continuing with the Saturn 3 Ultra and its innovations at the technology level will probably give us indications of where future models will go.
On the one hand, as we have already mentioned, we have a totally different screen to the Saturn 3 probably related to the change of the internal system and electronics. The Saturn 3 Ultra model has new Linux-based electronics that have 4 GB RAM and that will provide more processing power, allowing a better experience of use and fluid management of the printer.

Another specific feature of the Saturn 3 Ultra is its WiFi connectivity. This function, which we are already beginning to see extended among resin printers, will allow us to transfer our models to the printer wirelessly and forget about going with the USB from one place to another in addition to being able to monitor the status of our printer remotely. In this case, the Saturn 3 Ultra has a WiFi module compatible with 2.4G and 5G networks, with transfer speeds between 6-10Mbps.

With all the improvements mentioned, faster electronics, improvements in the kinematics with bearing rod and the new ACF for VAT the Saturn 3 Ultra together with the new ELEGOO Rapid resin promise truly incredible speeds of up to 150mm/H.
Start-up
The start-up of our Saturn 3 or 3 Ultra is extremely simple following a few simple steps that we can find in the included manual.
In the video that you can see below you have the steps to perform, in we list below the steps that you can also find in the printer manual:
- We will remove the resin tank/VAT carefully, use the leveling sheet to protect the screen and install the printing platform to secure it well and loosen the two fixing screws with the included Allen tool.
- We will go to the leveling menu, Tools / Manual, and press the Home icon. Once the printing platform is positioned in its location, we will use the Allen key included to tighten the screws. During the process, we will keep the platform correctly oriented with the hand and press lightly for a good alignment with the screen.
- Once the leveling process is done, we will return to the Tools menu and click on Set Z=0
- Finally, and to be able to install the resin tank or VAT again, we will move it manually from the corresponding option on the screen, pressing so many times until we can install our resin tank in its location.
- It is advisable as a next step to perform a test of the screen and UV. To do this we will go to Tools / Exposure where we will press the Next button, and we will see on the display, if everything is correct, the ELEGOO logo.
We already have our printer ready to print, inside the USB we have a typical test to verify that everything is correct.
If you own Saturn 3 Ultra you can review the Elegoo assembly video:
Once we have our test done, we advise you to start performing the exposure tests to adjust the times of our resin for our ELEGOO Saturn 3.
Exposure test
Correctly calibrating the exposure time is a critical factor to ensure that our parts are printed without problems and with the highest quality. There are mainly, there are other values a little more advanced that we do not advise you to modify initially, two very important values to take into account:
- The exposure time of first layers. These first layers are critical since they will withstand the tension of our piece and its supports when performing the printing process. In this regard, it is important to:
- The number of first layers, a low value or a very high value, can be counterproductive. Having a few first layers can make them not support, in this aspect, it is advisable to have a number between 4 and 8 base layers.
- Exposure of the first layers, also like the previous one can affect the adhesion of our piece and make the printing fail. A short exposure can influence adhesion, while a high exposure apart from causing similar failures will reduce the lifetime of our screen. Normally, as always depending on the printing conditions and resin we use, this exposure time is usually between 25 and 40 seconds.
- The exposure time of normal layers, if the previous layers were critical for the adhesion of our piece to the printing plate, in this case, they are important to provide consistency to the piece as it is created and achieve a good definition of details in our figures.
After all this explanation, it is important that we invest a little of our time to find the exposure time of normal layers. For this we can use different types of tests that you can find in our SLA calibration guide. The problem is that it is a tedious method and thanks to UVtools we can improve enormously!!
You can download UVtools from the following link, although the interface is not very intuitive we will guide you in the steps to create a multiple exposure test and with just one impression we will be able to test the range of exposure times we want saving time.
The first step to perform is to load the test file that is included in our USB from the File/Open menu, the ROOK.goo file that is the one we are looking for will be found in the ELEGOO SATURN 3 Rock Model fro Printing Test folder of our USB.

In the UVtools window we can see a thumbnail of the piece in the upper left, in the center part a preview of what the screen of our printer would do that we can control with the slicer that we have on the right side to move between layers, etc …
The next step will be to open the calibration tools to select the exposure test. You will also find many other tools to adjust your machine but in our case we are going to focus on exposure tests.

The new window that UVtools will open will be where we will configure our multiple exposure test. Let’s review the different sections.

- Common properties, since in the initial step we load the USB test piece we will have here everything almost preconfigured. We must pay attention to the values marked in the red box that are usually the ones we will need to adjust:
- Layer height is usually 0.050 although we can tell you that 0.030 is a value that goes very well with our Saturn 3 … That if… More printing time and to get more detail about your exposure settings, the quality of your resin and the figure to be printed will be key to seeing significant improvements.
- Bottom layers, as we explained before, base layers are key for our pieces to adhere well to our printing base. In this case the test piece has these optimized for the size and stresses it can generate. In our case and for more general prints use between 4-8 layers.
- Bottom exposure, like the previous point in this case is optimized for this test piece. Since we are not going to perform a base layer exposure test we are going to leave this value in 30 seconds. In the event that we see that our first layers do not adhere, and we have our printing base well leveled, we will go up from 5 in 5 seconds until we find the optimal value for your case.
- Normal exposure is the really important one for the test we are going to do. Since it is the minimum reference value we will adjust it to a low value I would advise you to put a value between 1.5 and 2 seconds… At least initially, until we take an initial test and see the results.

We go to the second section where we can configure the options of our test:
- Pin (positive) / holes (negative), personally it is an option that I like to be able to do the test of both positive and negative pins on the right side of the figure.
- Text, in our case we like to modify the test text by the name of the printer and the resin with which we did the test. It is also advisable to change the scale of the text to 1.5 to make it more visible.
- Preview, on the right side of this section we will see a preview of how our test will be.

Finally we will go to the interesting section, the configuration of multiple tests:

- Enable, will allow us to enable the options to configure our multiple exposure test.
- Maximum generations, will be the number of tests we want to do varying in each one the exposure time.
- Generate exposure table, pressing this button will generate the test table (4)
- Exposure table, will be a summary where it will inform us of the layer height, exposure first layers and exposure of normal layers. It will be in this last value, and for our case, in which we will see that using the value we put in Normal exposure (Common properties) of 1.5 seconds will add the value of Normal step (Multiple exposures) to each of the tests we do.
Once the configuration is finished, click on Exposure time finder at the end of the window to generate the test!!

Once generated it will return to the initial screen of UVtools where we can see our test and with the control on the right we can see the process that our printer will perform. Now you just have to go to File/Save as… and save our generated test on the USB and print it!!

A great little trick:
Although the test that UVtools does gives a lot of information, it takes very little time to be done and the expenditure on resin is minimal. It may be highly advisable to perform this test with other test figures.
In this case we chose the test figure previously, SLA calibration guide some interesting ones, you open it in your slicer and generate the file that we will use in UVtools to replace the ROOK.goo that we used previously.
We will perform the steps explained above, but in this case we will also use the final section Pattern loaded model and check Enable… Now we will use a custom test figure for these tests!!!
As you can see in the previous image, we use the minis’ column test, which although it is not one of our favourites to find exposure times, to find our optimal exposure value with a single print test.
Initially we do not advise you to make more adjustments to your laminator profile, in the case of being an advanced user and knowing moderately the resin printers you can try to adjust the speeds. Basically, these adjustments of printing speeds will result in a reduction in printing time, between 5 to 20% depending on the settings.
In case you want to make these advanced adjustments, always try to make small adjustments. Normally, with very fast speeds it can affect the flow of resin and affect the level of detail of our parts.
Another factor with which we can play is the antialiasing to disguise that staggered effect between layers. Personally, and taking into account the resolution/accuracy of the Saturn 3, it is better to print at a lower layer height (0.03 suits you very well… With the increased print time that comes with it) or use the minimum value of Antialiasing to keep details to the maximum.
Print quality
Once adjusted our Saturn 3 it’s time to see its full potential. Although we are already accustomed to the print sizes provided by our Saturn 3 we have to tell you that it is a joy to be able to have so much size … either to be able to make larger projects or simply to be able to print a greater number of pieces at once, saving especially in printing and post-processing time..
In our tests we perform the tests from both Chitubox and Lychee, our preferences in this aspect is to use Lychee for its workflow, tools, and interface … We believe that it is a software that if we use our printer assiduously is worth the cost of its license for the saving of time when processing our projects and, at least in our case, the failure rate when printing has been reduced to practically 0.
On the other hand, and although we are still doing it, ELEGOO attaches a license of VoxelDance Tango which is a laminator for resin printers compatible with our Saturn 3. If you are interested in using this slicer we advise you to read this video guide of ELEGOO for the use of this slicer:
One aspect that we have not emphasized much so far is that ELEGOO has developed a new and open-source laminate format called GOO and that they use the Saturn 3 and in the future their new machines. But you may wonder… That I care about?… Well, it should and a lot!! On many occasions the different brands take out their proprietary formats without being free, so, at least in the first weeks/months of their launch, we see limited support by the laminators to these machines.
This intelligent move by ELEGOO, together with the support of the different developers of laminators, will allow that practically from the day of launch (if not before) our favourite laminator has support for our machine, avoiding having to make “inventions” to be able to use it.
In order to get the most out of our ELEGOO Saturn 3 and its 12K panel it is essential to use figures with a level of detail at the height of the… for our first test we opted for a Bestiarium Miniatures model, specifically from its Goblin Grotto collection using the Gobling King figure. If you are fans of this theme of figures we advise you to get the collection because they have an incredible quality of details, in addition to having pre-supported files for Lychee.


As you can see in the photos, and using a normal ELEGOO resin, the level of detail is excellent… Remember… To get the most out of our machine it is necessary a correct adjustment of our exposure times, use quality resins, and some pieces/figures that have good detail in their designs.
For our second figure, we continue with another Bestiarium Miniatures model, specifically from its Beastman collection and its imposing Grimscar the Beastlord.


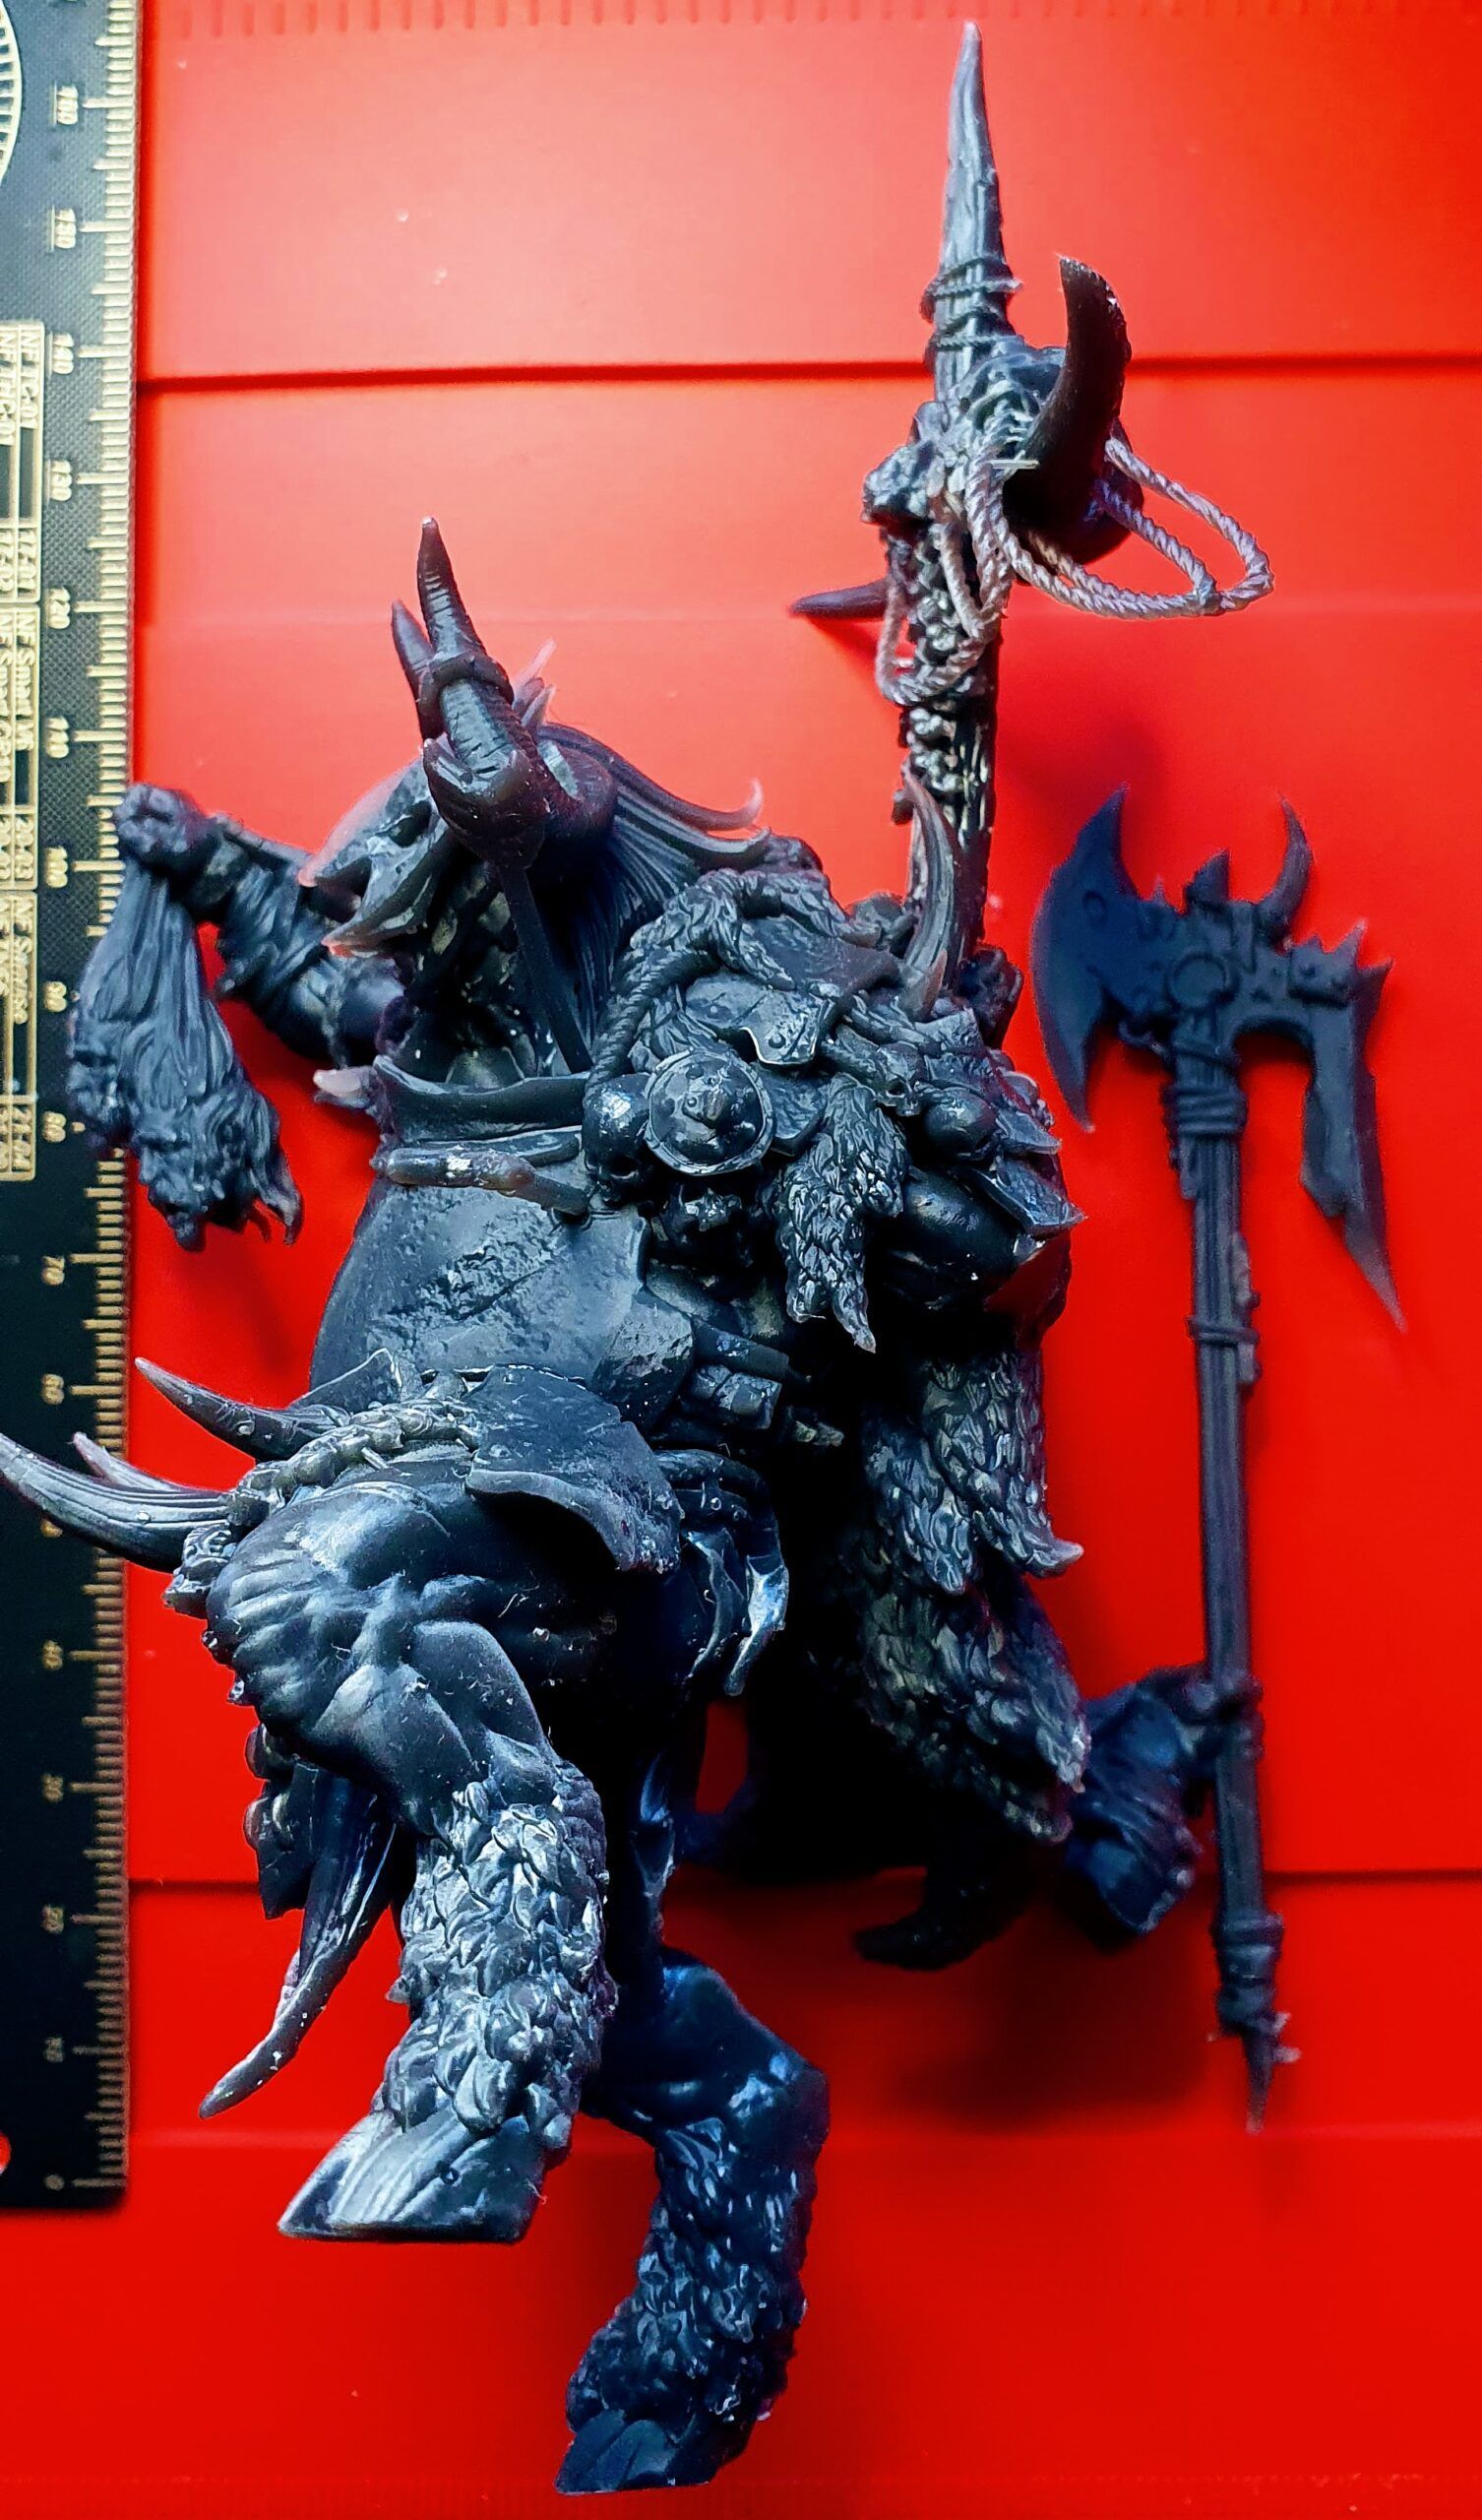


Again the level of detail of the figure is exceptional, making our Saturn 3 and its exceptional 12K screen look. If you look at the textures of the breastplate, the skin, the details of the ropes and the accessories are excellent.
We also decided to carry out other tests using another studio with high-quality works from Loot Studios, specifically the figures of Oah’Numarc (the Dark Rider) and Ungor Boom (Battlefire General).


With respect to Oah’Numarc (the Dark Rider) is a figure with some complexity since it has many internal holes and thin layers that make its impression complicated. The level of detail in both the frame and the costume of the figure are fantastic.


Finally we have a figure, Ungor Boom (Battlefire General), with great details both in the skin and in the clothing that again our Saturn 3 made look excellent.
Resin 3D printing tips
To have a somewhat percentage of success in our impressions we give you some small tips of aspects to take into account that can significantly affect our impressions:
- Use quality resins, resins are not cheap and sometimes we tend to buy any type of resin based on its cost rather than its quality.
Sometimes it is not usually a saving if not quite the opposite since the % of correct impressions is lower, the detail of our pieces less and the durability of the pieces over time is lower.
- Ambient temperature, 3D printing in resin is based on chemical processes and therefore the ambient temperature is important for the process.
Normally and for normal resins manufacturers advise an ambient temperature of 25-30º or higher.
Condition this value normally at the beginning of our prints since a posteriori the heat generated by the printer itself will maintain or increase the temperature.
There are different methods to adjust the temperature… from a bottle warmer to heat the resin, a hair dryer, or more complex systems of heaters with thermostats or even USB reflex entity heaters that are coupled to the VAT - Display/screen always clean, that our screen is completely clean and free of residues is very important since it is the one that allows the printing process.
We will always clean this following the instructions of our manufacturer without using certain products and always try to use a screen protector to protect it from debris that may leak. - Speed, generally 3D printing does not get along well with speed and specifically with 3D printing where chemical processes act where any variable can ruin our impressions we must be a little conservative in this aspect or in any case not to modify values related to speed if we are not 100% sure of what we are doing.
- Angular our parts, a basic rule not written in 3D printing is to angle our parts. Printing angled parts in their position will mean less probability of failure, better quality normally of printing as well as avoiding the amount of supports and many times the contact surface of the part in the FEP reducing tensions.
- Overload of parts in our printing, as we mentioned with the speed sometimes we tend to overload our prints with pieces to take advantage of the printing something that sometimes can be the opposite since we increase the % of chances that it fails.
Especially if you start in 3D resin printing we advise you to go little by little loading your printing base, understand how your machine works and the printing process and add and distribute the figures in the best way in your printing platform to optimize time, cost and % of a satisfactory printing. - Maintaining the VAT film, is in perfect condition allows us to reduce failures in our prints, resin leaks and even major problems such as damaging our screens.
Check it periodically in case it has damage, adjust the tension if necessary, apply a little dry PTFE lubricant to maintain its characteristics and protect it or even change it when we see any damage to it will allow us to keep our machine in optimal condition. - Leveling printing platform, as with the VAT film having our printing platform correctly calibrated is very important as well as being a quick and simple process. We also have tests that can help us identify leveling problems, such as those of comrade Dennys Wang.
- Kinematic maintenance, resin printers have mechanically been speaking a very simple system usually using linear guides, a rod anchored to a motor to move the fastening system of the printing platform.
It is important to keep these parts clean and oiled for optimal operation.
Common printing problems
We recommend some solutions to the most common problems that we can find in our impressions:
- The parts do not adhere to the printing platform and remain in the FEP
- Incorrect print platform leveling
- It is usually a symptom that our exposure time in the first layers (Bottom Exposure Time) is insufficient and we must increase it.
- The contact area between the piece and the platform is small we must add “raft” to them
- Layer separation or general delamination
- Ensure a stable and motionless base during printing
- Check the tightening of the anchors of the printing platform or VAT
- Check the VAT film, it’s tensioning and in any case replace it
- Up/down speeds can be too aggressive
- Separating layers in a part
- Usually indicates lack of supports, that these are insufficient or failed
- Up/down speeds can be too aggressive
Conclusions
One of the first things we would like to assess is whether we need the Saturn 3 or the Saturn 3 Ultra?
As we have already indicated the differences between both models are important in many aspects (WiFi, ACF in the VAT, improved kinematics with rod with bearings, electronics and improved menu management screen, external aesthetics) which although they will give us a plus in the case of using intensively or to produce parts in our printer at the moment of truth will not mean a significant improvement in quality.
In this case we would recommend the Saturn 3 Ultra if for you it is important the intensive use of the machine, the speed of production and to be able to remotely manage the printer … and obviously if since you invest in a quality machine like the ELEGOO Saturn 3 the price difference is not a big budget problem.
Continuing in relation to the improvements between the Saturn 3 model and the Saturn 3 Ultra we would have liked to have added functions such as automatic resin filling or automatic leveling … both functions worthy of a top of the range like the Saturn 3 Ultra.
ELEGOO has made a great improvement in this revision of its Saturn range, especially in the case of the Saturn 3 Ultra… a versatile machine for its print size and of course and thanks to its 12K resolution we will obtain exceptional quality.