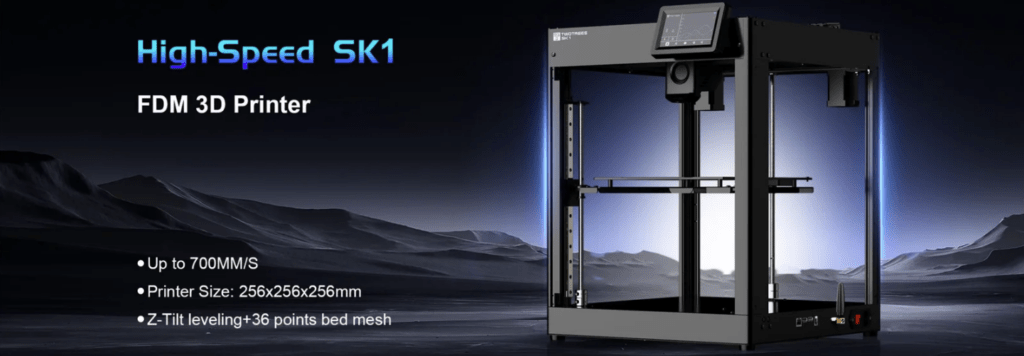
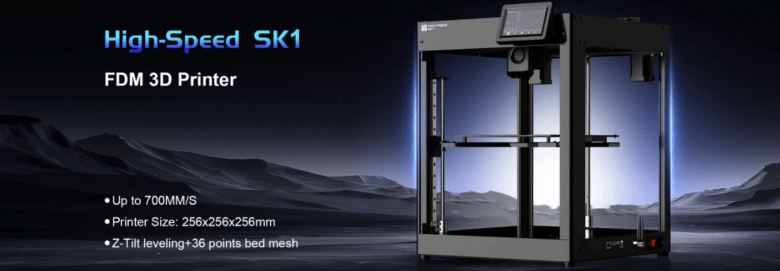
Our colleagues at TwoTrees have launched a very interesting new printer, the Twotrees SK1.
TwoTrees is an old acquaintance in the 3D world, created in 2017 and launching its first 3D printer in 2018. In addition, TwoTrees diversified its range of solutions back in 2020 by introducing the TT series of desktop diode laser engraving, which we could already see in our workshop some time ago.
Today we are going to review their new TwoTrees SK1 3D printer model that promises, on paper, a very fast printer with very interesting kinematics.
As always before continuing with the article, remind you that you can join 3DWork on our Telegram channel full of 3D printing derangers, or on our social networks Instagram, YouTube, TikTok, TwitterandFacebook.
TwoTrees SK1
The TwoTrees SK1 is a new generation within the TwoTrees range of 3D printers, an evolution of the SP range, improving in many aspects.
Among its main features we can highlight:
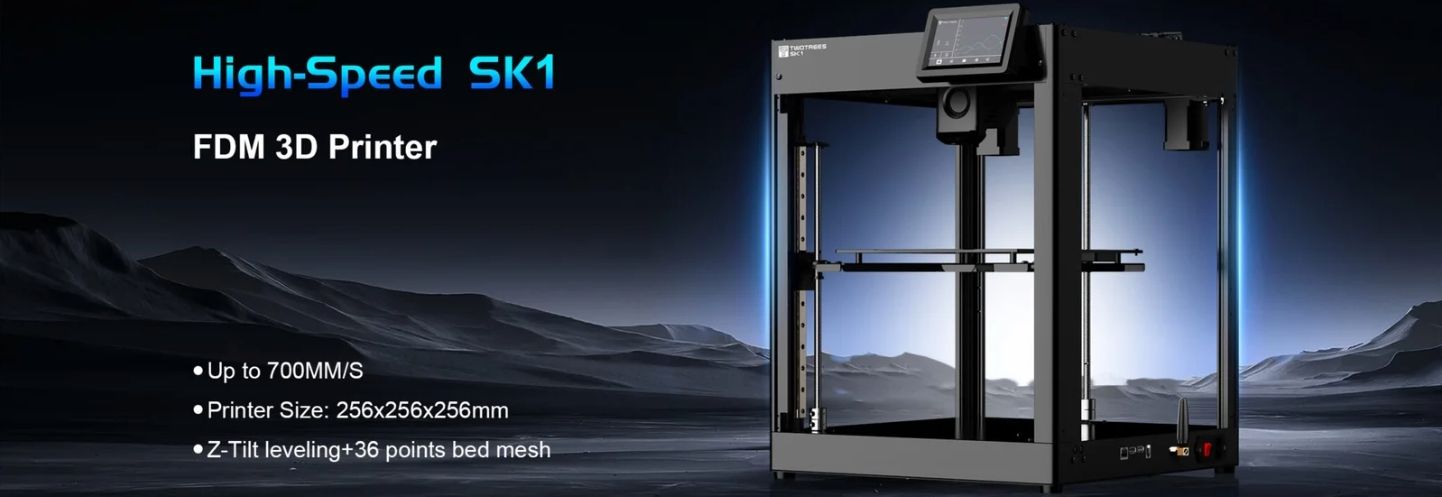
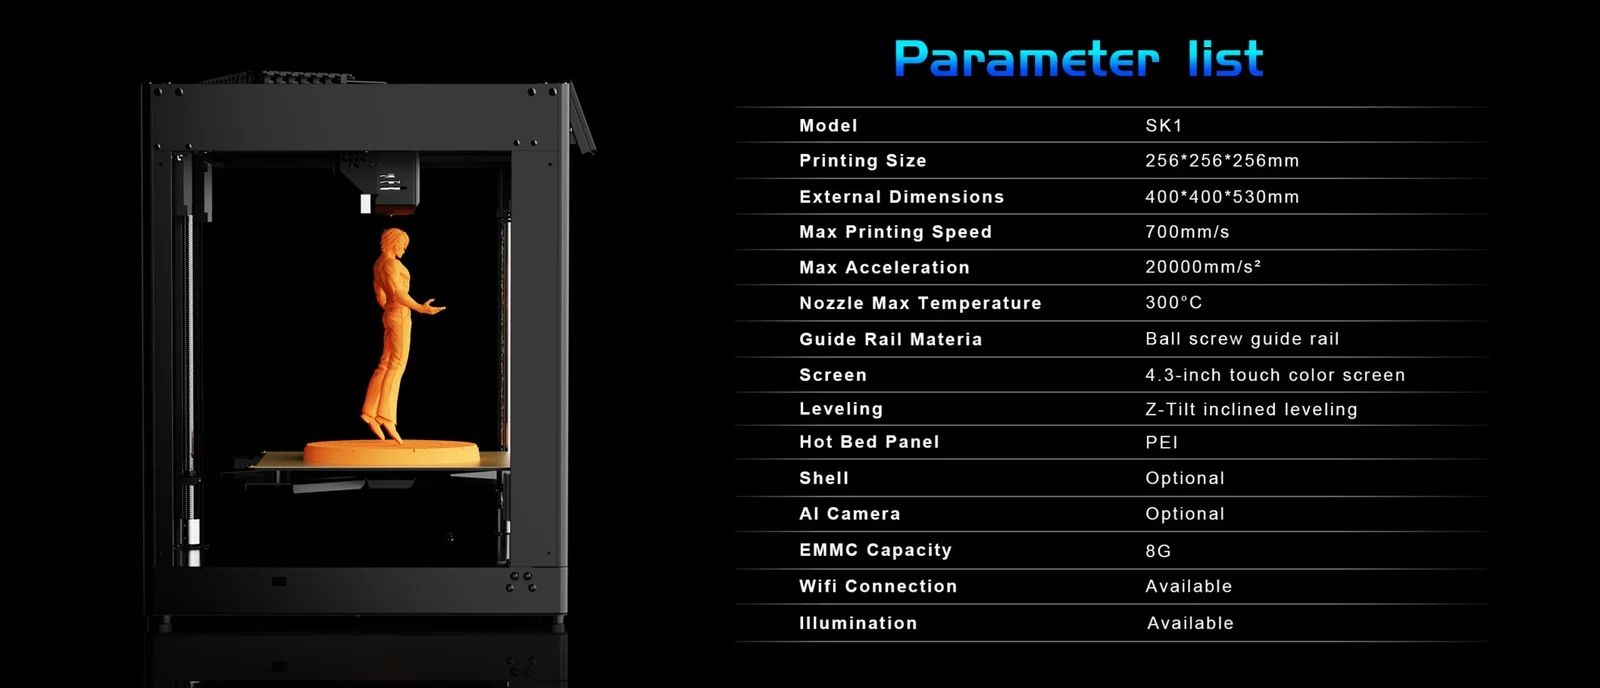
- Up to 700 mm/s print speed with 20000 mm/s acceleration, with the recommended speed being an interesting 300 mm/s and adjust the accelerations based on the vibration compensation tests (Input Shaper)
- Very robust chassis and kinematics, its CoreXY chassis/kinematics with machined parts and linear guides as well as triple Z-axis that will allow us a perfect alignment
- A print volume of 256x256x256mm
- Automatic calibration assistants, 3-axis automatic bed leveling as well as leveling sensor for compensation by means of 36-point bed mesh and vibration compensation
- Klipper firmware that will allow us to squeeze the most out of the machine
- Direct extrusion system with double gear and a hotend of up to 300º of high flow
In the following table you can see the specifications that we will analyze later:
Contents of the TwoTrees SK1 kit
The TwoTrees SK1 comes in a very compact and very well protected packaging to prevent damage during transport.
In the kit TwoTrees has included everything necessary to carry out the assembly, first tests and maintenance of the machine and some accessories for the electronics that are appreciated.

Going into a little more detail of the contents of the kit we will see a small roll of PLA filament from TwoTrees to be able to use our machine from the first moment, cables, spare parts, tools, screws, USB with some tests/profiles/printer manual as well as eMMC and microSD adapter for electronics update tasks.

TwoTrees SK1 Initial Installation
The TwoTrees SK1 comes practically assembled, so the start-up process is really simple by following the manual or video that TwoTrees has created of the process.
In any case, here are the steps for more details:
- We start by removing the TwoTrees SK1 from the box, inside the structure we find two boxes with the screen and accessories
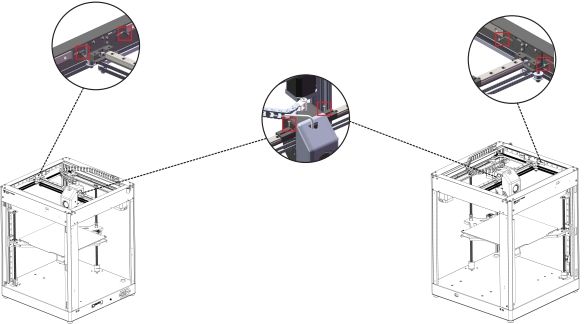
- First, we remove the XY axis anchors that are located at both ends of the linear guide, as well as at the head
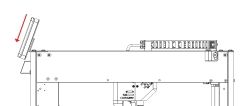
- We will assemble the stand and connect the screen, once connected we will anchor it to the stand by sliding it from above on the stand.
- We will install the Wifi antenna in the connector that we can find on the right side of the printer next to the connector and power switch and other USB inputs, Ethernet, etc.
- Finally, we will anchor the filament roll holder, which is also located on the right side.
Here are some images of the process that, as we have mentioned, is very simple and will not require more than 15 minutes.

Now that we have everything installed, it’s time to connect our TwoTrees SK1 to the mains, let’s not forget to check that the source is adjusted to the voltage we use in our case using the switch that we can find on the left side, and start the start-up process.
This process is quite simple to follow thanks to the options available on the screen:
- The first step once the system boots up will be to go to the Settings menu (gear icon at the bottom of the screen) and Calibrate where we will take the first Z-Tilt option. The Z-Tilt is the bed alignment assistant thanks to the 3 independent axes that we have and that is a great feature to highlight of this printer. Basically, and using the leveling sensor of the TwoTrees SK1, it will measure the deviations at the three anchor points of the bed to mechanically correct any deviation and that our bed is always perfectly level with respect to our XY axis.

- The next step will be to adjust the Z-offset, which although it is set at the factory it does not hurt to check it, in this case and within the same screen as the previous point the second option. This calibration will be done using the typical sheet and adjusting the height from the screen until our nozzle rubs against the paper, in the video below you can see it in more detail.

- The next step will be the meshing of our printing surface, which we will launch from the third option. The bed mesh is basically going to poll readings with the leveling sensor that is going to allow our firmware to have a map of possible deviations in the printing surface that it will use to compensate during printing and always have a perfect first layer.

- As the last calibration step we will perform the Input Shaper, which we will deal with in more detail later and which we advise you to review in detail, which can significantly improve the finish and quality of our prints. Basically, this vibration compensation performs an analysis by means of a sensor, accelerometer that is located in the print head, of the vibrations when making movements in a frequency range… With this analysis, it establishes some adjustments during printing to eliminate vibrations that later affect the finish of the prints as ghosting/waves in the outer layers.

- We’ll follow the options within Settings, but in this case we’ll go to Network, where we can adjust the WiFi settings so that our printer connects to our network and the Internet if necessary. The process is very simple, from the screen it will show us the available WiFi networks and when we tap on ours we will have to enter its password to be able to connect to it. If everything has worked correctly, it will show us the IP address that we can use later in other processes.

- Connection to the management web interface (Fluidd). With the printer connected to our network and the IP address, we can go from our computer, or any other device, and enter the IP address we obtained in the previous step into our web browser… You’ll see the management website of your TwoTrees SK1 where you’ll have more control options than those available on the screen.

- Thanks to the connectivity options of our TwoTrees SK1 by its Klipper firmware apart from the web interface, we will be able to send our parts directly from our laminator in a comfortable way. Depending on our laminator, this configuration is going to be done in different ways, in our case using OrcaSlicer:

- Then, and as a last step before printing, we will proceed to load the filament into the extrusion system using the wizard we have. It’s very simple, we will load the filament inside the PTFE tube to the print head and select LOAD on the screen, it will heat the hotend and when it is at the right temperature it will load the filament… We advise you to apply a little pressure at the beginning on the filament to make sure that it meshes into the extruder. At the end of the process, make sure to remove the extruded filament!!
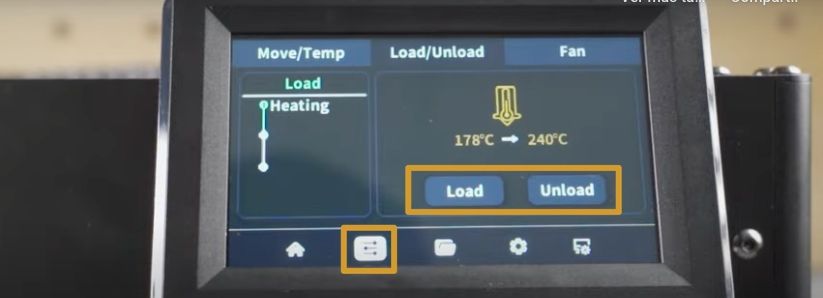
We’re ready to release our first impressions!! We attach a video of TwoTrees with the whole process that can be of great help to you:
In addition, TwoTrees emphasizes the quality process of assembly and testing of its machines where they check up to 47 critical points of the TwoTrees SK1.
TwoTrees SK1 Component Analysis
Before analyzing the results and experience with the TwoTrees SK1 we would like to do a more detailed review of its components.
Chassis & Kinematics
If there’s one aspect where the TwoTrees SK1 excels, it’s its rugged all-metal chassis, and when we say fully it’s completely. This aspect is going to be tremendously important as it is going to provide us with a solid and lasting foundation for the kinematics of a performance to match.

Regarding the kinematics, we have to highlight its CoreXY format, which also has linear guides in each of its axes and a sensational independent triple Z system that, as we have already explained, will allow you to have an automatic bed leveling and together with its 36-point mesh system on it we will have an almost perfect and automatic leveling. All thanks to the inductive sensor embedded in the print head.
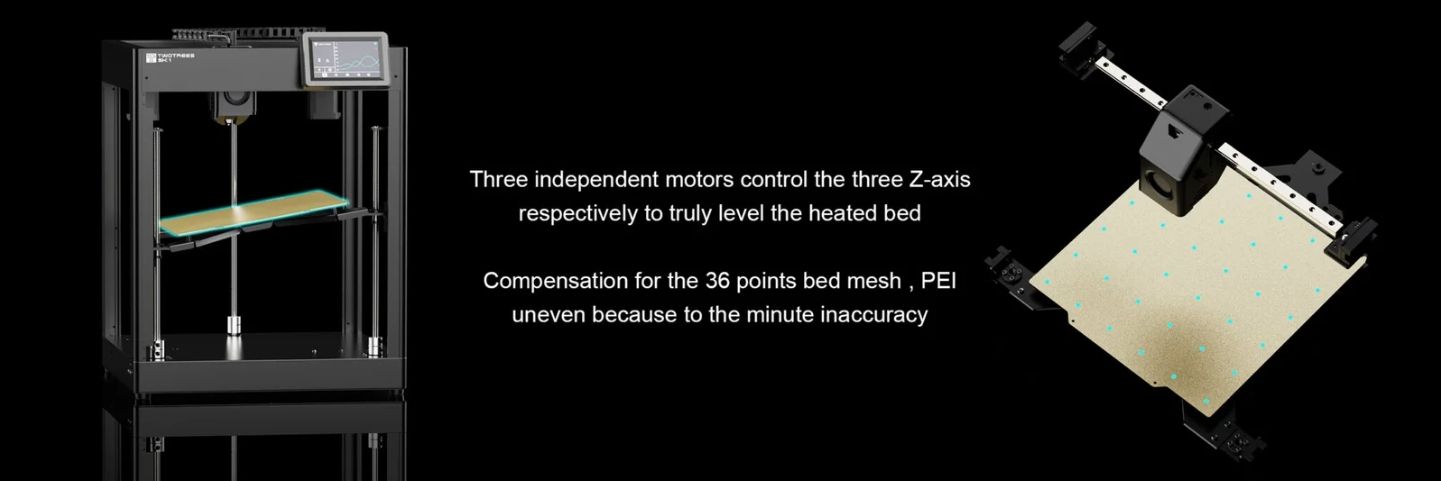
All the belt passages are all-metal as well as the XY bridge where the linear guide rests, we also have generous A/B motors to move the CoreXY kinematics and simple but effective belt tensioners that will be very useful to fine-tune the vibration compensation system later.

As we have told you, the TwoTrees SK1 has an infestable triple Z system, all our machines whenever possible like to modify Z for the installation of F8-16M bearings that will significantly reduce the weight of the set on the motor shaft and can cause problems.
On the other hand, we also like to add a bearing (7mm) as a ball joint in the coupling that allows us to improve the linearity of the rods, providing better stability to the Z axis in this case.

If we take into account the cost and time in making this improvement with respect to the benefits we can obtain, it is more than advisable not only in this TwoTrees SK1 but in any machine.

Another modification that we have seen as totally advisable, basically because we have had filament supply problems due to tensions due to the passage of PTFE, is to guide the PTFE with adapters on the outside of the XY axis chain.

In our tests of maximum speed and maximum extrusion volume we have obtained good results perhaps limited by the extrusion/filament system so it makes this TwoTrees SK1 one of the best machines, in terms of chassis/kinematics, that we have tested lately.
Extrusion System & Printing Platform
The TwoTrees SK1, with the model analysed that does not include an enclosure, does not look like a printer focused on the printing of technical filaments.
In any case, we can print materials such as PLA, PETG, ASA/ABS (taking into account their peculiarities with respect to printing with an ideally controlled room temperature) since we will be able to reach 300º.
We have been pleasantly surprised when disassembling the print head, since apparently its hotend is “identical” to clones of those used by Bambu Labs, so apart from having a well-tested design, we can have access to a wide range of spare parts, including being able to install CHT nozzles that will improve the extrusion volumetry to be able to scratch a little more printing speed… In our tests we have obtained a range of 20-25mm3/s.
At the extrusion system level, we have a double gear system with direct extrusion, which will provide us with precision in the control and flow of filament, especially important for a machine designed to work at high speeds such as the TwoTrees SK1.

In terms of ventilation, we have 3 ventilators… the typical layer and we liked its performance and design of the nozzles, although its size is somewhat non-standard… a secondary one for cooling and anchored the cold area of the hotend (heatsink)… and finally, a third for the ventilation of the extrusion motor and the electronics that are incorporated in the print head and that we will talk about in more detail later.

Something we didn’t like very much, which you can see in the photo above, is the printhead covers. Although they are easy to disassemble as they only have 4 screws each, on the front the PTFE tube makes it difficult to disassemble and on the back the anchoring of the cable/PTFE chain.
As for the printing platform, we have a volume of 256*256*256mm as we already mentioned, the heated bed at 24v on a 3mm aluminum surface that rests in turn on a metal platform supported on the 3 independent axes mentioned above. In our bed mesh tests we have not seen any major deviations in its machining/construction.

Moving on to the printing surface, it includes a double-sided PEI magnetic surface (rough on one and smooth on the other) that has actually behaved wonderfully in all our prints. Regarding the heater, it promises to reach up to about 100º in addition, although the heating time has not been particularly fast, the heat distribution over the entire surface, as well as the thermal stability have been very good.

We also liked the two small guide/stop screws that we have so that we can easily and reliably align the PEI strap.
Electronics
Now we come to one of the points that, along with the firmware, has lowered the expectations we were having with this machine.
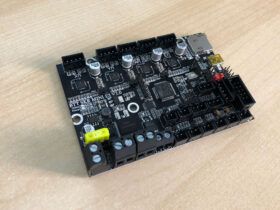
On the TwoTrees SK1 we find an all-in-one electronics from MKS, similar to those seen lately in other machines analyzed and that we did not particularly like. In this electronics we have the Klipper host part and the printer management electronics integrated.

All these electronics are located at the bottom of the machine, another aspect that we didn’t like basically because it is not very accessible on the one hand and on the other because we believe that for heat dissipation it is not the optimal position… in any case, TwoTrees has placed several fans to avoid temperature-related problems.

Let’s review your electronics:
- For the Klipper part, it uses electronics customized for TwoTrees MKS SKIPR, with a Rockchip RK3328 processor, Quad-core Cortex-A53, 1.5Ghz, with two DDR3 RAM modules of 512 KB and we have 1 GB in total… While we haven’t had any performance issues in our use, it’s a bit of a fair setup.
- Ethernet port for wired network
- 2 * USB Ports
- RJ11 port for serial accessory connection
- Wifi 2.4Ghz
- EMMC of 8GB, which is fair given that with the installation of Klipper about 2GB is available for our gcodes, timelapses, etc… a component that may be interesting to improve or look for formulas to lighten the size of the distribution used by TwoTrees


- Within the main electronics itself we find the management part of the printer that uses an MCU STM32F401XC to 84MHz of flash memory... while the MKS SKIPR usually uses a slightly more powerful STM32F407 MCU. By mounting TMC2209 drivers to control the X, Y and Z axes that are mounted on the socket so that we can replace them in case of failure.

- Finally in the printhead we have another control electronics, connected by USB to the main electronics, with an MCU Toolhead is again a customization of the MKS THR for TwoTrees, it has a Raspberry Pi RP2240 processor where we have all the connectors for the components of the printhead as well as an accelerometer for vibration compensation and a free pin for what looks like the installation of an LED.


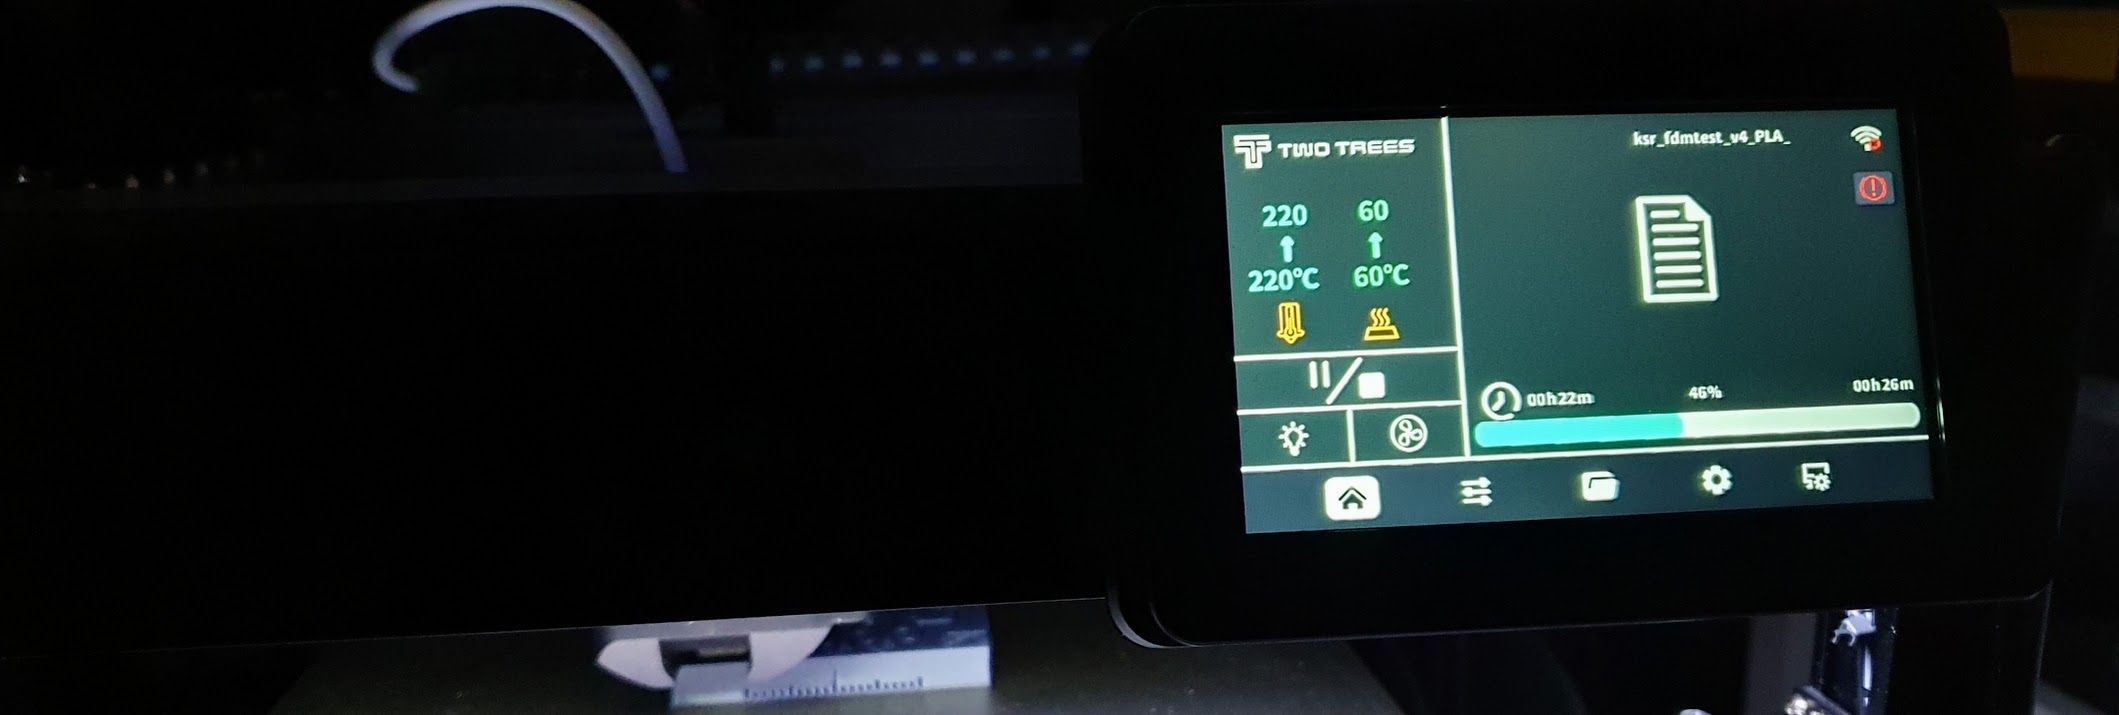
- We also have a 4.3″ screen of which we do not have much information, it looks like a Nextion/TaoJingChi model, simply that communicates by serial port (/dev/ttyS1) with Klipper and that TwoTrees has integrated with modifications in Klipper with its own firmware.
In the case of the screen, it has a fairly simple but intuitive interface, we have found missing or flawed in many of its functions, as well as the lack of preview of our laminated parts that we hope TwoTrees will take into account to solve them as soon as possible.
Firmware Klipper
If in the electronic section we find some aspects to improve in the Klipper firmware section, we are in a similar situation that has not convinced us.
We’ve already told you that TwoTrees has a custom distribution with certain limitations that we’ll talk about in detail later.
Going into the Klipper software part:
- Armbian MKS distribution and customized by TwoTrees using an old “buster” version instead of the current “bullseye”


- Rather outdated versions of Klipper and components of it unfortunately:

- Access to the management web interface, Fluidd, via the URL http://IP_HOST

- We have SSH access using any client and using the IP along with the username/password in the following table. The installation of klipper seems to be inside the mks user and using a rather old configuration directory structure that will cause problems if we update or add Klipper components.
| rol | nombre usuario | contraseña |
|---|---|---|
| root | root | makerbase |
| user (or user2) | mks | makerbase |


In the configuration section of the printer.cfg we find an implementation with relatively simple macros that usually perform their task correctly, such as filament management when the filament sensor detects a lack of filament.
Although we would like to add functions such as the M600 for example, which is a standard nowadays when it comes to making filament changes, or other macros that provide extra functions that allow the user to get the full potential of Klipper.
Although we have a shortened and limited version of Klipper, having SSH access and access to certain pre-installed tools will allow us to improve some aspects of our TwoTrees SK1.
Kiauh (Klipper Installation And Update Helper)
We also have Kiauh pre-installed that we can launch by running ./kiauh/kiauh.sh, it will probably ask us to update it:

Fluidd Update
As we have already mentioned, the Klipper system in TwoTrees is very old and it is not advisable to update any of its critical components (Klipper and Moonraker), but in the case of the web interface it can usually be updated without problem to add some extra functionality.
From SSH we will launch Kiauh ./kiauh/kiauh.sh, we will go to the Update section (2) and from there we will select Fluidd (4)… Kiauh will work his magic!!!

Backup of our configuration files
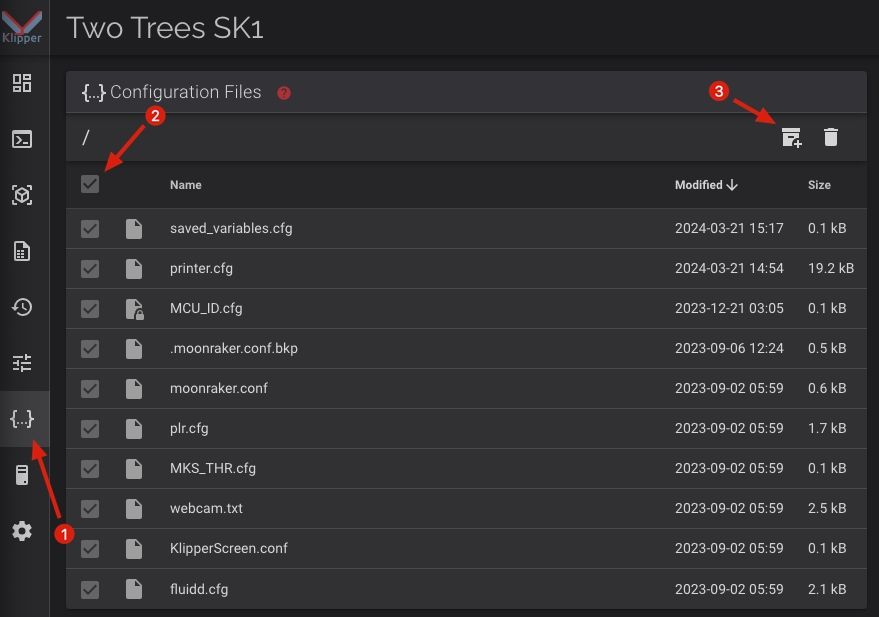
Before going into modifications and even between them, we advise you to always have a backup of your configuration files.
From the web interface, from the Configuration panel (1), we will see the Configuration Files section where we will choose all (2) and click on the create zip icon (3):
Add MCU Temperature Report
By default, TwoTrees only includes the temperature of the enclosure, extruder and heated bed in its configuration. Again, taking into account the characteristics of the machine andin order to have the conditions of the components under control and to have references when jams occur, it is advisable to add the temperatures of the main electronics (host and MCU, since they are integrated) and the toolhead.
To do this and within the printer.cfg we will locate the [include MCU_ID.cfg], we will add this configuration below for the temperatures of the host and mcu of the main electronics:
[include MCU_ID.cfg]

### 3DWORK - Temperatures host + μcontroler
[temperature_sensor host]
sensor_type: temperature_host
min_temp: 10
max_temp: 75

[temperature_sensor mcu]
sensor_type: temperature_mcu
min_temp: 10
max_temp: 75
```
We will continue to look for [include MKS_THR.cfg] in the same printer.cfg file where we will add the following after this line:
[include MKS_THR.cfg]

### 3DWORK Toolhead Temperature
[temperature_sensor toolboard]
sensor_type: temperature_mcu
sensor_mcu: MKS_THR
If we have done the steps correctly, we will be able to see the temperatures of all the components from our interface and have them under control:

Time Sync & Update
Since the electronics do not have a battery to maintain the time adjustments, it is ideal that we configure the system to do it automatically. It is important because in this way we will have correct estimates of printing times, in addition to being able to make software updates over the internet.

The process is very simple by launching the following commands:
- First of all, we’ll adjust our time zone with the following commands:
timedatectl list-timezones # to list available time zones
sudo timedatectl set-timezone Europe/Madrid # to set Europe/Madrid timezone
timedatectl # to check timezone was ok

- We’ll disable
systemd-timesync:
systemctl status systemd-timesyncd # to check current status
systemctl stop systemd-timesyncd # to stop systemd-timesyncd daemon
systemctl disable --now systemd-timesyncd.service # to disable systemd-timesyncd daemon
systemctl status systemd-timesyncd # to check systemd-timesyncd is disabled
- We’ll install
chrony:
sudo apt install chrony -y # to install chrony
- We’ve restarted the service:
sudo systemctl restart chronyd # to restart chrony daemon
- We can check the settings in case we want to adjust something, it is usually not necessary:
sudo nano /etc/chrony/chrony.conf
- We check the synchronization status with these commands:
chronyc sources
chronyc tracking

We can run a date command to verify that everything is in sync.
Now, when you turn off your machine, it will adjust the time when it starts.
Input Shaping (Vibration Compensation)
The Input Shaper process carried out by TwoTrees is totally unassisted, which is fine because you don’t have to do anything but, on the other hand, you have the problem that you don’t know how your machine really feels or how to try to adjust it optimally.
In the following video you can see the default process:
We’re going to improve the process to be able to generate the graphs and be able to see the result of the Input Shaper.
- We will go to our web interface and within the CONFIGURATION section of Fluidd we will create a new
shell_command.cfg:

- Within
shell_command.cfgwe will include the following shell macros:
[respond]
### 3DWORK - Input Shaper csv->png
[gcode_macro SHAPER_CALIBRATE_XY]
description: process csv file to png
gcode:
    RESPOND MSG="Homing"
    G28
    RESPOND MSG="Testing Input Shaper XY!"
    SHAPER_CALIBRATE
    RESPOND MSG="Generating Input Shaper X Graphs!"
    RESPOND MSG="Generating Input Shaper Y Graphs!"
    RUN_SHELL_COMMAND CMD=adxl_x
    RUN_SHELL_COMMAND CMD=adxl_y
    RESPOND MSG="Input shaper graphs generated for X and Y. You'll find them in your config/input_shaper folder in the CONFIGURATION tab!"

[gcode_shell_command adxl_x]
command: sh /home/mks/klipper_config/shell_commands/adxl_x.sh
timeout: 300.
verbose: True

[gcode_shell_command adxl_y]
command: sh /home/mks/klipper_config/shell_commands/adxl_y.sh
timeout: 300.
verbose: True

[gcode_macro SHAPER_CALIBRATE_COREXY_BELT_TENSION]
description: Generates resonance graph used to ensure belts are equally tensioned.
gcode:
    RESPOND MSG="Homing!"
    G28
    RESPOND MSG="Testing Upper Belt!"
    TEST_RESONANCES AXIS=1,1  OUTPUT=raw_data NAME=belt-tension-upper
    RESPOND MSG="Testing Lower Belt!"
    TEST_RESONANCES AXIS=1,-1 OUTPUT=raw_data NAME=belt-tension-lower
    RESPOND MSG="Generating Input Shaper Belt Tension Graphs!"
    RUN_SHELL_COMMAND CMD=adxl_belt
    RESPOND MSG="Belt tension graphs generated. You'll find them in your config/input_shaper folder in the CONFIGURATION tab!"

[gcode_shell_command adxl_belt]
command: sh /home/mks/klipper_config/shell_commands/adxl_belt.sh
timeout: 300.
verbose: True

### 3DWORK - Backup config to Github
### https://klipper.3dwork.io/klipper/mejoras/backup-klipper
[gcode_shell_command backup_cfg]
command: sh /home/mks/klipper_config/shell_commands/autocommit.sh
timeout: 30.
verbose: True

[gcode_macro BACKUP_CFG]
gcode:
    RUN_SHELL_COMMAND CMD=backup_cfg
We’ll go to our web interface and within the CONFIGURATION section of Fluidd we’ll create a folder called shell_commands:

Inside this folder we will add a file called adxl_x.sh with the following content:
#!/bin/bash

NEWX=$(ls -Art /tmp/calibration_data_x_*.csv | tail -n 1)
DATE=$(date +'%Y-%m-%d-%H%M%S')

outdir=/home/mks/klipper_config/input_shaper
if [ ! -d "${outdir}" ]; then
    mkdir "${outdir}"
fi

/home/mks/klipper/scripts/calibrate_shaper.py $NEWX -o "${outdir}/resonances_x_$DATE.png"

rm /tmp/calibration_data_x_*.csv
We will add a second file called adxl_y.sh with the following content:
#!/bin/bash

NEWX=$(ls -Art /tmp/calibration_data_y_*.csv | tail -n 1)
DATE=$(date +'%Y-%m-%d-%H%M%S')

outdir=/home/mks/klipper_config/input_shaper
if [ ! -d "${outdir}" ]; then
    mkdir "${outdir}"
fi

/home/mks/klipper/scripts/calibrate_shaper.py $NEWX -o "${outdir}/resonances_y_$DATE.png"

rm /tmp/calibration_data_y_*.csv
We will add a third file called adxl_belt.sh with the following content:
#!/bin/bash
#set -e -u -o pipefail

## the TEST_RESONANCES command seems to return before all data is completely
## written. it'd be better to poll for the files to be completely written,
## but this has been reliable for me so far…
sleep 10

outdir=/home/mks/klipper_config/input_shaper
if [ ! -d "${outdir}" ]; then
    mkdir "${outdir}"
fi

/home/mks/klipper/scripts/graph_accelerometer.py \
    -c /tmp/*.csv \
    -o "${outdir}/belt-tension-resonances-$( date +'%Y-%m-%d-%H%M%S' ).png"

rm /tmp/raw_data_axis*
Inside our printer.cfg we will add an include to load our new shell_command.cfg at the end of it, but remember that as always above the section SAVE_CONFIG!!!:
### 3DWORK - Shell Macros/Commands
[include shell_command.cfg]

#*# <---------------------- SAVE_CONFIG ---------------------->
We will restart our Klipper and we will have to find a new macro SHAPER_CALIBRATE_XY that we can launch and it will perform a homing process, test in XY of Input Shaper and generate the graphs to be able to review them:

You’ll find the generated graphs in a new folder in our /config called input_shaper:

Inside you will find the graphs of each axis:


Although it can be improved, it’s not bad at all

Here we see that there is some more work
As you can see in the example above, there is a lot of room for improvement!! If you want to learn how to interpret them, you can find information in our Input Shaper guide.
Let’s start by looking at the tension of our belts using the new macro SHAPER_CALIBRATE_COREXY_BELT_TENSION which will perform a similar process to the previous one but will show us a graph of the tension of the belts to have a reference.


Now we will show you, in practice, how these tests will help us to significantly improve the performance and quality of our machine.
We’ll start with the belt graphs, basically in our case what we did was homing all the axes and we moved the Y axis to its 0 coordinate. With a Spectroid-style mobile application that analyzes the sound we will try to adjust that the frequency in both straps in the middle of their lateral travel gives us a frequency of about 75-85Hz, we can also use touch or ear to make this first adjustment since later with the graphics we will play with the adjustments.
The goal is to obtain a graph of overlapping belts as much as possible!! You don’t have to be paranoid about them being exact, but you do have to be paranoid that they overlap as much as possible and that the peak of these is of the similar high frequency.
As you can see, the peak is at a desirable 50Hz, as well as having much less variation in responses. So our goal is to try to correct the tension of the upper step belt (orange) so that it assimilates to the lower one (blue).

The change has been substantial.
In the following video we can see the process for adjusting belt tension on our TwoTrees SK1:
But what do we get with this? Now we’ll see it in the following graphs when we relaunch the macro SHAPER_CALIBRATE_XY and we’ll analyze the results again… Let’s start with the X axis:

In this case, with the moderately correct adjustment of our straps, we have gone to a much cleaner vibration graph with a well-marked peak of frequencies and in high frequencies, which is great. In addition, the suggested type of Input Shaper is the same but with significantly higher accelerations as well as fairly good vibration and smooth ranges.
Let’s also review the Y-axis graph:

In this case, although the original graphics were not bad, it has been significantly improved again, a better type of Input Shaper suggested, a significant increase in accelerations and very good vibration/smooth values.
We can already save these Input Shaper values and in the case of maximum accelerations it is advisable to select the value that does not exceed the values calculated on the X and Y axes (we will use the lowest of them) in addition to adding a certain margin of safety such as 90-95% of the value we obtained in the tests (again on the axis that gave us the lowest value). In the same way, we will adjust max_accel_to_decel to 1/2 of the previous value.
[input_shaper]
shaper_freq_x: 84.0
shaper_freq_y: 56.0
shaper_type_x: mzv
shaper_type_y: zv

[printer]
kinematics:corexy
max_velocity: 800
max_accel: 12000
max_accel_to_decel: 6000
max_z_velocity: 15
max_z_accel: 100
square_corner_velocity: 5.0
As you can see, and although they “sell” some accelerations and dizzying speeds, the reality is usually quite harsh and they are quite far from them.
We also advise you to adjust these accelerations in your rolling mill so that they are aligned.
Printing and usage tests of the TwoTrees SK1
Once the analysis of the different components of the TwoTrees SK1 has been carried out, it is time to see how it has behaved during our tests, and although we have already advanced some aspects of its use, we are going to try to give you some extra information that we think is interesting.
We start as always by carrying out tests using PLA since with the configuration of our test machine it is the type of filament that would be mostly advised to use, with TPU or PETG we will not have problems either. As always, we use OrcaSlicer as it has support for our TwoTrees SK1 and is currently our preferred laminator.

If we go to slightly more technical filaments such as ASA/ABS in which it is more than advisable to use an enclosure, although in our case and under our tests with ASA we have not had problems, we have to tell you that the machine is prepared to be able to install an enclosure and we have a project in Printables for it all and that probably soon TwoTrees will have it available in its online store.
Going back to the printing tests once the initial installation of our TwoTrees SK1 was done, we started by launching an OrcaSlicer cube, since this laminator has excellent calibration options with a few simple mouse clicks, the result although it was acceptable showed us some problems to solve.

Among the problems detected we saw some punctual jams and some vibrations, this was before carrying out the adjustment process that we explained in previous sections of Klipper improvements, we realized that the issue of jams was caused by the passage of the filament through the PTFE within the guide chain that goes to the head so as we already told you in the analysis of the kinematics we made some modifications to improve that and we didn’t have that problem again.
Then we carried out a flow test, Pressure Advance (PA) and extrusion volumetry where we obtained, for the test filament, atmore than 27mm3/s (for a layer height of 0.2 and line width of 0.4) which gives us a maximum printing speed of just over 300mm/s… Remember that this is the maximum in a test piece and should only be used as a reference.

With all this information obtained from the tests, we set up our OrcaSlicer base profile for the TwoTrees SK1 and launched several stress tests to see how the results go… We also make the modifications for vibration calibration explained in the Klipper section of the guide.
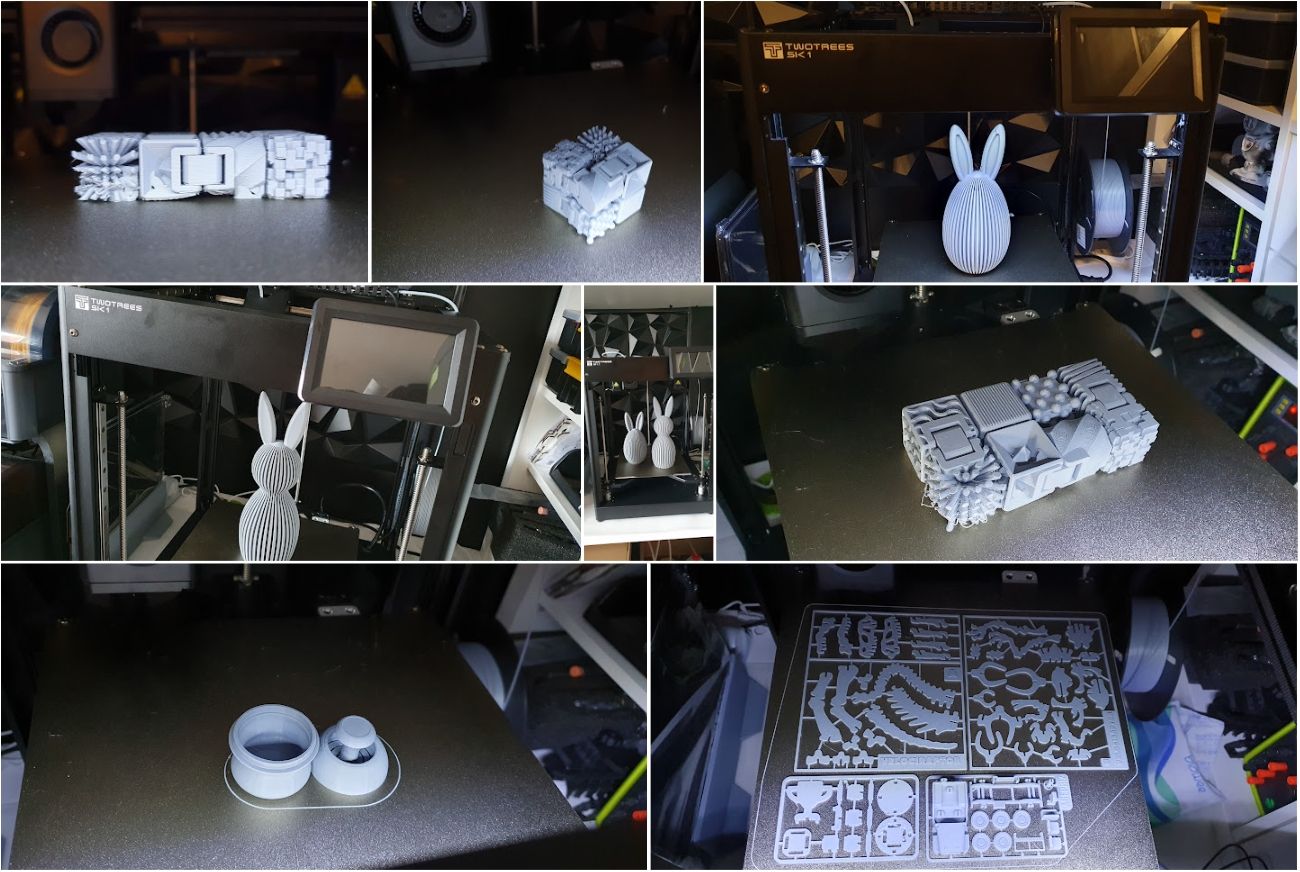
In the first of them, Autodesk FDM Test that we can find directly in OrcaSlicer, with which we can see the adjustment of several aspects such as the behavior in bridges, cantilevers, mansions, expansion and retractions… we have to say that the TwoTrees SK1 after those initial tweaks performed excellently.

As a second test we launched the Sensory Fidget Cube, a very complex test to print and that except for expected parts came out decently well and fully functional. The profiles of the laminators at the end are a starting point to be able to adjust them to our machine, filament, printing conditions and needs. As always, we advise you to visit our calibration guide and check out our collection of Printables with more test prints for the fine-tuning of your printer.

With a base profile adjusted for our needs we carried out some more tests with our TwoTrees SK1 to put it to the test, we have to say that it is a very fast, reliable machine and that has left us a good final quality in our prints.

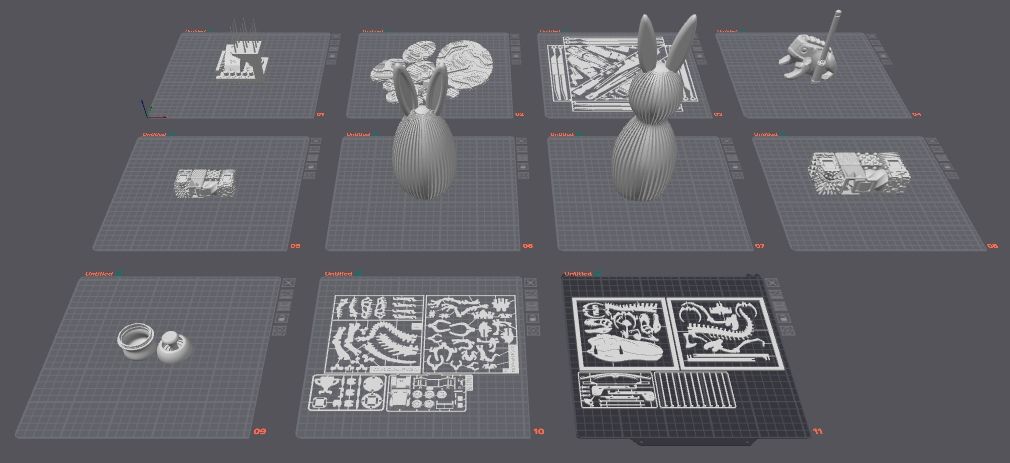
Although we already explained it previously in the analysis of the electronics, after a few days of intensive use we found problems of disconnections and random failures in our prints by performing a stress test, due to the experience with other machines with a similar base we made a modification in the electronics of the print head to improve the cooling of the MCU and the driver of the extrusion system… With this mod we had no more problems during the rest of the test days with the printer working an average of 12 hours continuously.

Also, although we also commented on it in the analysis part of the electronics, it is sensational to have a screen to be able to manage the printer directly but we have to say that the implementation of TwoTrees in the functions and operation in general of the screen leaves a little to be desired with a lack of options, which we do have from the web interface or if we had KlipperScreen, in addition to many failures in these.
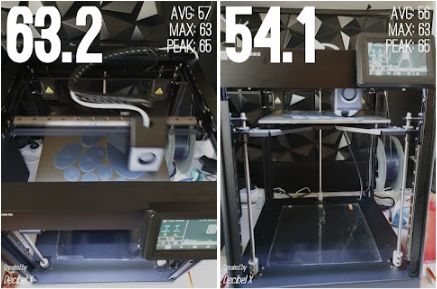
Another aspect to highlight, and quite important depending on the location you have in mind for your printer, is that it is quite noisy mainly because of the type of kinematics based on linear guides at the speeds it moves and taking into account that it is not a closed printer it can be annoying… very annoying… with an average of 50-60dB at 1m of this, even exceeding 70db at times.
Final review TwoTrees SK1
The TwoTrees SK1 is focused on a niche market where it will be very difficult to enter taking into account some deficiencies mainly focused on its electronics/software, as well as the price of the machine that many users probably do not know how to value the quality of construction used in it.
Although we have a base, chassis/kinematics and extrusion system, excellent, this is overshadowed by the implementation of Klipper where you could get more functions or at least the freedom to have access to them if you use an official version. And the same with the electronics, which although it has behaved better than in other similar analyzed machines, we believe that it is not a base at the height of the overall quality of the machine. And seeing the source of these problems, we are afraid that even if TwoTrees makes efforts to improve it, it will be difficult to have a machine where the word Klipper truly acquires its meaning of powerful, versatile firmware and that, thanks to its continuous improvements, gives us more functionalities to improve the use and reliability of our machine.

Manufacturers in general without talking specifically about TwoTrees, either because of the possibilities or because of fashion, are making the leap to Klipper and this is something that has its advantages and disadvantages for both manufacturers and users.

From the manufacturer’s side, they want to have control to minimize problems with their machines since a low-level control such as Klipper provides, which on the one hand is an advantage, can turn into a disaster in certain scenarios such as users without a Klipper base or trying to change configurations… And in the end, the normal thing is not to think that it is our fault as a user but to complain to the manufacturer. But on the part of the medium/advanced users who see how their powerful machines are limited in functions that they could have and depend on the manufacturer to give good support and follow-up to their Klipper implementations, something that in the medium/long term and due to the experience of many years we doubt that it will be so. Sticking with a very capable machine, limited and outdated in options with respect to what it could have.
With all this, the performance and print quality during our tests have been very good, although far from the “marketing” numbers of 700mm/s we have been able to print approximately 300mm/s the fill of our tests and normally 60% of that speed is what we apply to external perimeters.

An aspect that we would also like to highlight is the support of several laminators with a base profile that can make our lives much easier when it comes to having the freedom to choose the one that best suits our needs.
For all the above reasons, I think it is a perfect machine for two types of users… the one who just wants to print as the machine comes and hope that TwoTrees continues to improve the overall experience related to the software part… and that advanced user who is looking for a machine with a very good base (again talking about the chassis/kinematics/extrusion) and who in the long run decides to improve the Klipper part either with unofficial updates (if these are not provided by TwoTress in the medium/long term) or directly by making a change in the electronics.
Where to buy the TwoTrees SK1?
TwoTrees has an online store on their website where you can buy directly the TwoTrees SK1 and its accessories/spare parts.
In any case, we provide you with some links to other stores for reference:















Déjanos un comentario