Normally we tend to focus on devices and accessories related to 3D printing, in this case we are going to present the new LaserPecker LP4 laser engraver that as a good maker that we are should not miss in our workshop.
Laser engravers have evolved a lot in recent times and this LaserPecker LP4 is a sensational machine, easy to transport, with premium finishes and that will be a perfect complement to our creations.

As always before continuing with the article, remind you that you can join 3DWork on our Telegram channel full of 3D printing derangers, or on our social networks Facebook, Twitter, Instagram.
LaserPecker LP4
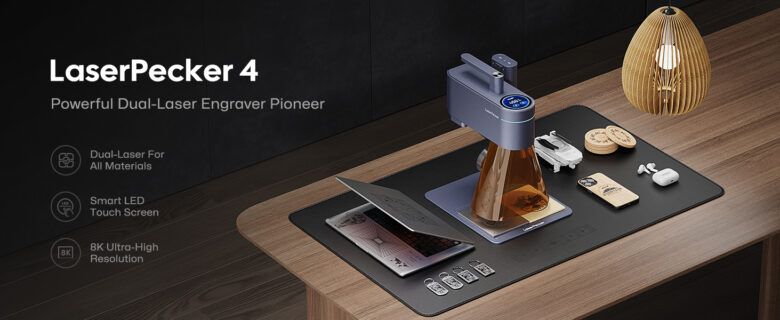
The LaserPecker LP4 is a laser engraver that is compact in size and relatively easy to carry. Thanks to its double laser, it will allow us to work with practically any material from wood, metal to stone.
The LaserPecker LP4 has a premium design and finishes, made of aluminum, has fairly compact measurements as well as a robust and consistent appearance. LaserPecker has built this LP4 with love and care.

The LaserPecker LP4 mounts an innovative dual laser system managed by an electronic system and by means of a complex and precise system of mirrors it is possible to use both, independently, without the need to make changes to the device, since due to its mechanics/software we can use one or the other in a very simple way.

In addition to the laser management system, we have a lens and algorithms that allow a precise and fast adjustment of the laser beam for results of up to 8K resolution that will allow us to make high-detail recordings.
The combination of this dual laser system will allow us to work with a wide range of materials with our LaserPecker LP4:

- Using the blue laser diode of 450nm and 10W of power we will be able to work with materials such as… wood, acrylics, glass, leather, ceramics, paper, stone, metals, etc… Regarding the wood and depending on the type of wood, we can make not only engravings, but also cut it up to 8 mm thick. For acrylic we can reach thicknesses of up to 5mm with the correct settings.
- If we use the 1064nm infrared laser with 2W of power we will be able to work on stainless steel, aluminum, gold, silver, plastic and other similar materials.
LaserPecker has also created a complete ecosystem of accessories around the LP4 where, for example, we have a sliding extension to increase the engraving area by up to 300x160mm.
We also have a rotary accessory to be able to work on curved objects more easily and obtain perfect results

Something that we found very interesting and useful was the touch screen where we can manage some options, as well as see the status and progress of our engraving works. Among its functions we can turn on and off.

We also have, integrated into the handle, an emergency button to be able to stop the machine quickly in case of any problem that we detect during the use of the device.
In the table below you can see in detail its characteristics:
| Laser Type: | 10W (450nm Blue Diode Laser) 2W (1064nm Infrared Laser) |
| Working Area: | 160 mm x 120 mm (Basic) 160 mm x 300 mm (Slide Extension) |
| Working Speed: | 4000 mm/s |
| Engraving Precision: | 0.0019 mm |
| Resolution: | 1K/2K/4K/8K |
| Applicable Materials: | 10w 450nm Blue Diode Laser: Lacquered metal, anodized aluminium, 304 stainless steel, Bamboo, Wood, Leather, Food, Paper, Fabric, Photosensitive printing, Plastic, Acrylic, Tinted glass, Colour glaze ceramics, etc. 2W 1064nm Infrared Laser: Metal, Plastic, Leather, and any material with paint coating |
| Cutting Depth: | 8 mm Balsa Wood, 5 mm Dark Opaque Acrylic |
| Preview Mode: | Center Point, Outline Frame, and Contour Preview Modes |
| Software: | LaserPecker Design Space (Android,iOS, Windows & MacOS) LightBurn (Windows & MacOS) |
| Support Format: | PC: G-Code/JPG/PNG/BMP/SVG/DWG/DXF etc.Vector Format MOBILE: JPG/PNG/G-Code/SVG |
| Connection: | PC: USB Connection / Wireless Bluetooth 5.0 (Dongle Required) MOBILE: Wireless Bluetooth 5.0 |
| Operating System: | PC: macOS 10 & Windows 10 or higher MOBILE: iOS 9.0 & Android 7.0 or higher |
| System Languages: | Simplified Chinese/Traditional Chinese/English/Japanese /Korean/German/Spanish/French |
| Safety Certification: | CE, ROHS, FCC, FDA, CDRH, NCC, KC, UKCA, TELEC |
| Input Power: | DC(24V 5A) AC(100-240V, 50-60HZ) |
| Size: | Laser Head: 241 x 82.1 x 139.7 mm Stand: 260.5 x 218 x 283.5 mm Protective Shield: 176 x 145 x 155.7 mm |
Start-up
The LaserPecker LP4 has a compact design and its commissioning is very simple and fast thanks to the documentation, which is somewhat fair in some respects.
All the components come perfectly protected, again, providing a feeling of a premium product and with very good attention to detail.

Along with the different components we find the manuals, different boxes with cables, fountains, protective glasses, etc… and something that we liked a lot, a toolbox with the screws and everything necessary for the assembly and maintenance of our device.

As we told you, the assembly is extremely simple:
- We will anchor the laser support arm to the base with 4 screws and then the laser body to the arm in a simple way
- The motorized extension to enlarge the printing area is just as simple where we will anchor the two parts that will form the engraving platform with 6 screws to the motorized base
- The rotary extension is also just as simple, with a few screws we will have it ready as well

- The cube-shaped protective enclosure has a little more work, but by following the instructions we can assemble it in a few minutes.

Once we have everything set up, it’s time to start using our LaserPecker LP4!!!

Now that we have our LaserPecker LP4 assembled, it is time to perform the leveling, which is very important for us to have optimal results. In the following video you can see the process in a simple way:
The next step will be the connection of the power cables and between the different modules, in this case and for now the motorized Z-axis, the protection cone and our LP4 central unit. To place the protection cone, which includes a fan for smoke extraction, we must first remove the protection cap of the laser optics of the central unit and simply bring it closer as it uses a very useful magnetic fixing system.

In the following diagram, which can be found in the included manual, we can see how to connect the power supply and through the USB C cables including the modules discussed:

Below you have a video summarizing the whole process that can be of great help, as you can see LaserPecker has taken great care of the process to make it as simple and straightforward as possible.
User Experience
When we first turn on the LaserPecker LP4, we are quickly struck by its circular display at the top.
This screen, which is touchscreen, will allow us to manage some basic functions of this since most of the adjustments and configurations will be made from the application. So the first thing we advise you to do is download the LaserPecker Design Space software, either in its version for mobile devices (Android/iOS) or desktop (Windows/MacOS).
Once installed, we will register as a user to be able to use the Cloud functions and we will start creating a new project.

It is important to first connect the device, which is usually quite intuitive. It is important to emphasize that from mobile devices we will connect by bluetooth, but from desktop we will require a specific dongle that is not included or use the USB C cable for the connection… It is something that, taking into account the cost and quality of the machine, we do not understand the reason for this limitation for the direct connection from a desktop computer or that this dongle is not included.

We will be able to start working on creating our projects, we are not going to go into the detail of the different options available in the software, but we advise you to check the great documentation that you have available on the LaserPecker website.
Once we have our composition ready, the ideal is to use the preview mode to adjust the position of our engraving, where our LP4 will show us a line in the work area where it will make the engraving and through the application we can adjust it. It is important that in this process we correctly adjust the focus and the distance between the LP4 and our model, we have a red LED and a line mark with the laser to adjust the height and position either in the machine itself or in the software:

Once we have everything adjusted, we will only go to the next step, which is to make the engraving, we will adjust the options and send the work to our LaserPecker LP4.

A couple of tips that can be very helpful, on the LaserPecker website we have a lot of resources to get the most out of your machines. Specifically, we especially recommend the tables they have for the base options to use with different materials for all their models and that can save us time.
On the other hand, the following video will help you create a material test to see how, in reality, to use the different settings for an optimal result in our materials. Something highly recommended to do.
Our next step, after carrying out several tests to get hold of the software and engraving process of this LaserPecker LP4, was the connection and use of the engraving extension that will allow us to expand the engraving area considerably up to an interesting 160*300 mm.
Like the rest of the components of the kit, the quality of this extension is very good and the connection, as you may have seen in the previous video, is very simple. Of course, in order to use it is necessary to make adjustments in our LaserPecker Design Space to enable it.

Honestly, we thought it was a more than advisable accessory to have, because with this increase in the engraving area we will not only be able to carry out larger projects, but we can also carry out small production projects in groups, saving a lot of time.
Finally, we got down to business with the rotary extension. This extension will allow us to carry out more specific projects on circular objects in a really simple way and with sensational finishes.

Again the construction and details of the rotary extension are sublime, in line with the overall quality on this LaserPecker LP4. In the following video you can see in a very visual way its use and implementation.
We’ve done different engraving and cutting tests with different materials, the learning curve of the LP4 and the software is pretty straightforward. Thanks to the resources available on the LaserPecker website, they are of great help to be able to find the right values for the material we want to work with.
Something that we liked was the simplicity when it came to the parameterization of our engraving/cutting process where we basically have to act in 3 values… the power of the laser, the depth (which affects the speed), and the number of repetitions. Also something curious is that when we transfer our work to the LP4 we can choose the quality/definition between 1K/2K/4K/8K depending on the one we choose, it will have an impact on the process time of our project.

- Cardboard/cardboard, where we must find the right combination for our material between power and penetration to obtain the desired effect. In terms of cutting, as it is a malleable material, it is very easy to cut. It is curious in this case how the use of one or the other laser gives a different finish to the engraving.

- Wood, another material where exceptional work is done. With a few tests we can obtain our values and exceptional creations… Cutting certain types of wood is also done in a simple way depending on their thickness. Although LaserPecker indicates that cuts can be made with wood of up to 8mm, in our case if we exceed 3-4mm, although we could cut thicker, the wood was very burned. On the other hand, in engravings it does a sensational job that with a few adjustments depending on the material we will obtain an impressive quality of details.

- Acrylic, another material where the LaserPecker LP4 behaves sensationally… That is if in this case, contrary to wood, we have to fine-tune the parameters more. Something interesting, as we saw with materials such as cardboard, is the effect of engraving with the diode laser or infrared, leaving results with different finishes. We advise you to check the help section of the LaserPecker website for the guide to cutting acrylics that was very helpful.
- Leather, although we didn’t have this material at hand, we opted to take an old mobile phone case to do some tests. And we were amazed at how easy, fast and finished it was to work with this LaserPecker LP4 on this material.

- Glass, material that is very appreciated, being able to carry out very cool projects. As with acrylics, we advise you to check the guide to glass engraving on the LaserPecker website.

- Metal, another of the benefits of this LaserPecker LP4 is its double laser with which we can work a wide variety of materials directly. We have carried out different tests with different metals with sensational results and where we have seen this LaserPecker LP4 shine, never better said. Aluminium works such as keychains, jewellery, bottles have a sensational finish thanks to the infrared laser that is especially useful for this type of material.

Although the conical protective cone has been the most comfortable option for us, normally with respect to the enclosure, we also have to say that depending on which cases it has been cumbersome in the aspect of not having space to manipulate or removing it and placing it can interfere with our objects to be engraved/cut.

Continuing with safety, the inclusion of an integrated safety button at the top, on the handle, allows us to stop the machine at any time and immediately. From the available information, it seems that it also has a temperature sensor, which can stop the process in case of detecting high temperatures that may indicate the action of a potentially dangerous fire.
We also found the anchoring system of the LP4 very useful as it allows us to work with the machine at different angles. Its portability is another noteworthy point so that, at any given time and with the maximum-security measures, you can make engravings by holding the machine by its handle… That is if we hope you are strong because due to the quality of materials it is somewhat heavy.

Since we have a 3D printer/s we decided to look for some improvements that could help us in the use of our LaserPecker LP4 such as guides for materials, supports, etc… If you want, you can find the models that we found most useful in our collection of Printables.
Before finishing with our user experience, we would like to dedicate space to the control software of this LaserPecker LP4.

Considering the construction, appearance, and operation of the LaserPecker hardware… Not forgetting the price… We sincerely believe that at the software level it should give us something more. We’re not saying it’s a complete disaster, but we’re saying it’s not up to the machine.
We have tested its Android, iOS versions on iPad and desktop version on MacOS… we have observed inconsistencies between them with differences between options between them, on iPad for example the impossibility of using the landscape mode when rotating the screen for better use, sometimes not very intuitive in its interface or lacking help for its use.
Something that also surprised us is how it is possible that we can use our LaserPecker LP4 directly via Bluetooth from mobile devices. However, from desktop versions we have to have a dongle that, as we have already mentioned, is not included in the kit and we have to buy it separately and limit ourselves to its use from these platforms by cable.
We have a set of tools that have a correct balance between simplicity of use and being able to do certain advanced actions, but it has always left us with the feeling of leaving us halfway, especially the section of the adjustment of options for each layer.

In any case, we advise you that, even if starting the machine is done in just 15m, spend time reviewing the help and videos that we can find from the LaserPecker website in reference to the LaserPecker Design Space to learn all its options and settings.
Accessories
LaserPecker has created a large ecosystem of accessories to enhance and extend the functionalities of our LP4. Although we have already seen some of them, we will give you a quick review of the ones that we found the most interesting:
- Sliding extension, depending on the use you want to give to your LP4 laser engraver is a more than advisable component that will allow us to increase the working area by 160*300 mm

- Rotary extension, another accessory that, depending on the projects we do, will be extremely useful in cylindrical engraving projects such as bottles, glasses, rings, etc. In addition to rotating, we can angle the position of the piece to place it in the most appropriate way or position.

- Protective enclosure, with this cover we can protect ourselves from the laser as well as have an air outlet for proper ventilation. In our case, the truth is that we have found the use of the magnetic protective cone more comfortable in general, in any case we have found it better to use when we have used the sliding or rotating extensions.

- Carrying bag, another good accessory, especially if you are going to need to transport your LP4 frequently.

- Air purifier, recently added, is another accessory that is advisable, especially if we are going to use our recorder in closed spaces.
- Bluetooth dongle for PC, we have already told you about this accessory to be able to connect wirelessly via bluetooth from a desktop computer.

Final Assessment
LaserPecker LP4 is a powerful, portable and versatile laser engraver that, thanks to its dual laser system, will allow us to quickly engrave up to 4000mm/s, with high precision 8K with a granularity of 0.0019mm (and which has an effect on speed) and on a wide variety of materials.
The build quality of the LaserPecker LP4 and the accessories available to extend its functions are a plus point for those users looking for a device of high performance, quality and durability. Perfect for those users who, taking into account its features, want a powerful device in terms of options and quality. Especially focused on small engraving businesses that require some mobility of the equipment.

On the other hand, we have a software that, although it offers us a relatively simple experience of use and with good options, we find it slightly just for the quality and price of the machine, something that LaserPecker will surely improve in successive versions. Also noteworthy in this aspect is the compatibility with Lightburn, which is very good since it is a reference, but we think that LaserPecker has to provide a more powerful solution here that does not require third parties and an extra outlay.
Price is another aspect that can hold many users back… Yes, it has a high price, but if we value the quality and design of the materials we believe that they are up to the task at all times.
Where to buy the LaserPecker LP4?
LaserPecker has an online store on their website where you can buy the LaserPecker LP4 and its accessories/spare parts directly. You can also use the exclusive code for 3Dwork ‘3DW10’ for which you will have an additional 10% discount.
In any case, we provide you with some links to other stores for reference:






Déjanos un comentario