Today we bring you another printer that we really wanted to get our hands on, the new Anycubic Photon Mono M5S PRO.
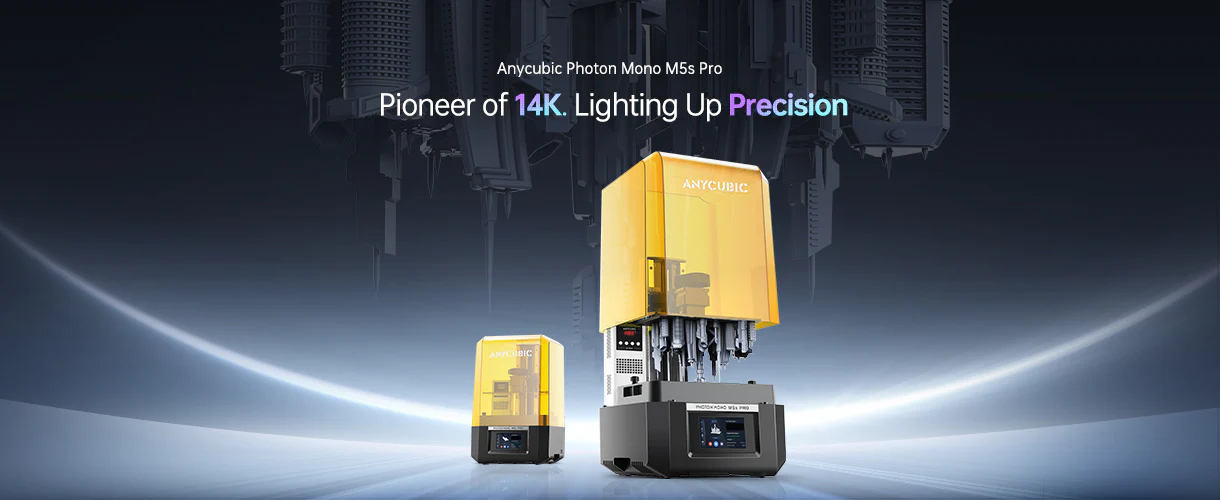
Anycubic is a benchmark in 3D printing both FDM (filament) and SLA (resin), this M5S PRO comes to significantly improve its M5S sibling improving many aspects of it and providing an incredible 10.1″ screen and 14K resolution as well as other interesting improvements.
As always, before continuing with the article, we remind you that you can join 3DWork on our Telegram channel full of 3D printing derangers, or on our social networks Facebook, Twitter, Instagramand YouTube.
Anycubic Photon Mono M5S PRO Printer
The Anycubic M5S PRO was presented last November at Formnext, the world’s leading 3D printing exhibition held in Frankfurt (Germany) where we already had the first contacts with it where they also showed other models such as the Anycubic Photon D2 (DLP), the Anycubic Photon M3 Max (SLA) and the great Kobra 2 (FDM).
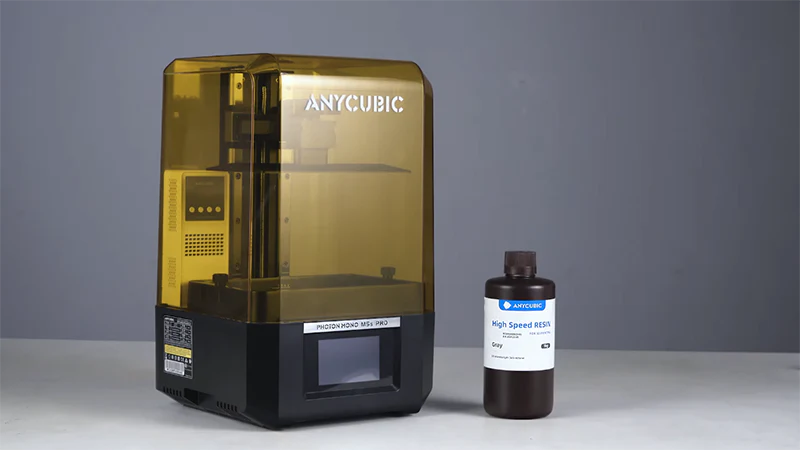
This Anycubic M5S PRO has been released relatively quickly with respect to the M5S, probably to polish some aspects of it that are going to be more than interesting. Although we have not officially had the M5S due to our experience with two units and experiences of other colleagues, there have been some problems with some of the assistants and this M5S PRO comes to solve and improve significantly.
One of the most important aspects of resin printing is the leveling of our printing platform and despite being a relatively simple process, it does generate a lot of problems for new users of this type of printer. Anycubic introduced this feature in the M5S and in this M5S PRO it has significantly improved it with its floating display system and the smart sensors on the Z-axis arm.
This set of technologies and sensors allows this automatic process to be precise, ensuring that our platform is always flat concerning our curing screen without any effort or adjustment on the part of the user. Thus eliminating the dreaded manual leveling by some users with the typical manual calibration and adjustment folio.
Also as part of these smart functions, we can connect our M5S PRO to the network and be able to manage it from the Anycubic application, being very convenient to be able to monitor the status and progress of our prints as well as being able to send and manage our print jobs as well as quick and easy access to help and support guides.

This new generation of resin 3D printers is focusing on providing greater speed to the printing process, all thanks to the improvements introduced at the processing level, the new third-generation ACF films, high-speed resins, and of course a bit of 🙂 marketing.
The M5S PRO, like the M5S, improves this aspect and can reach about 105 mm/h (*under special conditions) with the use of ACF and high-speed resins.
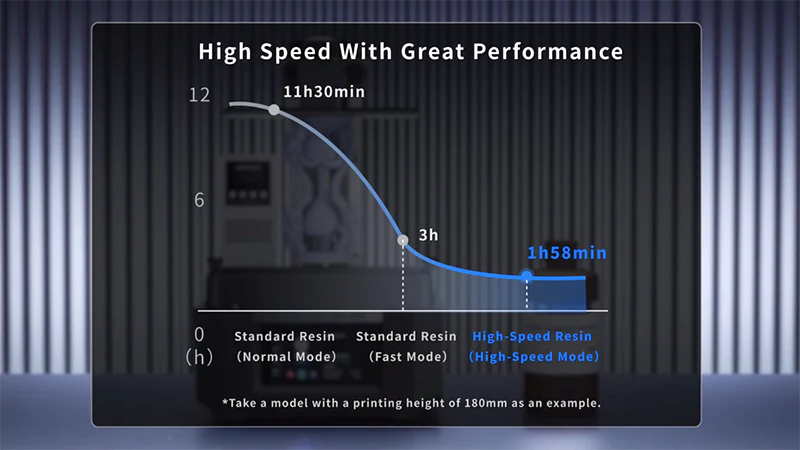
On the one hand, the new ACF film in its 3rd generation minimizes the forces when detaching our model from it, allowing a higher retraction speed, as well as significantly improving the % of error-free prints. At the same time, the new Anycubic High Speed Resin resins with their low viscosity allow a smooth movement in the layer change movements, allowing for faster printing times.
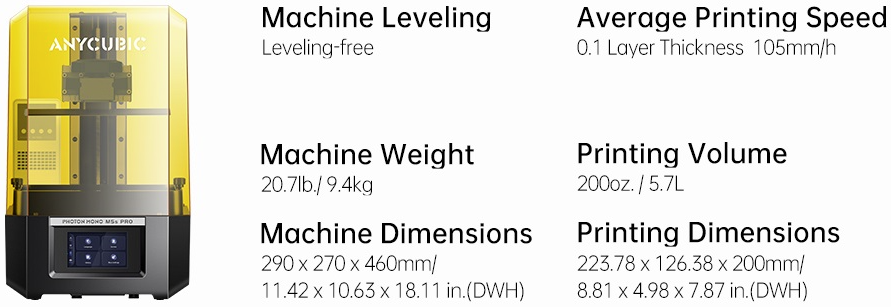
Here’s a comparison between the Anycubic M5S PRO and M5S:
| Specifications |  Anycubic Photon Mono M5s Anycubic Photon Mono M5s |  Anycubic Photon Mono M5s Pro |
| Build volume | 218x123x200mm (5.4L) | 200x224x126mm (5.65L) |
| LCD size | 10.1″ monochrome screen | 10.1″ monochrome screen |
| LCD resolution | 12K, 11520×5120 | 14K, 13312×5120 |
| XY resolution | 19×24.8 micron | 16.8×24.8 micron |
| Bed leveling | Auto-leveling | Auto-leveling |
| Print speed | 105mm/h (avg.) | 105mm/h (avg.) |
| Release film | ACF film | ACF film |
| Display | 4.3″ TFT touch-control | 4.3″ TFT touch-control |
| Connectivity | WiFi, USB | WiFi, USB |
| Anycubic app | Support | Support |
| Accessory | Air purifier (optional) | Air heater and purifier (standard) |
| Other feature | Device self-checkResin detectionPrinting monitoring | Device self-checkResin detectionPrinting monitoringResin residue detectionIntelligent release |
Start-up
Once the review of its characteristics has been completed, the most important thing is the turn to start it up, an extremely simple process that follows a few simple steps that we will find in the manual included in physical format (paper) and electronic format on the USB of the kit.
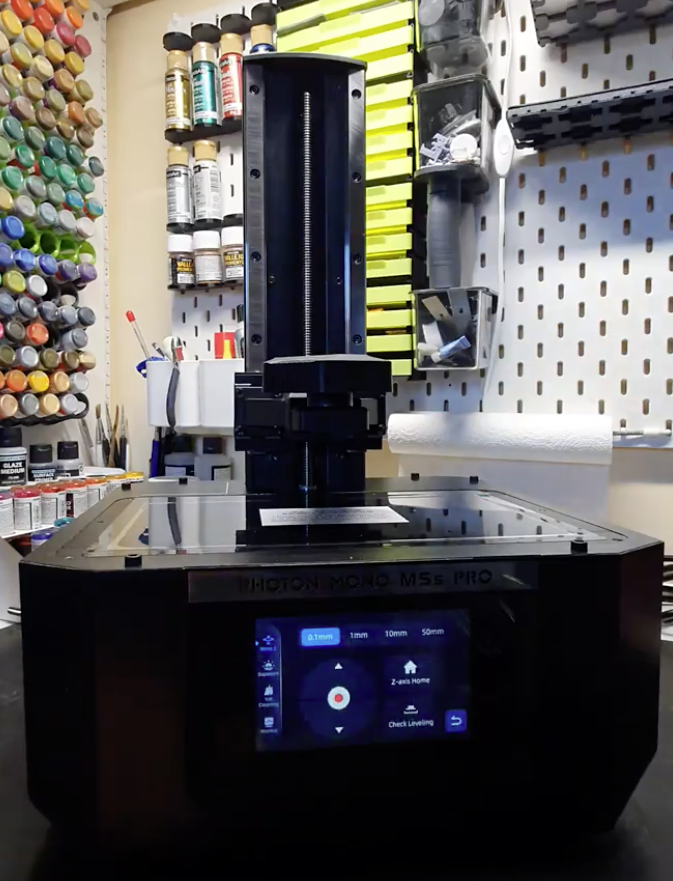
- We follow the process by anchoring the printing platform to the z-axis arm and fixing it with the clamping wheel, which is especially comfortable with its generous size. To be able to carry out this process, we must first raise the Z axis. To do this, we will turn on our M5S PRO and within the
Tools/Move Zmenu we will find the controls to raise the axle and leave it at a sufficient height to be able to place the platform and space to place the VAT.
- Once the platform is installed, we will verify that the screen of our M5S PRO works correctly from
Tools/Exposureand we will select any of the three tests that include:

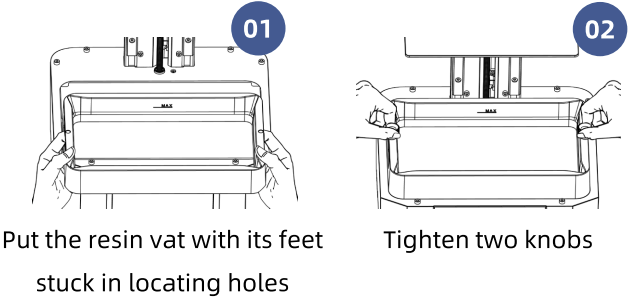
- With the screen checked we are almost finished, we will install the VAT aligned with its anchors and anchor with the fixing screws. Make sure that you remove the protective films that come with it first.
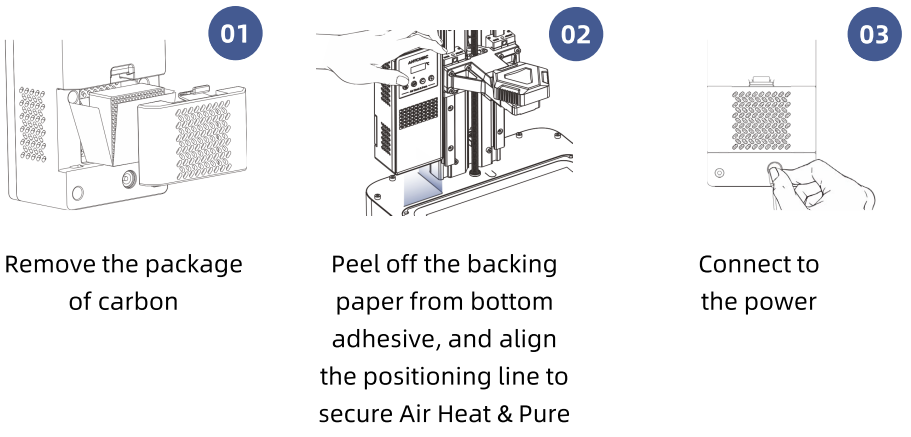
- Let’s go for the last step!! Install the heater + purifier. This heater + purifier is an external add-on to the printer so we’re going to need a second plug to power your printer’s independent power adapter. On the back of the heater + purifier, we will find a small lid that will give us access to the activated carbon filter from which we will remove the protection and put it back in its place. We will remove the adhesive on the bottom of the heater + purifier and stick it to our M5S PRO following the alignment lines that we have screen-printed. Finally, we will connect the power cable.
That’s it!! Our printer is ready to do the first test:
- We’ll start by filling our VAT with resin, being careful not to leave too many bubbles. It is more than advisable that before adding resin to our printer it is well mixed, for this the ideal is not to shake it but to make circular movements changing direction since we will avoid creating bubbles and the resin will mix correctly. Remember not to go over the top resin mark!!
- We will connect the USB and turn on our M5S PRO, among the examples included you have the Anycubic test which we advise you to do as an initial test.
- The printer will carry out all the tests before and during printing, as detailed in previous points
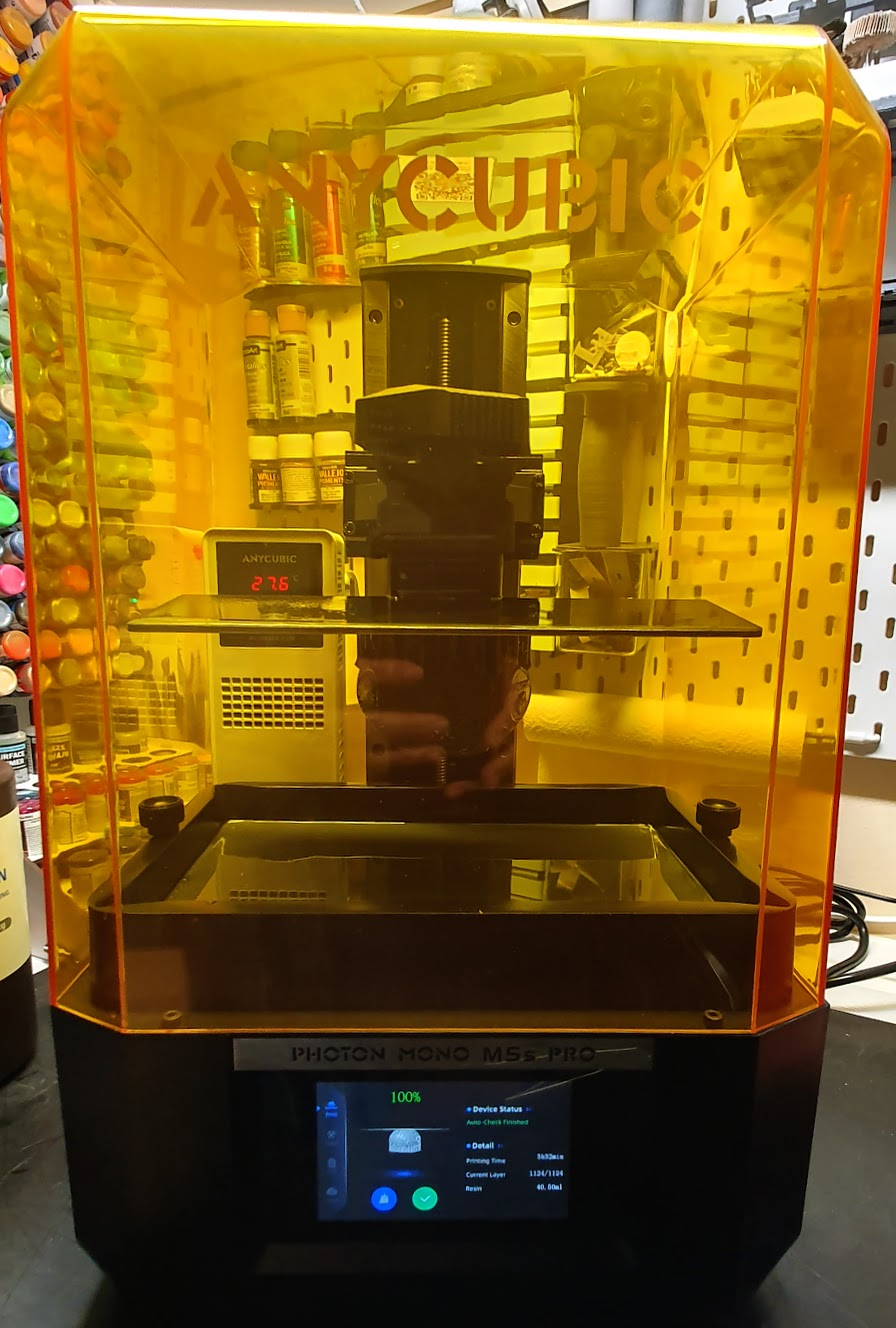
- Remember to set the heater to the desired temperature, even though it already comes with one by default, and activate the purifier.
- Once we have our test done, we advise you to start performing the exposure tests to adjust the times of our resin for our M5S PRO.
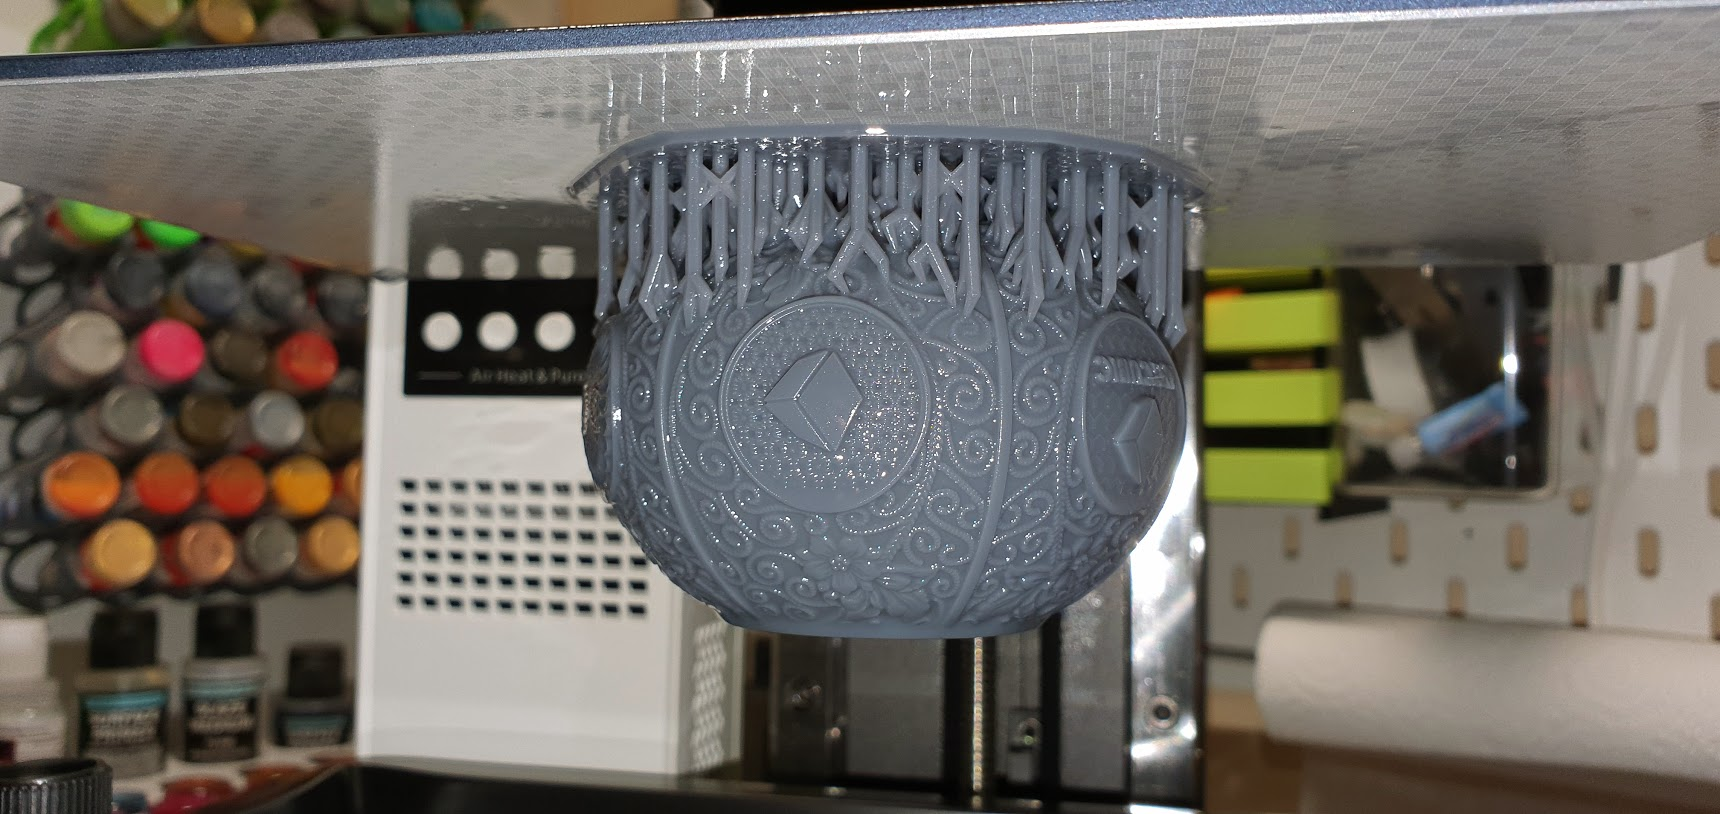
This test piece, made of Anycubic High Speed Resin, took about 50 minutes and already gave a glimpse of the precision capabilities of this M5S PRO.
Initially, we do not advise you to make further adjustments to your laminator profile, in the case of being an advanced user and knowing resin printers moderately, you can try to adjust the speeds. These print speed adjustments will result in a reduction in printing time, between 5 and 20% depending on the settings.
In case you want to make these advanced adjustments, always try to make small changes to your settings and check that they do not affect anything. Usually with very fast speeds it can affect the flow of resin and affect the level of detail of our parts.
Another factor that we can play with is the antialiasing to hide that staggered effect between layers. Personally, and considering the resolution/accuracy of the M5S PRO, use the minimum antialiasing value to keep the details as high as possible.
In any case, we advise you to check out our SLA calibration guide for more detailed information on parameters, options, and tricks with our printers.
Here’s the whole process on video in case it helps:
Print Quality
Once the first basic adjustments were finished, we started printing some projects for some colleagues. The truth is that we were looking forward to seeing how this M5S PRO behaves with that extra point of definition, the ACF that depends on which machines/configurations have given some problem, and above all to see the improvements and reliability of the new assistants vs those of the M5S.
Although we haven’t finished all the tests we have prepared for it, we are going to show you some of them in which we have tried to see the performance of the M5S PRO.
The first project was a squad of Orcs, specifically the Orc Spearmen Regiment from the great design studio Avatars of War. They are figures with a 28mm scale that, although they have interesting details, are a bit flat in their definition… But for the tests we want to do, they are perfect.
For this project, we used 100% Anycubic High Speed Resin with a speed profile where we placed the parts unevenly and distributed them on the platform to see the performance when we want to print at slightly higher speeds than what we normally use.

In the next project were also Orcs from the Mezgike studio who are amazing in detail and options, with a sensational design to be able to print.
In this case, we made our Anycubic High Speed Resin mixture to give the resin a little more tenacity and flexibility, as well as give it a slightly darker finish since we like a dark gray finish more.
We opted to place the parts in a way that was not very organized and optimal for printing to see how far the fault tolerance goes… the M5S PRO once again behaved exceptionally without missing a single part and all with excellent quality.

We can see in some of them some of the layers, as we mentioned we have not made any extra adjustments to antialiasing and we placed the pieces expressly with angles and positions that were not optimal, in addition to printing at 0.05 layer height… something that for this machine with its XY resolution would be advisable in projects where we are looking for the maximum definition to adjust to a better one close to 24.8 μm of resolution that calculating would be 0.025 of layer height.
It should be clarified concerning the layer height that although the previous one would be optimal in definition, it does not have to provide us with significant advantages depending on the use, on the other hand, it can have an impact on higher printing times, greater wear on the machine, chances of failure, etc…
Wash & Cure 3… Compact but very versatile!!
Along with our M5S PRO came the new Wash & Cure 3 from Anycubic.

A very compact and very capable cleaning and curing machine with some interesting new features compared to the Wash & Cure 2:
- Increased the volume of the cleaning area in the basket to 3L, 1.5L in the Wash & Cure 2, with a total capacity of 4L in the cleaning bucket… Not bad for the compact size of the machine
- Increase in curing size with a volume of 160×180 mm, 15% compared to Wash & Cure 2.
- The flexible curing lamp has been improved, increasing its power to 30,000uW/cm² (1-3 cm) with which we can cure our parts in specific places or act as a support to the normal curing LED column.
- The washing basket has also been improved from metallic, in the Wash & Cure 2, to being made of PP… Material that is more resistant to contact with cleaning fluids. In addition, it has a design that will allow us to directly locate our printing platform at two different heights, allowing a better use.

By way of comparison… the size of the new Wash & Cure 3 compared to our must-have Wash & Cure Max :).

Review & User Experience
As we have already mentioned on several occasions we were very much looking forward to being able to put the M5S PRO to the test, especially to be able to compare it with the M5S that in our tests unfortunately did not leave a very good taste in our mouths.
We have to say that Anycubic, in our experience with both machines, has improved the M5S PRO by solving the problems we had detected in the previous M5S version… This M5S PRO is going to be a reference machine for users and future models of the brand without a doubt!!
The inclusion of the heating system, which we’ll talk about a bit more in detail later, and the improvements in the sensor systems, printing platform, probably UV adjustments, and the use of third-generation ACF and firmware make this M5S PRO the product that the M5S should have been.

In the kinematics section, we find a robust and firm Z-axis with a printing platform anchoring system that is truly comfortable to handle thanks to its generous proportions. The use of third-generation ACF together with the powerful kinematics system mounted on the M5S PRO will ensure fluid movements and high mechanical durability.

About the build platform, the inclusion of screws for possible manual adjustment if required and the documentation of how to perform this manual leveling has been a great improvement over the first units of the M5S that lacked that manual leveling option. In cases where the system did not work properly because we had a serious problem when using the machine… Well done by Anycubic!!

The heater + purifier has been one of the parts that we have liked and disliked the most, we have loved the inclusion of this component that will significantly improve the printing conditions for optimal results. Also to highlight that although they already warn that the heating times, due to the power of the device, can be somewhat high to reach the target temperature in our tests in just a few minutes we already had our printer ready to print, a function that was perfect for this is the scheduled start of printing what we did to make sure that it does not start until the temperature is adequate.

On the other hand, the negative part has been that we can’t manage the settings or functions without having to open the dome, being a bit cumbersome and dangerous at times if we have to modify something during a print… I’m sure Anycubic will take note of this for future reviews.
In these new generations of printers, remote printer management is finally starting to be taken seriously, which, at least in the supervisory aspect, greatly facilitates certain tasks for the user.
Among the available options, we have the possibility of configuring our printer to connect to our network and through Internet access to be able to use these Cloud advantages. The process is very simple:
- We will adjust the region where to join our printer (Global or China)

- We will perform a reset of the WiFi data of the M5S PRO creating a WiFi access point that we will use in the next steps.

- We will install the Anycubic application (available for Android and Apple) and from the App, once our account has been created, if we do not have it, we will follow the wizard to add a new printer:


- Once the process is finished, you can see an icon on the screen indicating the status of your connection.

We have to point out that during our tests, probably because it is a test unit and the support for M5S is not 100% deployed, some Cloud functions or transfers from the laminator to the printer of our projects did not work. The part that did work well for us was the tracking and status of the printer, which was a great help to us receiving notifications of the status of the printer.
We found the programmed compression function to be extremely useful, especially in two cases… The first, as we mentioned before, to make our prints start with a few minutes delay to allow the heater to do its job and the printing to be done in the best conditions… the second, to schedule the printing to be done during the night or when it is more convenient for us.

But in a function that we found sensational, we have found that the implementation, in our view, is not correct… Let me explain… when you program a print, the platform lowers to the VAT and then rises to a resting position halfway through the stroke in a movement and distance that unfortunately can cause the resin to splash out of the bucket!! Hopefully, Anycubic solves this problem, we suppose that this initial movement is to check the condition but perhaps better to do it when starting the print, or if necessary ideally instead of raising the platform so much to leave it a few mm above the height of the bucket to avoid splashing.
Another function available, and that we think is essential, is the VAT cleaning function that is available when we finish printing to make sure that our VAT does not leave any residue that could damage our printer. Sometimes, especially if we see a flaw in our printing, it is advisable to use a little extra resin with this process rather than risk damaging the ACF film or even something more serious.

As we saw in the M5S the M5S PRO has a replacement notice for the ACF film, according to Anycubic it is advisable to change this every 30K layers so when we arrive it will notify us suggesting the change of the film for optimal results. Anycubic also advises changing every 10K for FEP/nFEP/PFA.

We also have USB/OTA firmware update options, the latter being especially useful since we will be able to carry out this process in a very comfortable way while always keeping our machine with the latest improvements available.

Final Assessment
We have honestly ended up loving the M5S PRO during the 3 weeks we have worked with it!! A printer where Anycubic has improved all aspects that, in our experience, could be improved to the M5S.
A printer that, despite a good print volume, has very compact dimensions, a fluid interface with all the necessary options in a simple and functional way.

In the construction aspect, we have a well-built printer, although we would have liked to have height adjustment on its legs since sometimes the bases where we place our printers may not be correctly leveled, and in a resin printer it is important.
The quality of the pieces obtained has been sensational, a printer that is sure to make users who make organic figures with many details fall in love with them.

An aspect related to the finish of the parts that we were concerned about was the use of ACF, Anycubic indicates that this M5S PRO uses a third-generation ACF that along with other improvements eliminates that “salmon skin” effect that we have been able to see in similar printers and that, at least in the tests we have done, we haven’t seen it on the M5S PRO.
As we already mentioned, the inclusion of the heater + purifier has been a success, although we hope that for future versions this can be managed directly from the printer and not independently.

We would also like to highlight the Wash & Cure 3 which, despite being very compact, has not subtracted from the volume available for washing and curing.

In short, a highly recommended machine… Great quality, large print volume and great smart features that will simplify and improve our user experience.












Déjanos un comentario