These last weeks, and after the article we made about the resin printer Phrozen Shuffle XL Lite, I have been working with a new closed machine on which I was interested in making a short article, the QIDI TECH X-Plus printer.
The QIDI TECH X-Plus printer is developed by the well-known Chinese company QIDI Technology, which offers us both FDM and resin printers (UV LCD) in its catalog. According to this company, the QIDI TECH X-Plus would bring us industrial grade features to our prints and, most importantly, at a price that is really affordable for our pockets.
Although the QIDI TECH X-Plus is not the top model in its catalog, it is just below the top of the range (QIDI TECH X-Max) and It will help us to get a broader idea of the rest of their products.
As always and before starting the article I encourage you to access our Telegram channel or to follow us on our social networks, where you will find more upset by 3D printing like us.
Brief introduction
It is no secret that I personally have a preference for all types of closed printers over the typical “Prusa” type printers currently flooding the market.
And yes, open printers perfectly fulfill the function of attracting and making this type of technology known to the vast majority of users in a fairly inexpensive way. This is undeniable, in the same way that in a short time you will discover the limitations that these machines carry.
We can cite a myriad of problems: Limitation of printing materials, inertia and ghosting problems, weak and unstable structures, vulnerability to drastic temperature changes, cracking in printed parts, warping or lack of adherence, etc.
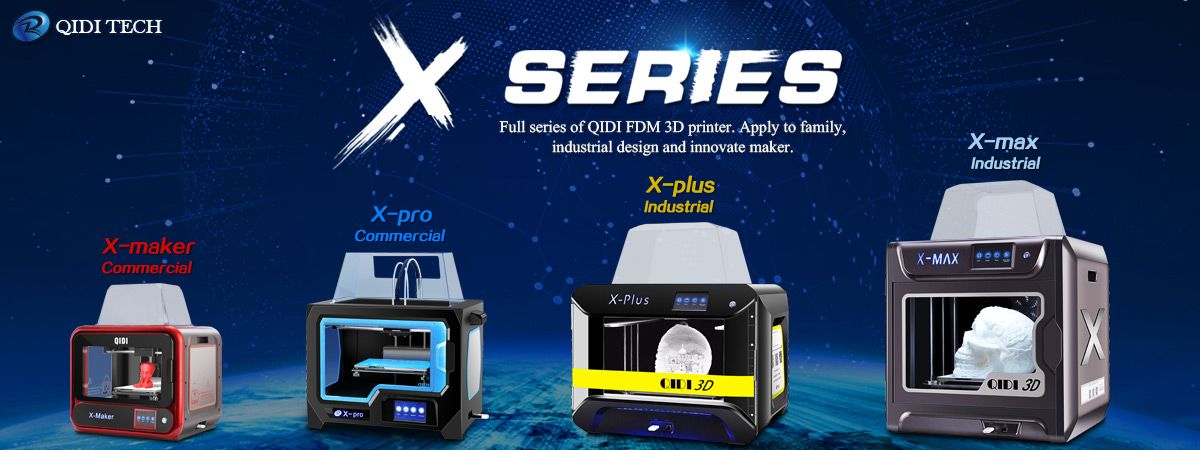
QIDI Technology knows all these drawbacks very well and offers us the range of completely closed printers, the X Series, where our QIDI TECH X-Plus is located.
And in my opinion, with the last 2 models (X-Plus and X-Max), QIDI intends to enter a much smaller niche of users that requires high performance in 3D printing without having great resources to invest and correctly interpret this need in today’s market.
And in this niche is where QIDI tries to make a difference with respect to other machines such as Ender 3 family, Artillery Sidewinder/Genius, etc., highly demanded but not oriented to a more professional profile, and with clear limitations.
QIDI TECH X-Plus Printer
Here are the main features of the QIDI TECH X-Plus printer, as well as that of two other versions of the X Series to put it a little bit in context:
Technical specifications (X-Series)
Qidi X-Max |
Qidi X-Plus |
Qidi X-Pro |
|
| Build volume | 300 x 250 x 300mm | 270 x 200 x 200mm | 230 x 150 x 150mm |
| Technology type | FDM (Deposición) | FDM (Deposición) | FDM (Deposición) |
| Print surface | 4 Guides + 2 Spindle | 4 Guides + 2 Spindle | 2 Guides + 1 Spindle |
| Filament diameter | 1.75 mm | 1.75 mm | 1.75 mm |
| Positioning accuracy | XY 11 micron Z 2.5 micron |
XY 11 micron Z 2.5 micron |
XY 11 micron Z 2.5 micron |
| Layer resolution | 100~500 microns | 100~500 microns | 100~500 microns |
| Nº of extruders | Simple extrusion (2 extruders included) |
Simple extrusion (2 extruders included) |
Doble extrusion |
| Printing materials | PLA, SPLA, ABS TPE/TPU, PETG PC, PP, Nylon, Carbon fiber |
PLA, SPLA, ABS TPE/TPU, PETG, PC PP, Nylon, Carbon fiber |
PLA, SPLA, ABS TPE/TPU, PETG, PP |
| Package dimensions | 736 x 660 x 609mm | 710 x 540 x 520mm | 579 x 535 x 469mm |
| Software | Qidi Print, Cura, Simplify3D | Qidi Print, Cura, Simplify3D | Qidi Print, Cura, Simplify3D |
| Weight | 37 kgs | 28 kgs | 18 kgs |
| Connectivity | USB, Lan y WiFi (WLan) | USB, Lan y WiFi (WLan) | USB, Lan y WiFi (WLan) |
Where to buy the QIDI TECH X-Plus

In case you are interested, the QIDI TECH X-Plus printer as well as other X-Series models are available at the following direct links and Marketplaces.
Some of them are affiliate links, that means that if you use 3DWork you will receive a small commission to help maintain our website.
| QIDI TECH X-Max | |||
| QIDI TECH X-Plus | |||
| QIDI TECH X-Pro |
And remember, if you want to find any 3D printing product, you can use our search engine Markets.sx. You will be able to save time and carry out simultaneous searches in several marketplaces at the same time (Amazon, Gearbest, Aliexpress, etc.)
Package content (Unpacking)
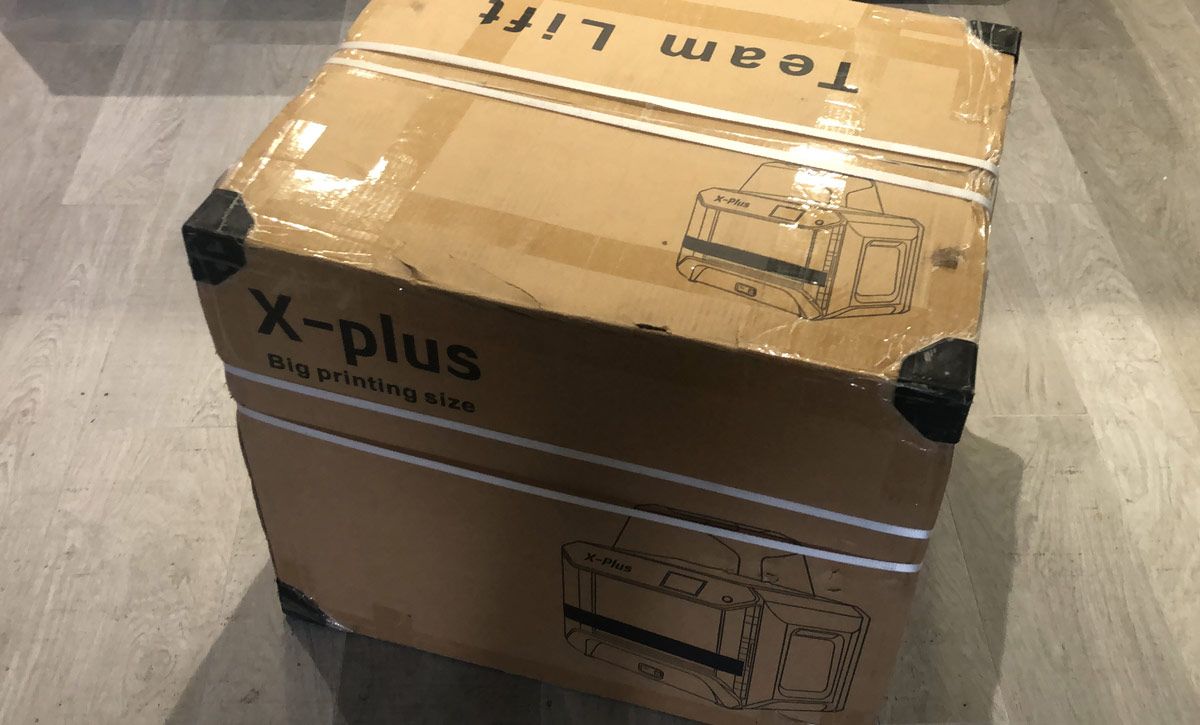
As can be expected in this type of product, the QIDI TECH X-Plus printer comes completely protected in a huge carton box for this purpose, and with plastic protectors in the corners of it.
The weight of the machine is quite high and is around 30 kgs, so it is likely that you will need some help to remove it and place it in its final location.
At the top we can find most of the accessories that come with our printer, which are not few. In order to access it, you must remove this first level and you will already have the printer at hand, as well as the lateral parts that are removable (recommended for printing PLA filaments).
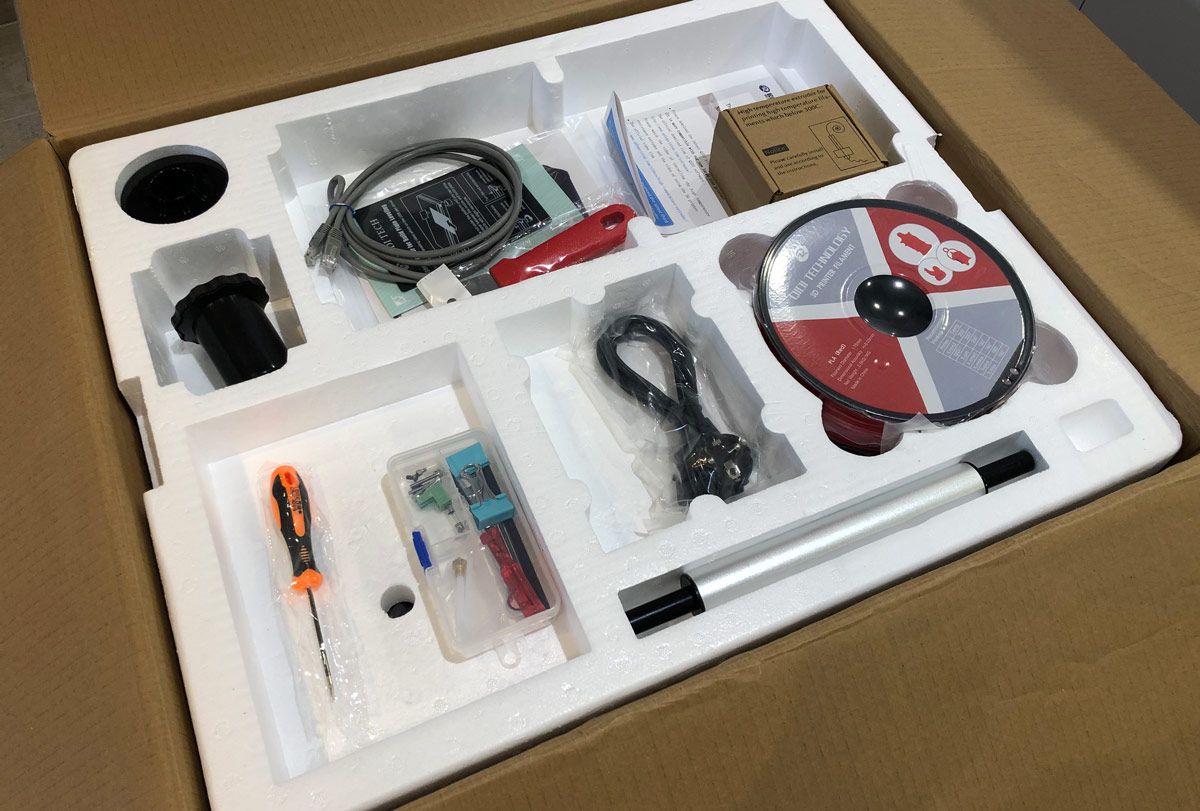
This is the complete list of all its content, and that you can see in part in the photo above:
| Package content | ||
|
|
|
Components and mechanics
General structure
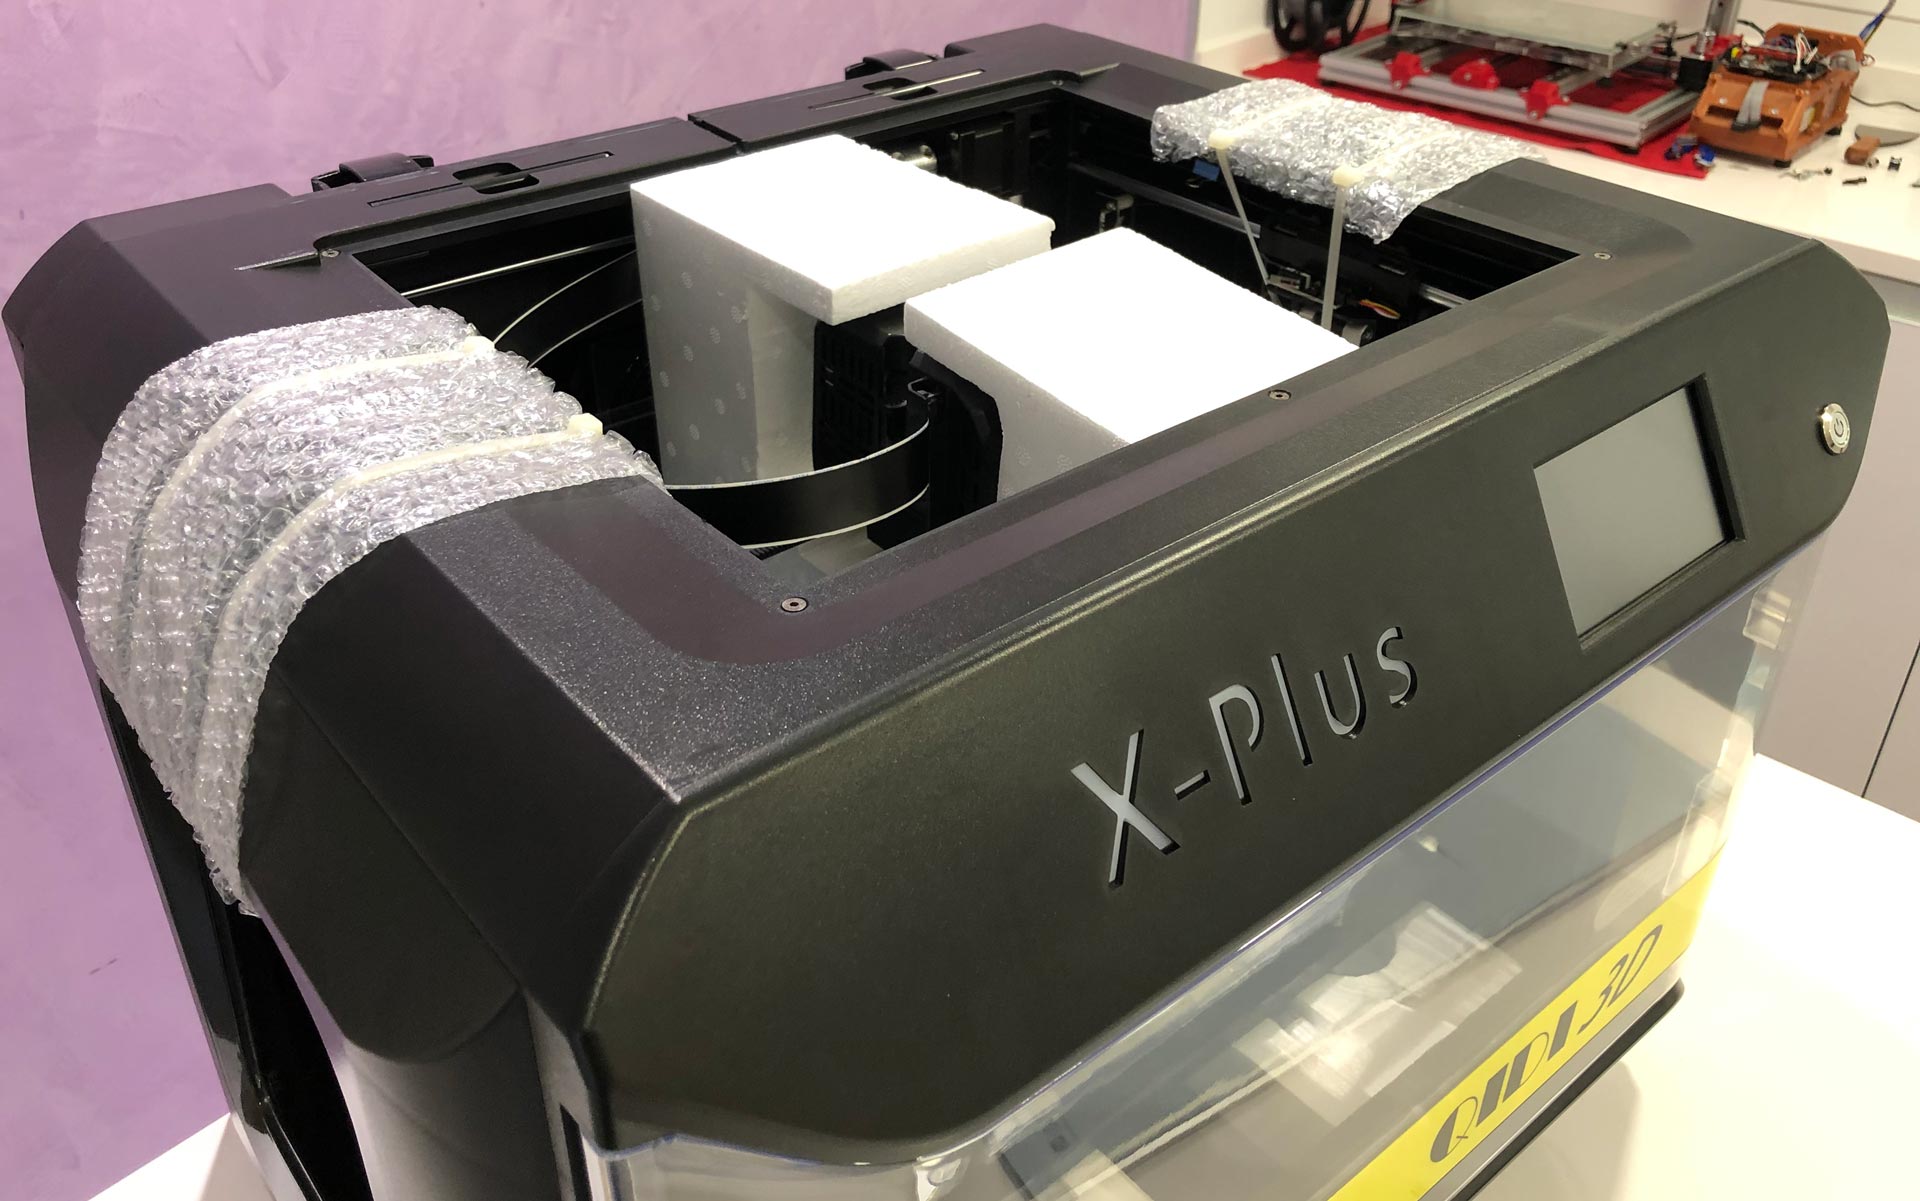
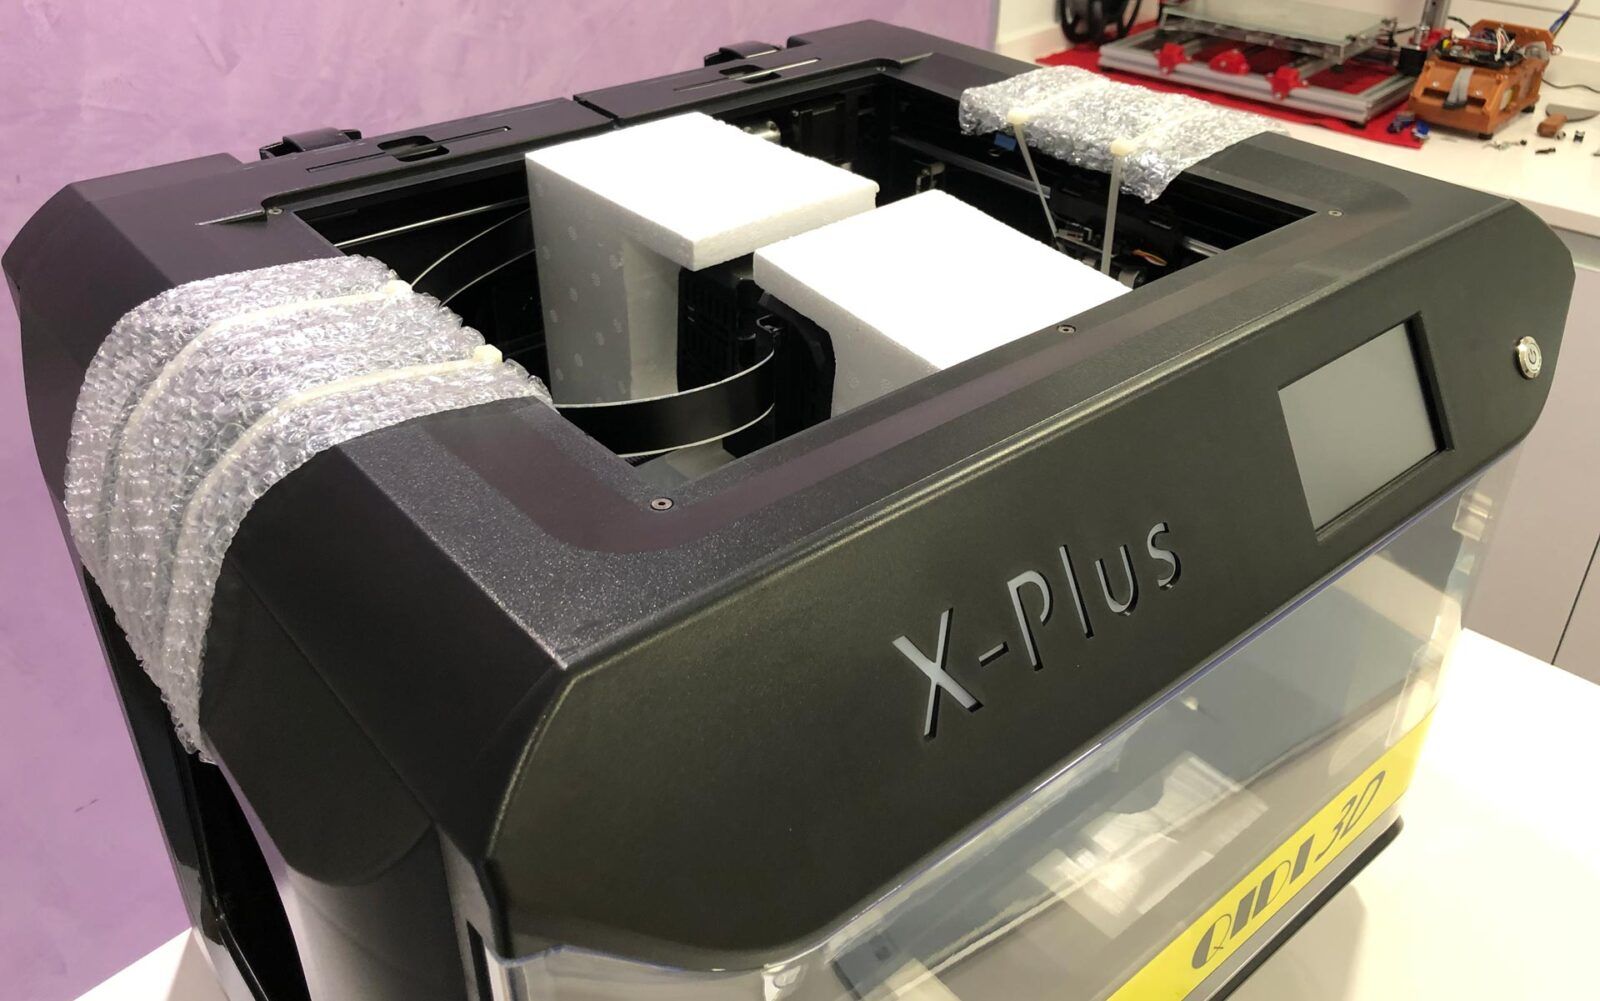
The QIDI TECH X-Plus printer has a cubic structure and is completely rigid, as it could not be otherwise. Externally it is made of injection plastic panels, which gives it a rather elegant appearance.
Inside, it has been reinforced with different metal sheets to give the whole set robustness and serve as a support for the incredible Z-axis (bed set) that we will cite in detail later.
It has a front door made in the same way in transparent injected plastic, which allows us to see all the pieces during printing. It is also equipped with neodymiums for a completely hermetic closure.
On both sides we can find two removable methacrylate panels, which we can disassemble for printing with PLA filament, and which are also very easily anchored with magnets.
And finally, in the upper part we can see a large transparent dome, which will prevent heat leakage and will help us to keep it at a stable temperature, something essential for when we work with excessively technical filaments (ABS, Nylon, Carbon Fiber, etc.)
Kinematics and movements
The kinematics chosen for the QIDI TECH X-Plus printer is Cartesian, something quite common among printers of this range, using one nema17 motor per axis (in the case of the X and Y axes) and two nema17 motors in the case of the bed (Z axis).
This type of kinematics, so common in most printers on the market, offers us minimal maintenance and avoids us dealing with problems inherent to other available kinematics such as mis-squares, excessive wear or incorrect tension (CoreXY, CoreXY Markforged, HBot, etc. )
Heated bed (Z axis)
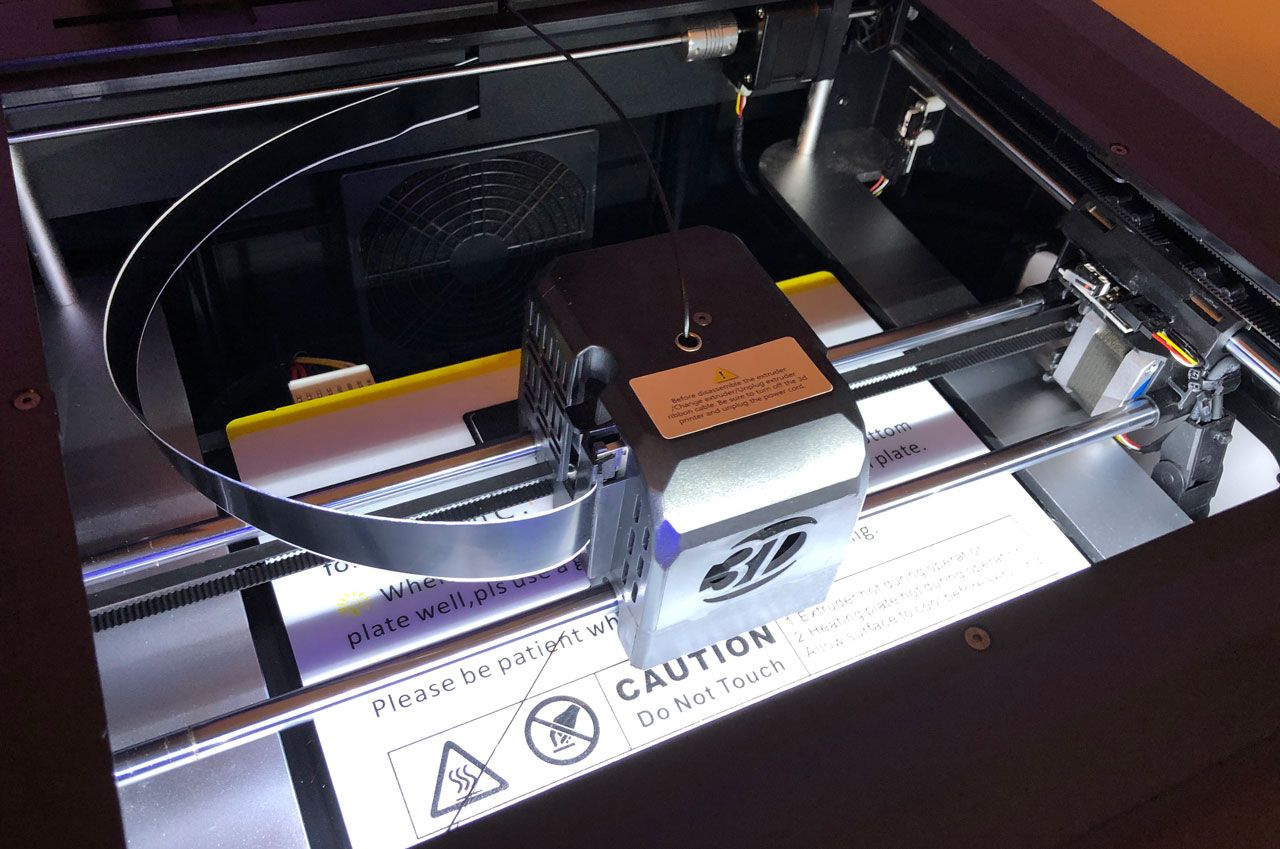
The printer has a printing area of 270 x 200 x 200mm. Although it does not seem excessive at first glance, we must always keep in mind that it is a completely closed printer and with support for internal filament (heated in the cabin).
This obviously reduces our printing surface, but if we compare it with other closed printers we will see that it is by no means small, since they do not usually have larger sizes unless you look in higher ranges (and with much higher prices). And as you can see, for most prints it will be more than enough.
The Z-axis guidance and the heated bed is really impressive in my opinion. In printers that have these surface sizes, what we usually see is a spindle with two side guides, always hanging from the back of the bed support.
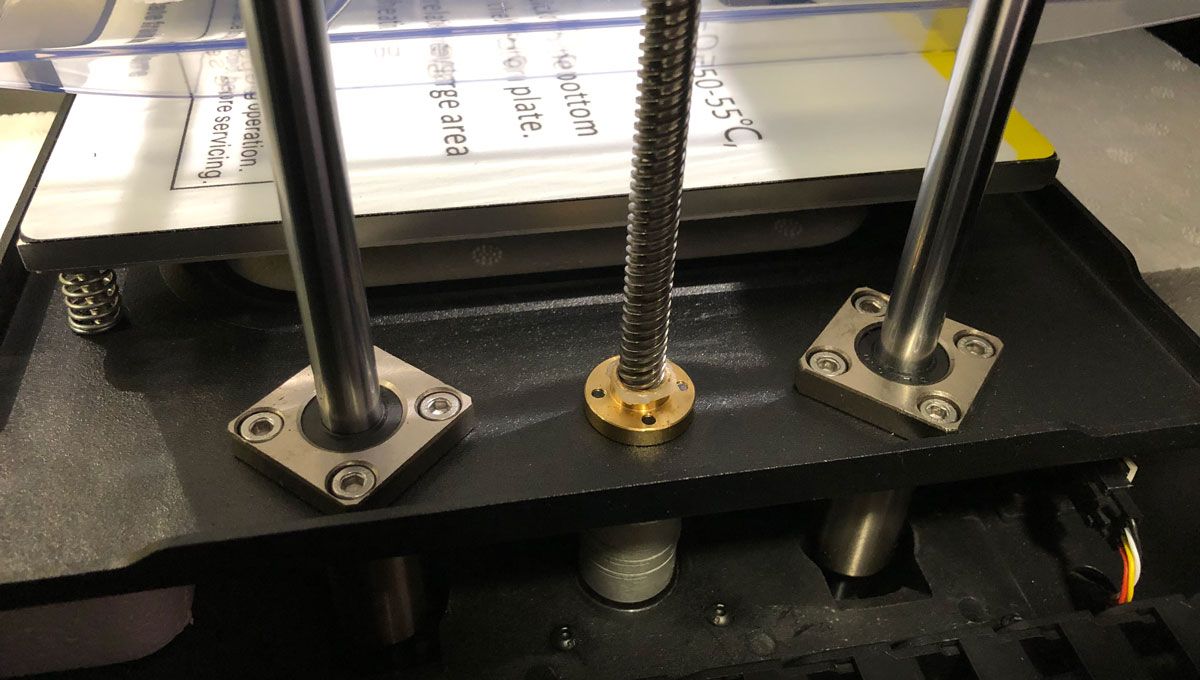
QIDI TECH has very intelligently chosen to offer us 2 motorized spindles and 4 linear guides at this point of the printer, and of course, anchored to oversized aluminum supports to avoid any possible movement.
This completely avoids possible buckling or vibrations caused by the movements of other axes that will later be absorbed by our bed, and gives it extreme rigidity. A great success in my opinion and a differential point compared to many other closed printers.
If we add to this that it has a 8mm aluminum plate thick as a heated bed that supports temperatures of up to 120ºC, we are faced with one of the best mechanics in the Z axis that I have personally seen to date, always talking about 3D printers of this range.
This aluminum bed has different neodymiums positioned along it, which will help us to fix a flexible strap and where we are going to make all our impressions. And the strap has 2 faces for different types of impressions and materials, one for non-excessively technical materials (rough) and another for more complicated materials that require special products to facilitate adherence (completely smooth).
Extrusion system (2 different extruders)
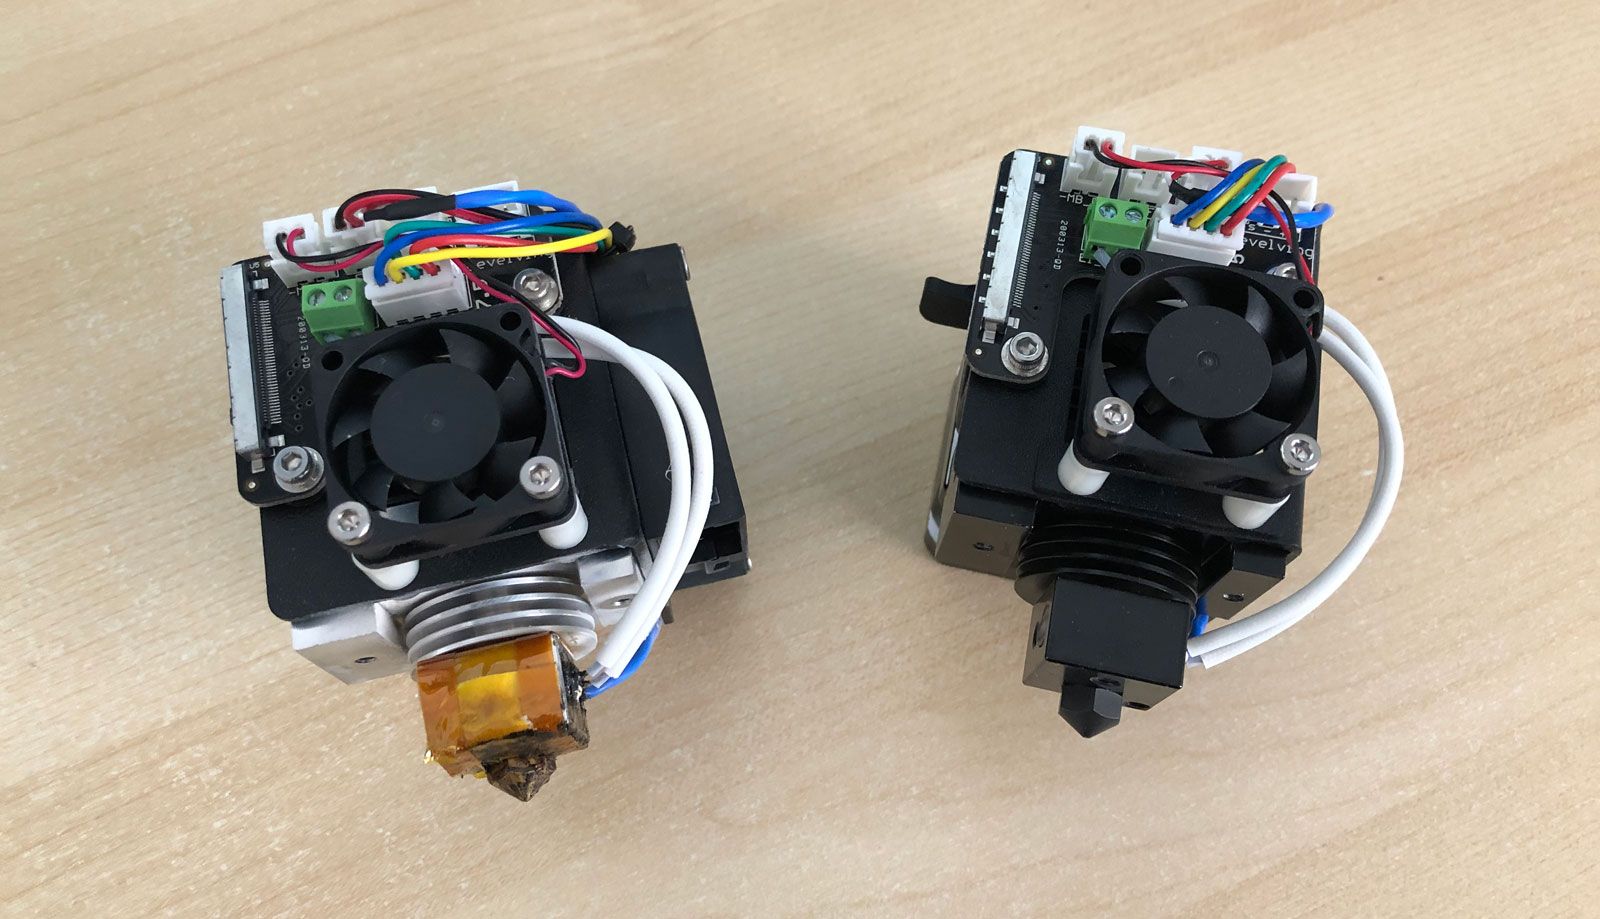
The extrusion system of the QIDI TECH X-Plus printer is direct and today the most reliable compared to other extrusion systems, such as bowden or remote direct drive extrusion.
However, and although its extrusion system is simple (it only has one head printing at the same time), it does include two different heads to choose a greater range of materials. This is not common and I was pleasantly surprised.
The first extruder is installed by default in our printer and withstands temperatures of up to 250ºC. Ideal for working with filaments such as PLA, SPLA, ABS, HIPS, PVA, ASA, PETG, TPU/TPE etc.
The second, high-performance extruder comes prepared to withstand temperatures of up to 300ºC. This extruder has a black, hardened steel nozzle that is resistant to abrasive materials and does not have a layer vent.
We must use it for technical materials such as Nylon, PC, Carbon Fiber and any other type of abrasive materials or that require temperatures above 250ºC.
Having two extruders available comes with some significant “extra” benefits. The first is that the wear they may suffer over time when allocating each one to different materials will always be less when dividing the workload between 2 extruders. The second is that in the event of a possible “emergency” we will always have a functional one with which to work until we correct our unforeseen event.
The replacement of the extruders is extremely simple, loosen 5 screws and the flat cable (flex) and mount the new extruder. An operation of 5 minutes or less inclusive, as you can see in the video above.
Obviously, after each extruder change, it is recommended (and almost essential) that we perform a new leveling of our printing surface, since we have modified the mechanics. To do this, you must use a plastic for this purpose, which QIDI TECH supplies you in each and every one of its printers.
Filament holders
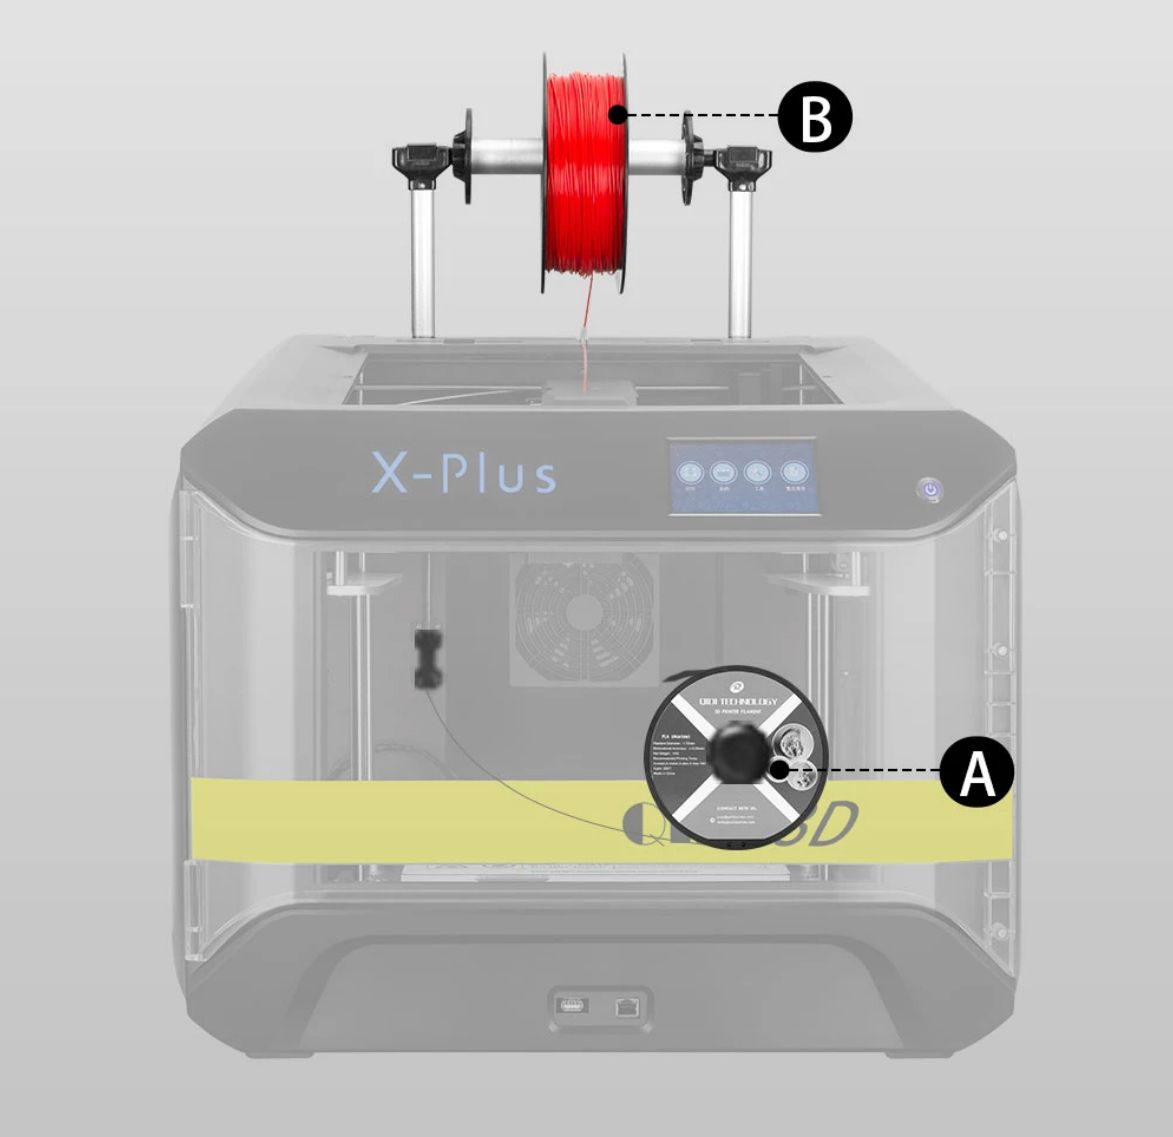
QIDI TECH offers us in its X-Plus and X-Max models the possibility of positioning our filament rolls in two possible locations. The first is the common one, externally to the enclosure of our printer and in height, to facilitate the entry of the filament led to its extruder.
The second way in which it surprises us, and which is not usual to see in any home or desktop printer, is inside our cabin just behind the printing platform. You can see the roll anchor inside the printer in the next video.
This location entails some improvements, since when printing technical filaments it is vital to have our material at a stable temperature and if it can be preheated, even better. Dealing with filaments like Nylon at 260ºC/280ºC is complicated and any help is appreciated.
Other advantages is that you can have the filament more protected against dust or dirt and humidity, if you have it inside the cabin, and visually it is appreciated, since it is integrated within the same machine. In total, the QIDI TECH X-Plus allows you to place up to 3 rolls at the same time in your printer (2 outside and 1 inside, protected).
Connectivity (USB, Lan, Wifi)
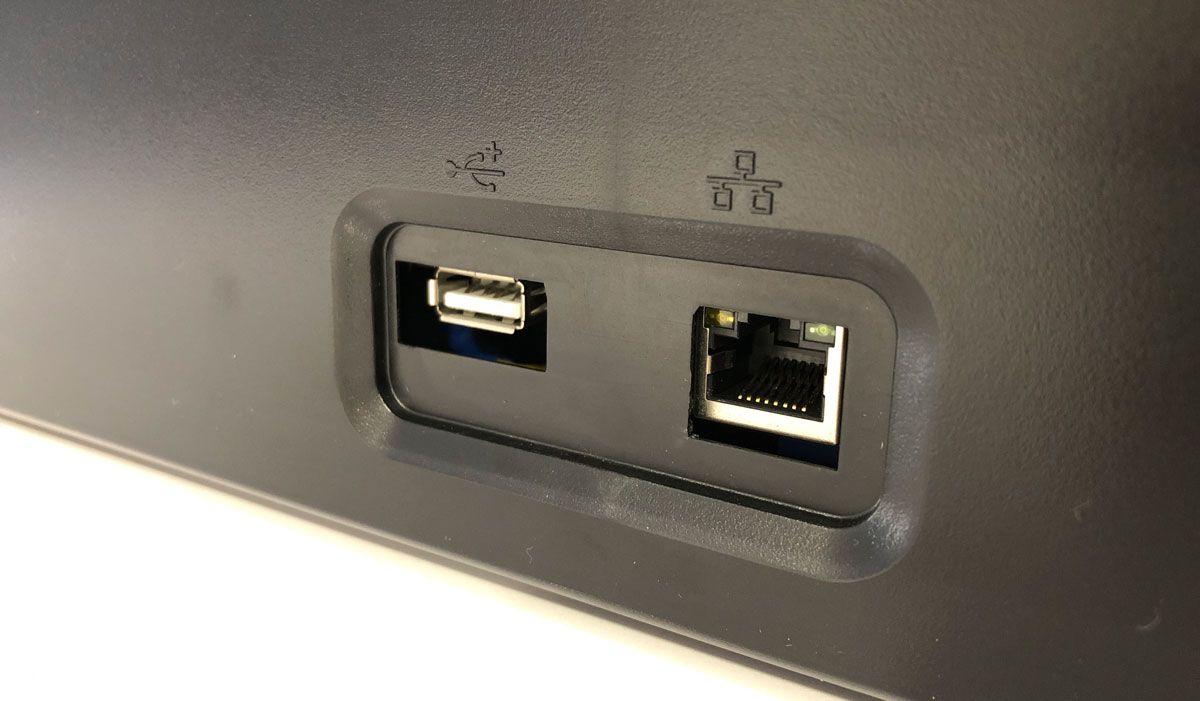
The QIDI TECH X-Plus printer supports Lan and WLan (WiFi) connections. In this way you can send your files over the network to print remotely without any problem.
It is obvious that applications like Octoprint, which we talk about exhaustively in this article Octoprint: Manage your 3D printer remotely with Raspberry Pi and Octopi, they will offer you this functionality and many more.
But you are already in the position of adding additional hardware and configurations that will drain you time in configurations and especially in this printer that does not have an external “visible” USB port.
However, QIDI TECH offers you this ready-to-configure serial connectivity, simply by searching your available network and entering the relevant password. The process is very simple, once the network is configured in your printer, and after filleting the 3D model, they will simply send it through the network and you will confirm its printing.
It is worth highlighting a detail, and it is that you must always have a USB connected to your printer since it uses it as a “hard disk”, storing there the files you send via Lan or Wlan (Wifi) to your impression.
Finally you can always have the USB port to print with a normal USB memory, as if you were using an SDCard without any problem. Although I think that the 30 or 40 impressions that I have made 99% have been made through my WiFi and without any problem (neither speed nor crashes).
Impressions and user experience
The QIDI TECH X-Plus printer comes pre-assembled at the factory, so practically from the first moment you can start making printed parts.
You simply have to remove the upper cover that is stored inside the cabin for transport, remove several polystyrene protectors that protect it and unlock the GT2 straps to start using it.
Inside the USB that comes with the printer itself you will find up to 14 videos, which will explain the most common tasks to carry out as well as instructions for the disassembly of various components (extruders, nozzles and front door).
The ideal and advisable thing would be to preview them if you are not a seasoned and experienced “maker”, since they only last a few minutes and they indicate the correct way to operate with our QIDI TECH X-Plus at all times.
You also have QIDI TECH’s own slicing software available for installation on Windows and Mac. As you will see if you have experience in 3D printing, it is a variant of CURA customized for this purpose, and it is fully functional.
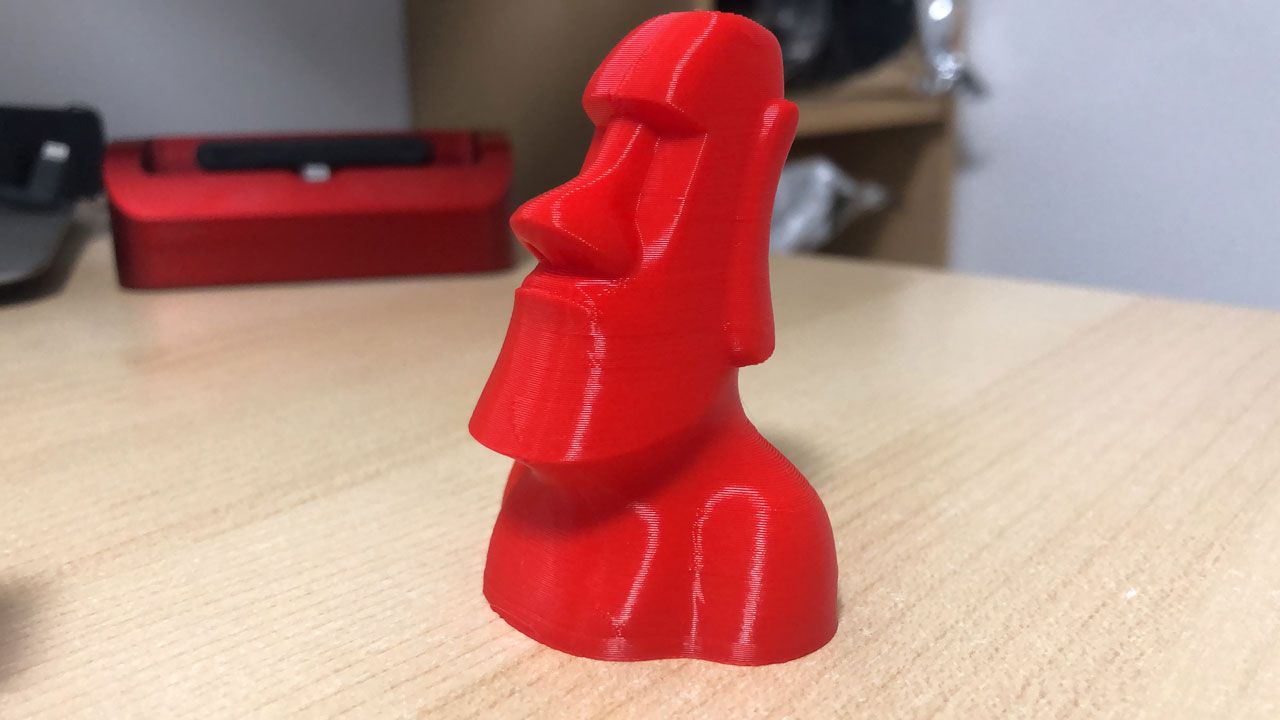
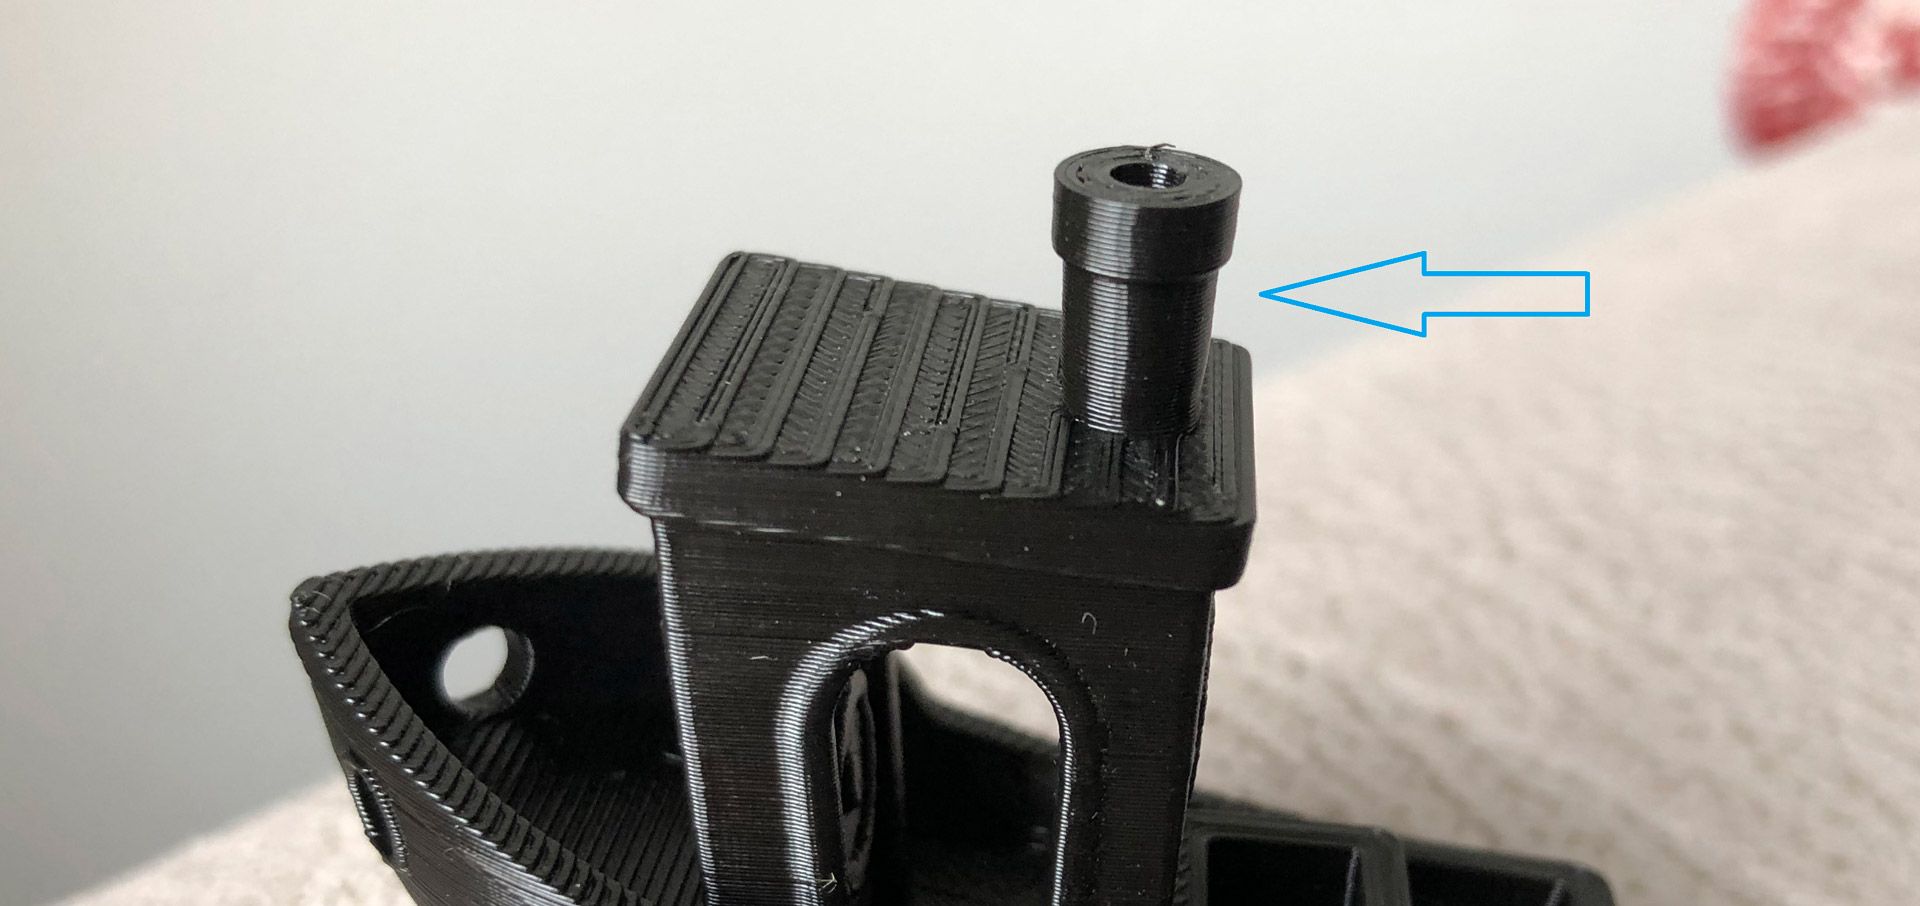
The quality of this printer is quite high, as you can see in the following images. One of the things that I liked the most and called my attention is the quality of the union between the layers of our printed parts, showing us the importance of having good mechanics in the Z axis.
I leave you a detail of the fireplace of a Benchy3D so that you can observe in greater detail (you can click on all the images to enlarge them).
Already getting into more technical materials such as ABS, I usually make a “skid” or “raft” and build the pieces of ABS. After printing more than 10 pieces, I have not had the slightest warping effect on them, something that we constantly struggle with in open printers.
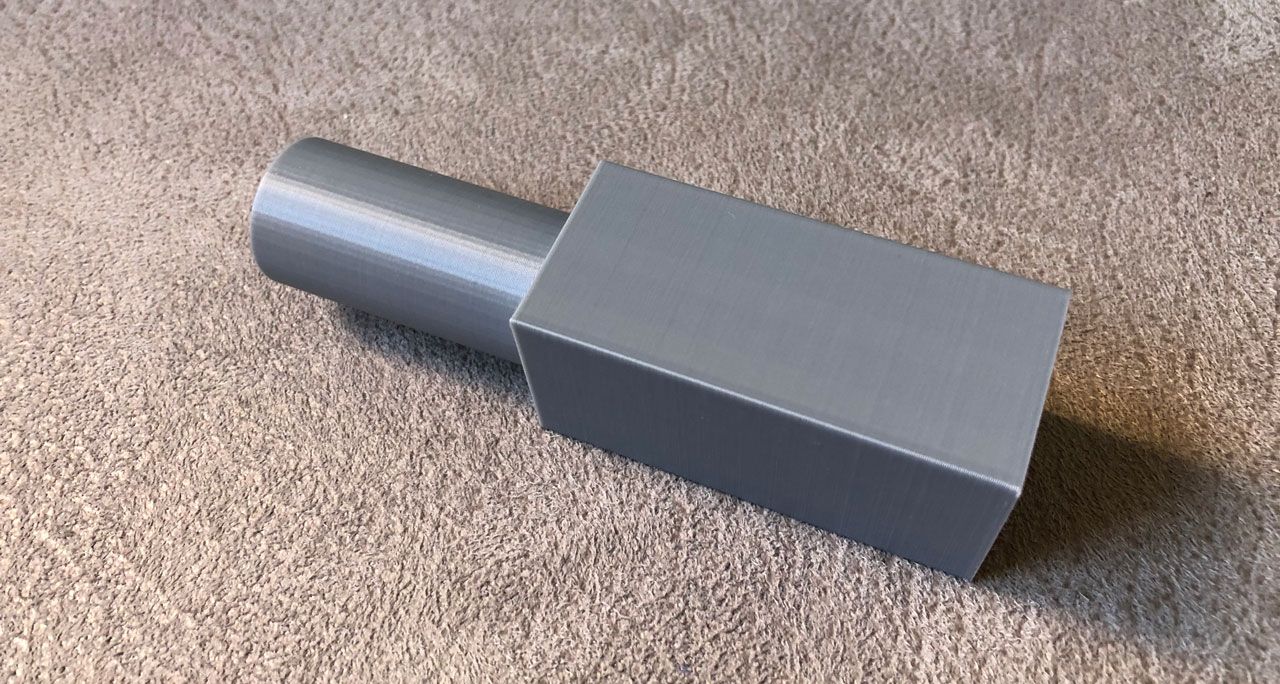
And not only that, but it has behaved exceptionally in relatively tall ABS parts, which tend to have adhesion problems in the uppermost layers (which do not receive temperature from the hot bed). In the piece of this image you can see that there is no problem, neither Warping nor Cracking (after performing 4 iterations of it).
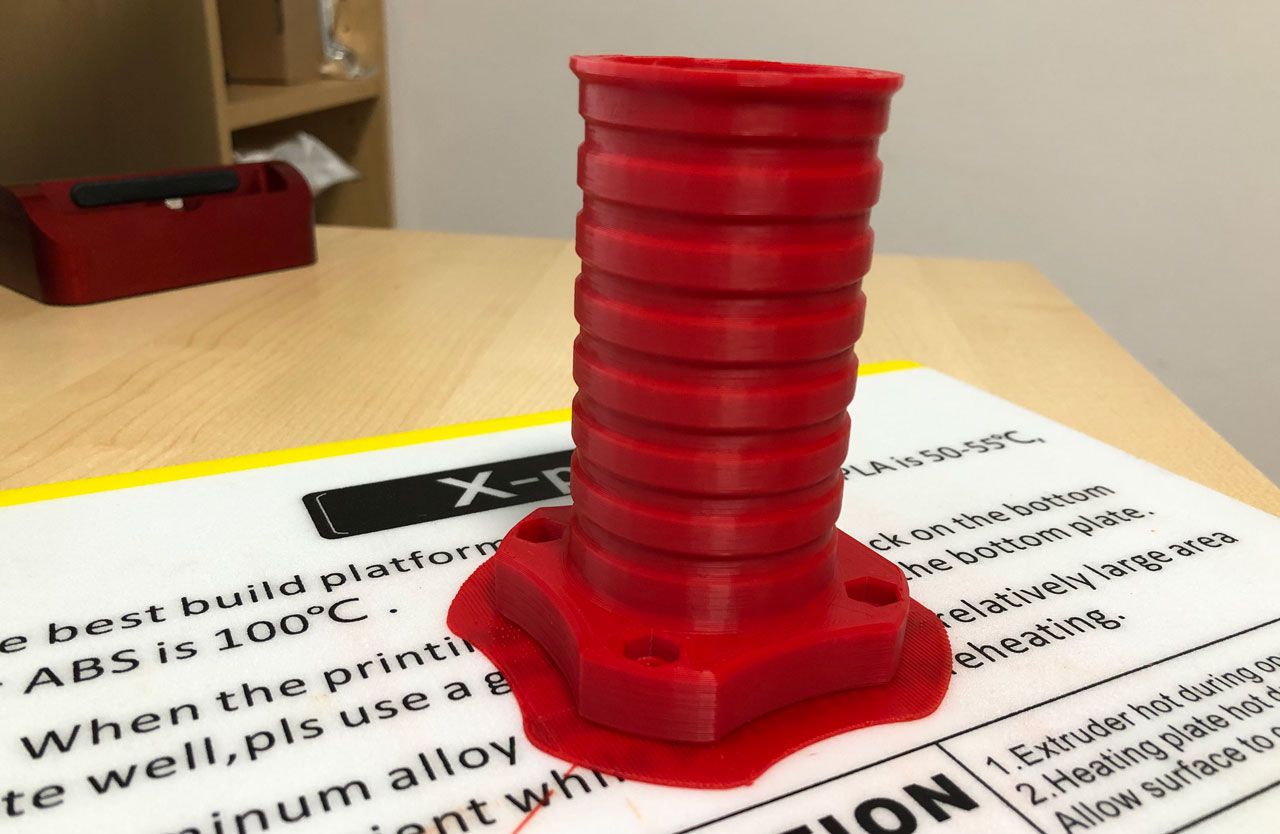
In this piece I set the temperature of the nozzle (or fuser) to 250ºC, the printing surface to 105ºC and the speed to 30mm / s, to achieve the best possible adhesion between layers.
In addition, I intentionally left the inner part hollow, so that heat accumulates in that area and will help mitigate problems inherent in printing ABS filaments.
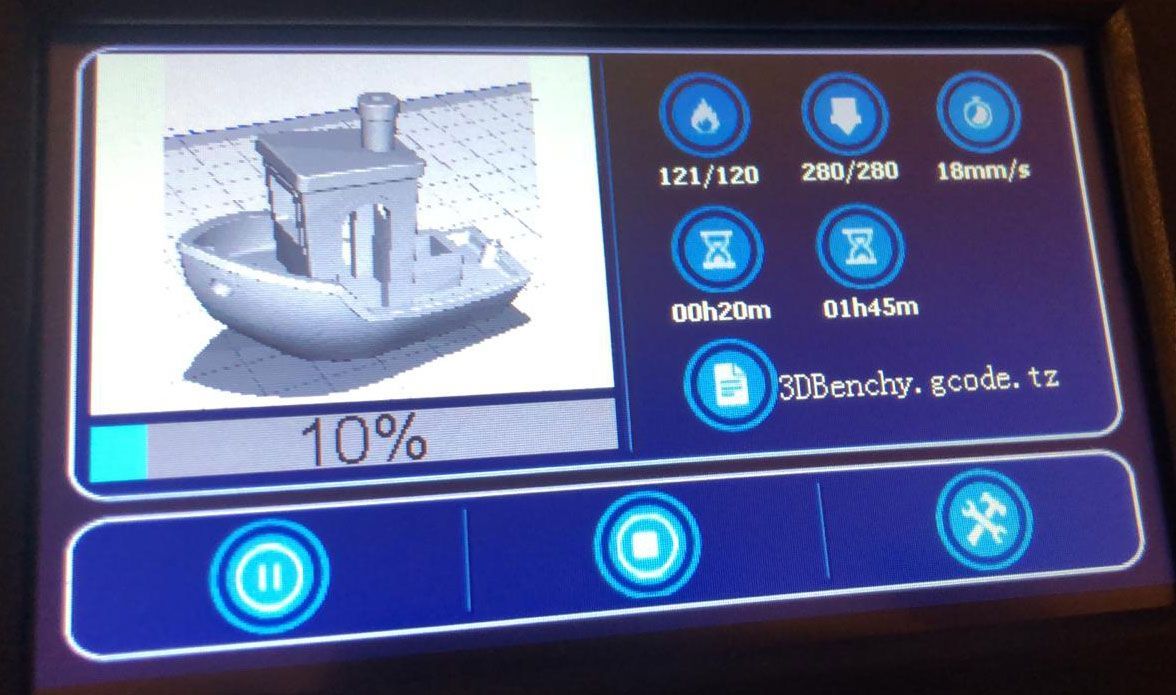
Already working with much more technical and complicated materials to handle, such as Nylon, the ideal is to position the roll inside the cabin.
In my particular case with Taulman Nylon filament, I had to increase the temperature to 280ºC at the nozzle and 120ºC on the printing surface, which heats up in a relatively short period of time without any problem.
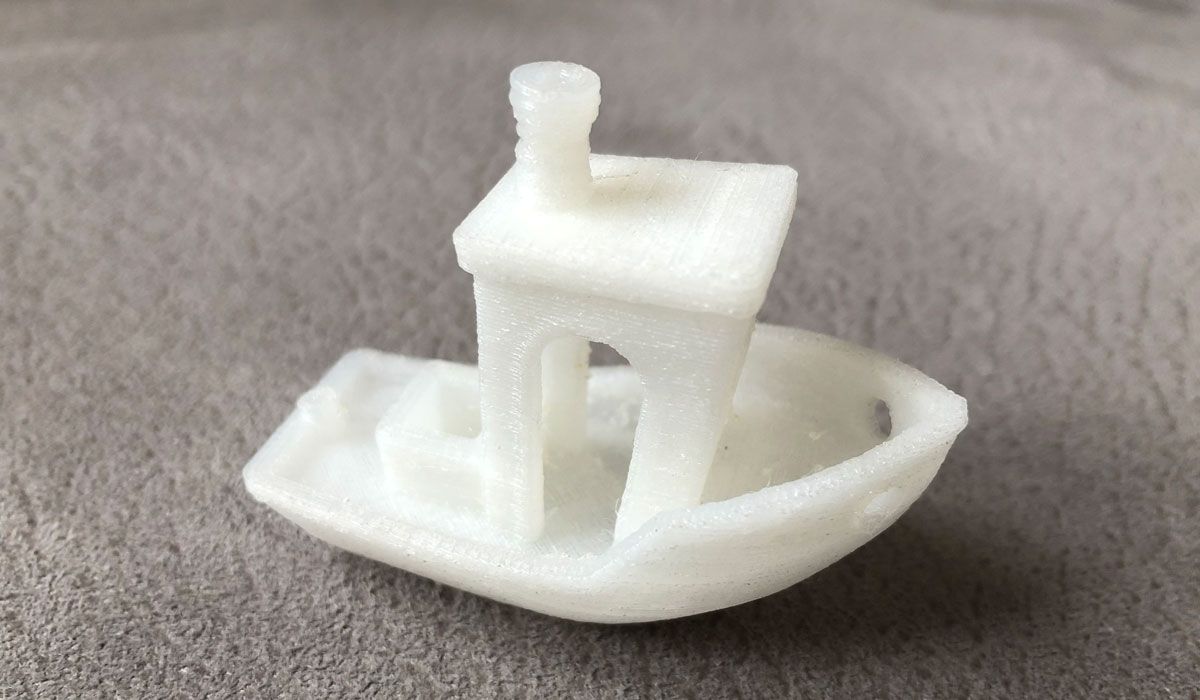
The results are much more than acceptable, considering that my Nylon filament roll is some years old and that there was still some moisture in it after drying it at 60ºC for 4 hours (there were some creaks during the printing process).
And the excellent adhesion to the printing platform at a temperature of 120ºC has prevented the appearance of any type of Warping during the printing process.
Final assessment
From minute zero the company QIDI TECH has been able to interpret an existing need in the market and has guided the range of X-Plus and X-Max printers to this very specific (and forgotten) niche of users.
Neither does it intend to compete in the 150-350 euro range nor should it attempt it in my opinion, as they are products for completely different applications and users.
This need we are talking about is none other than having a versatile tool that can offer us semi-professional features in a desktop printer at an affordable price for small and medium-sized companies in the sector.
QIDI TECH with its X-Plus model presents us with a product much superior to the rest of printers that we are used to seeing for similar price ranges, and fully prepared for printing all types of materials below 300ºC degrees of temperature.
Simple characteristics such as storing the filament inside the cabin, a complete enclosure or impeccable Z axis mechanics will show us why this type of printer is light years away from other similar products, and will make huge qualitative differences when working with them.
When you want to make prints using Nylon or ABS, materials that are a real toothache, that’s when you realize that low-end printers like the Ender 3 or Artillery become a real paperweight, and you start to visualize their deficiencies in a more than evident way. And in this aspect QIDI TECH has paid special interest.
Obviously, like any product and 3D printer that can be analyzed and/or experimented on, some aspects that can be improved will always appear, although I have to say that they do not present any problem for day to day.
I must admit that in recent years I have gotten used to having self-leveling in all my printers (in particular BLTouch/3DTouch). In the QIDI TECH X-Plus the leveling system is manual, so for future versions it would be interesting to have this feature as standard.
It is certainly not a must, and the leveling system on this printer is extremely straightforward with two modes of operation (single and full). If we add it to the fact that it has an impressive 8mm thick aluminum block as a bed, we will verify that there is no deformation and that the process is always carried out correctly.
As a last possible improvement I would highlight the possibility of replacing the use of Allegro A4988 drivers. I will not deny in any way that these drivers are completely valid, and until relatively recently they were the most widespread in our printers.
But drivers like the Trinamic TMC series are offering superior characteristics, and for a printer of this type it would be a very interesting improvement in a possible revision of it.
I sincerely believe that it is the ideal product for any small or medium company that operates in this type of sector, and that is mainly dedicated to offering prototyping or 3D printing services to third parties.
So nothing more, I say goodbye wishing that this reading could have been of interest to you. Other cool articles from 3DWork.io:
- Phrozen Shuffle XL Lite: Large-scale printing, with 2K resolution and ParaLED technology
- SKR GTR V1.0: Complete analysis and configuration with TMC22xx drivers and Sensorless (Marlin 2.0.x.x)
- Adding filament sensor in SKR electronics (MINI E3, v1.3, v1.4 and v1.4 Turbo)
- Hygroscopy: Moisture issues in 3D Printing Filaments
- Post-processing of 3D parts: Much more resistant and airtight with heat and salt
- Marlin Builder: Update with support for version v2.0.6.1 and factory preconfigured firmwares
- Monoprice Cadet: Safe 3D printing for kids and beginners
- New review of electronic BTT SKR MINI E3 V2.0 for your Ender 3 printer
- Closed-Loop Motors: Makerbase MKS Servo42b (Brief analysis)
- Complete guide SKR v1.4 / v1.4 Turbo with TMC2209 Sensorless drivers and Display TFT35 V3.0






DO NOT BUY! All Qidi 3D printers are designed so they can’t be repaired. The too-intricate extruder design is prone to filament jams that you can’t unclog without disassembling the entire thing, which is often impossible because the cheap screws they use tend to strip when attempting to remove them. If by some miracle you manage to take the entire extruder unit apart and remove the clog you will _NEVER_ be able to put it back together again and have it work properly. They keep sending me new extruders (which are a pain to install due to the terrible design) but then they jam and I’m back with an expensive piece of crap. Worst part is I can easily see how they could have designed it to be far easier for the end user to repair/clear/maintain/upgrade but they refuse to even consider input from a customer. DO NOT BUY!
No idea what you are going on about. I do agree that taking the extruder apart is a bit of a pain, but it is by no means impossible and for the life of me I can’t possibly understand how you have damaged one taking it apart. For the record i have had this printer for several years now and it is excellent. Prints nicely and isnt any more difficult than any other 3d printer on the market. They are all finicky and if you dont have the stomach for it don’t try to 3d print. This a a great printer for the money and the ONLY complaint I have is I wish it has auto bed leveling but in fairness when I bought it pretty much NO ONE had auto leveling so I cant fault this printer for that. Ignore the guy above as he has NO CLUE what he is doing or talking about.
True !