Introduction to Warping
Warping is one of the biggest problems, and probably challenges, that any Maker has to face when manufacturing or printing parts with their 3D printer.
Its meaning comes from the English homonym “Warping” and means buckling or distortion of an element. Applied to the context of 3D printing Warping would mean the deformation or contraction of it during the printing process.
The Warping phenomenon is very easy to detect, and produces a very significant lifting of the part on the printing surface. Not only can it cause some part to lift up, but it can cause the part to come unstuck completely, ruining our impression completely and forcing them to repeat the impression.
This lift usually occurs at the corners of the piece to be printed. When they finish at an angle, they tend to generate higher surface tension, and are the most vulnerable parts of our printing. Furthermore, it is important to understand that the higher the temperature we need to melt a material, the greater the chances of Warping during printing.
Why does Warping appear?
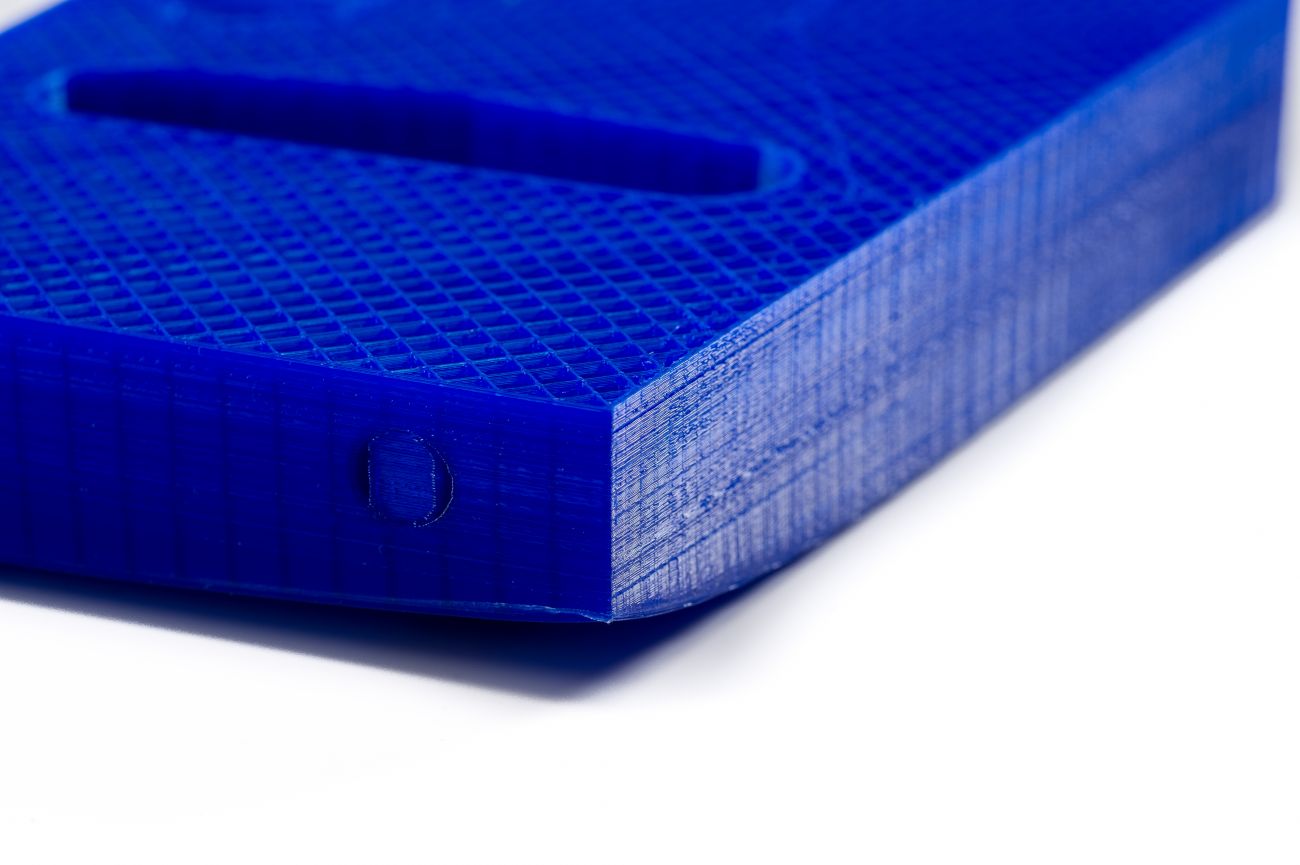
The main reason for Warping in our prints is the shrinkage that occurs from the inside of the pieces due to temperature changes during the printing process.
It is well known that materials tend to expand or contract with sudden changes in temperature, and obviously plastics are no exception. During an impression a contraction can occur from the inside to the outside and produce this lifting without any remedy.
In principle this would be the main reason for its appearance. However, there are many other conditions that can favor Warping. An incorrect ambient temperature or drafts, poor heat distribution on your print bed, leveling errors or dirt on the bed for example.
Differences between ABS Warping and PLA Warping
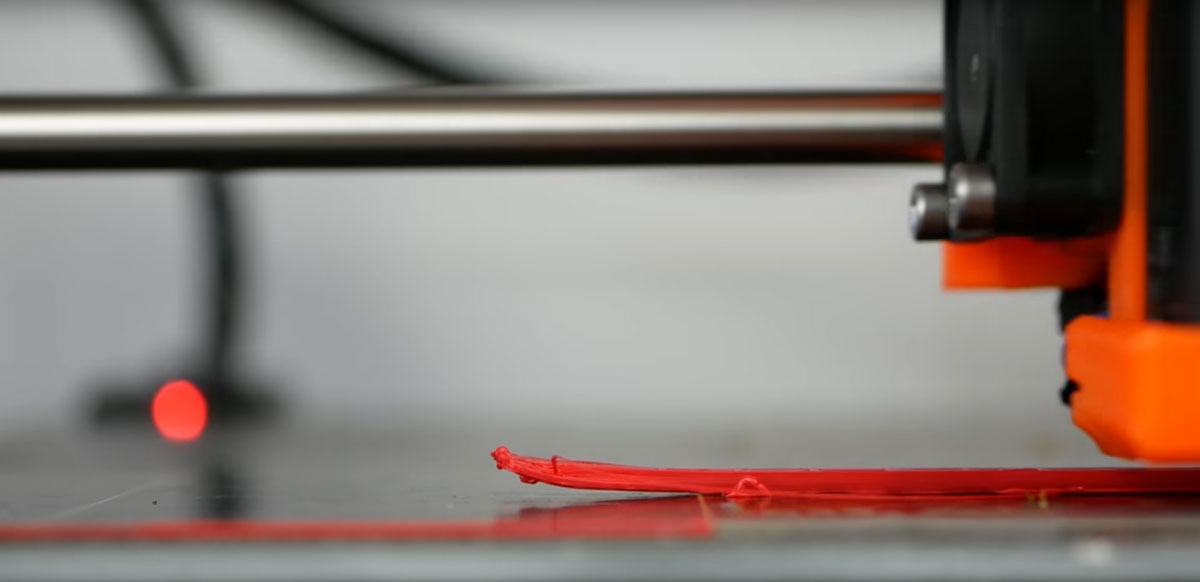
As we discussed in the introduction to the article on Warping, the higher the temperature, the greater the probability of contraction. This means that when we use ABS (or Acrylonitrile Butadiene Styrene) in our impressions, we will generate significant contractions inside the piece.
As you well know, to print ABS it is recommended to use a temperature of 250ºC in the nozzle and about 100ºC in our printing base.
Unlike ABS, PLA (or Poly Lactic Acid) requires 200ºC at the nozzle and about 50ºC at the printing base. With this, when printing with PLA the effects of Warping will be very limited or practically null .
This does not mean that they cannot appear, but if they do, it is more likely due to lack of calibration in the build platform or sudden temperature change among other things.
Avoiding Warping (8 practical tips)
Leveling the build platform
As we have tirelessly repeated throughout 3DWork.io and on our own Telegram Channel, the print quality of the first layer will be decisive. In fact, is the most important layer in the entire printing process.
If our first layer does not finish completely adhered to the build plate (slightly flattened), we will not obtain adequate adhesion. This becomes critical when we use impression materials that are very prone to Warping, such as ABS (or Acrylonitrile Butadiene Styrene) or Nylon.
Self-leveling sensors
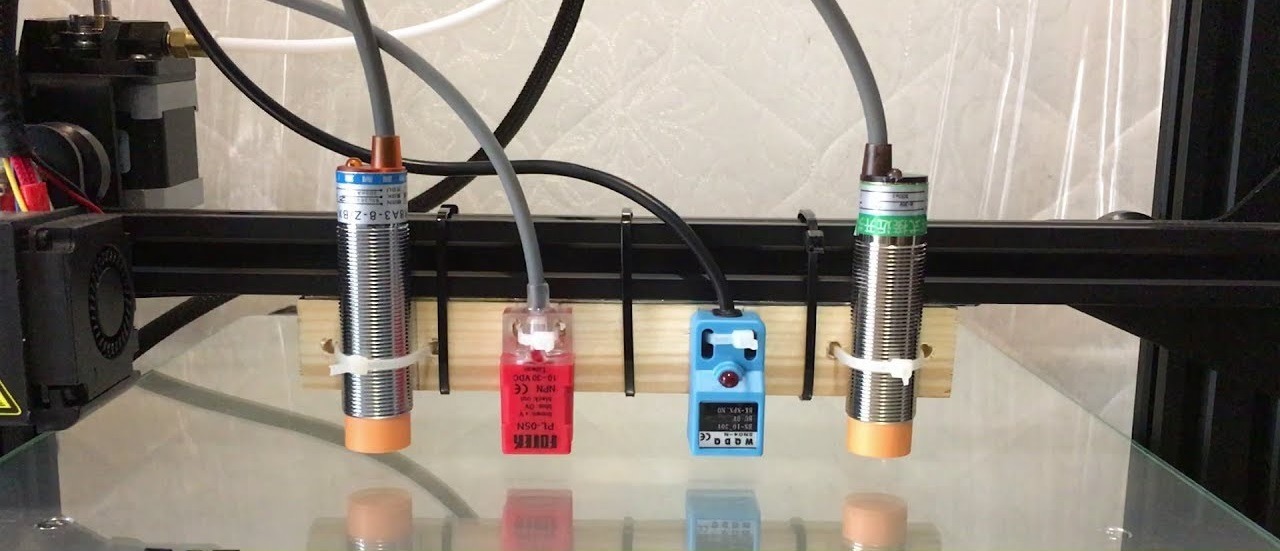
A good recommendation is to use a level sensor, since they are very easy to use and can make your life a lot easier. It is clear that they are not essential at all, you can make completely correct impressions without them, but they are always an extra help.
If your printer does not have a self-leveling sensor , it may be a good time to think about it and buy one. You can buy them from very few euros and there are many types (inductive, capacitive, infrared, etc.) to choose from.
| Sensor LJC18A3-B-Z/BX (1-10mm, NPN) | ||
| Sensor PL-08N (≤ 8 mm, NPN) | ||
| 3DTouch (Geeetech) | ||
| BLTouch original (Antclabs) | ||
| Pivot IR Sensor |
Also, if you have a commercial printer without a sensor, don’t worry, since there are countless updates made by Internet users who have already purchased and previously mounted them on their machines. In Thingiverse you will find many of these fully tested updates available ready to download and print.
Once your sensor is installed, you must give support to the firmware of your printer (Marlin, Sprinter, Repetier, etc.) to get it to work. And if you use Marlin, we recommend that you take a look at our article Complete guide: Configure Marlin 2.0.x from scratch and not die trying that will be able to help you in this regard.
And in the event that you acquire a 3DTouch / BLTouch sensor, which we highly recommend due to its high precision and zero variation due bed temperature, you can always consult our article Install and configure BLTouch / 3DTouch in Marlin 2.0.x to mount it on your 3D printer very easily.
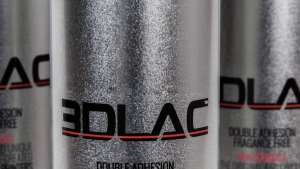
Improving adhesion (3DLac, Kapton, Tape, etc.)
Getting a perfect first layer impression will not always be the solution to our warping problems. There are many products on the market that will improve the adhesion of our pieces to the printing base.
Here we list some of them, so that you take them into account and do your own experiments. Indicate that they can also be combined with each other. In my particular case, I usually use Kapton tape when printing a piece is too complicated and on top of it, a little lacquer, or masking tape. This way you get a fairly effective fixation.
3DLac
3DLac is a Spray format product developed specifically for use in 3D printing. It is chemically formulated to give a strong adhesion to the pieces. Its operation is very simple, just spray a little product on our printing base before starting the process. A little bit is enough, you do not have to flood the bed, and try to spray from approximately a hand’s distance so that it is distributed correctly.
If you don’t have 3DLac, a good alternative you can use is Nelly hairspray. As a curiosity, it should be noted that the company that manufactures Nelly lacquers is the same one that developed the 3DLac formulation.
The only differences between Laca Nelly and 3DLac is that for the production of 3DLac they improved their formulation and eliminated the typical lacquer smell that is so annoying to some. In short, 2 totally essential products when it comes to improving our adherence and avoiding warping.
| 3DLac | ||
| Nelly |
Wolfbite
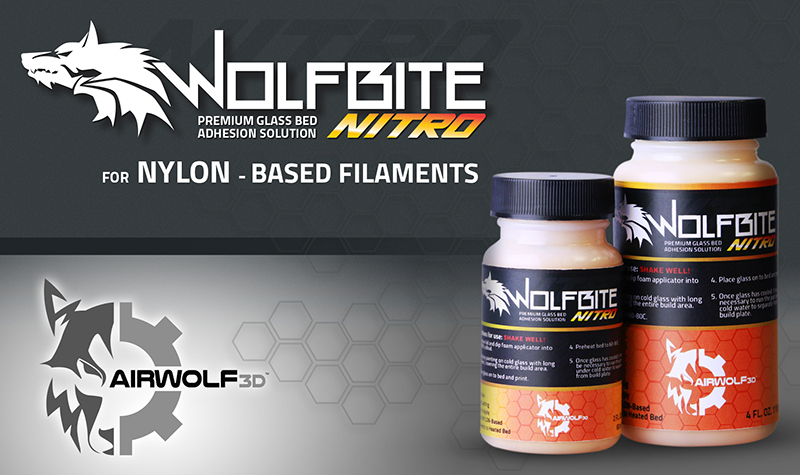 Wolfbite is another commercial 3D printing adhesive chemically formulated to improve the grip of our parts. There are many variants, as you can see in its official website.
I personally have not had the opportunity to test this product. However, I have decided to review it as it seems to have quite a few good reviews. If you have the opportunity to try it, do not hesitate to give us your opinion at the end of the article, in the comments section.
| Wolfbite adhesives |
PEI sheets
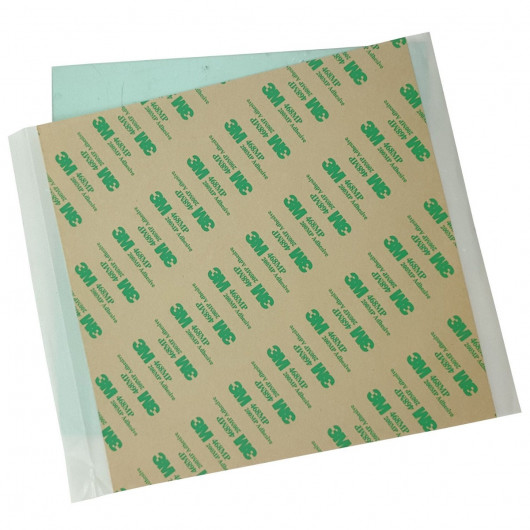 As its name suggests, PEI is laminated and can be easily placed on any printing surface.
There are countless sizes and brands, so it won’t be difficult to find one that’s the right size for your printer. They are usually about 0.2mm thick and can be easily trimmed.
The installation process is very simple, simply by placing it on top of your printer base. Some include double-sided stickers.
Unlike Kapton or tape, you will not have bubble problems. They offer a more than correct adhesion with all materials, except Nylon.
| PEI Sheets |
Kapton tape
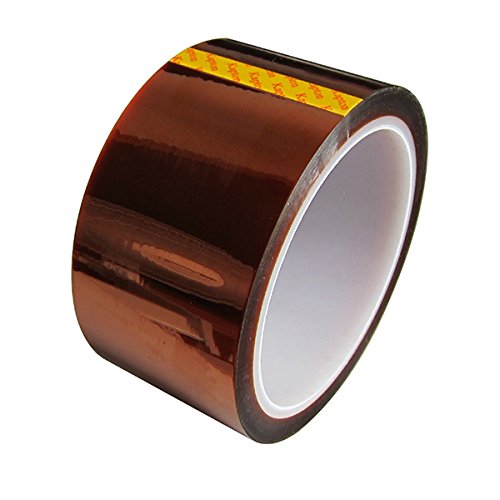 This type of tape withstands extremely high temperatures and is often used in electronics to protect components when welding or stripping parts.
Apart from that application, it can be applied without any problem on any printing surface, and will give us an amazing adherence to our prints.
Ideally, it is to combine it with some type of spray (such as 3DLac or Nelly) and we will considerably improve the grip. These are basically the ones that I always use in my ABS prints and I am quite satisfied.
You have different widths, and obviously the wider the width, the easier it is to apply on your printing surface. The only downside is that sometimes it can leave some residue when you remove it, but with a little alcohol and a plastic scraper you should not worry in the least.
| Kapton tape |
Masking tape
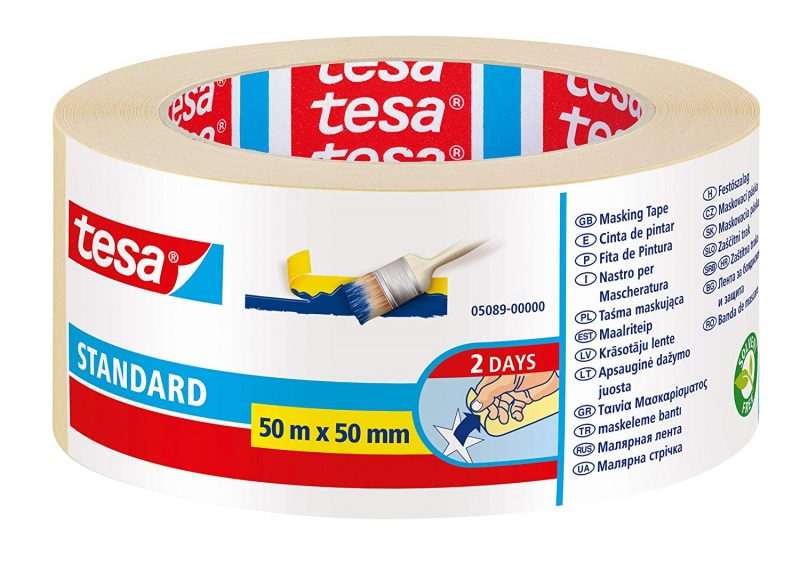 We all know what masking tape is. Surely you have used it on some occasion when painting a room in your house, or in a piece for post-processing.
It is cheap, it is available in any local store and it offers you, like Kapton tape, a good adhesion.
The point in its favor about the Kapton tape is that its price is not that high, since it is quite cheap.
| Masking tape |
Glue stick
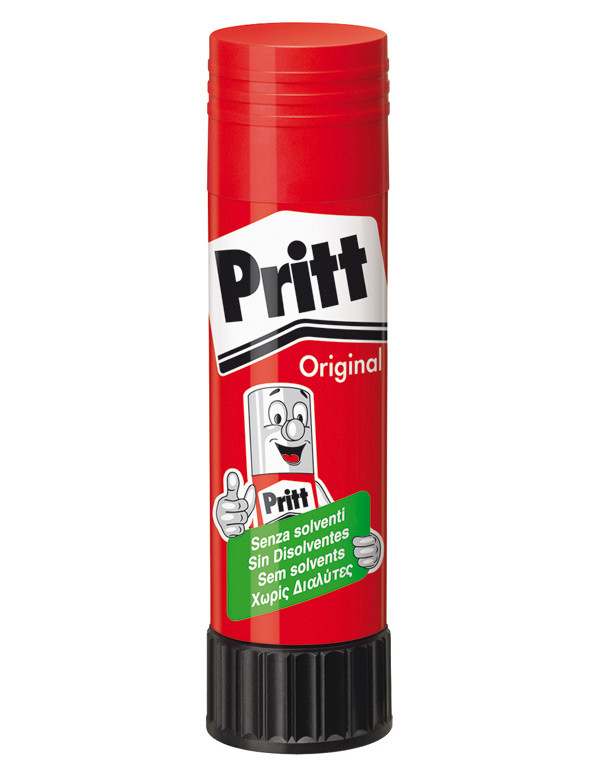 Glue stick is another available alternative and some printer manufacturers even include a stick when purchasing their products. The way to use it couldn’t be easier, we simply add a little glue to the printing surface and that’s it.
Some users prefer to dilute it with water and use a brush to “paint” the glue onto the glass. In this way it can be distributed more evenly and using a smaller amount of it, something that we will appreciate when cleaning the printing surface.
| Glue stick |
Diluted ABS solution
As with glue, we can dilute a few pieces of ABS in acetone. Cut out a few small pieces of filament with scissors, put them in a small container and add a little acetone. This will dissolve the ABS completely. This will create a paste that you can then use to “paint” the printing surface with a brush.
Needless to say, this method is only applicable to ABS as we use acetone. However, if you want to print on other materials, you can always dilute them by looking for the corresponding chemical and applying it in the same way on the printing surface.
Preparation of the pieces (Brim, Skirt y Raft)
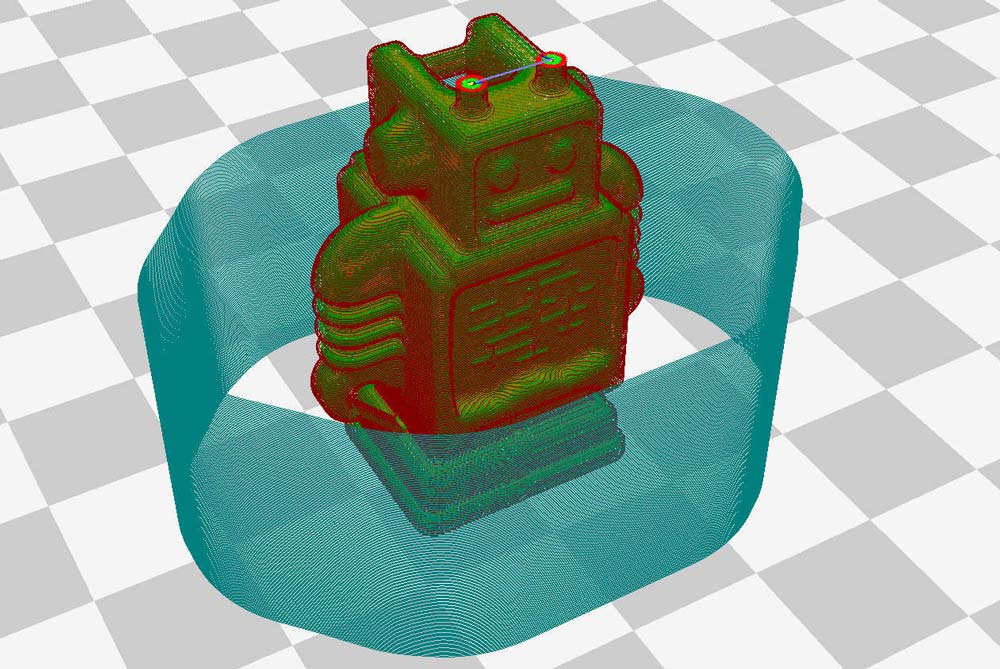
The preparation of the pieces is essential to prevent the problem of warping. Practically all slicers have functions that will help us solve these problems. Therefore, it is very important to know them and use them in our impressions when necessary.
In addition, it should be noted that warping usually occurs more easily in the corners than in more rounded parts of the pieces. A rounded corner always tends to improve upward tension. This means less stress and less deformation, and of course, more chances of success. If in the way possible, in the design phase, you can add rounded corners, do so.
BRIM function
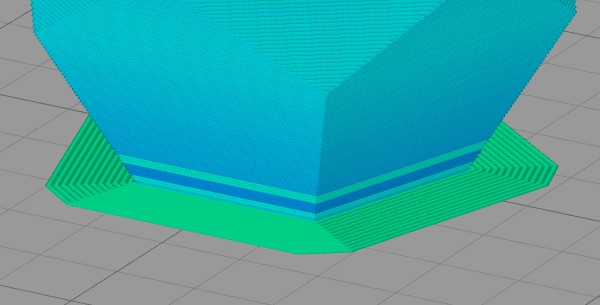
The BRIM function will print several contours or perimeters that we will define around our piece. It is normally used to clean the nozzle before starting printing, but we can configure it to increase the adhesion of the part to the printing surface.
What we must do is tell it to make us a certain number of perimeters (for example 10mm.) At distance 0 from our piece. In this way, a kind of ring will appear around it as we can see in the image above.
SKIRT function
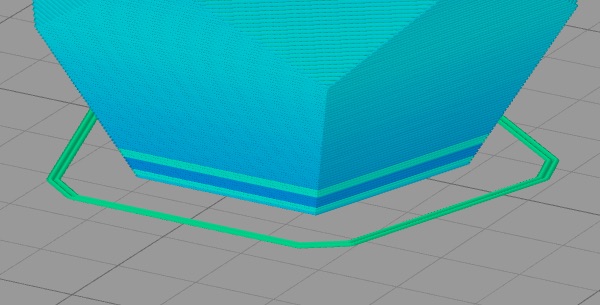
The SKIRT function is actually contours that we will make around a piece at a certain distance, as if they were rings. The difference with BRIM is that they don’t touch the piece.
A trick that we can do with SKIRT is to make a contour at a certain distance from the part (for example 10mm.) And that has an identical height to the same part. This will generate a kind of shield around it. The interesting thing about this shield is that it will better retain and conserve heat, thereby increasing the chances of success of our printing.
RAFT function
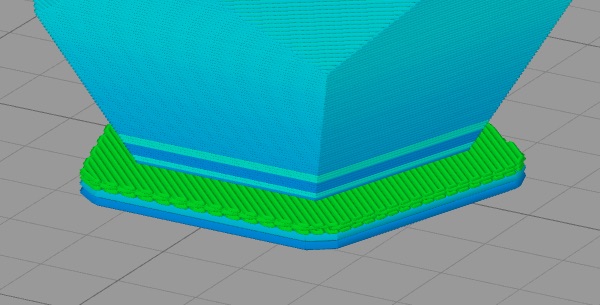
The Raft function generates a raft that is printed directly on top of the build platform to counteract warping and improve adhesion of the printed object. On this raft is where our piece will be printed later, obtaining a great adhesion.
First layer print and infill
For the printing of our first layer it would be advisable (although not essential) to increase the layer height. If, for example, you have the normal layer height set to 0.2mm, you could raise the value up to 0.3mm in the first layer.
In addition, printing this first layer at low speed will also avoid possible errors and increase the chances that we will not suffer warping much later. To print ABS or Nylon a speed of 30mm/s would be recommended.
Another parameter that we must modify is the infill. It must be taken into account that the retractions suffered by the printed pieces are higher the more filling we add in the Slicer configuration. It may seem little, but a 5% fill is usually more than enough for pieces that do not have any mechanical application, and are going to be of an ornamental nature.
Temperature of your printing surface
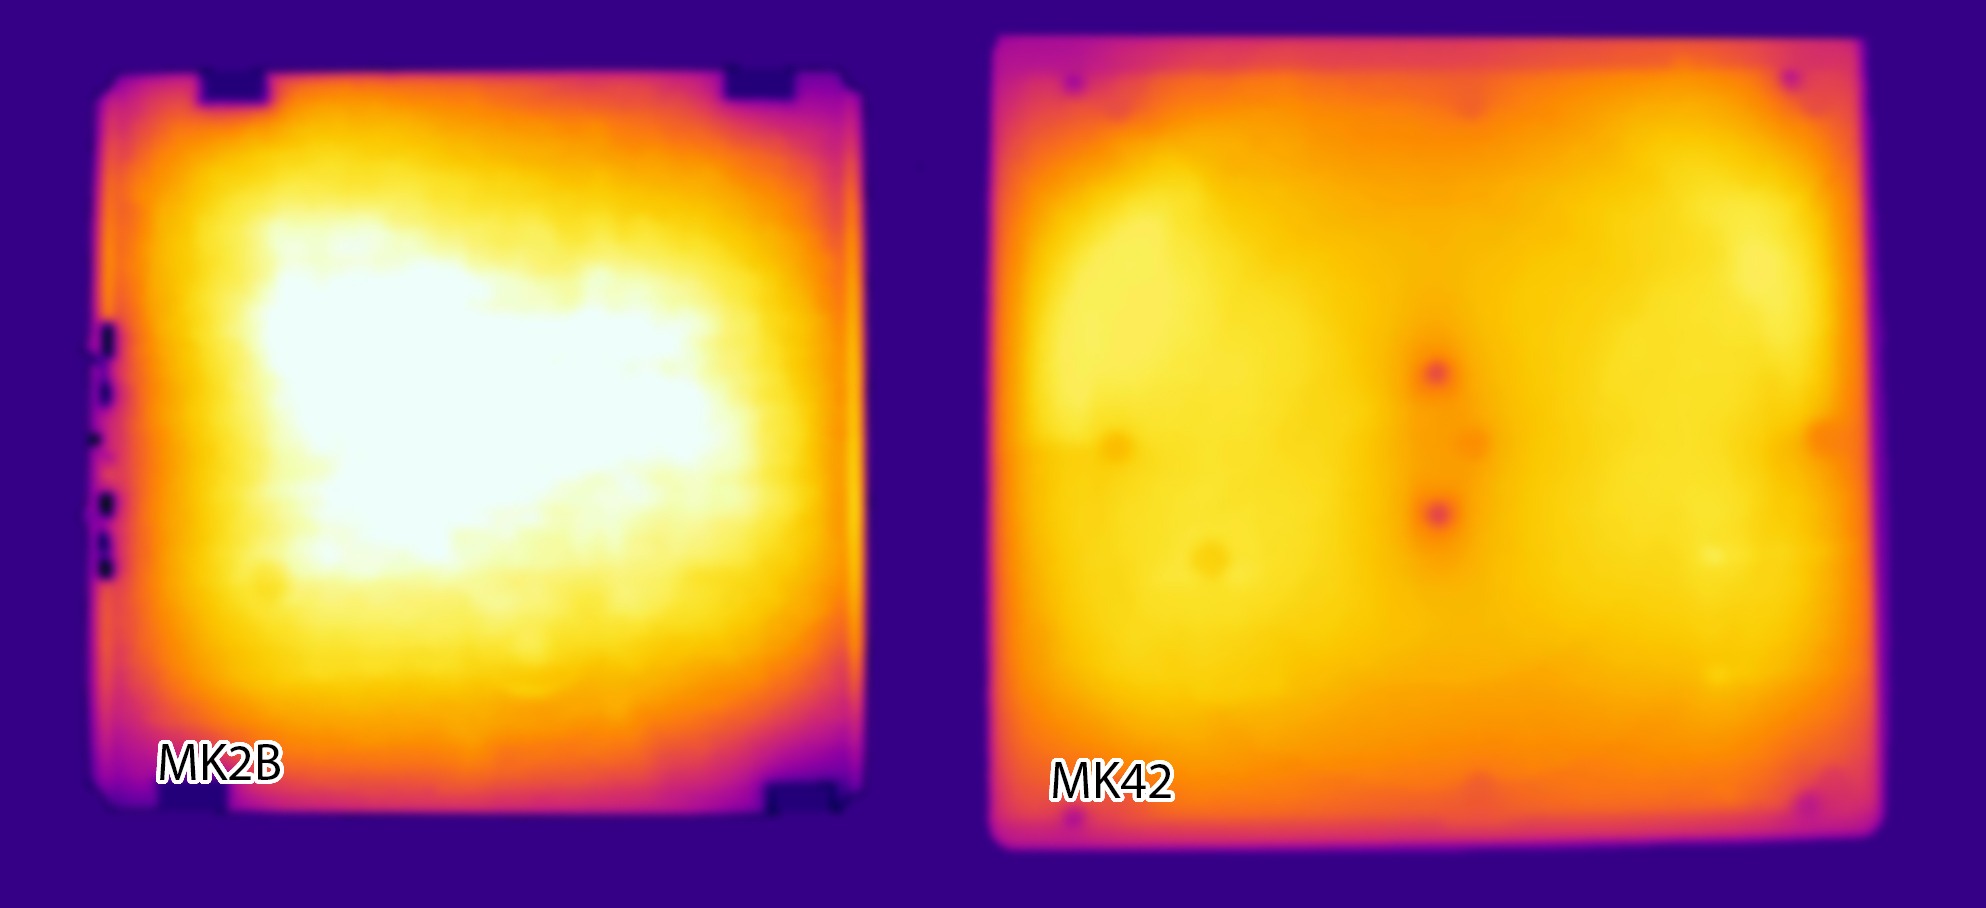
When it comes to avoiding the warping problem, the temperature of your printing surface is more than a determining factor. This reduces the chances of your piece coming off and keeps it warm throughout the printing process.
In the case of ABS, Nylon or similar filaments that require high temperatures, it becomes completely essential. In these cases we recommend setting a temperature of at least 90ºC on your printing surface.
You must also take into account the correct distribution of heat on the bed. A good idea is to leave the bed at 100ºC for 5-10 minutes and not just start printing when you reach the set temperature. The fact that your thermistor indicates 100ºC does not imply that each and every part of the bed is necessarily at that temperature.
Another added problem is that some beds do not heat evenly the entire surface. That has no easy solution, unless we replace the bed with a higher quality one. However, if you make a lot of parts in ABS or materials prone to Warping, my recommendation would be that you invest a little more in a good impression base.
Finally, check that there are no drastic temperature changes in your work area (for example an opened window). These will ruin your impression, since oddly enough they can lower the temperature of the bed by several degrees, and make the Warping make an appearance.
Increasing the recommended temperature
Another quite effective option consists of increasing the standard temperatures that we usually use on our printing surface for the different filaments that we use.
Everyone knows that to print in PLA a temperature of 50ºC is recommended, but we can print complicated pieces or those with little adherence at 80ºC to give you an example. The result is a fairly significant increase in adherence.
 In the case of ABS, due to technical limitations, it is likely that you will have more difficulty rising than the recommended 100ºC on your printing surface.
For example, I had quite a few problems to go above 95ºC, but changing the length of the cables to the bed and increasing the section I avoided voltage losses and I reached 100ºC without problem.
In this article you can find 6 Tricks to increase and improve the temperature of your heatbed, it is an interesting reading so I recommend that you take a close look.
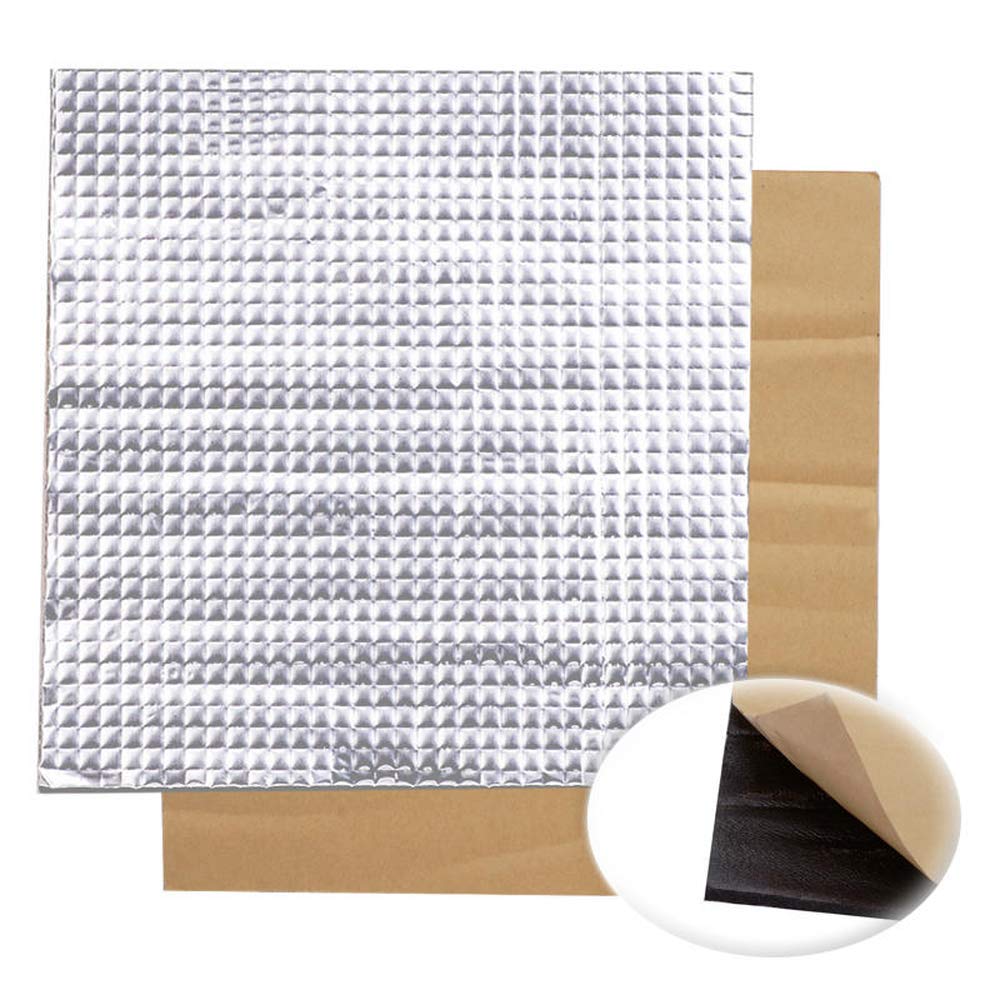
However, in order to reach 110ºC I opted to add insulating foam to my print bed. In this way, you largely avoid heat loss, and you can exceed the maximum temperatures that your bed currently offers you. Now for ABS prints I put 110ºC directly and I get an extra adhesion. It is not that it is something overwhelming, since it is a small differential, but as I always say, everything adds up.
Another advantage of thermal insulation foams is speed. In a room with a room temperature of 22ºC, my bed took approximately 13 minutes 25 seconds to reach 100ºC. After adding the thermal insulation foam I went to 9 minutes 50 seconds which represents an increase in speed of approximately 30%.
Enclosure of your printer

One of the drawbacks of printers based on the original Prusa model is that they lack any enclosure. Having a closed compartment in our printer will considerably increase our chances of correctly printing a part without signs of warping.
In addition to preventing warping, we will also avoid having another typical problem called cracking (breakage of the piece between upper layers), which is also produced by the same temperature retractions.
You can find different ways of making enclosures. There are people who use IKEA tables as you can see in the photo above). Others make complete methacrylate boxes or if you don’t want to complicate your existence you can even use a large carton box.
In fact, the latest versions of Marlin 2.0.x already support temperature management in closed rooms (Chambers), in addition to controlling the bed (Heatbed) and the fuser (Nozzle). Yes, it is not something that we see in normal desktop printers, but it is a feature that all professionals incorporate as standard, for a good reason.
You can also find commercial enclosures on different marketplaces, without the need to prepare a “homemade” solution, investing excessive time in it. They are usually flame retardant protective covers, which completely cover our printer.
| 3D Printer enclosures |
Cleaning the printing surface
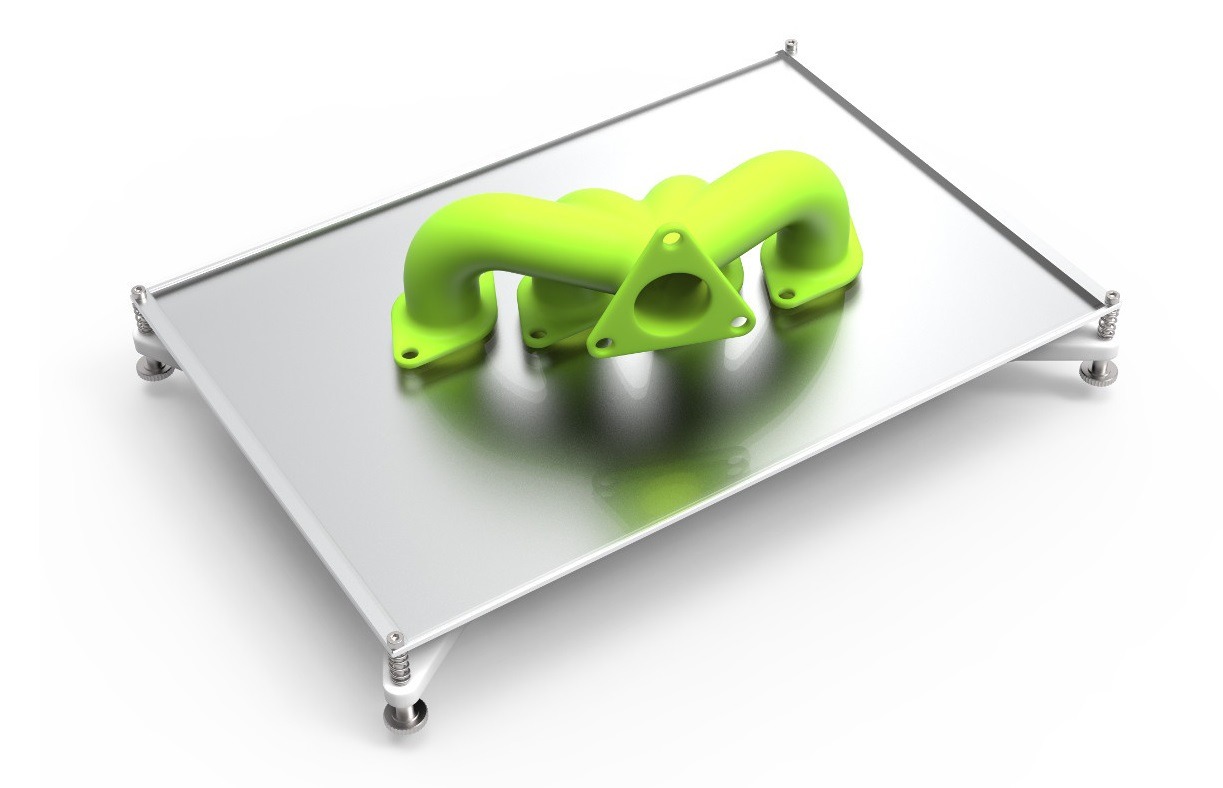
You should always make sure that your printing surface is as clean as possible and without any grease or dirt. I know that sometimes it can be lazy, but it is something quite important since otherwise the adhesion of your pieces will be compromised.
You must clean the surface thoroughly. You can use different window cleaners or simply alcohol. If you have a better than better scraper, remember that everything adds up in our fight against Warping.
Having said all this, I think there is little more we can add to our article. If you think we have missed something, please feel free to indicate it in our comments section at the end of the article.
We hope and hope that all these indications can be of some help to you to eliminate warping from all your 3D prints.
Other cool articles from 3DWork.io:
- Phrozen Shuffle XL Lite: Large-scale printing, with 2K resolution and ParaLED technology
- SKR GTR V1.0: Complete analysis and configuration with TMC22xx drivers and Sensorless (Marlin 2.0.x.x)
- Adding filament sensor in SKR electronics (MINI E3, v1.3, v1.4 and v1.4 Turbo)
- Hygroscopy: Moisture issues in 3D Printing Filaments
- Post-processing of 3D parts: Much more resistant and airtight with heat and salt
- Marlin Builder: Update with support for version v2.0.6.1 and factory preconfigured firmwares
- Monoprice Cadet: Safe 3D printing for kids and beginners
- New review of electronic BTT SKR MINI E3 V2.0 for your Ender 3 printer
- Closed-Loop Motors: Makerbase MKS Servo42b (Brief analysis)
- Complete guide SKR v1.4 / v1.4 Turbo with TMC2209 Sensorless drivers and Display TFT35 V3.0








A good read. I did miss a segment about draft/ooze shields to keep the heat in for printers without enclosure (the skirt part somewhat mentions it, but falls short of explaining the concept. Also, it would’ve been a good idea to mention ASA (or ApolloX) along ABS, since its print characteristics are identical (it’s just UV stable and suitable for outdoors). Also, Polycarbonate should have been mentioned as a warp-prone material.
Last but not least, I would have added a section about “soft” stick agents versus “hard” ones. Soft agents like glue stick, masking tape or ABS juice allow the print to shrink a bit while keeping it on the bed, hard agents (e.g. glass with Kapton, pei coated beds etc) don’t, so if the print does shrink, you’re doomed..
Hello Daniel,
Thanks a lot for your comment, you are totally right, and I assume that always this kind of articles will be incomplete due the big amount of information you can expose.
Btw, as I usually say, this articles are a good start point for do your own research. I appreciate a lot your comments and other users/readers too, I am sure.
Best regards!
Peter