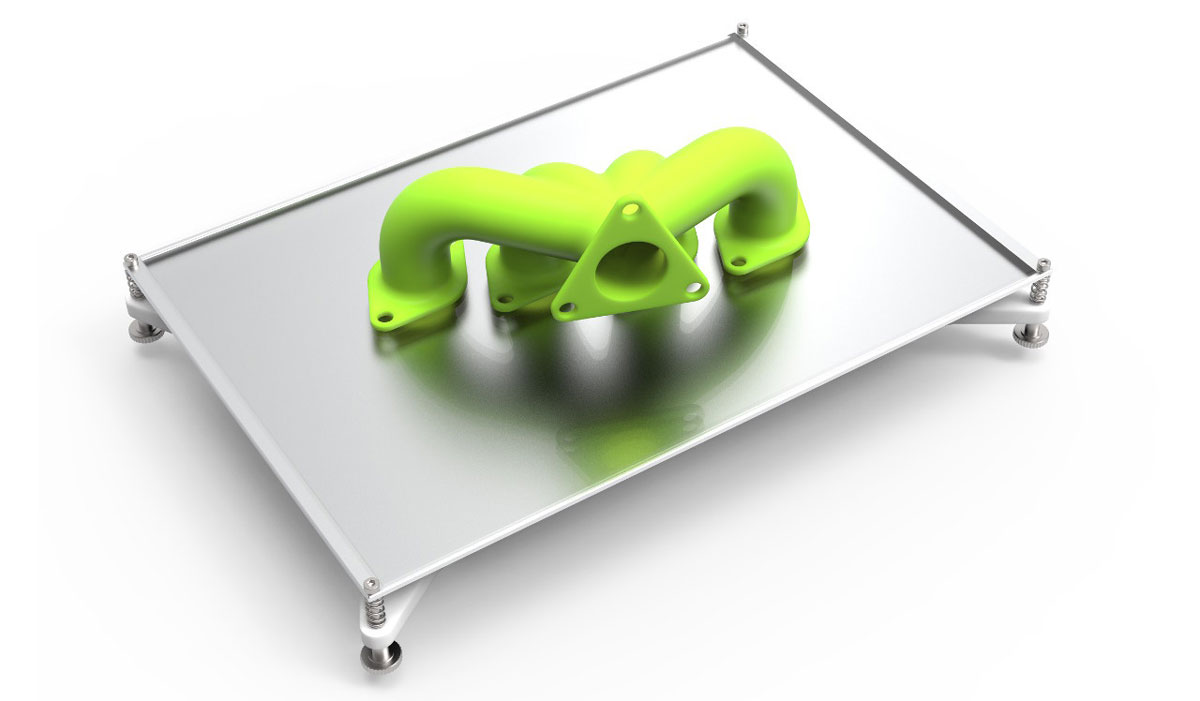
As you well know, temperature is our best ally when it comes to printing parts with our 3D printer. Having a decent bed that can easily reach 100/110 degrees is very important , and will help us avoid possible Warping problems with more technical materials , such as ABS, Nylon or HIPS.
Many of these materials require quite high bed temperatures, and here every degree that you can scratch your electronics is important, believe me. By the way, very recently we talked about the temperatures of existing filaments in a very interesting article: Definitive guide to 3D filaments for your printer
Returning to the topic that concerns us, not only a good bed prevents us from possible Warping problems . It will also reduce another fearsome lesser known drawback called Cracking, which can give you quite a few headaches.
The cracking problem appears during printing in the middle and top of the pieces, as they are away from the heat given off by the bed. What happens is that the internal stresses that occur when the plastic cools, cause the same piece to retract and separate the layers between them. And it is not an easy problem to solve even increasing the temperature of the bed, I assure you.
The ideal solution is a good hermetic seal for our printer. And if you already have it, increasing the temperature of our bed as much as possible will go a long way in achieving a warmer cabin, which will reduce these tensions considerably.
Think that everything that you can increase the temperature of your bed in degrees will result in more probabilities of successfully finishing your impressions. If you can print ABS, Nylon or HIPS materials with the heated base at 105ºC better than 90ºC, as long as your electronics and hardware allow it.
Introduction
In today’s article I want to expose some recommendations or tricks that will possibly help you to increase the operating temperature of your bed a little. And of course, the management of the same via Marlin in case you use this firmware on your 3D printer.
They are very simple recommendations, which personally helped me to increase the temperature of my bed up to 110ºC (from 300 × 200 and 3mm aluminum), since at the beginning it was completely impossible for me to go beyond 95ºC.
YES, I must say that my 3D printer did not have a Mosfet, so I directly connected the bed to the electronics that I had at that time, an MKS Gen v1.4. Also my power supply was 12V and not 24V, something that is always more recommended. So I certainly found the worst possible scenario to be able to reach very high temperatures.
As always, I remind you that we have a great community on our recently launched Telegram channel, where we share our doubts and experiences. You can probably find us there by clicking the link below. So without further delay we go with the recommendations.
Some recommendations
Installing a mosfet to your heated bed
The first (and most important) recommendation would be to install a suitable Mosfet for your heated bed, especially if you power your electronics at 12V. A Mosfet is a security element that acts as an electrically controlled switch, and it will help us to avoid the passage of all the current in the bed through our electronics and to manage it in a better way.
Think that not only the current from the bed passes through our electronics, but also that of the Hotend, the drivers that manage the motors and the different elements that we have configured. By reducing your workload you will avoid possible security problems, since these devices can manage and dissipate all the heat generated without any problem (up to 40A).
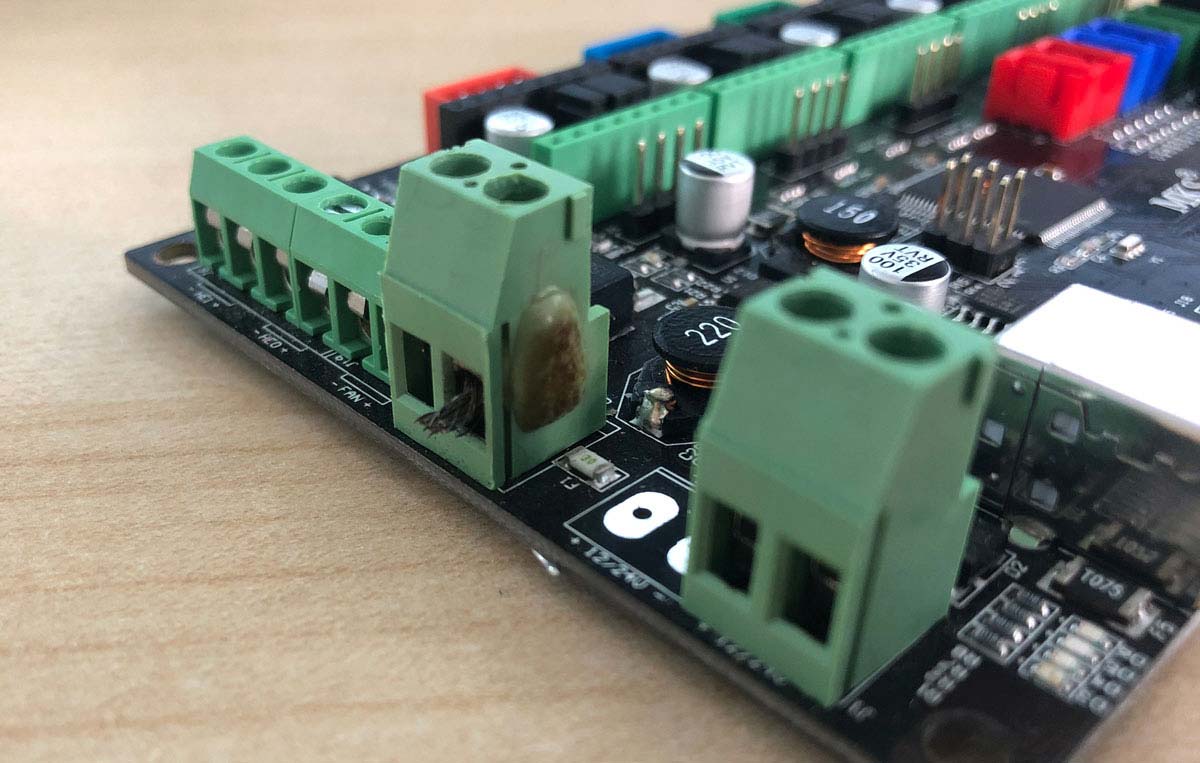
In the image above you can see what happened to my old MKS Gen v1.4 a couple of years ago, and now I save it for possible spare parts. It overheated in the connector and melted inside.
Although the problem did not go further, it is a fairly clear warning to never leave our printers completely without ever monitoring . This is something that we always emphasize in 3DWork.io, since at any given moment any unforeseen event can arise, and we do not in any way want that to happen.
In case you need a simple way to manage your printer remotely, do not hesitate to consult our article Octoprint: Manage your 3D printer remotely with Raspberry Pi and Octopi, and you will find it of great interest.
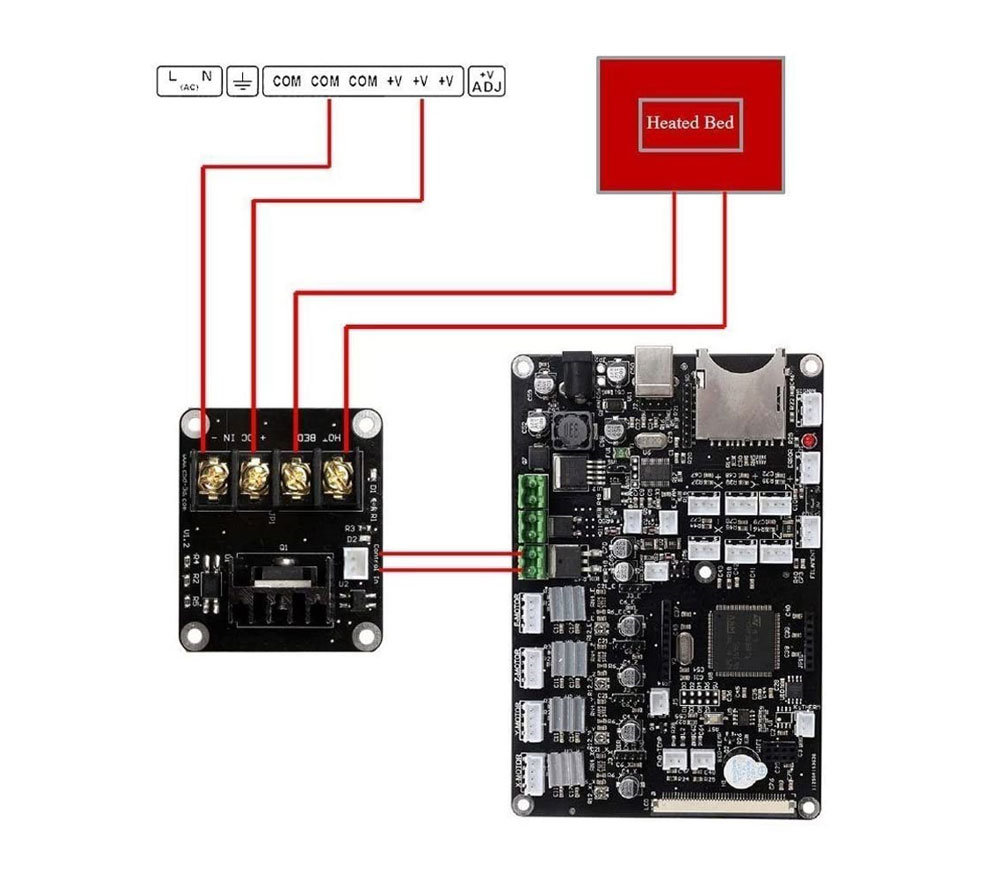 Installation is a very simple process as you can see in this image. Simply wire the Mosfet from the power source.
Then connect the two cables of your bed in the same Mosfet, and finally to our electronics. In this way it will act as a relay, allowing the current to pass directly from the source to the bed when Marlin gives you the order to heat our printer dock.
It is a more recommended update for 12V electronics , it must be said. And if you wish, it can also be added to our Hotends, although it is not really necessary, since today’s electronics can handle it without any problem.
| Mosfet BIQU | |
| Mosfet HiLetgo 2pcs (30A) |
Thermally insulate the bottom
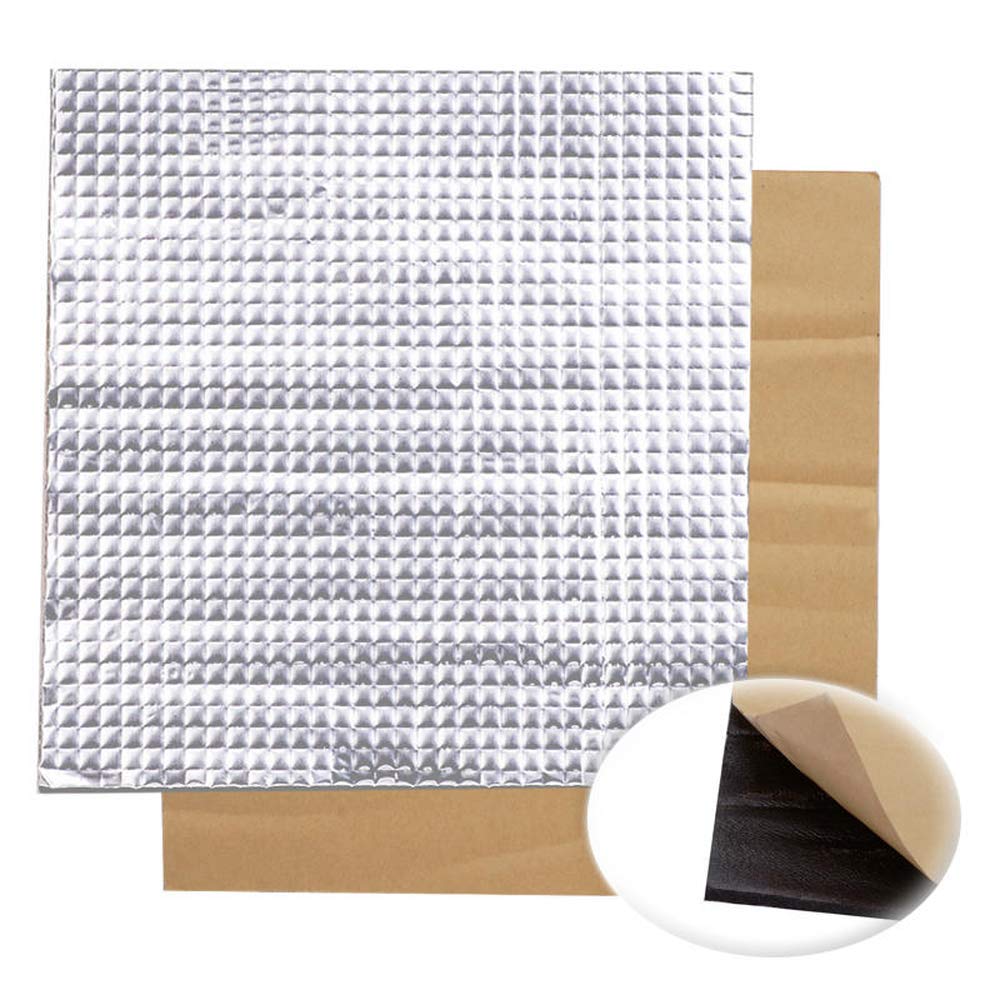
Thermally insulating our bed is another of the important improvements that we can make to increase the temperature of it. There are different solutions on the market to avoid heat loss from our beds, such as insulating foams, as you can see in the photo above or cork.
I opted for an insulating foam and the result was more than spectacular. I bought the foam of 300x300mm, so I had to cut it out and then glue it to the bottom. Simply remove a film that protects the face with the adhesive and position it correctly.
Do not forget to cut the foam well and leave a hole where the soldered cables of the bed (or the connector in other cases) are, with a small enough window. I will not deny that at first it gave me a little bit of mistrust, heating a foam iron at 100ºC worried me. But after many hours and impressions I have not had any problem, so I highly recommend it.
The insulation foam will mainly provide you with 3 advantages:
- It will avoid a great loss of heat from the bed at the bottom and it will not need as much energy to stay at a stable temperature.
- It will stabilize the temperature of the bed itself , since there will be less temperature variations.
- And finally, will increase the heating speed of it, obviously.
In the room where I have my printers, which is normally at an ambient temperature of 22ºC, it took approximately 13 minutes 25 seconds for my bed to reach 100ºC. After adding the thermal insulation foam I went to 9 minutes 50 seconds, which represents a not insignificant increase in speed (approximately 30%).
You can buy them in any online store (Amazon, Aliexpress, Banggood, etc.). I personally opted for Amazon for speed. I leave you some affiliate links, just below these lines:
| Heated bed foil insulation 300x300mm | |
| Heated bed foil insulation 200x200mm |
Activate and configure PID Tuning for your heatbed
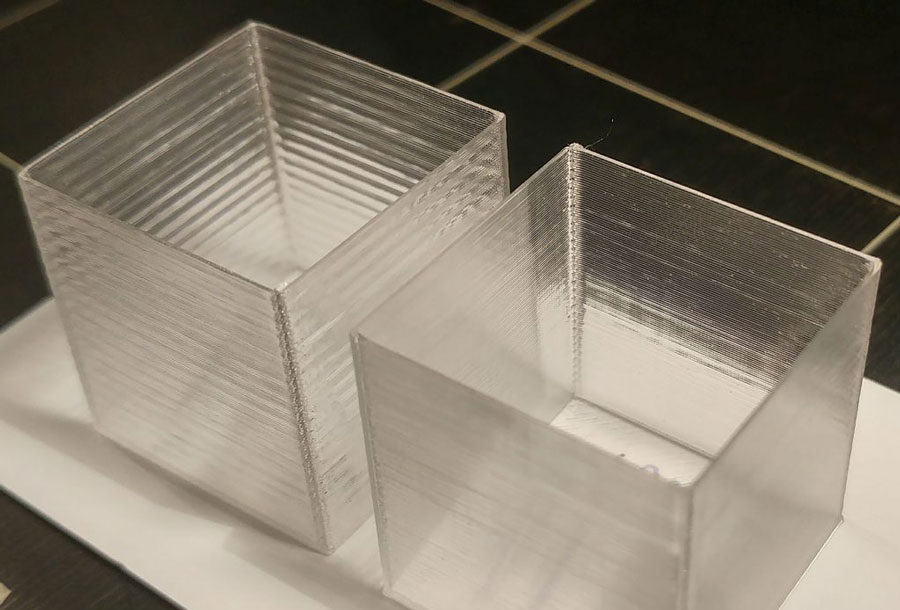
Failure to perform a correct PID Tuning can lead to bed heating problems, drastic temperature variations and even the quality of the printed parts (as you can see in the image above).
PID Tuning is basically a control algorithm that Marlin uses to manage the temperature of our melter (Hotend) and of our bed (Heatbed). This algorithm uses 3 values to correctly define the temperatures, which are K , P and I .
If you are interested in learning much more about PID Tuning I highly recommend you take a look at the following article at REPRAP on Pid Tuning .
However, it is important to note that in some cases and in certain electronic ones, the opposite may occur . That after activating Pid Tuning and configuring it for our printing surface, the pieces present a significant loss of quality. When distinguishing between signals for the Nozzle and for the bed inductances can appear.
This is usually due to quality/protection problems in our electronics, power supply, cables, etc. So if that’s the case, you shouldn’t turn it on and leave the default Bang-Bang mode that Marlin uses. A Mosfet will always isolate you from this type of problem , since it does not load the electronics with the consumption of the bed as we explained in the previous point.
How to extract K-P-I values
After mounting a 3D printer, and especially if it is a “custom” design, it is always recommended to perform a PID Tuning and then configure the values obtained in our printer. The test is very simple to carry out and will hardly cost you a few minutes. Also, if you are trying to “fine-tune” your printer it becomes an essential test.
By default in Marlin, the PIDTEMPBED option will be disabled. If you have a heated bed you should uncomment this option, as you can see in my Marlin configuration.
//===========================================================================
//====================== PID > Bed Temperature Control ======================
//===========================================================================

/**
* PID Bed Heating
*
* If this option is enabled set PID constants below.
* If this option is disabled, bang-bang will be used and BED_LIMIT_SWITCHING will enable hysteresis.
*
* The PID frequency will be the same as the extruder PWM.
* If PID_dT is the default, and correct for the hardware/configuration, that means 7.689Hz,
* which is fine for driving a square wave into a resistive load and does not significantly
* impact FET heating. This also works fine on a Fotek SSR-10DA Solid State Relay into a 250W
* heater. If your configuration is significantly different than this and you don't understand
* the issues involved, don't use bed PID until someone else verifies that your hardware works.
*/
#define PIDTEMPBED
Once you have activated this parameter, you should calculate the correct values for your configuration and indicate exactly to Marlin the values obtained. In this way he will be able to use them correctly. You must write them a few lines below, as you can see below:
if ENABLED(PIDTEMPBED)
//#define MIN_BED_POWER 0
//#define PID_BED_DEBUG // Sends debug data to the serial port.

//120V 250W silicone heater into 4mm borosilicate (MendelMax 1.5+)
//from FOPDT model - kp=.39 Tp=405 Tdead=66, Tc set to 79.2, aggressive factor of .15 (vs .1, 1, 10)
#define DEFAULT_bedKp 347.77
#define DEFAULT_bedKi 48.46
#define DEFAULT_bedKd 623.90

//120V 250W silicone heater into 4mm borosilicate (MendelMax 1.5+)
//from pidautotune
//#define DEFAULT_bedKp 97.1
//#define DEFAULT_bedKi 1.41
//#define DEFAULT_bedKd 1675.16

// FIND YOUR OWN: "M303 E-1 C8 S90" to run autotune on the bed at 90 degreesC for 8 cycles.
#endif // PIDTEMPBED
Extracting the correct values for our bed is very simple. Marlin uses an internal function called PID Autotune .To call this function, connect your printer to PronterFace or any other software that allows you to use GCODE commands. Once connected, send the command M303 E-1 C8 S90 and the process will begin.
Your printer will start to carry out different warm-ups, and after a few minutes, in the information window of the software you are using, it will show you the values obtained. Just have a little patience and when you get them you set them to Marlin and voila.
Optimize THERMAL PROTECTION parameters
Another reason that can influence your bed not to reach high temperatures can easily be the thermal protection offered by Marlin in its different firmware versions.
How you should know if you are a user of a 3D printer, Marlin manages the temperature of your bed to initially heat it and, of course, to maintain it in a stable way throughout the printing process.
During the initial warm-up, Marlin applies tension to the bed to increase the temperature, and is constantly monitoring the temperature rise of the bed. By default, in case the temperature does not increase 2 degrees for 60 seconds, Marlin will kindly show us an error on the screen and stop the heating process.
Raising the temperature from 30ºC to 31ºC for Marlin can be easy, but when the bed is at 95ºC, raising the temperature a little more can take a little longer. So, to help Marlin a little, one possibility is to tell her to be more flexible and to spend extra time in bed so that we can reach our target temperature.
This is done by modifying the following parameters found in the file “Configuration_adv.h” of our Marlin firmware:
/**
* As described above, except for the bed (M140/M190/M303).
*/
#define WATCH_BED_TEMP_PERIOD                60 // Seconds
#define WATCH_BED_TEMP_INCREASE               2 // Degrees Celsius
The first parameter “WATCH_BED_TEMP_PERIOD” indicates the time range that Marlin waits to perform each temperature check, and the second parameter “WATCH_BED_TEMP_INCREASE” shows the degrees of temperature that it should have gone up so as not to throw the error.
In summary, if when Marlin applies temperature to the bed, it does not rise 2 degrees in 60 seconds, it will give us an error. You can modify both so that Marlin is not as demanding, such as raising the waiting time to 75 seconds, or simply indicating that the increase is 1 degree.
For security it is not recommended to raise these values too much, since they are precisely applied to avoid “unforeseen events”. Be especially careful when modifying them, and always within “reasonable” margins.
Section and length of our cables
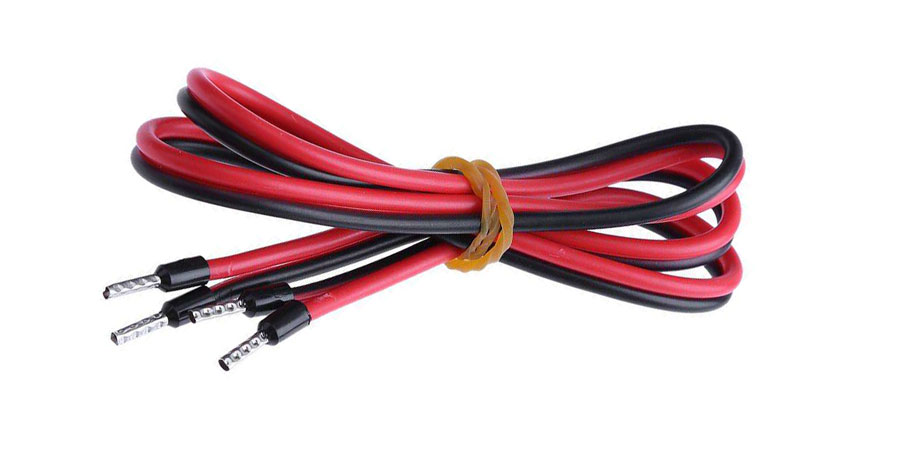
As of today, most heated beds usually come with “decent” cables, but in my case it came with a deplorable (extremely thin) power cable. Obviously I’m talking about the power cable, not the thermistor.
One day I did a test, I took the multimeter and measured the voltage coming out of the connector of my electronics MKS Gen v1.4 and then I measured the one that received the bed. I noticed that tenths were lost along the way (and the cable got quite hot).
To make matters worse, a similar cable also supplied my electronics from the power supply. So I decided to change both for others with a much larger section and I reduced them to the minimum expression as far as length is concerned. Recovering those accumulated “lost” tenths of both cables meant increasing the final temperature of my bed a few more degrees.
Regulate the power supply

In 12V power supplies it is very common to see a small orange potentiometer to the left of the connectors, as you can see in the image above.
This potentiometer allows us to regulate, within an acceptable range, the voltage offered by the same power supply , making it possible to raise it to 13V or even a little more. If we increase the voltage by 1/1.5V you will be able to obtain some extra degree of temperature for your heatbed.
I personally have had no problem raising the voltage, and have had multiple printers for years working like this. However, I recommend that it is not an excessive increase in it and in no way leave the printer unattended during long print jobs.
I hope and wish that this article is to your liking and can be useful to you. You can find more interesting articles at 3DWork.io at the following links:
- Powering the Raspberry Pi from the power supply of your 3D printer
- Booting our Raspberry Pi from USB with an SSD hard drive (or pendrive)
- Maker Ultimate 2: Review of the latest Monoprice printer
- Analyzing the new resin printer Phrozen Sonic Mini (Review)
- MKS Robin Nano v1.2: Analyzing the new MakerBase 32bit boards
- Hollow 3D objects with ChiTuBox to save resin
- 10 reasons to use ChiTuBox with your resin printer (SLA / DLP)










Déjanos un comentario