These days ago a quite interesting 3D printer has fallen into my hands of which I certainly knew little or nothing. The model in question is the Maker Ultimate 2, and it belongs to the extensive 3D printing catalog of the Monoprice company.
This Californian company develops and markets all kinds of electronic devices such as drones, speakers, projectors, 3D printers and much more. It was founded in 2002, and has in its online catalogue more than 7000 products with 57 3D printers included, nothing more, nothing less.
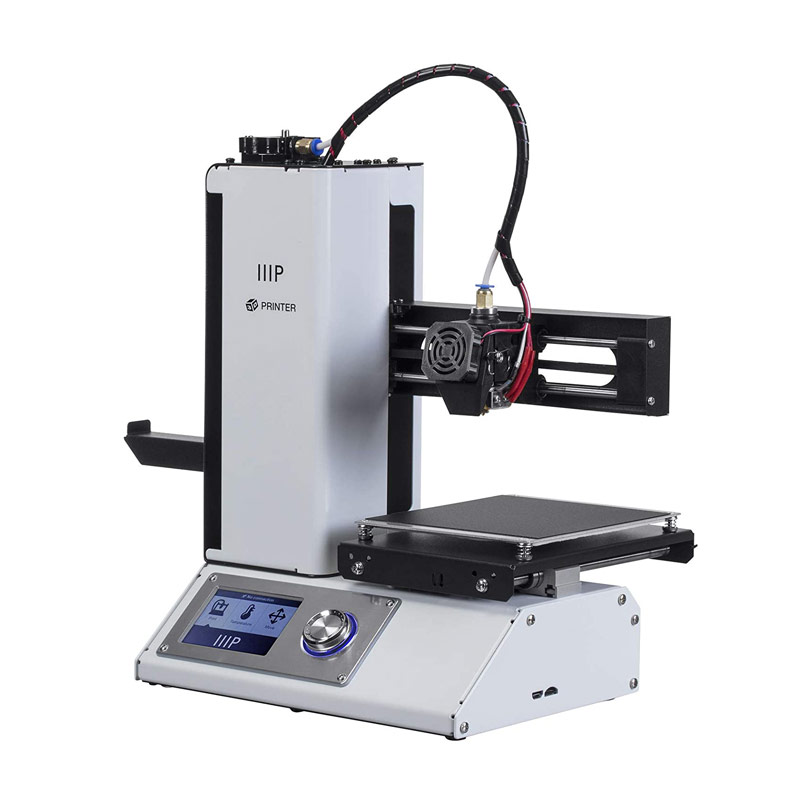 However, although I was unaware of the existence of the model that I am going to show in the article, I confess that I had always been attracted to a printer that was launched by Monoprice some time ago, very compact and small, but with a curious design, the Select Mini V2 .
I am sure that more than one of you might be familiar with this design, very similar to another 3D printer of a widely known brand and that was recently launched 🙂
But hey, I wouldn’t want to divert the focus on the 3D printer Maker Ultimate 2 , so let’s talk a little bit about it.
And as it has become customary at this point, we encourage you to add us to your social networks (FaceBook , Twitter and Instagram) and to our Telegram, where you will find other users interested in 3D printing.
Introduction
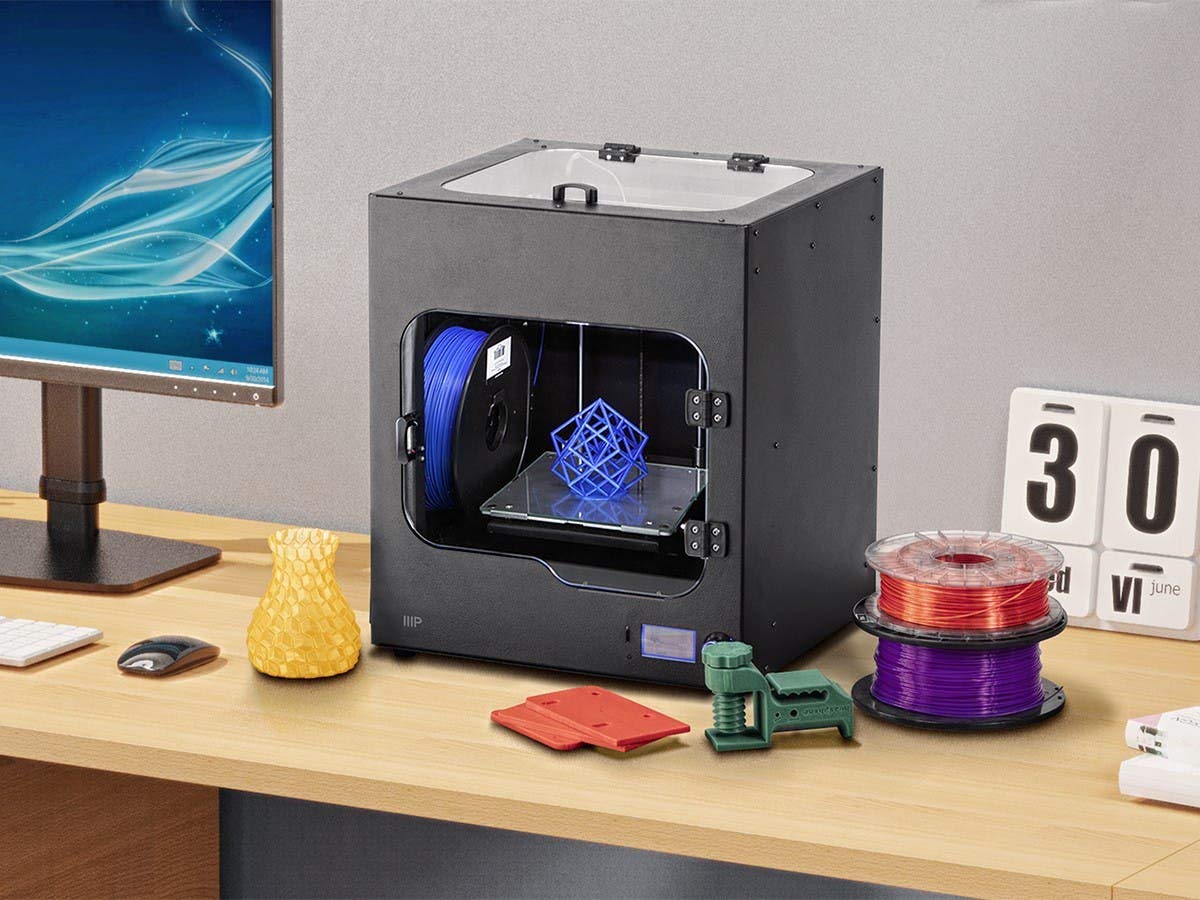
The Monoprice Maker Ultimate 2 printer at a glance is a minimalist, robust, quite compact and fully encapsulated cube, as you can see in the image above. It has 2 access points, one at the top (to facilitate the maintenance of the head and its components) and the other at the front, for the removal of parts and loading of printing filaments.
The mere fact of being encapsulated gives it a great advantage when dealing with more technical materials, and which requires high temperatures during its extrusion (ABS, TPU, Nylon, etc.). I’m certainly very curious to see how it behaves about it, so we have some evidence on the way to see its results.
A brief paragraph, if you want to know more about types of filaments and characteristics, the memory that a few days ago the article Definitive guide to 3D filaments for your printer, with all kinds of very interesting technical information ( properties, temperatures, manufacturers, etc.).
Where to acquire the printer
The Monoprice Maker Ultimate 2 is available on Amazon.com, as usual. Here are some direct links:
| Monoprice Maker Ultimate 2 |
Opening our Ultimate 2 (Packaging)
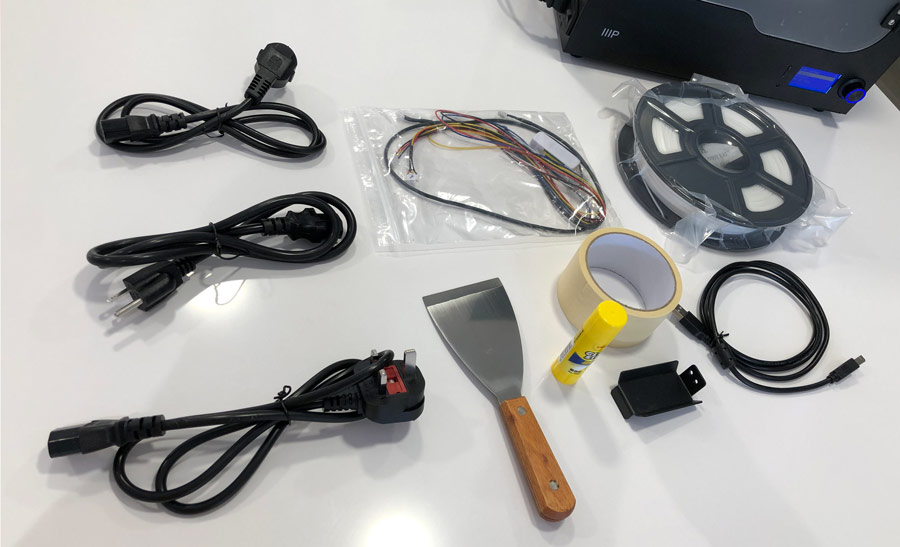
As usual in all 3D printer manufacturers, the Maker Ultimate 2 is completely protected in a huge cardboard box with special plastic protections for this purpose. In this way it will arrive free of possible unforeseen events during transport.
Inside the same printer package, there are two other small cardboard boxes. One with all the accessories necessary to work with it (and which we will list below), and a second with a roll of filament of 500 grams (in my case it was made of white PLA, of quite good quality).
Here you have the complete list of all the content of it, and that you can also see in the photo above:
| Package content | ||
|
|
|
Technical specifications
Below I leave you here the main technical specifications of the Maker Ultimate 2 , obtained directly from the manufacturer’s website Monoprice .
However, during the prints I put the bed at 105ºC, so I estimate that you still have more margin in the Nozzle and bed temperatures.
Monoprice Maker Ultimate 2 |
|||
| Maximum Printing Area | 7.9″ x 5.9″ x 5.9″ (200 x 150 x 150 mm) | ||
| Filament Diameter | 1.75mm | ||
| Nozzle Diameter | 0.4mm | ||
| Maximum Nozzle Temperature | 250ºC | ||
| Maximum Build Plate Temperature | 100ºC | ||
| Printing Speed | 20 ~ 150 mm/seg | ||
| Positioning Accuracy | Ejes XY : 0.011mm Eje Z: 0.0025mm |
||
| Supported Filament Types | ABS, PLA, PLA Pro, TPU, TPE, PET, Metal fill, Wood fill, etc. | ||
| Supported File Formats | .STL, .gcode, .OBJ | ||
| Supported Software | Wiibuilder, Cura, Simplify3D, Slic3r, Kisslicer, Repetier, PrusaSlicer | ||
| Supported Operating Systems | Microsoft® Windows®, Mac® OS X® | ||
| Input Power | 24 VDC, 10A | ||
| AC Adapter Input Power | 100 ~ 240 VAC, 50/60 Hz | ||
| Maximum Power Consumption | 200 watts | ||
| Dimensions | 15.0″ x 13.4″ x 16.5″ (380 x 340 x 420 mm) | ||
| Weight | 33.1 lbs. (15kg) |
Structure and main features
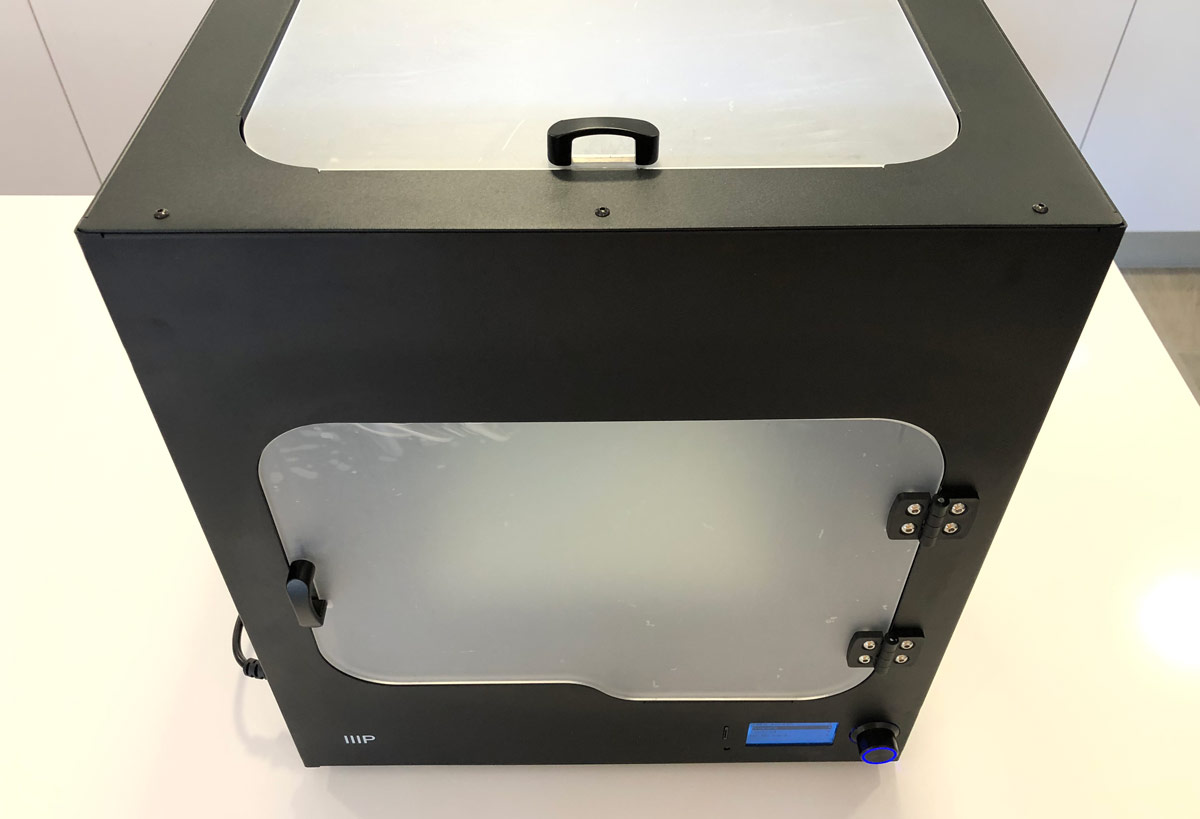
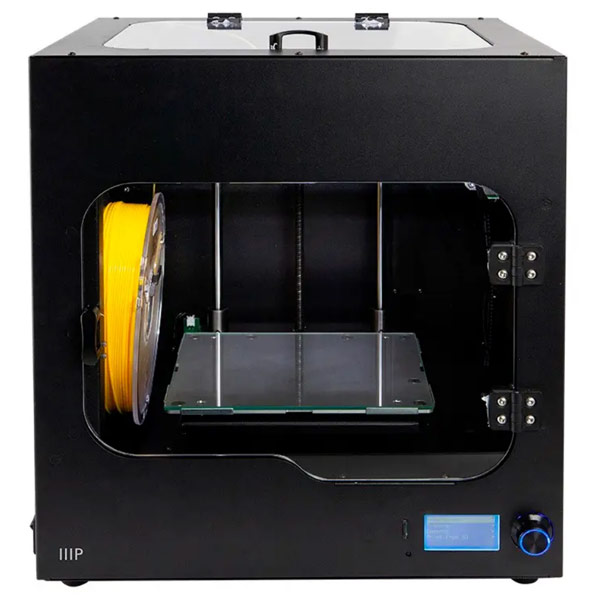
The Maker Ultimate 2 printer is entirely made of metal , as you can see in the image above, except for some interior supports. Specifically in 1.5 mm thick sheet metal, laser cut, folded and painted in a matt black color. All these folds give it a completely solid and robust structure.
This same structure, together with the lower rubber silent blocks where it is supported, absorbs any vibrations that may occur during the entire printing process . Something quite important (and indispensable) so that it does not affect the quality of our printed parts.
The inner supports are made of injected plastic , and are used to hold the motors, rods, bearings and even the limit switches of the printer itself. Everything is quite organized and clean inside, as you can see in the photo below (click on it).
It has two opening doors through which to access it , as I mentioned a few lines above. These doors are made of transparent methacrylate and allow you to monitor printing at all times. You will excuse me but I did not remove the protective plastics (I am a disaster with the photos), so just clarify that they are completely transparent (as if they were glass).
These doors have very comfortable neodymiums , so they always stay perfectly closed when you approach them, leaving the cabin airtight to maintain the ideal temperature when working with more technical materials.
Outwardly you cannot see anything else, since practically everything is hidden inside, including the printing filament that is arranged on one side of the printing surface (right side of it).
Heatbed
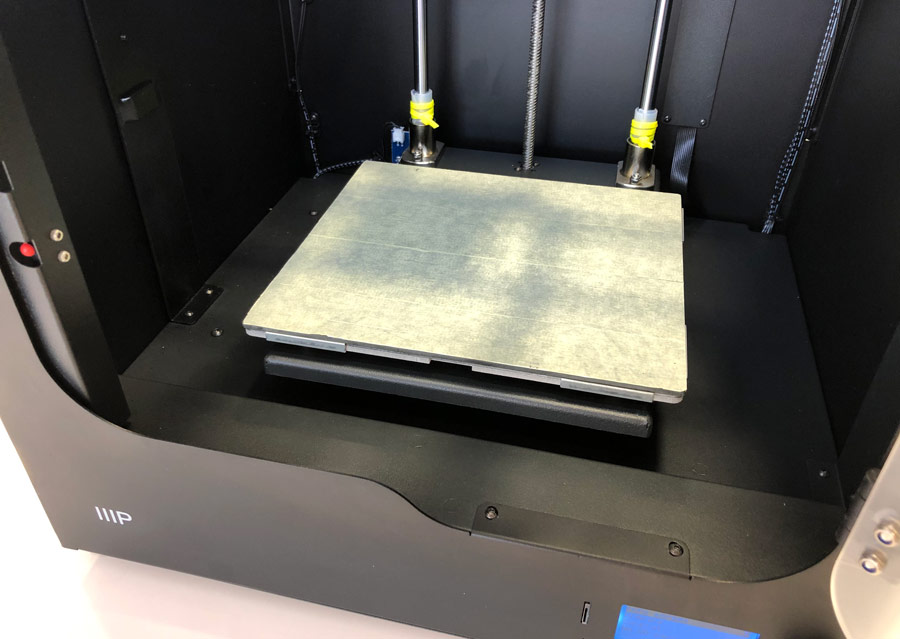
The print volume of our Maker Ultimate 2 is 7.9 “x 5.9″ x 5.9 ” (200 x 150 x 150 mm). It is certainly not excessive volume, but I guess more than enough for most of the prints that are usually made.
The bed is made of black glass, and a metal plate is attached to the bottom. The reason is that is magnetically attached to its mount by powerful neodymium magnets . So once your part is printed you can easily remove it by simply using a slight upward force.
From the factory the bed is prepared with bodybuilder tape, which works perfectly. I always use glass or Kapton tape, so I decided to use it to see its result. However, you can remove the bodybuilder tape at any time and print on the glass if you wish.
I leave you here an article I wrote a long time ago about 6 Reasons why you should use glass bed in your 3D printer , it may interest you.
Self-leveling sensor
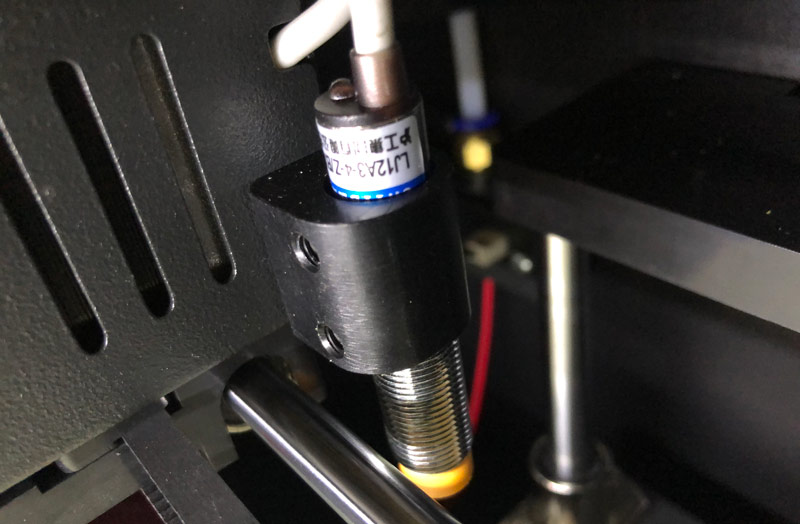
For leveling, the Maker Ultimate 2 printer uses an inductive proximity sensor, specifically a LJ12A3-4-Z / BX , which allows to detect objects metallic in a range of 4mm. Thanks to this sensor (or probe), it carries out 4 probes in the corners of the bed and in the center before each impression (command G29).
I am not a big fan of this type of sensors. I have tried them all, and these in particular are prone to slight measurement variations depending on various circumstances (bed temperature, type of metal, etc.). However I must confess that in all the tests carried out, the leveling has been more than accurate , and I have not had any problem, quite the contrary.
This is because the Maker Ultimate 2 is fully calibrated at the factory, so it avoids the hassle of wasting time on these tasks. Something I liked a lot is that the printer firmware includes the BabyStepping function .
Babystepping is a great feature added in the latest Marlin firmware versions that allows the Nozzle height in the Z axis to be modified before printing very easily. You just have to turn the button to the right or left to go up and down respectively. Interesting, right?
And not only that, once printing has started, it will also allow us to perform the same operation in real time. I always activate this function in each and every one of my printers, and I highly recommend it, in case you need to make any minimum adjustments in the first layers of your print.
If you don’t know how to activate it, you can check our Complete guide: Configure Marlin 2.0.x from scratch and not die trying , or directly use the Marlin Builder , a firmwares generator that we developed on our 3DWork.io website a few weeks ago.
Axes and extrusion head
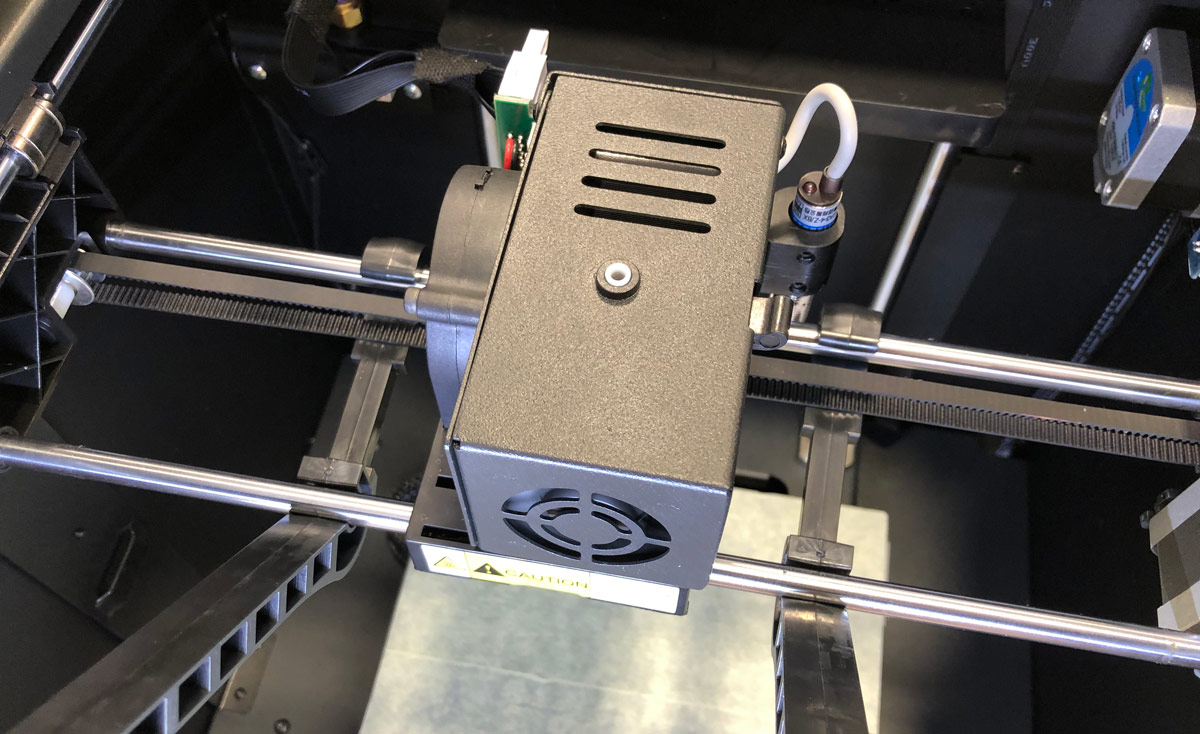
As you can see in the image above, on the X and Y axis the print head slides on two machined rods of diameter 8 using linear bearings . It runs pretty smooth indeed and although I have not been able to check the weight I suspect it is within normal parameters for a direct extrusion head.
Precisely this direct extrusion is a point in its favor. The Bowden is a valid system and it is not my intention to debate it, in fact I have used it for years. But I prefer direct extrusion for some time back.
It is clear that Bowden systems reduce weights, avoid inertias and allow you to have a much lighter and more compact head, but they also have various “added” problems that I no longer feel like dealing with in my day to day (jams, retractions, breakage of fittings, oozing, etc.)
The supports for the head itself and all the extrusion guides, motors, bearings and limit switches are made of injected plastic (I understand ABS), something that is appreciated.
Apart from all that, the printer comes from the factory with two “hooks” that completely fix the head avoiding its displacement and whose function is to prevent it from being damaged during transport.
The layer fan and the self-leveling sensor are located on both sides of the fan and bolted to the outside of the head. In this way we have direct access to both for future maintenance tasks.
To insert the filament you only have to press the side lever that will open the gears and allow us to introduce it through the hole at the top, and we will have the Maker Ultimate 2 ready to produce parts.
Filament
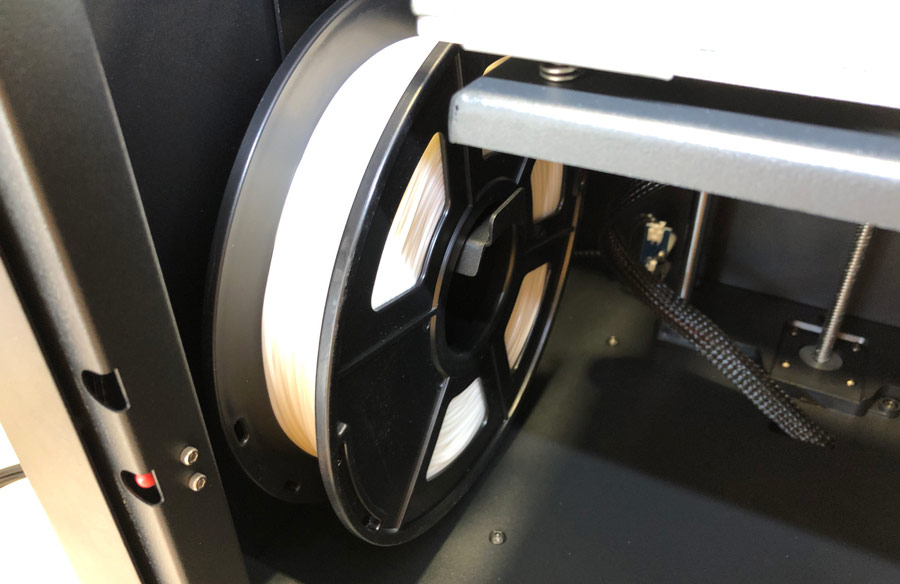
Filament rolls for printing are installed inside of the Maker Ultimate 2. This seems like a great idea to me, for the following reasons:
The first is that protects the filament a little better, preventing possible dust particles and moisture from affecting it. It is clear that it is not a completely hermetic closure by far, but it will always be better protected than if you have it outdoors.
Another advantage is that when we use more technical materials (HIPS, ASA, Nylon, etc.), when placing the roll of filament inside the structure, it acquires a little more temperature, partially helping the nozzle during its fusion operation and extrusion.
Finally, aesthetically we free the printer from a roll of filament that is normally hanging somewhere in it. So everything is very compact and minimalist, as I like it 🙂
The guiding of the filament is carried out with a teflon tube with a larger diameter and very short, simply to take it to the extrusion head (since it is not a Bowden system). And right where it is introduced, we will find a limit switch whose function is to detect possible filament cuts, a feature that is now practically offered by most 3D printers.
3D models printed with Maker Ultimate 2
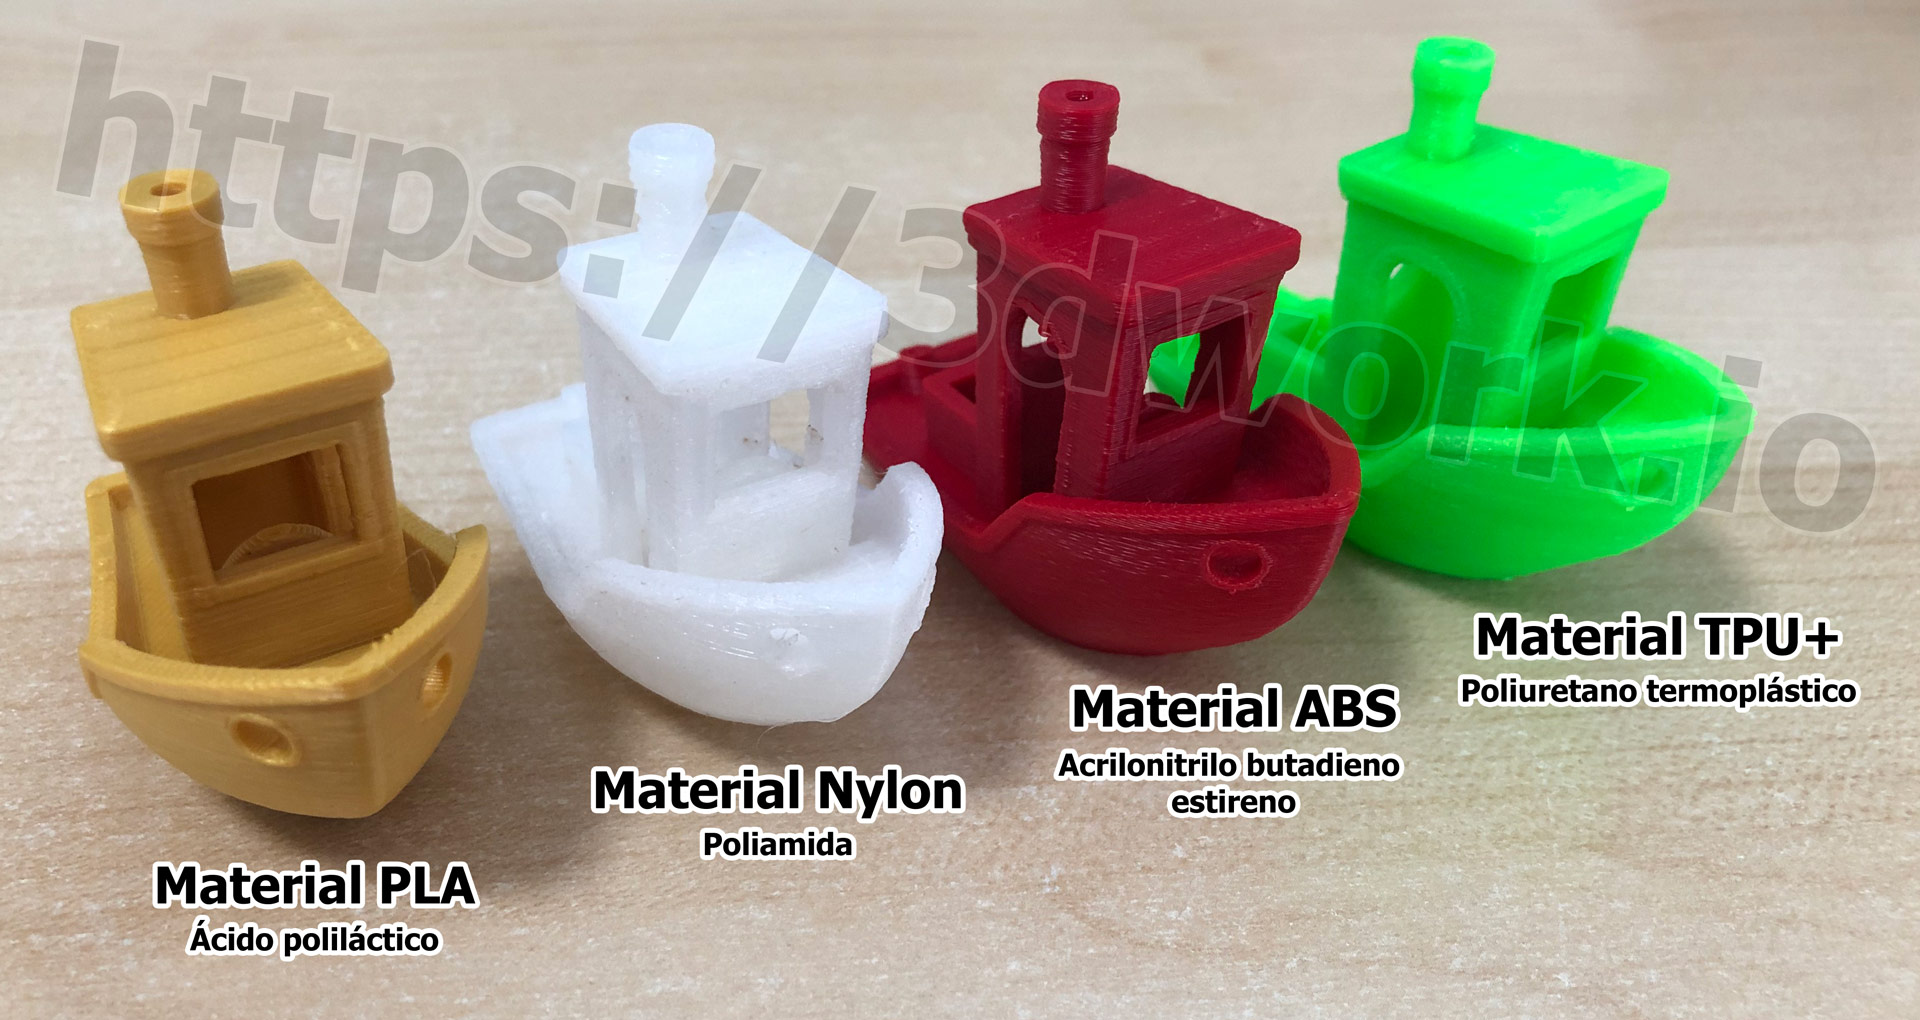
I’ve set out to print a few Benchys (toy that my daughter loves), and check how Maker Ultimate 2 works with different 3D filaments. The result, as you can see in the following images, is very satisfactory.
The PLA filament prints without any problem , something basic for any 3D printer, since it is very easy to work with and offers the best resolutions. The slicer that I used in my tests was PrusaSlicer. If you have never worked with it I highly recommend it: PrusaSlicer: Learning to use this powerful slicer from scratch.
I had to create the profiles completely from scratch, since I did not have them for PrusaSlicer, and although the result is not as spectacular as in the demo pieces that come on the included memory card, the pieces are printed without any defect.
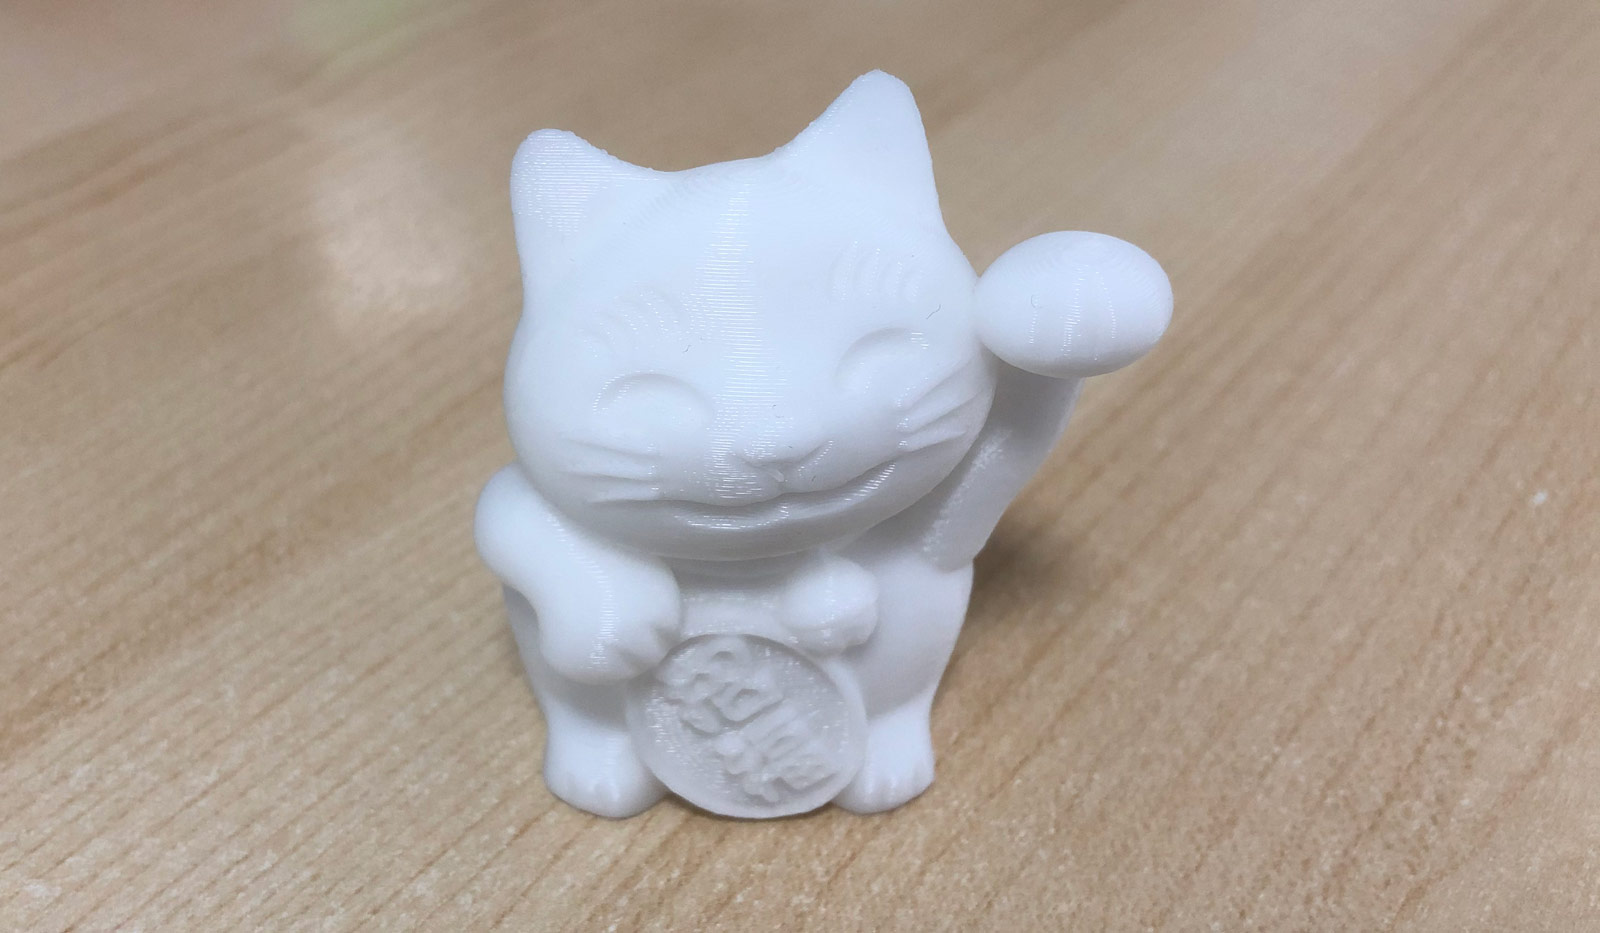
I have to refine my profiles even more, and if you are very picky (I hope so), you may notice it in some piece. The Chinese cat, as you can see in the image if you click on the image, comes out with an amazing definition (example model).
With the ABS filament I had absolutely no problem . I set the temperature of the hotend and bed to 250º and 105º degrees respectively, and on the first attempt the Benchy3D came out perfectly printed. And by the way, I love the cherry colored filament, it’s really spectacular.
With more technical filaments like TPU + I did have to adjust the parameters properly. The TPU filament did not get rid of the occasional jam, but always due to incorrect parameters of mine (own mistake). Even with specific heads for these materials such as extruder Hemera, it is a challenge to work with this type of filament. At the end it came out without problem (it had an excessively low temperature), it was raised to 230ºC and solved.
And well, I wanted to try Nylon, which is a real nightmare for me since the retractions that this material has are monstrous (greater than in ABS). After several tests, since it had been a long time since I worked with him, he went ahead as you can see. Of course, I did not get rid of configuring a good raft in my fillet to help me with its adherence and avoid the fatal Warping .
So I think that the test was passed by far, and indeed the encapsulation of the same helps a lot, although it does not free you from configuring your slicer well.
User experience
At this point, I am going to tell you my impressions (never better said) about the Monoprice Maker Ultimate 2 . The characteristics that I like the most and, of course, about which they could improve in order to have a more competitive product.
Strengths

Probably the strongest point that I see in this printer is the fact that it comes encapsulated, with all the advantages that this entails. If you have a Prusa type printer, printing materials such as Nylon / ABS / ASA can be a real nightmare, due to the widely known problems of Warping and Cracking .
It is clear that there are plenty of “tricks” and tips to get to good use with this type of materials in open or semi-open printers. In 3DWork we have already delved for some time into a very complete and highly recommended article: Warping: Guide to permanently remove it from your 3D prints .
Maker Ultimate 2 is going to make this task easier for us in advance, and it is going to avoid quite a few headaches along the way. The interior temperature of the interior will largely prevent possible internal retractions of our pieces, considerably increasing the correct completion of our prints.
The next point to comment on is the ease of handling it . When you remove the printer from the box you only have to remove the two supports that fix the printhead for transport (as I previously mentioned). After this operation I started to print the test pieces that come in the SDCard with the included filament. The result was perfect.
It was something I wanted to test, to see how it came from the factory assembled and the calibration of the self-leveling sensor. I think it is quite important that a new user can start printing from minute 0 from the moment they acquire a machine without any problem. As we all know, in 3D printing problems always arise, you will have more time to deal with all of them later.
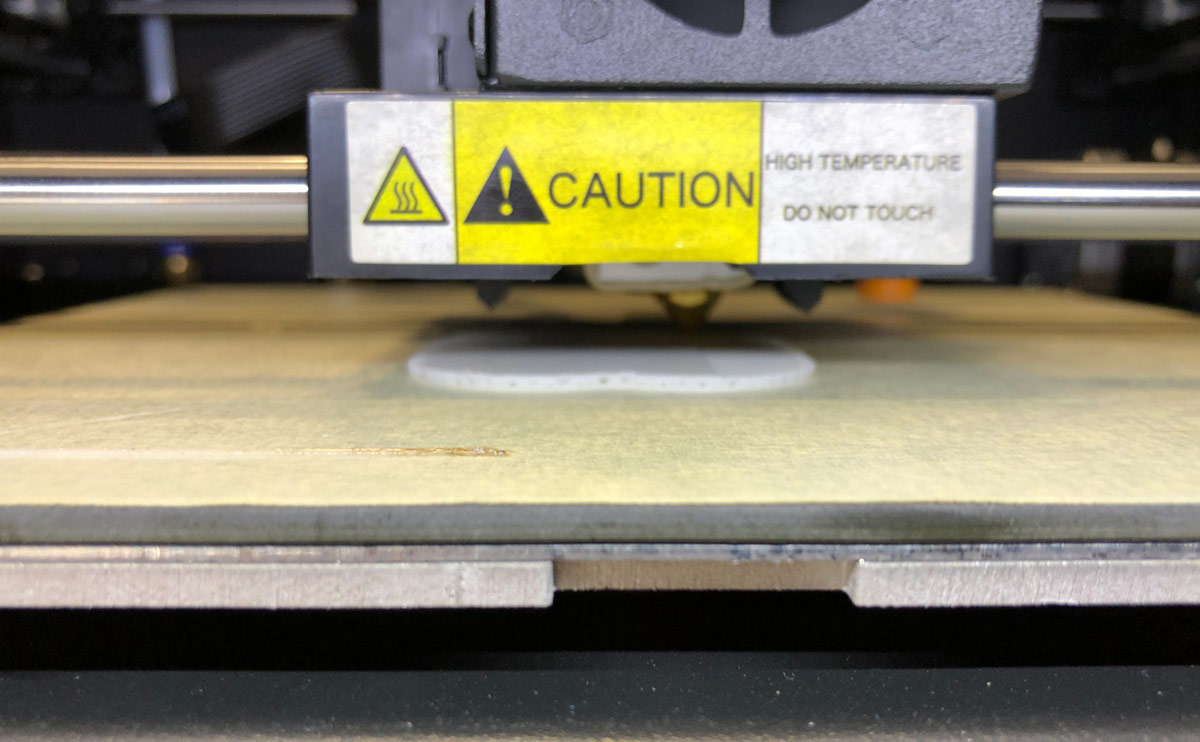 The glass bed with its magnetized metal plate is another point to consider. Normally you usually see flexible steel straps magnetized on which you print the pieces, but this method has seemed quite original and practical to me, and maintains the glass as a printing surface.
I have always preferred glass as a surface in my prints, due to the “mirror” finish that remains when the pieces are finished. And thanks to the powerful neodymiums that make it completely immobile, free of screws or tweezers that can disturb the printing surface, a complete success.
Another point in its favor is the Nozzle. Disassembling it becomes an extremely simple and quick task . As designed, you just have to loosen a screw and move down to leave it completely free. Jams do happen, and no printer on the market gets rid of that, but disassembling the nozzle in 30 seconds is priceless, trust me.
Another thing that has caught my attention are the two openings, front and top. When you work with open prusa or corexy printers only with profiles you have great freedom, which is not possible with closed printers. However, the handling has made me quite comfortable, and the interior lighting is perfect, nor do I have to turn on the lights in the room to see how my night impressions are going.
Possible improvements
As in any printer, there are always points that can be improved to obtain a more pleasant user experience. And Maker Ultimate 2 is not an exception.
One of the things that can be improved, although it is not something that keeps me awake, is the sound of the fans. I think they could reduce a little more the sound volume.
It is likely that being closed structure is more audible, however, it would not be a bad idea to change it for something less loud, such as Noctua fans. These are ultra-quiet fans widely used in 3D printing, although they are not cheap to say.
The other option to improve that I can think of would be the size of the bed . In my particular case, I have several 300x200mm printers and I do not need large printing surfaces. But now there are many printers on the market with dimensions of 300x300mm or more. And it is likely that some user requires a larger size.
And finally, more than a possible improvement would be the possibility of constantly monitoring the interior cabin temperature. As I mentioned in a previous article, in the latest versions Marlin has provided a new function in its firmware to manage the temperature of the interior passenger compartment (called Chamber Temp).
If the temperature could be displayed in real time, and somehow manage this same temperature, the difficulty of printing excessively technical materials would disappear.
However, I am realistic, and I am clear that including this feature entails adding extra hardware (heater, thermistor, temperature / humidity sensors) and an additional cost. But hey, the section was possible improvements, right? So I leave it there, in case Monoprice wants to take note 🙂
Final assessment
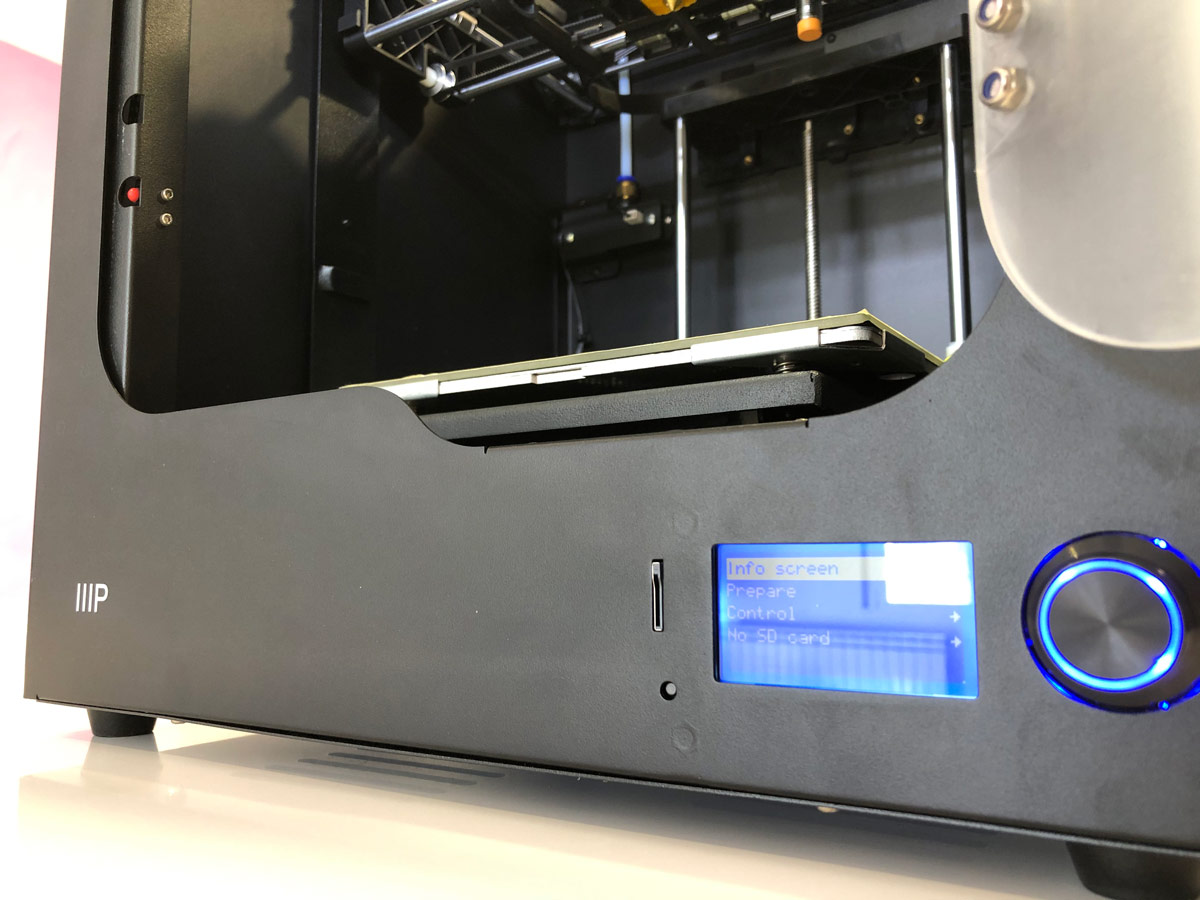
As I mentioned a few lines above, the feature that most appeals to me about the Maker Ultimate 2 printer is its complete encapsulation, which facilitates the printing of a wide range of materials. It could be said that it is an extremely versatile machine, a quality that we can give you without a doubt.
While the size of its printing surface is not excessively large, it more than makes up for it with its ease of use and range of materials. The compact size allows you to have it on top of any table , with the convenience of no loose cables in sight (except for the power supply) and completely hidden filament reels.
Self-leveling has given me a pleasant experience and it is essential from my point of view. It escapes my understanding that there are still manufacturers that do not add this feature to all the printers in their catalog, especially if we think about the negligible value of a single leveling sensor (a few euros).
In my opinion, it is a highly recommended printer for those who want to take their first steps in 3D printing. But also, with the features and versatility it offers, it is completely valid for any more experienced user. And well, it comes from the hand of the company Monoprice, a company with extensive experience in the 3D printing sector.
|
|
I hope the analysis Maker Ultimate 2: Review of the latest Monoprice printer could have been of interest to you.
Do not hesitate to read other interesting articles that you can find on our website:
- Marlin Builder: Update with support for version v2.0.6.1 and factory preconfigured firmwares
- Monoprice Cadet: Safe 3D printing for kids and beginners
- New review of electronic BTT SKR MINI E3 V2.0 for your Ender 3 printer
- Closed-Loop Motors: Makerbase MKS Servo42b (Brief analysis)
- Complete guide SKR v1.4 / v1.4 Turbo with TMC2209 Sensorless drivers and Display TFT35 V3.0
- DyzeXtruder Pro: Analysis of a high-performance extruder for professional environments
- MKS TFT35 Display: Latest updates v106 and v107 available
- The Spaghetti Detective: Monitoring Octoprint from the Internet safely






Thanks for sharing your thoughts on Luke Sample. Regards
Thanks for your comment,
Regards!
You still feel like this is a good printer even after they dropped the ball on firmware? Newest firmware breaks the auto level completely and many other issues. I personally feel ripped off. The last firmware update, that broke many features, was in January of 2020. Almost a year later and they will not fix it or provide a better firmware. Junk printer.
Hello Austins,
In my case, and being honest with you, I only had one issue. The initial firmware that come with the printer had issues when I try to raise temperature for use ABS filaments.
I just downloaded and flash with last firmware in website and problem was completely solved.
About the issue with auto leveling, it works like charm, but as I explain in the article, this is my personal experience with the printer.
Thanks for share your thoughts here,
Regards!
Thanks for the great review! The print quality was perfect when using the included software, however, now that I am using cura it is difficult for me to find the right settings.
Could you share your cura settings which you used for these prints?
Greetings
https://wakelet.com/wake/U5Z9gJXu27VTHyhk8X6gm xolagold orvill 8bb1175cff