Hollow 3D objects with ChiTuBox
Hollowing 3D objects with ChiTuBox is a very easy and fast process. Today, there are other programs such as Meshmixer or PreForm that can help you with this task. But as we have commented in other articles about ChiTuBox, using a software for slicer and another for “retouching” is not a productive way to work.
By default, printers that use stereolithography as a printing technology (SLA and DLP) often create completely solid objects. This generates an amount of material expense and time that is many cases unnecessary. If you have to produce a 3D piece or prototype that requires a specific stiffness or resistance, you probably need to make it solid. If what you want to print is a piece for your favorite RPG (a dragon, for example), there is no point in making it solid.
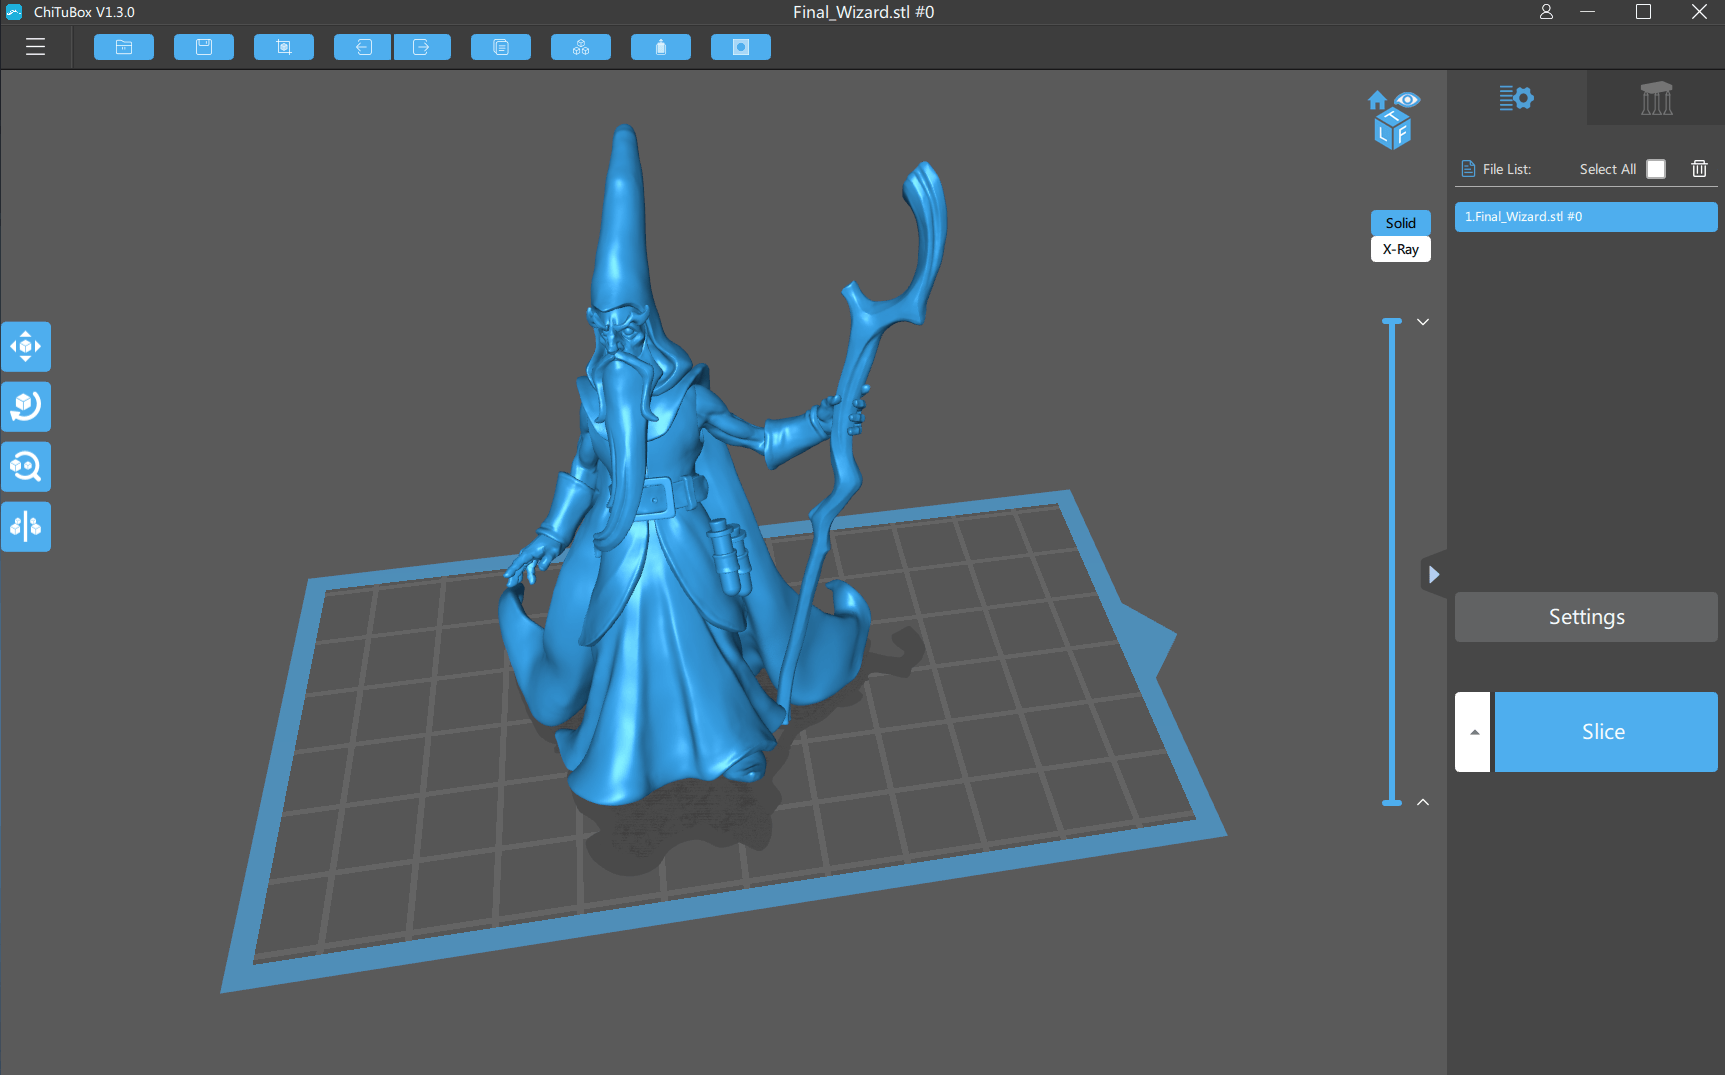
Today we are going to take as an example a magician of our friend Davide Tedeschi. Davide is a sculptor / 3D modeler from Turin whose work we are passionate about and of which we published an interview recently. If you want to know a little more about him, like his designs, I recommend you take a look at this link: Modelizado 3D profesional con Davide Tedeschi
Hollowing function
[vc_row_inner][vc_column_inner width=”1/2″][vc_single_image image=”16850″ img_size=”full” alignment=”center” onclick=”link_image” image_hovers=”false”][/vc_column_inner][vc_column_inner width=”1/2″][vc_single_image image=”16846″ img_size=”full” alignment=”center” onclick=”link_image” image_hovers=”false”][/vc_column_inner][/vc_row_inner]
In the bar at the top, where some blue buttons are located, we can find the function of hollowing. Being the penultimate button that performs this function.
Once the piece we want to hollow is positioned, we simply have to select the wall thickness, the accuracy (in desired percentage) and the type of hole (inside or outside). I have personally left the precision at 0 and I have not visualized any problem. Once the options have been selected, we will press the start button. An animation will start showing us how the piece is already calculated with the hole made (it takes a few seconds). After that, the piece will be ready for the next process, the hole.
The thickness of the wall that we want to give to our piece, will always depend on the function of it. An ornamental piece will not require a great thickness, however a structural piece will need a little more solidity. Obviously, the smaller the thickness of the wall, the greater will be our resin savings, but we will also obtain a lower strength. In the end, our experience will help us define the most suitable thicknesses for each occasion.
Adding exit holes
[vc_row_inner][vc_column_inner width=”1/2″][vc_single_image image=”16848″ img_size=”full” alignment=”center” onclick=”link_image” image_hovers=”false”][/vc_column_inner][vc_column_inner width=”1/2″][vc_single_image image=”16847″ img_size=”full” alignment=”center” onclick=”link_image” image_hovers=”false”][/vc_column_inner][/vc_row_inner]
After having done the hollowing process, we must make different drainage holes for the leftover resin. In case of not doing so, the resin will be trapped inside, and the hollowed out will not have served. It will also be an entry zone for alcohol (IPA) at the time of cleaning it.
The button to add the drainage holes in the 3D object is also in the upper bar (last button). Ideally, add the holes in the least visible area of the piece in question (for example the area near the construction platform). In this case of the magician, we have added them to the base where the feet of the magician are located.
When running the ChiTuBox function we will let you select several options as well. The shape of the hole (circle, hexagonal and square), as well as its diameter. Press “Add hole” and indicate in the piece the area to be drilled. ChiTuBox will begin to calculate and in a few seconds it will finish the calculations and show how the drilling has been.
Once done, we can check with the left bar (moving it up and down) as the piece has already been prepared for printing.
Printing the finished object
[vc_row_inner][vc_column_inner][vc_single_image image=”16881″ img_size=”full” alignment=”center” onclick=”link_image” image_hovers=”false”][/vc_column_inner][/vc_row_inner]
In our case, we used to calculate the printing time and saving resin a DLP printer. That is why the printing times are identical. In the case of an SLA printer, the printing times would have been different and would have been fired in the case of the solid piece, since it is a laser beam that sweeps the layer completely and not a projected image.
As you can see, the use of resin has drastically decreased, which is a huge saving in respect of the solid piece, and something totally necessary to make due to the high price of the material. You can check it in the following table.
| Solid object | Hollowed object | |
|---|---|---|
| Material amount (in milliliters) | 12.7 (mL) | 8.6 (mL) |
| Printing time | 13h 36m 40s | 13h 36m 40s |
If you want to know more information about the Slicer ChiTuBox, do not hesitate to visit the following article as well: 10 reasons to use ChiTuBox with your resin printer (SLA / DLP)














Déjanos un comentario