If you like the world of 3D printing you surely know the brand Creality .
Normally when we talk about Creality comes to mind its FDM printers, filament, which have undoubtedly been architects of the great expansion of 3D printing in recent years with very capable machines, a very balance between quality/price and an immense community.
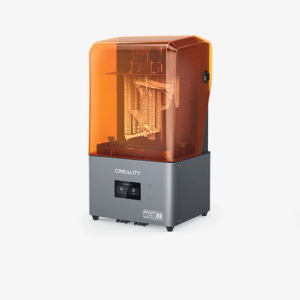
Today we are going to show you a line of Creality machines that may not be so well known… Its HALOT series resin 3D printers, specifically its flagship, the Creality HALOT-MAGE PRO launched in April 2023.
As always before continuing with the article, remind you that you can join 3DWork on our Telegram channel full of deranged by 3D printing, or on our social networks Instagram, YouTube, TikTok, ,TwitterandFacebook.
Creality HALOT-MAGE PRO Printer
The Creality HALOT-MAGE PRO is currently the top of the range in SLA technology, resin, from Creality. A printer focused on production environments, really fast, with a panel of 10.3 “and 8K resolution. It also incorporates a really useful resin feeding and management system, as well as an active air filtration system and remote management through Creality Cloud.
The HALOT-MAGE PRO also has different accessories, consumables or spare parts for it.
The cleaning and curing station to allow us to make processing as simple as possible, or the USB camera to be able to make our time-lapse videos with which we will leave our friends speechless as well as being able to monitor the state of our impressions.
On the other hand, and in reference to consumables or spare parts, we have the new high speed VAT films (ACF) that are key to the incredible performance of our HALOT-MAGE PRO as well as the new Creality Fast Resin resin, as well as spare parts for the air filtration system..

Technical specifications:
| HALOT-MAGE PRO | |
|---|---|
| LCD resolution | 8K (7680×4320) |
| LCD size | 10.3″ |
| Pixel Size (xy) | 29.7 μm |
| Print Size | 228x128x230 mm |
| Velocity | up to 170 mm/h in Dymax mode |
| VAT Film | ACF, includes spare |
| Kinematics Z | Double linear guide |
| Touch screen | 4.3″ color capacitive touch |
| UV source | Integral Light Source 3.0 |
| Software | ChiTuBox, Lychee Slicer and Halot Box |
| Other | Resin pump, air-filtered system, WiFi and Ethernet for remote management |
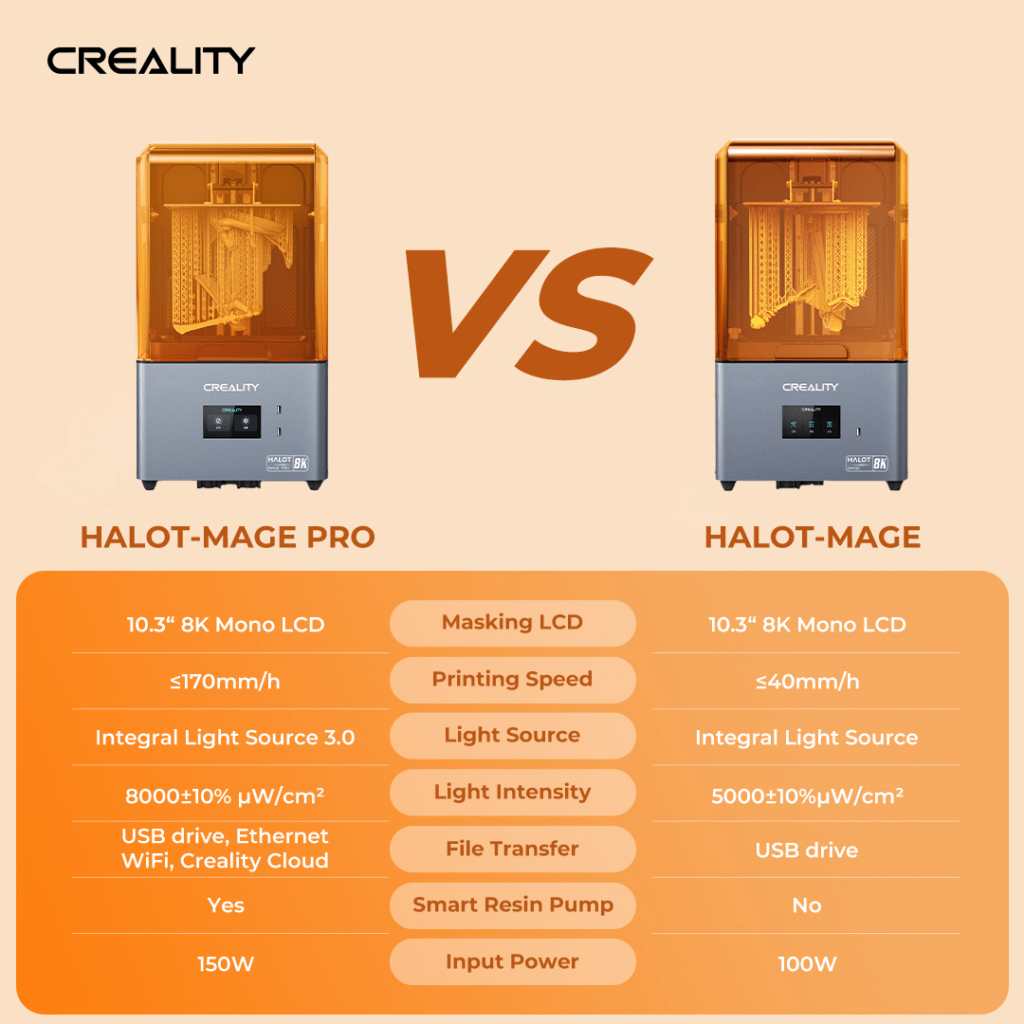
Creality in the kit of your HALOT-MAGE PRO includes everything you need for commissioning and maintenance, especially interesting to have spare parts for the VAT ACF film.

Features and functions
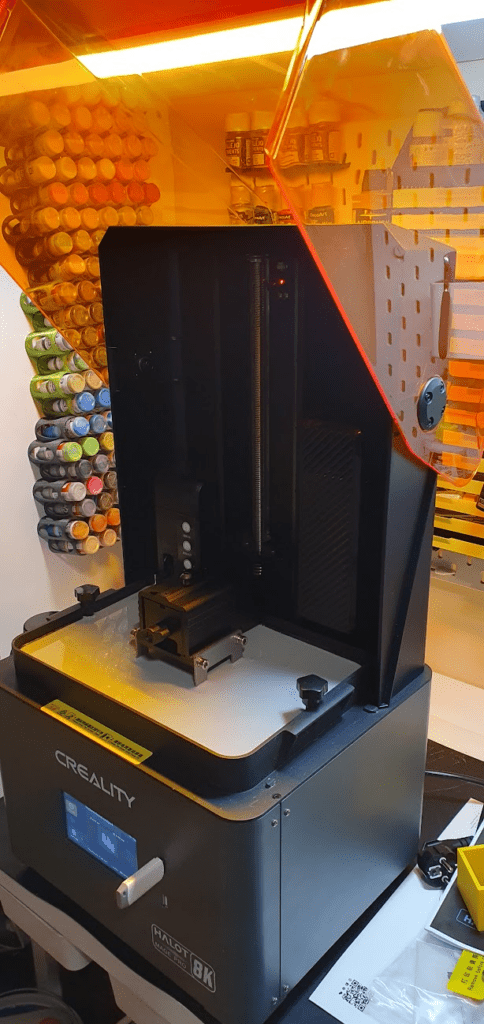
The Creality HALOT-MAGE PRO is an imposing printer right out of the box, built partially in metal since the back-top is made of a plastic material. Its folding door in orange is really comfortable, and that allows it to filter 99.89% of UV, leaving the feeling of a robust machine… More as you will see later for its incredible speed!!
The HALOT-MAGE PRO is designed to print at high speeds, sometimes too much, and in production environments. We have a mode called “Dynax” that allows the retraction process between layers in 1.2s allowing speeds of 70mm / h in normal mode and an incredible 170mm / h in maximum speed mode.
It is important to emphasize that these speeds are in an environment with optimal conditions… Specific resin for printing at high temperatures, optimal temperature for printing around 30º.
In the examples of tests by Creality, Titanic, is laminated with a height of 0.2 mm (when the normal is usually 0.05) and at the maximum speed of the machine.
In order to reach these speeds, the HALOT-MAGE PRO has a powerful close-loop motor that generates up to 1300 N of torque without vibrations at low speeds or loss of steps at high speeds. This together with a double system of linear guides allows moving the assembly with great precision and reliability.

In addition to the above, the HALOT-MAGE PRO mounts a powerful MCU developed by Creality especially to manage print speeds, UI, and remote management functions that we have available.
It is important to emphasize that to take advantage of these functions, currently, it is advisable to use the Creality HALOT Box laminator.
This allows us to obtain prototypes quickly and be able to print final versions, even at a normal speed, really quickly. In the following video, you can see it in action!!
In the optics section, we have a 10.3 “8K monochrome screen that gives us a resolution of 7680 * 4320 pixel and an XY resolution of 29.7 microns with tempered glass protection to prevent scratches or resin leaks from damaging it.
As is normal this type of panels usually supports about 2000 hours of printing, so they are usually considered consumable.

Continuing with the optical part we have a UV light source with the Integral Light Source 3.0 system which promises +90% light consistency, as well as about 8000μw / cm² of intensity that can allow us to cure a layer of resin in 1s.
In addition, we have a printing volume of 228x128x230 mm that will allow us to print almost any type of project.
On the outside of our HALOT-MAGE PRO we have a great 4.3″ full-color touch screen with a friendly interface, full of functions that we will talk more in detail in our final assessment of the machine but we anticipate that Creality in this case has to continue improving the usability of the interface.
We also have two USB connectors on this front, one for our USB key with our parts and the second for a webcam for monitoring or time-lapse.
As we can see in the previous video, the HALOT-MAGE PRO has a particularly interesting function… a resin management system that will allow us to both empty and fill our VAT, 1 l may take about 20-30 minutes but it will be a safe and clean task for us to do it manually. It will also allow us to fill automatically during a print to avoid ruining our print due to a lack of resin.
A really useful function has some room for improvement that we will explain in more detail later.
The HALOT-MAGE PRO also has a carbon-based air filtration system, which will allow us to considerably reduce the smell of the resin, as well as the filtering of harmful particles such as HCHO/TVOC/AQI.
It is advisable for optimal operation to replace the filter every 3 months approximately.

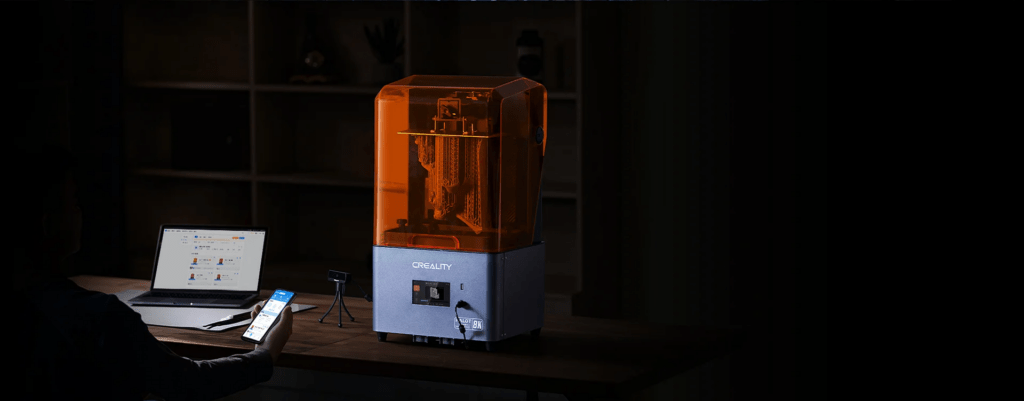
The network functions of the HALOT-MAGE PRO will allow us to remotely control our printer as well as remote printing. The HALOT-MAGE PRO has the option of adding a webcam, not included with the kit and sold as an accessory by Creality, with which we can also visually monitor our impressions will allow us to create time-lapse.
Another interesting feature, especially in production environments, is the integration of multi-printer control of HALOT Box or Creality Cloud with which we can remotely manage our HALOT-MAGE PRO farm in a comfortable and simple way.
Commissioning
Starting the HALOT-MAGE PRO is practically child’s play, in the following video of Creality you can see the whole process in a simple and visual way:
Anyway, we are going to explain the process on our part emphasizing those parts that we think are important.
Once we have unpacked the printer, although it seems an unimportant detail the packaging of the printer with vertical opening greatly facilitates the process, we will remove the printing platform and the VAT as we can see in the previous video. It is advisable to check that everything has arrived and is in the correct state.
We will connect our HALOT-MAGE PRO to the current one and turn it on, the first step will be to verify that the screen works correctly, for this we will go to the Settings icon and click on Cleaning.
Below you have some screenshots of the process to follow on screen.

The next step to perform will be the levelling of the printing platform, the process is very similar to other printers, we will remove the VAT, we will place the levelling sheet protecting the screen, will place the printing platform and we will loosen the screws of this as we have in the following capture.

Once we have everything ready we will go to our screen, within the menu Settings/Print Settings/Z axis Movement/Leveling which will make the printing platform go down to position 0 of the Z axis.

With one hand we keep the printing base firm and we tighten the anchor screws, ideally one of the sides following the screw of its diagonal and the same process with the other two, the objective is that the calibration sheet is slightly pressed by the platform evenly in all its corners.

Once the printing platform has been adjusted, we will click on the Back to Zero option or Reset Position depending on the firmware version of your machine may vary.
Although the interface of the printer is friendly, we believe that usability has to be improved in future firmware, since for example, the name of the options lead to confusion sometimes or missing options such as being able to move the height of the Z axis during this process manually.
Once we have our level platform we will proceed to place the VAT in its location, we remind you to pay special attention to the resin management system and that the conduit of this is in its correct location.
It is time to use the resin management system, for this the first thing will be to arrange our resin canister next to the printer and place the conduit of the resin system located in the back in it.
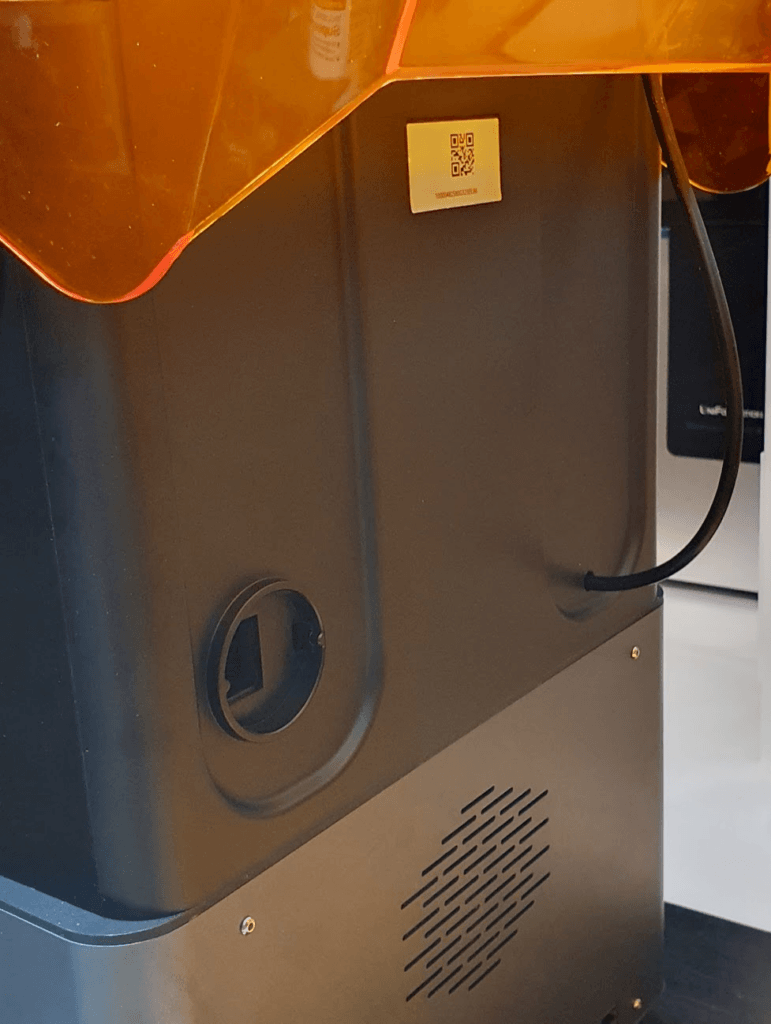

Then we will use the buttons available on the resin pump, in our case we will use IN to fill the tank and STOP when we have it at the desired level.
A 1l can take about 20 or 30 minutes, by hand this initial process can be faster, but this way we check that the system works correctly.
We also have two marks in the VAT to indicate 500 ml and 1000 ml which is the maximum advisable, taking into account the speeds reached by the printer and having a self-filling system we do not advise you to pass the 500 ml mark to avoid splashes of resin outside the VAT.
Below, you can see the detail of the resin management system:

We can also manage from the screen, Settings/Print Settings/Feed System, how the system should act during our prints for the autofill or simply to activate the filling or emptying from the screen itself without having to open the folding door to access the interior.

As with the resin management system, we can manage the air purification system from the screen to activate it manually or automatically when printing (more than advisable) as well as the deactivation time setting once printing is finished.
You can find all these options in Settings/Print Settings/AP System.

A good detail is the inclusion of a system to be able to attach a tube to guide the odors/vapors extracted by the air purification system to an air outlet and prevent them from remaining in the room or room where we have our printer.
In addition to the anchoring system, the kit includes a tube for this purpose which is appreciated.

Once we have everything ready we can start printing!! We will use our USB to print something that we generate from our favorite laminator or any of the examples included.
The process, the first few times, can be a bit confusing since when selecting the file to print it will make a process of loading and validation to the memory of the printer and once loaded we will have to select it again to start printing.
In the following video, you will probably be clearer about the process.
Opciones de gestión remota
We have already told you that the HALOT-MAGE PROincludes network connection options, both WiFi and Ethernet (cable), for remote management tasks that will simplify some processes or machine management.
In the case of WiFi connection, we can configure this from the screen in a simple way in Settings / WiFi selecting the one that interests us and putting the access data.
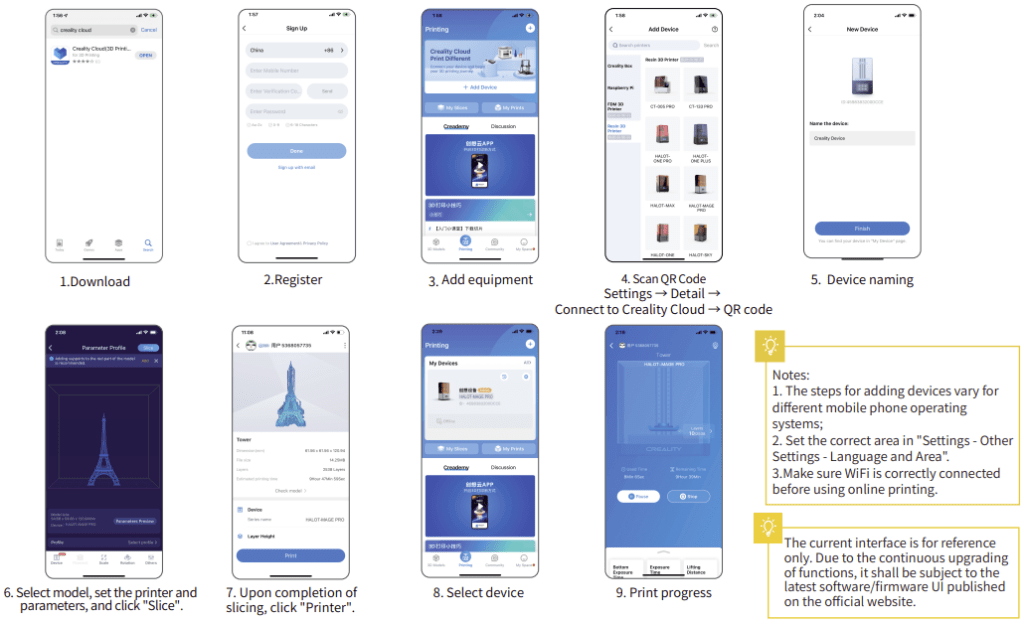
For now the possibility of sending our prints by network are limited to the Halot Box laminator although probably in the near future it can be supported by ChiTuBox and Lychee Slicer. In the following screenshot you can see the process:

Creality also has an App for mobile devices from where we can monitor and send our prints to our printer. We will not go into detail, then as you can find in the manual you have a quick guide to get it going.
Print quality
Before we start showing you some examples of impressions we would like to talk about the adjustment of exposure times.
The expansion of 3D printing in recent years along with access to technology in an affordable and high quality also makes many users start using their printers, many times, without being properly informed or not taking advantage of the options and quality that these printers can allow us.
Correctly calibrating the exposure time is a critical factor in ensuring that our parts are printed smoothly and with the highest quality. There are mainly, there are other values a little more advanced that we do not advise you to modify initially, dos very important values to take into account:
- Exposure time of first layers. These first layers are critical since they will withstand the tension of our piece and its supports when performing the printing process. In this regard it is important to:
- Number of first layers, a low value or a very high value can be counterproductive. Having a few first layers can make them not support, in this aspect, it is advisable to have a number between 4 and 8 base layers.
- Exposure of the first layers, also like the previous one, can affect the adhesion of our piece and make the printing fail. A short exposure can influence the adhesion, while a high exposure apart from causing similar failures will reduce the lifetime of our screen. Normally, as always depending on the printing conditions and resin we use, this exposure time is usually between 25 and 40 seconds.
- Exposure time of normal layers, if the previous layers were critical for the adhesion of our piece to the printing plate, in this case they are important to provide consistency to the piece as it is created and achieve a good definition of details in our figures.
After all this explanation, it is important that we invest a little of our time to find the exposure time of normal layers. For this, we can use different types of tests that you can find in our SLA calibration guide.
We started by performing the Phrozen RP exposure test which is fast, but it also gives us a lot of information when choosing our optimal exposure time, and we use normally which allows us to compare results with other printers.

Now that we have our exposure time, in our case we find that depending on the type of piece 2 s or 2.1 s are optimal times for our machine and the Creality Rapid resin, it is time to see the full potential of this HALOT-MAGE PRO and we started to launch our pending projects, and we could not be happier with the result.
Given the characteristics and approach of the HALOT-MAGE PRO we focused on making a big, very big project. We decided on the Wicked model, which has incredible designs, Groot – Guardians of the Galaxy 1/6 scale a really large print where to test the size, speed and capabilities of the machine.
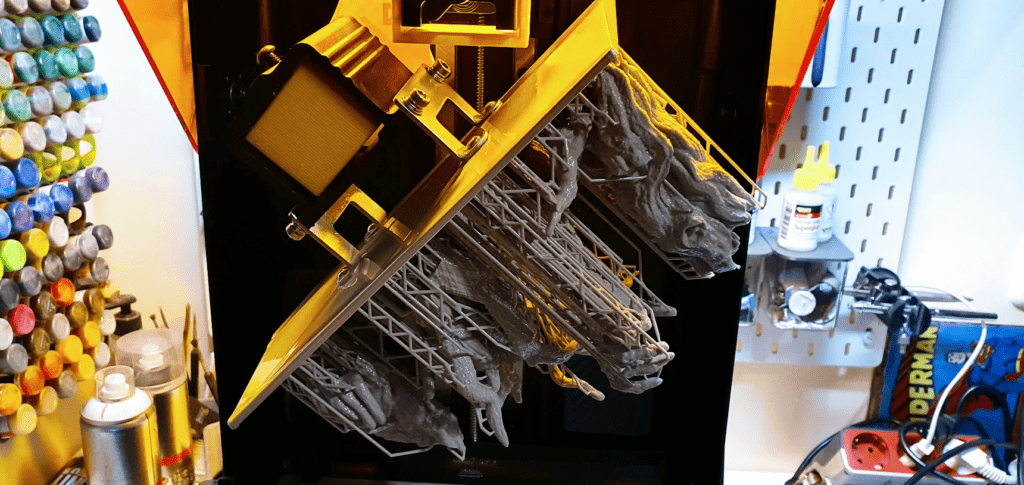
HALOT-MAGE PRO allowed us to complete the project in 1/4 of the time we would have needed on any of the other machines we had. Although the 1/6 scales are not usually very critical, the detail in this case the textures of Groot or details of the base show, despite the printing speed, in a hasty manner.
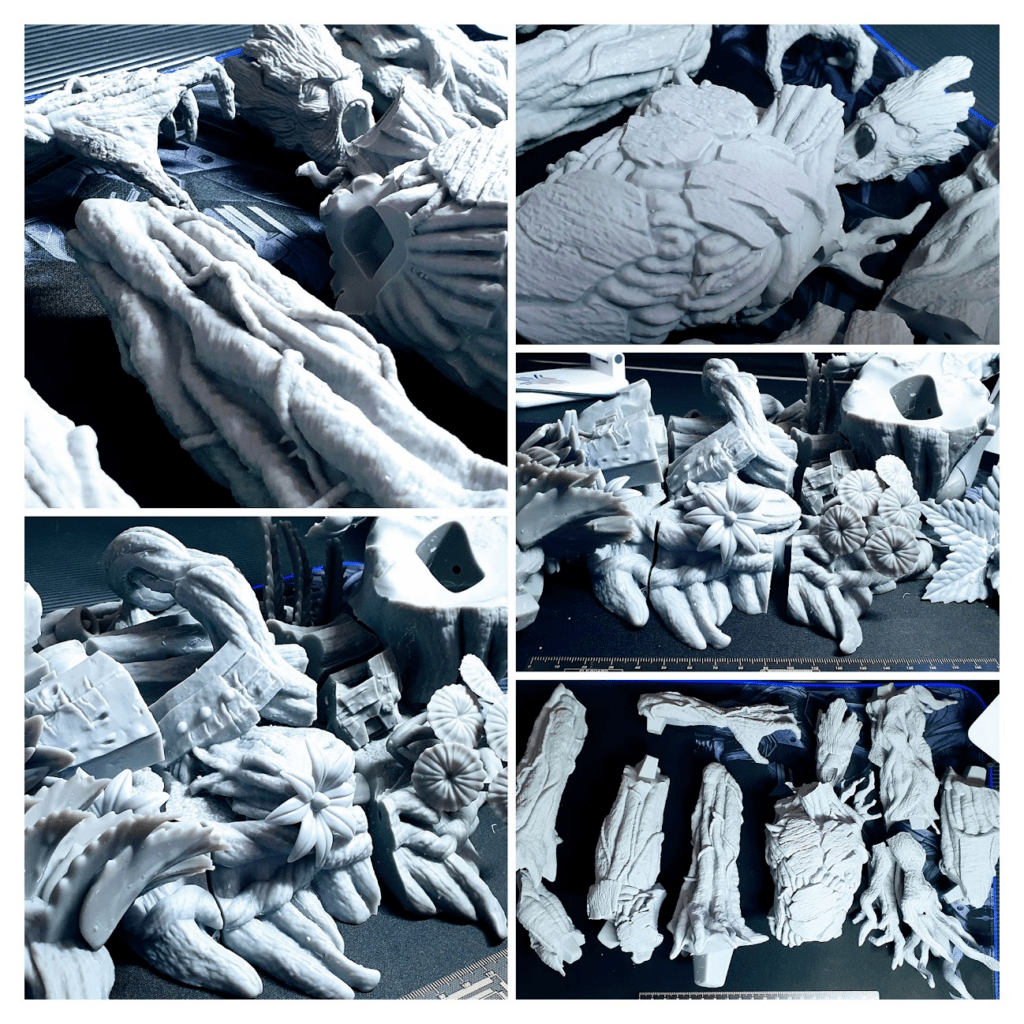
Also note that the resin management system worked sensationally, avoiding any scare by not correctly calculating the volume of resin needed to finish printing.

For the following projects we focus on reducing the scale of the figures where we realized that depending on what type of projects speed is not a good friend
We opted for a project of different squads of Orks where we could observe the great speed of the machine and that required finer adjustments of speeds and exposure to get the figures with all their details and without failures.
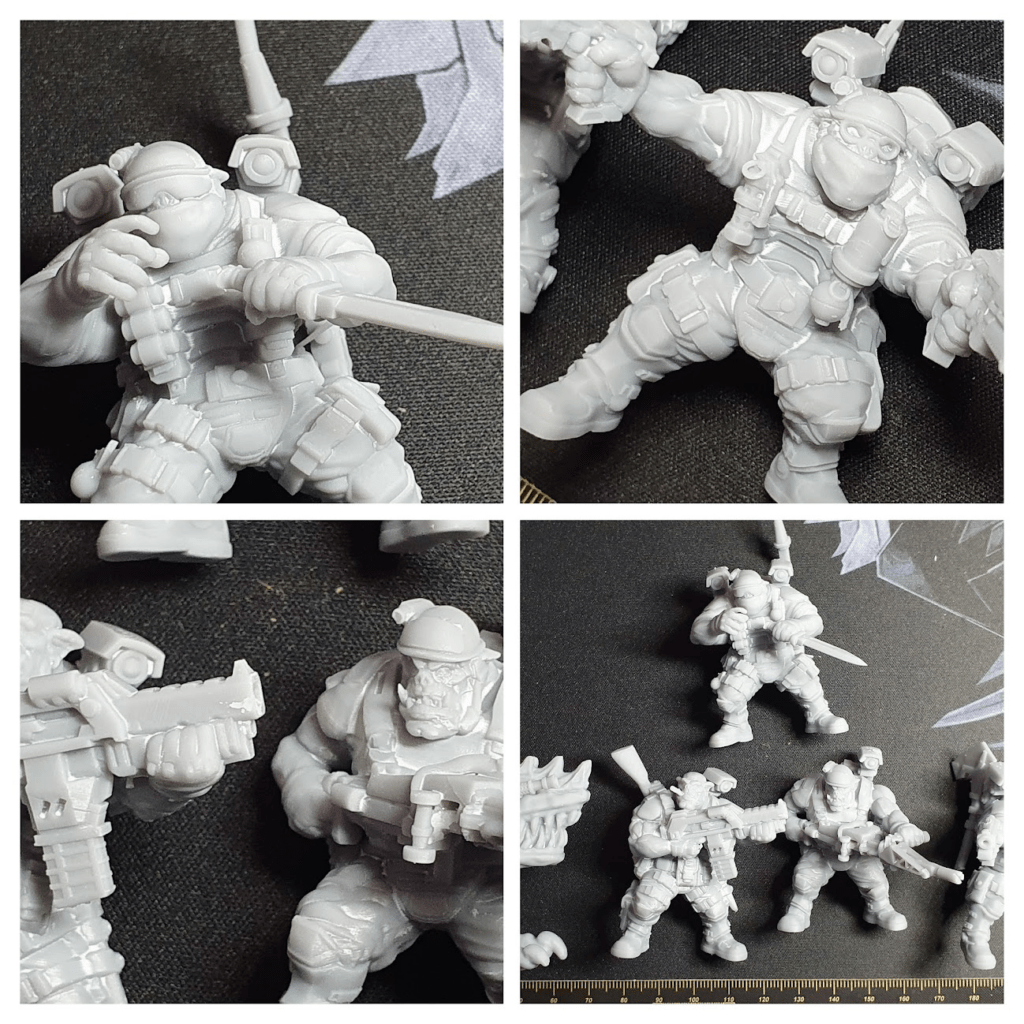
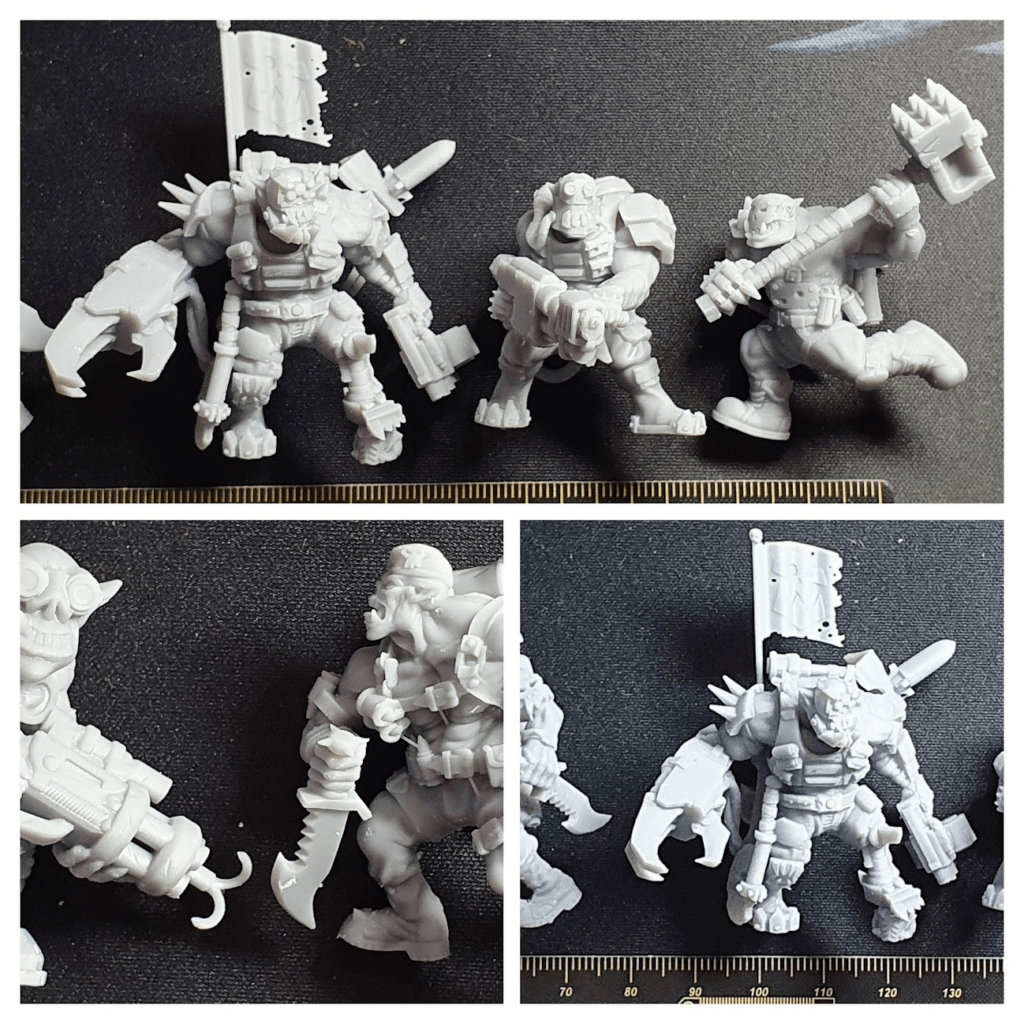
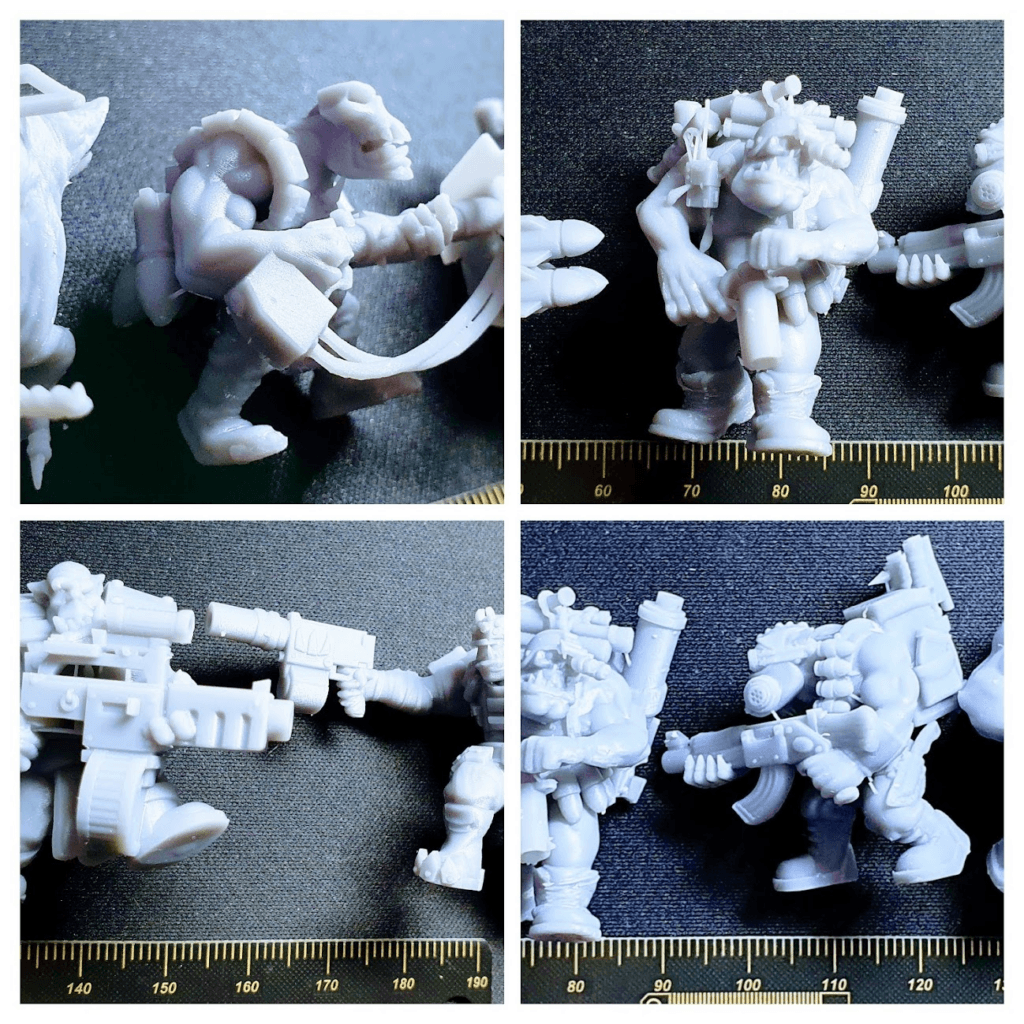
Again the HALOT-MAGE PRO had a sensational performance, taking the different prints in 1/3 of the time on other printers in our workshop.
We will continue to show you more printed figures in the future on our social networks Instagram, YouTube, TikTok, , TwitterandFacebook.
Final assessment
Creality with its HALOT-MAGE PRO has a really good printer in quality, speed and in general very good finishes both in printed and construction parts … But we believe that it has lacked a return to get the perfect product from our point of view.
However it is also true that Creality’s approach with this machine is totally focused on speed and production environments.
The inclusion of a one-year license to Chitubox PRO is something great to consider.
One of the biggest of this machine, although with a relatively simple solution by Creality through firmware updates, is that of its on-screen interface and its usability. The use of scrolling in long texts too fast does not give time to read them.
Although we have many functions from the UI some are confusing to use, such as the process of leveling the platform or the process to print something from the USB.
Regarding the latter, in the following video you can see how the scroll in names is somewhat confusing. As well as the process of loading from USB to the printer’s memory, click again to print from this memory, or the window prior to starting printing with two options that do not distinguish its function very well.
In any case, in reference to its 4.3 “touch screen and full color has excellent brightness, viewing angle, and response time It’s too bad that the usability of the menus or their options are not currently at the same level.
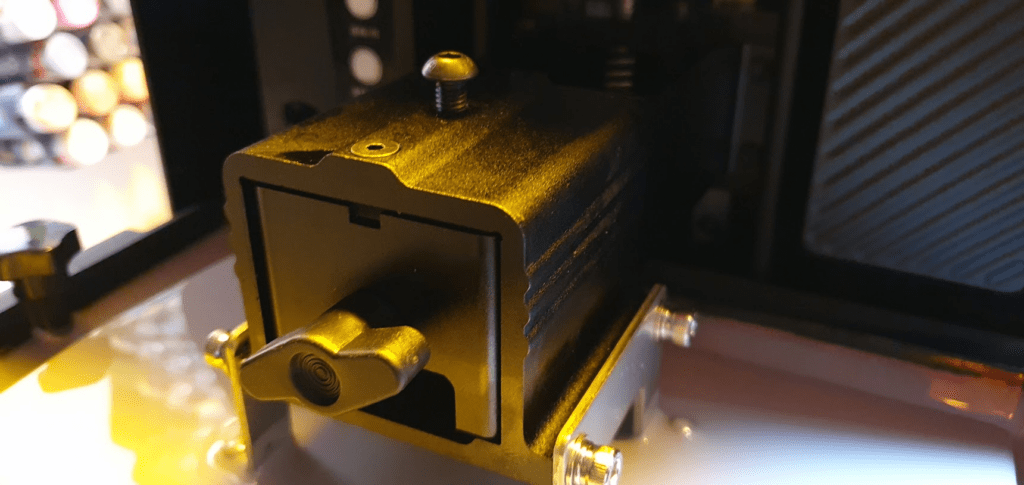
The anchoring of the printing platform, although firm, has given us problems with the system used in our test unit.
Since the anchoring system of the printing platform has an M5 thread at the top we put a screw to improve the anchoring, and it has been sensational, a “mod” is more than advisable.
In addition, we have not been able to find out why, the first layers have not come out correctly in any of our tests. In the following image, you can see those artifacts similar to the typical elephant foot.
We have done the levelling process several times, with different heights, adding sheets to the levelling sheet, adjusting speeds, etc.

In favor of saying that the printing platform has a laser engraving to improve the adhesion of the resin and that, in our case, we never had problems with adhesion or when removing our pieces from this.
In our case, we believe that the problem may have to do with a problem with our test machine. Also, Creality has decided to put the limit switch at the top of the Z axis which together with the speed of the homing process can be the cause of certain deviations during this process.
We have to say that from a few initial layers, all the prints have come out perfect and without similar artifacts.
Related to the speed used in some movements such as home, initial entry into resin by the platform when printing or even at the end of printing can splash the resin outside the VAT, and may even leak resin to dangerous areas
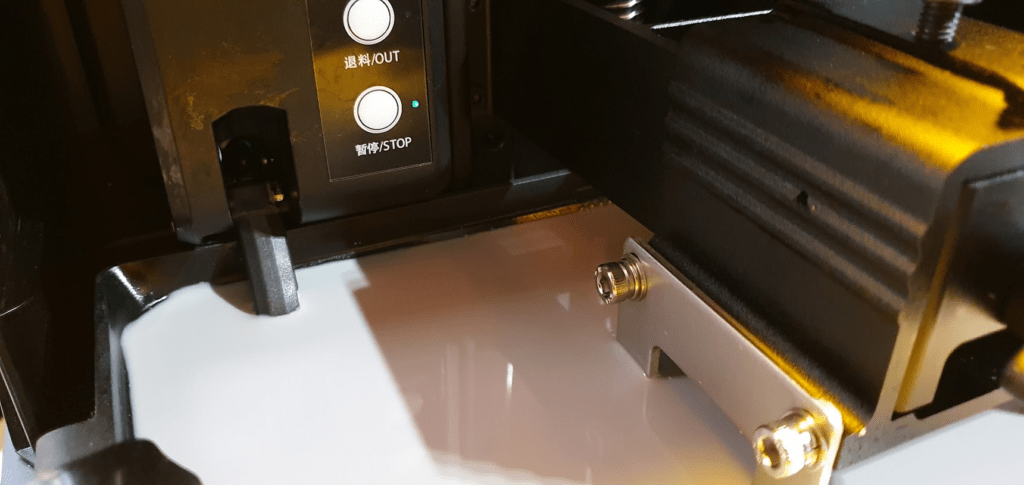
The resin management system, although it may take more or less is great, but it should be improved.
If you do not pay special attention to the first uses you can damage it and over time even mark the ACF film of the VAT.
We also thoroughly reviewed the air filtration system because honestly we found the airflow very poor and the system quite rudimentary and that could certainly be significantly improved, more being a component that improves the safety of use of the product.
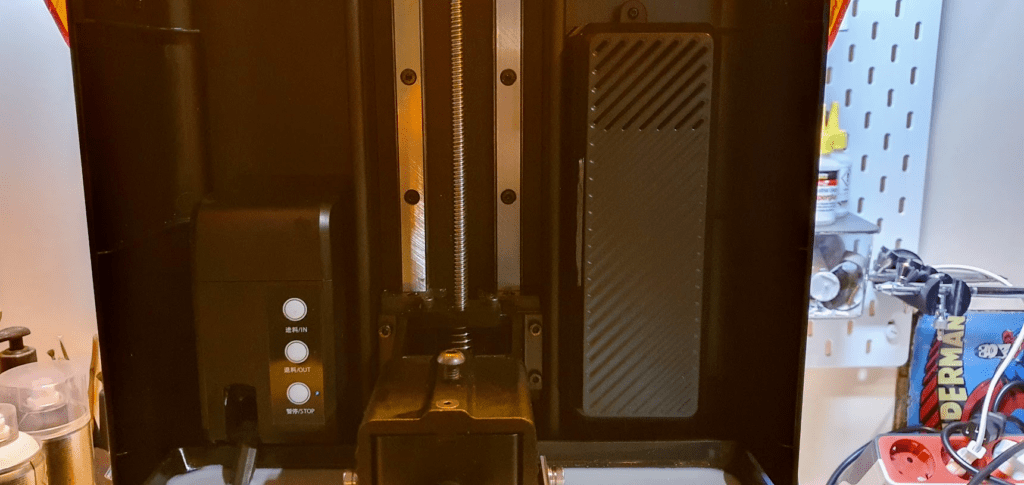
With respect to the ACF, we have seen that it is perfect for the speeds of the machine, but on the other hand, we have found some artifacts in certain situations that could be related to the use of this new film for VAT and that we have not found in other similar machines using other types of films with similar figures.
In some flat faces or in figures with a lot of detail… it’s something we’re continuing to test to identify whether it’s a general problem with the use of ACF, something on our part, or a combination of several factors.

In the section on remote management and connectivity is appreciated wireless and wired options, in any case, it would have been interesting to support bands of 5 or 6 Ghz instead of limiting only to 2.4 Ghz.
More related to aesthetics, is that the fans for UV / electronics are at the bottom exposed without protection, and that detracts a little from the aesthetics of the printer. Although, on the other hand, for production environments it can go sensational for the maintenance and replacement of the same.

Sometimes the problems we detect can be more or less simple to correct and we believe that the HALOT-MAGE PRO with a review of its interface focused on usability can gain many integers as a machine.
Where to buy the Creality HALOT-MAGE PRO?
Creality has its own online store where you can buy directly the HALOT-MAGE PRO as well as its accessories and spare parts. In any case, we provide you with some links to other reference stores:
If you use the shopping links, the price of the product will be the same as if you access it regularly, but 3DWork will have a small commission.
Something that will help us support the project and continue generating content.












Déjanos un comentario