Creality is a well-known brand in the world of 3D printing, it is probably one of the brands that have contributed the most to the growth of 3D printing thanks to its wide range of printers that adapt to any need/pocket.
The world of 3D printing has evolved enormously in recent times with machines that are increasingly faster, more reliable and with a quality that was unimaginable just a few years ago. Within this progression, brands have entered a race where we find machines equipped with advanced kinematics… CoreXY in the case of the K1 series that we will talk about… more powerful hotends, electronics, management and laminating software to allow us to accelerate our 3D printing with quality and reliability.
In this case, Creality last April presented us with its top of the range, the K1 series, which currently has 3 models: the K1, the K1 Max and the K1C (start 2024) which we will talk about later.
As always before continuing with the article, remind you that you can join 3DWork on our Telegram channel full of 3D printing derangers, or on our social networks Instagram, YouTube, TikTok, TwitterandFacebook.
Creality K1 Series
The Creality K1 Series has everything you could look for in a 3D printer, it’s fast and accurate… are the new generation of Creality printers.

They have an elegant design and a robust structure that will allow us to have very high printing speeds without sacrificing quality. It’s completely enclosed structure helps to significantly reduce noise, which is unfortunately quite high but normal considering the speeds it reaches, as well as allowing it to work with more technical filaments that require certain special temperature conditions.
With CoreXY kinematics perfect for working at high speeds, AI (fault detection) options or the option to use LIDAR technologies make the Creality K1 Series at the forefront of options.
We are going to try to explain all the functions of these Creality K1 Series by trying to compare the similarities and differences between them.
Among the common features between the different models of the Creality K1 Series we have:
- Print speed, as we have already mentioned, one of the great improvements in this new generation of printers is its approach to printing at high speeds. The Creality K1 Series features CoreXY kinematics that, together with its powerful XY motors, promise maximum speeds of up to 600 mm/s and accelerations of up to 20,000 mm/s2

- Printing surface, all three models have an aluminium heated bed that allows for fast and homogeneous heating. As a printing surface they include the same type of magnetic and flexible PEI sheet that sincerely behaves quite well in any situation, making it possible to print on high temperature filaments such as ABS or ASA.

- Printer control, again all models have a great 4.3″ full-color touch screen with a custom UI by Creality to operate the printer that has quite a few options, although some we miss for more advanced control. On the other hand, we also have a web interface to be able to operate the machine remotely, which in this case, unfortunately, is quite limited in options if we compare it with other more classic Klipper machines. We also have a customized version of Klipper that is the same in all three models which we will talk about later.

- Aesthetics and construction, in this aspect the three models have the same aesthetics and construction materials. An elegant design and relatively robust materials allow these machines to give us sensational performance.

Now let’s go on to describe the differential functions between the three models of the Creality K1 Series:
- Print area, something that probably stands out from the name of one of the models :). While the K1/K1C models have a print area of 220*220*250 mm, the K1 Max has 300*300*300 mm. Considering the dimensions of the machine, we realize what a great job Creality has done when it comes to building a compact machine with a large printing area. The fact that it has a larger printing surface also has its maximum power consumption, the K1 Max has about 1000 W while the K1/K1C has around 350 W.

- Intelligent assistants, this is another differentiating aspect between the different versions, their support for AI functionalities. For example, in the K1C we find that it mounts the K1 Smart AI Camera, the K1 Max includes the K1 Smart AI Camera in addition to the AI LIDAR, being the most advanced as standard in this aspect, K1 Smart AI Camera will allow us to monitor the status of our printing, detect printing errors and make time-lapse (recordings) of our prints. AI LIDAR sensors map the first layers to optimize and ensure that they have a correct flow and adhesion.

- Types of filaments supported, here we have another big difference between the different models. The K1/K1C models support a variety of filaments such as ABS/Hyper PLA/PLA/PETG/PET/TPU/PA/ABS/ASA/PC. On the other hand, the K1C, hence that “C” added to its name, adds the option of using “Carbon” filaments such as PLA-CF/PA-CF/PET-CF, for this the K1C is equipped with a set of tri-metal nozzle/barrel.

Now that we have an idea of the different models and features of the Creality K1 Series, the big question probably comes to mind… Which model is right for me?
Giving an answer to that question can be somewhat complex because it will depend on the use, budget and personal preferences in any case:
- Budget, if this is an important aspect when selecting the right model for us, the Creality K1 is the best option due to its lower cost compared to its sisters, offering similar quality and speed.
- Print volume, if our needs are going to require the printing of models of a certain size, the Creality K1 Max is undoubtedly the model to choose… its large print volume, quality, speed, and AI capabilities are the perfect argument in this case.
- Use of certain filaments, in the event that the use we want to give to the printer, or we want to explore these types of filaments, is to work with carbon-based filaments, the choice is clear… the Creality K1C is your printer, as it comes prepared and designed for it without having to complicate our lives.
Below you have a summary table with all the characteristics of these Creality K1:
| K1 | K1 Max | K1C | |
 |  |  | |
| Product Dimensions | 355*355*480mm | 435*462*526mm | 355*355*482mm |
| Package Dimensions | 415*415*550mm | 508*508*608mm | 428*428*567mm |
| Net Weight | 12.5kg | 18kg | 12.5kg |
| Gross Weight | 16kg | 23kg | 16kg |
| Display Screen | 4.3″ color touch screen | 4.3″ color touch screen | 4.3″ color touch screen |
| Input Voltage | 100-240V~ | 100-240V~ | 100-240V~ |
| Output Voltage | 24V DC | 24V DC | 24V DC |
| Rated Power | 350W | 1000W | 350W |
| Build Volume | 220*220*250mm | 300*300*300mm | 220*220*250mm |
| Printing Speed | 300mm/s | 300mm/s | 300mm/s |
| Max. Printing Speed | ≤600mm/s | ≤600mm/s | ≤600mm/s |
| Acceleration | ≤20000mm/s² | ≤20000mm/s² | ≤20000mm/s² |
| Filament Diameter | 1.75mm | 1.75mm | 1.75mm |
| Filament Types | ABS/Hyper PLAPLA/PETG/PETTPUPA/ABS/ASA/PC | ABS/Hyper PLAPLA/PETG/PETTPUPA/ABS/ASA/PC | ABS/Hyper PLAPLA/PETG/PETTPUPA/ABS/ASA/PC PLA-CF/PA-CF/PET-CF |
| Extruder | Dual-gear direct drive extruder | Dual-gear direct drive extruder | All-metal direct drive extruder |
| Nozzle Material | Copper Alloy | Hardened Steel | Tri-metal Nozzle Integrated |
| Nozzle Diameter | 0.4mm (included) 0.6mm, 0.8mm (optional) | 0.4mm (included) 0.6mm, 0.8mm (optional) | 0.4mm (included) 0.6mm, 0.8mm (optional) |
| Nozzle Temperature | 300℃ | 300℃ | 300℃ |
| Build Surface | PEI Flexible build plate | PEI Flexible build plate | PEI Flexible build plate |
| Heatbed Temperature | 100℃ | 100℃ | 100℃ |
| Power Loss Recovery | √ | √ | √ |
| Filament Sensor | √ | √ | √ |
| Bed Leveling | auto leveling | auto leveling | auto leveling |
| Enclosure | √ | √ | √ |
| Air Purifier | / | √ | √ |
| File Transfer | USB drive, WiFi | USB drive, WiFi | USB drive, WiFi |
| Remote Printing | √ | √ | √ |
| Slicing Software | Creality Print; Cura, Simplify3D, PrusaSlicer, OrcaSlicer | Creality Print; Cura, Simplify3D, PrusaSlicer, OrcaSlicer | Creality Print; Cura, Simplify3D, PrusaSlicer, OrcaSlicer |
| AI Camera | Optional | √ | √ |
| AI LiDAR | / | √ | / |
Creality K1 Max Kit Contents
In our case we have had access to the impressive K1 Max. We have to say that despite the print volume it has, 300*300*300 mm, both the packaging and the printer itself are quite compact.

Everything comes neatly packaged and protected so that no damage occurs during transport. We liked the level of detail and number of accessories included in the kit:

In the kit, we can find everything you need to carry out the assembly, the first tests since we have a HYPER SERIES coil, and basic maintenance of the machine. It is interesting to find a reel box to use during printing, which we will talk about later. Anti-vibration rubber feet are also included, which apart from improving the overall stability of the machine will reduce the vibrations that appear at high printing speeds.
Creality K1 Max Start-Up
The printer comes practically assembled, so getting it up and running is going to be a very simple and quick process, with an instruction manual that makes the whole process easier.
The assembly, once we have removed all the accessory boxes from inside, is to install the screen on the front of the printer, place the filament roll holder on the back, place the top glass cover, and plug in the printer.
Once you take the Creality K1 Max out of its box you can see a robust chassis and a sleek design in metallic grey where we have a slightly smoked glass door and top lid.

Once we have the “hardware” part ready, we will proceed to turn on the printer from the back button. Once the printer is turned on, follow the on-screen wizard where you will perform the following steps:
- Language selection, we were surprised that we have several available, including Spanish. Normally, other brands tend to have only Chinese and English.

- Removing the three anchors from the bed, a very important step!! and that from the screen will indicate the location and the process to remove these anchors.

- The next steps will be to configure our Wi-Fi connection, time zone, associate the printer with Creality’s Cloud services and to finish a test to verify heaters/fans/Input Shaping/leveling

- To finish, all that’s left to do is go to the Prepare>Extrude/Retract menu to load our HYPER SERIES filament:

With these steps, and in just under 15-20 minutes, we have our printer ready to go!! To check the operation of our printer, the first thing we did was to print a calibration cube that we already had available from the printer itself.

The cube was printed smoothly at high speed, but we have room for improvement in some respects. In any case, we already have our machine ready to start printing.
In the following video, you have the whole start-up process that can surely be of great help to you:
Components & Mechanics
Enclosure
The K1 Series is mounted on a robust aluminum chassis that gives it great rigidity to house the rest of the necessary components. This aluminum chassis is completed with panels as an enclosure, the front (hinged door), and the upper part (depending on the model) in opaque glass that gives it an exquisite and durable detail. On the sides we have some opaque polycarbonate panels, and on the back, we have a plastic/ABS panel.

This enclosure will be perfect for working with technical materials such as ABS/ASA/Nylon that require an environment with high temperature and no airflow. Since the K1 Series does not have a heater, it is ideal to keep the bed on for a few minutes with the entire enclosure closed before printing.
On the other hand, other filaments do not like high temperatures such as PLA in these cases, to avoid jamming, it is advisable to keep the top lid and the door open to maintain a not-too-high internal temperature.

In prints with filaments such as PLA, it is more than advisable to remove the top cover and leave the door slightly open.
Luckily, we have a temperature sensor where we can monitor the temperature of the enclosure and we can even use it in Klipper automations.
As a negative point to the enclosure, we have found that the wiring guidance system and the PTFE that supplies the filament to the print head collide with the enclosure slightly, and depending on the positions they are in less-than-optimal positions. In our case, to alleviate this problem slightly, we removed a couple of links from the cable chain and printed a mod of the clips for the PTFE tube so that it went through the top with a little more freedom.
Kinematics
One of the highlights of the Creality K1 Series is its CoreXY kinematics mounted on a compact yet robust structure. It uses tubular linear guides for the X and Y axes that will allow high printing speeds to be achieved, on the X axis it has self-lubricating bearings with graphite inserts while on the Y axis it uses the typical LMU8.

Another aspect to highlight is the generous and powerful motors that Creality has mounted on these K1s, which have larger pulleys than what is usually used, helping the set to obtain high speeds.
The K1 Series has in its kinematics a mixture of metal and plastic components, which seem rigid and of good quality although on the other hand, the belt and gear steps could be of better quality.
The support of the bed is made of metal, which helps, together with the triple axis that supports it, to leave a very robust and reliable set that we will deal with in more depth later.

As we have seen, the system has a drag chain system to guide the wiring of the print head in addition to the PTFE tube to guide the filament, at the entrance of this we have a filament sensor.

If we look at the previous photo we can see that we have a curious belt tensioning system, something that will be necessary to check since in CoreXY printers it will be very important that the tension between them is optimal since it can produce waves/ringing in our printed parts. We have different ways to check the correct tensioning, such as the mod that we can find in Printables to align and adjust the tension following the indications of the Creality guide. Later we will also be able to see how we can use the accelerometer of our K1 to obtain graphs of the belt tension for its correct adjustment.
Extrusion System
The print head of the K1 is designed in line with the design of the machine and is compact. This component, from our point of view, is where we can find some points for improvement. The compact design means that all the components have to coexist in a very small space with some problems that can harm us.

Disassembling the case is not very complicated since we have a couple of screws and we will be able to access, at least from the front, the inside of our head. The first thing that catches our attention is that we find a CAN toolboard and behind it, the hotend fan, leaving a rather scarce airflow that in some conditions can lead to an increase in temperature and end up in filament jams.

Speaking of the hotend, we have a ceramic heater that will allow us to reach the target temperatures quickly and accurately up to 300º, and that will provide us with a theoretical 32mm3/s of flow depending on the filament.
We also have a volcano-type all-metal nozzle that has behaved quite well, in any case, it is advisable to use a bi-metal (in the case of the K1 Max) of those available in the Creality store to improve it. In our case, as we will see later, we opted to install an E3D Revo system, which made the problem of punctual traffic jams disappear and simplified the process of changing the Nozzle thanks to its system.

We also have a layer fan (40x20mm) slightly smaller than what we are used to seeing other machines but with a correct airflow that together with the auxiliary layer ventilation system, on one side only, will be enough to work at the speeds that the K1 will allow us.

We also have another fan, 60mm axial, extra dedicated to the management of the enclosure and filtering of air to the outside where we can adapt a HEPA filter to improve this section.
At the extruder level we have a very compact orbital design and where we have observed some things to improve… At the level of the extrusion engine, we thought it was fair, which also contributes, together with the compact design, to increase the temperature of the cold zone of the extrusion system, contributing to possible blockages.

The inclusion of a filament lock lever has seemed very comfortable to us and although in the previous point, the compact design can affect certain situations it benefits us in others such as its use with flexible filaments such as TPU since the grip, in addition to the filament traction gears of generous dimensions, of the filament is produced very close to the extrusion system.

Print Platform
As we mentioned before, the K1 series, in its different versions, has different sizes and print volumes. Apart from this size, the characteristics of these are very similar.
Let’s start with something that we loved, the heating system of the K1 Series is based on a 220/110v silicone heater that will allow us heating times and homogeneity throughout the surface.

We also have a magnetic surface that has given us good adhesion results, but as we always like to modify our printers, we immediately opted for a PEO sheet with textured that, in addition to good adhesion, allows us to leave a pattern on the bases of our prints that give a sensational finish.
Related to the bed, we have a new leveling system integrated into it by the K1 Series, where we do not have a traditional leveling sensor but a pressure gauge system in each of the corners of the bed.

When the nozzle, during the home or mesh process, presses on the printing surface, these sensors immediately detect this contact, creating a safe and reliable system.

On the other hand, we have only one motor that moves the 3 axes that support the printing platform by means of pulleys. As we have only one motor, we do not have the option to level the shaft automatically, and in cases where we have a mismatch that is difficult to compensate for by leveling the machine, we will have to manually adjust the belt system by adjusting the pulleys as you can see in the previous images.
Electronics
We come to the electronics part where we have the CAN toolboard of the printhead and the main all-in-one electronics with the electronics dedicated to the Klipper host and the control part of the printer.
In the K1 we can find these electronics at the bottom of the printer although we should not need to touch anything, it seems to us an inaccessible location, and that normally involves placing the electronics in less than optimal positions for cooling, although in the case of the K1 we have an auxiliary ventilation system.

In the lower part, in addition to the electronics, we have the 24v power supply, correctly sized for the consumption of the machine and a control relay for the heated bed, which we already commented on in more detail in the previous section.
As for the electronics, host Klipper, we have a 32b Genic X200 MCU, dual-core at 1.2 Ghz with 256 RAM a bit special since it is based on MIPS32 architecture and developed by Creality (the electronics). Accompanying the MCU is a 2.4Ghz WiFi controller, plus an Ethernet connector for a wired connection, and 8GB EMMC storage.

In the electronics section of the printer, we have an MCU GD32F303RET6 accompanied by different connections/components, among which we will highlight the 3 TMC2209 drivers that will control the motor of the Z axis and the two (A/B) of the XY axis.
Although we mentioned earlier that we have a fan to cool the electronics, an interesting mod would be to put heat sinks in the MCUs of the electronics to improve the working temperature.
In the print head, we have control electronics, usually called a toolboard, which is like an extension of the main one controlled by the host system which allows us to keep the wiring to a minimum.

As we told you before, the whole set is very compact, preventing proper cooling, especially considering that the hotend fan is almost completely covered by the toolboard and we believe that it is a source of the problems we have had with jams in certain situations.
Also related to electronics, we have three more components:
- Screen, which has pleasantly surprised us for its response times as well as for a very friendly control interface with quite a few options… although, as always, we miss some of them. Although it is not directly related to the screen, it indicates that we have a USB connector on the same front as this one to be able to transfer our gcodes.

- LIDAR, one of the great novelties included in the K1 Max model, which promises us the advantage of being able to scan a test model… Analyze… and adjust the values in an optimal way of flow or Pressure Advance (PA) or detect problems in our first layers. In this respect we have to say that we have not seen great improvements in use, in fact until we have recent firmwares it does not seem that it was used properly.

- Camera, also by default on the K1 Max and K1C models, is a great addition either to monitor our prints, use the AI functions for automatic error detection or make our time-lapse videos of our prints. Here’s a video where you can see these features.
Diagrams/Pinout
Below you can see information and details about the electronics of our K1:
Creality OS
We are going to enter into one of the sections of this K1 Series that have left us with some conflicting feelings in some aspects.

Creality OS is the firmware that controls the printer, a Klipper customized by Creality. We believe that Creality would have to act in two sections to have a top-notch machine… firstly, to use current versions of Klipper, and secondly, since you are using firmware from the community, perhaps collaborate and support the community to continue to improve as other manufacturers do.
It must be said that Creality has made a great effort since the different K1 models were released especially focusing on its firmware, making different updates to solve problems, adding new functionalities and something that we loved and that we will talk about later in the improvements section… root access to the firmware that will allow us to adjust our machine to a low level.

We have to say that, unfortunately, it’s not just something from Creality but that all the brands that jump on the Klipper bandwagon either for functionality or sometimes for hype are making the same mistakes in this aspect. On the other hand, we understand, as a manufacturer, the complexity of leaving full access to a firmware like Klipper and the impact that this can have on misuse by the user affecting subsequent claims to the brand, or the opposite side, how average/advanced users can find themselves with a machine that lacks certain functions that it could have or be adjusted… it’s hard to find the balance and Creality with its root access has, for now, found this one allowing relatively both.
Once we have explained the above, which we believe is important for future and current users to know, we will go into more detail about this Creality OS.
Creality OS together with its 1.2GHz dual-core electronics will move the machine, its web interface, and its display interface in an optimal and agile way.
Regarding its web interface, customized by Creality, we have to point out that it has appeared a little fair in options if we compare it with those that we can find with official versions of Klipper. We lack some controls, access to macros, and other interesting options.

In the section on screen interface we have to say that Creality has done a very good job with a clean, agile interface and with many options… although, as always, we miss some.

Among the advanced functions implemented in Creality Os we have an “AI” through the use of sensors such as Lidar or the camera that will allow us, for example, to detect failures in the first layers or detection of “spaghetti” when our object fails during printing… Interesting options certainly always help.
Print Tests
Slicing for our K1
During the start-up, we started using Creality’s laminator, Creality Print, which promises us a fully integrated user experience with the K1 Series… The reality is that in our case it was a good experience in part.
We’re not going to hide the fact that Creality Print has improved significantly since its first versions and we can, luckily it’s not a problem anymore, use the advanced options of the K1 Series like Lidar. Another advantage is being able to send our prints directly, without the need for modifications, to our printer without using USB.
We are going to briefly explain how to start using it
- We will download the latest version available from here.
- Once installed, open it and load our model to be laminated:

- From the right-hand side, you can access the printer, material, and laminate printing settings:

- Once we have everything adjusted we can laminate our model:

- Once laminated, we will be able to see the pre-visualization where we will be able to review the simulation of the 3D printing process of our layered object and other interesting information… Once everything is verified, we can send via the network, copy to USB or send to Creality Cloud for printing:

- If we decide to send our object to be printed via the network, we will be able to select and see the status of our printers, something that we liked and found very convenient for managing our K1 printer farm

Our first tests were directly from the examples included in our K1 Max, from Creality Print or Creality Cloud. The first being a Creality calibration cube that although it was printed very quickly and dimensionally well, we already saw some things to adjust such as belt tension and basic temperature/flow adjustments… In addition to others of the vibration compensation system that we will talk about later in the improvements section.

Once these basic adjustments were made, the quality of our prints improved considerably… In short, you should always check the mechanical settings of the machine, even if it is new, in addition to carrying out the fit tests to improve the configuration of the slicer.

We had high expectations with the Lidar and its use, but honestly in our tests, as we saw with the vibration compensation, we haven’t seen it improve even when we modify settings to see how it works as well as its use to check the first print layer… We assume that as firmware-level improvements are implemented, these features will eventually bring more benefits.

Using Creality Cloud to track and review our prints from anywhere, especially when we are not in the same place as the printer, is a very useful feature.

Although Creality Print has very interesting things, it is still far away in terms of usability and options that we can count on other laminators such as OrcaSlicer, which is our main laminator normally, which also has base profiles for our K1 Series.

Most of the tests we have carried out were from OrcaSlicer, in the following screenshot you have some of the projects we have carried out with our K1 Max:

We mainly did all our tests with PLA with the high-speed profile and where, as we told you in previous sections, we had some problems with jamming so it is advisable to remove or open slightly the top cover and the front door.

An aspect to take into account is that inorder to have a layer fan with a good performance and an auxiliary layer fan, we find some problems in overhangs due to speed/temperature, so for parts that have this type of planes it is advisable to adjust the speed/temperature settings appropriately for perfect finishes.

We have to say that the Creality Hyper Series filament has done very well for us, giving us a good result in all our tests.

We also used other PLA filaments with which we also obtained very good results, although in some cases it was necessary to make a finer adjustment at the level of temperature/flow/speed for optimal results.
We also use other types of filaments such as PETG/ASA/ABS where we loved the K1, on the one hand, the enclosure allows these filaments to be printed reliably and in this case, unlike PLA filaments, the temperature of the extrusion system does not affect the flow of filament of this type so much, considerably reducing jamming problems.
We use TPU to a lesser extent, it is not a material that we use much only for tests, in this case as with PLA we had to finely adjust temperature/flow/speed to avoid jamming. TPU jams tend to give you more headaches at times.
Although we have already mentioned it, the printing surface included in the K1 Series has given us good results in general, although in certain prints/filaments, we have used an adhesive that improves adhesion.
As we have mentioned, despite having an improved revision of the extrusion system compared to the first versions of the K1 Series, we have suffered from jams that we have been able to minimize or eliminate in different ways... Mainly, as we mentioned in the previous paragraph, finely adjusting temperature/flow/speed, leaving the top cover and front door open, and some options in the printer configuration… As we mentioned before, in the section on the extrusion system, we do not think that the design of the print head will help in this aspect.

In any case, we have a detailed list of things to check in case of jams on the Creality Wiki, as these can occur in different parts of the extrusion system.
Improving the K1 Series
If you’ve made it this far, you’ll have read some great things about K1 and others to improve.
We have been using this machine for a few months because we think that it is a printer that, and for a use like ours, can make us have a very good machine as a series as well as being able to improve it and take it to another level.

To do this, we are going to divide our improvements into two sections, although in some cases they will be linked since they depend on the improvements at the Creality OS level and the improvements at the hardware level.
Improving Creality OS
The K1 Series uses Creality OS (basically a Klipper customized by Creality) as well as allowing root access so that we can improve it. In this section, we are going to show you how to root and some of the improvements that we can obtain.
As we have already mentioned, the K1 has limited access to its Klipper firmware, Creality itself has released the process here, in our case we will use the Guillouz companion method that you also have available on its Github.
Why is it important, depending on the type of user using the machine, to have root access to the machine?
Mainly because Creality uses a customized version of Klipper, capped in certain functions and outdated concerning the official versions, which can limit us in the use and enjoyment of certain functions of Klipper that could considerably improve our K1.
In the following steps we are going to describe the process of having root access to our Creality K1, K1 Max and K1C as well as add improvements in the configuration and management of this that, as of today, are not available on the machine.
Let’s start the process:
If our installed firmware does not have a root option, currently versions 1.3.2.1 (changelog) or higher already have root options, we will have to update.
- We will use a USB with FAT32/4096 format where we will copy the
.imgfirmware, in the previous point you have a link to them, which we will copy to the root of the USB. The firmware links at the top are valid for both the K1 and K1 Max models. - With the printer turned on and on the home screen, we will connect the USB and a warning will appear indicating that we have a new firmware. Tap Upgrade and wait for the process to finish.
- Once the process is finished, the printer will restart, when the home screen appears again we can remove the USB
- It is more than advisable to perform a
Reset Factoryto restore the values to the factory ones.
If you already have a firmware version that supports root, perform the following steps:
- From the screen we will go to the
Settings -> Root account informationoption

- We advise you to carefully read the text and the warnings about rooting the machine, if we agree we will check I
I have understood the risks of root loginand pressOK

- Next, it will give us the data of our root to be able to access our firmware by SSH

Installing Helper Script for K1
Klipper is based on Linux and its internal management will require some basic knowledge of it to be able to perform certain actions.
In this case, to make the process easier, colleague Guillouz has made our lives much easier with a tool based on menus, Kiauh style. To be able to install this more than interesting installation wizard:
- We will access our K1 via SSH, using our favorite client, using its IP and the username/password data we obtained in the previous step. In our case we use Terminus as a client, which is simple, powerful, very visual as well as multiplatform, you can also use others such as Putty:

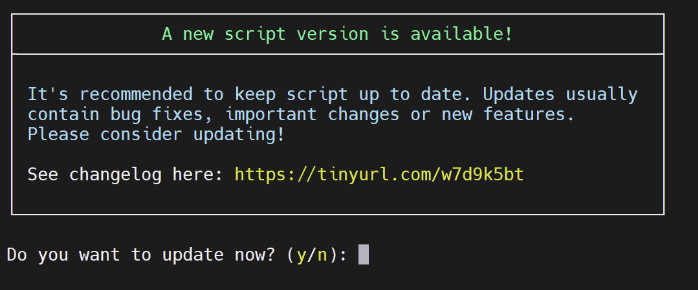
- From the command line we will launch the following command for the installation of the K1 Helper Script:
git clone https://github.com/Guilouz/Creality-Helper-Script.git /usr/data/helper-script
- Once installed, launch the K1 Helper Script using the following command:
sh /usr/data/helper-script/helper.sh

At this point, we have everything ready to transform our K1 to be able to customize and adjust it to our liking freely. We are not going to explain one by one the functions that we can adjust since in our Creality OS modification guide for the K1 or in Guillouz’s own Wiki for the K1 Series we have all the details.
In any case, we recommend some that we thought were essential:
- Backup, before starting to add all the improvements that you can see below, we would like you to keep in mind that in some of the following processes, something can go wrong, so it is more than advisable to have a backup/backup of the most important data. To do this, the Helper Script makes the task easier with options to make a backup of our Klipper configuration files.
- Installation of extra system components, the system used by Creality for these K1 as we have already mentioned is very limited which in itself is not bad for a user who wants to use the machine as it comes but if we want to get more out of it we will need to install extra components to it.
- Entware is a software repository for Linux systems that will allow us to install extra components to our system.
- Nano, one of the packages that we recommend you install is Nano, which is a command-line editor that will surely be useful at some point.
- SFTP, the next package to install is SFTP since it is not enabled by default, and if we need to transfer files to or from another computer it will be of great help.
- Installation of Moonraker, a previous and essential step is the installation of Moonraker, which is the API that will allow other components that we install to “talk” with Klipper. On the other hand, Nginx is a web daemon that will allow Moonraker to work in addition to the UIs that we want to install. This change will allow us to send prints locally over the network from our laminator, compatible with Klipper/Octoprint, to the K1 without the need to use Creality Print, Cloud or USB.
- Installation of UI Web, it will be the web interface with which we will be able to manage our machine being able to use the most used in Klipper… Mainsail and Fluidd from which we will be able to have many more options to manage our K1

- Manual assisted bed leveling, a very interesting feature is Screws Tilt Adjust, which allows us to adjust the manual leveling of our bed using the precision of the leveling sensor of our K1.Es interesting, as we will see in the following points, that the bed of our K1 is not always in the best condition. To be able to correct this, this mod is going to be sensational.
- Improved automatic bed leveling, Creality by default uses
lagrangeas an interpolation method in the calculation of our leveling mesh while the method that may be more beneficial may bebicubic. To modify this, we will go to ourprinter.cfgand in the[bed_mesh]section we will add the following lines at the end of that section: - KAMP (Adaptive Leveling and Purging), KAMP is always a component that we like to add to our printers, this extension to Klipper allows us to generate an adaptive mesh to the printing area of the objects to be printed with which we will have a mesh area more defined to the needs considerably improving the result of our first layers. KAMP calculates the mesh area taking into account the information provided by the laminator when enabling the object labeling function in the laminators.
- Improvements in fan management, our K1 has three manageable fans that it uses by default in different actions during printing. With these improvements from the Creality Helper Script and applied to the printer.cfg we will be able to have more control over the fans and optimize their use.
- Improvements in vibration compensation (Input Shaping), Creality seems to have limited the operation of Input Shaping only to the Y axis (and this is copied to be used as X values, which is not always advisable) when due to its kinematics and the sensor it carries it can do it for the X and Y axes. With a few tweaks to our printer.cfg we will be able to solve this.
- Macros for filament changes (M600), typically laminators use the gcode M600 to indicate to the machine when a filament change is going to be performed. Unfortunately, the K1 doesn’t have a macro of this type by default, and since if we don’t have root, it’s difficult to add them to our K1, we can take advantage of rooting to improve this and other macros. We can use the macro included in the Creality Helper Script for the M600 as an example, but you can always use more complex and process-enhancing macros like the one we used in our Klipper bundle.
- Z-Offset, a recurring problem is that if we adjust our Z Offset during a print (baby-stepping) to make adjustments we have to remember to save these changes in our settings from the web interface to keep them. With the following changes, we’re going to make the Z Offset automatically save and load automatically when the system starts.
- Buzzer/speaker, Another improvement that we can make, and that can be very useful, is to enable the buzzer/speaker that the electronics of our K1 have.
- Alternative UI on screen, the interface of our K1 is quite intuitive and functional but lacks many advanced management options such as those we can find in KlipperScreen.
Thanks to our colleague ballaswag who has created a new UI, called Guppy, with advanced functions we can significantly improve the control from this in our K1.
These are some of the ones suggested by us as “essentials”, in any case, we suggest you regularly visit the Guillouz Wiki for K1 where you will find more improvements that may be useful to you.
Improving the K1 Hardware
The other section to improve our K1 printer is in the hardware part where we are going to advise you on some interesting mods as well as advising you to go through our collection of Creality K1 Series 3Dwork Mods in Printables:
- adjusting the cinematics, although this is not a mod per se, it is advisable to do it as soon as we can.
Basically, we will use two tools that we can print ourselves to align the axis of the extrusion system and on the other hand to adjust the tension of our belts

- Bed leveling, we have already talked about that sometimes the system of straps that control our bed can be misadjusted and this can affect the correct compensation by the automatic leveling. Since the adjustment process is laborious since we have to disassemble the machine, it is advisable to install a traditional manual leveling system with the typical adjustment wheels. Also taking advantage of the change, it is advisable to put silicone blocks or rigid springs.
- Auxiliary layer fan, as we have already mentioned and despite having good layer ventilation in the hotend and auxiliary on one of the sides of the machine, it can fall short or cause artifacts.
If we want to get the most out of our K1, it is advisable to install a second auxiliary fan to increase layer ventilation and ensure that the airflow reaches evenly from all sides.

- Replacement of the hotend, as we have told you on several occasions, the extrusion system of the K1 can give us problems at times and we have different alternatives to improve it… One of them is the substitution of a more advanced one. In our case we decided to use an E3D Revo Creality Sprite kit that is compatible with the K1 hotend which was perfect for us since we use Revo in other machines, the quality of its nozzles and the nozzle quick change system is something that works very well for us and has helped reduce traffic jams to practically zero.

Final rating Creality K1 Series
Creality with its K1 series has taken a step forward with powerful printers that with its 3 available models can be adapted to any use. In this respect, we have the K1 Max version if we are looking for a large print volume and on the other hand the K1C if we want to work with technical materials, apart from the K1 entry model, of course.
Creality has also put special detail on an aspect that users increasingly value, the aesthetics of its printers… and these Creality K1s look great. Apart from the design, Creality has mounted a chassis and kinematics that have given us very good results for a “premium” printer like this. In addition to this detail in the design, Creality has paid attention to the commissioning process and documentation/support, something that is greatly appreciated.
An increasingly important aspect is the noise levels generated by this type of machine since they can be installed in work environments and for many hours, if it is your case that you have to live near it we have to tell you that it is a printer that generates a lot of noise depending on the speed or type of filaments we use… as they are directly related to the % of ventilation to be used. In any case, it’s an endemic evil of this generation of super-fast printers.
In the quality section, we found it a great surprise of the K1 Series, taking into account that its great asset was speed, and like any printer, adjusting and calibrating this one we can obtain very good results. Perhaps this quality is tarnished by the reliability at times with the extrusion system that has given us some jams until we find the right settings to minimize them. Continuing on the experience during printing Creality Cloud is one of the functions that in our experience has not been as pleasant as we would have liked, confusing environment, advertising, very focused probably on users of the Chinese market for our taste.
In summary, we have to say that two parts of the K1 can be improved:
- First, the extrusion system can cause a lot of problems when working with certain filaments and will require fine-tuning. We have different generations of extrusion systems that have been improving this aspect… something to thank Creality for.
- The second is the implementation of Klipper by Creality, we have commented on several occasions that finding the key when implementing Klipper in certain printers that focus on a certain type of user is and will be a problem. In this case, Creality has opted for a great alternative which is to have a “closed” system but with advanced access options that allow the community to improve this aspect and that we have already talked about during the review.














Déjanos un comentario