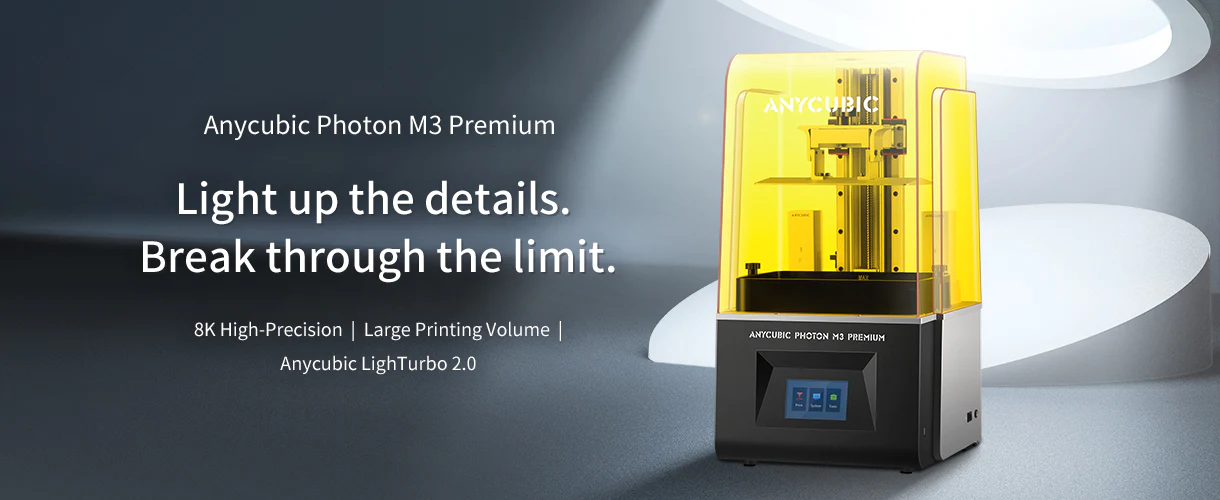
Anycubic has launched the new Photon M3 Premium, precisely that premium of its name gives us clues to the objective of this model which Anycubic has tried, based on its experiences with the M3 series and users feedback, to create the perfect machine.
Below is an introductory video of the Anycubic Photon M3 Premium.
As always before continuing with the article remind you that you can join 3DWork in our Telegram channel full of those upset by 3D printing, in the specific group for Anycubic resin printers, or in our social networks Facebook, Twitter, Instagram.
Anycubic Photon M3 Premium
The Anycubic Photon M3 Premium has several excellent improvements over its M3 series sisters, making it a premium printer in the M3 series.
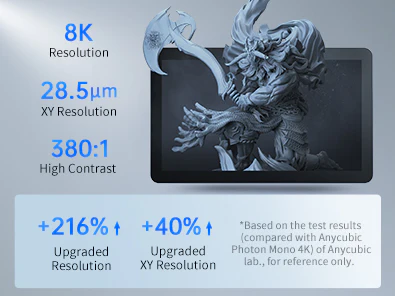
Although we will detail you later we advance some improvements such as its XY resolution of 28.5 microns (0.0285mm) thanks to its 10.1 “monochrome screen with an 8K resolution of 7680×4320 pixels making this Photon M3 Premium one of the best MSLA printers size/resolution ratio on the market.
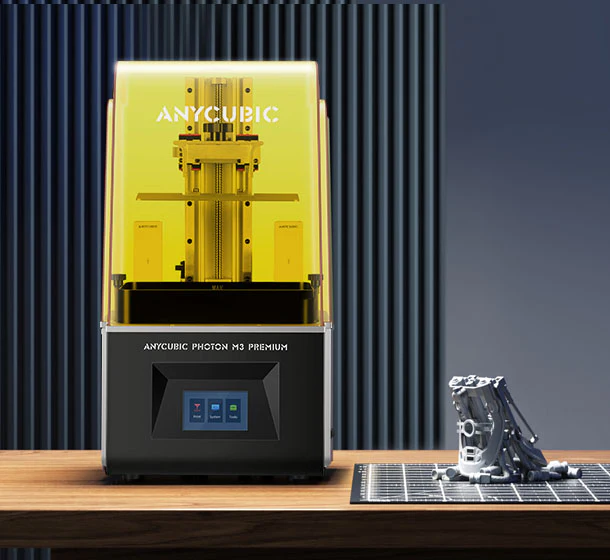
In addition to the resolution, we find other improvements such as the blackening of a double air filtering system, a generous 4.3 “control screen, the inclusion of nFEP, WiFi, and some other novelties that we will detail later.
Below you can see the features of the Photon M3 Premium compared to its sister the Photon M3 Plus:
| Photon M3 Premium | Photon M3 Plus | |
|---|---|---|
| Screen size | 10.1″ Monochrome | 9.25″ Monochrome |
| Screen resolution | 7680×4320 px (8K) | 5760×3600 px (6K) |
| XY pixel size | 28.5 um (0.0285 mm) | 34 um (0.034 mm) |
| UV Type | Anycubic LighTurbo 2.0 | Anycubic LighTurbo |
| Print volume | 250x123x219 mm (6.7L) | 245x197x122 mm (5.9L) |
| Printer size | 66x33x35 cm | 47.4x29x36 cm |
| Control Panel | 4.3″ touch panel | 5″ touch panel |
| Other | USB TypeA 2.0/WiFi | USB TypeA 2.0/WiFi/Webcam/Auto refill |
Kit Components
As usual, Anycubic machines arrive in perfectly protected and compact packaging, avoiding the printer and the accessories/components included can be damaged during transport.
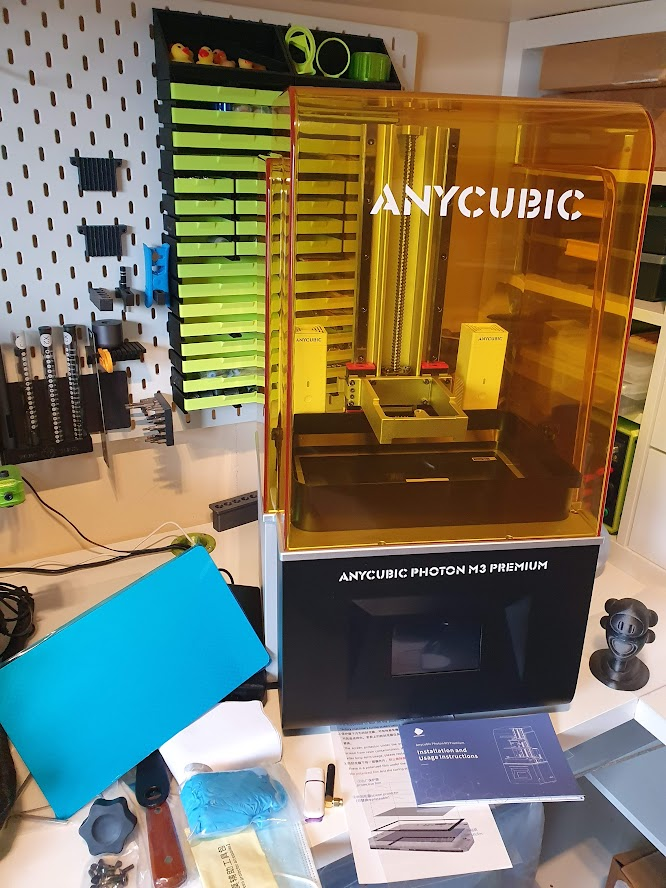
As for the aesthetics of the Anycubic Photon M3 Premium we do not find the typical design of the brand that has a dome with a more rounded design and the base of the electronics and lighting system that impress using aluminum in two colors.
It is on the front where we find the 4.5″ color touch control screen to handle the simple and functional control interface.
In addition the right side we can find the power switch, the power connector, and the USB port, in our case it seems more comfortable and functional that both the switch and the USB are on the front.
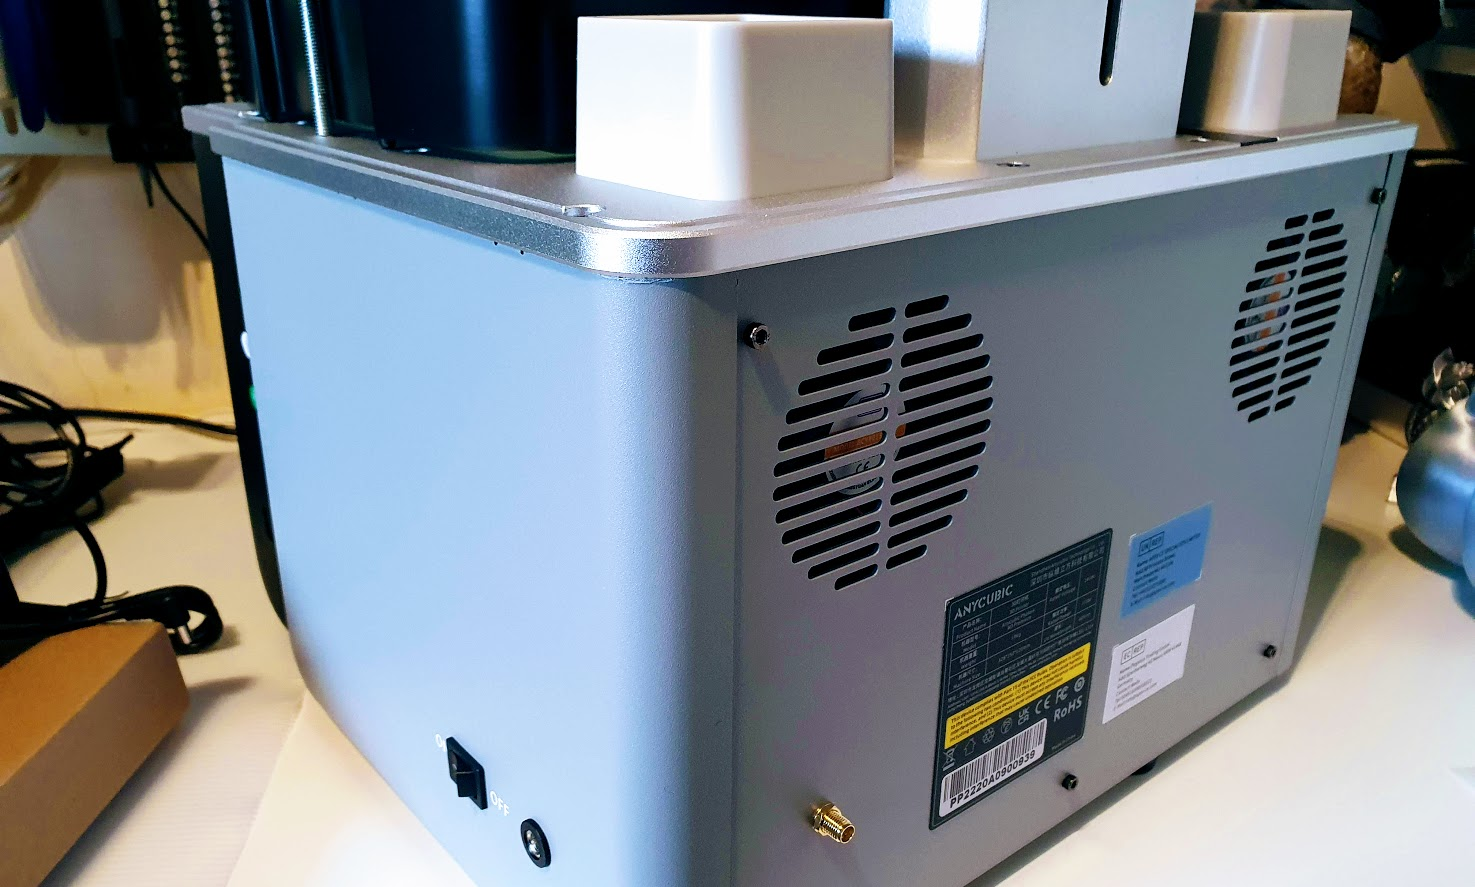
Finally, in the back, we can find the connector of the WiFi antenna and the ventilation system. We have been pleasantly surprised that the fan system for the size of the machine is quite quiet something that is appreciated.
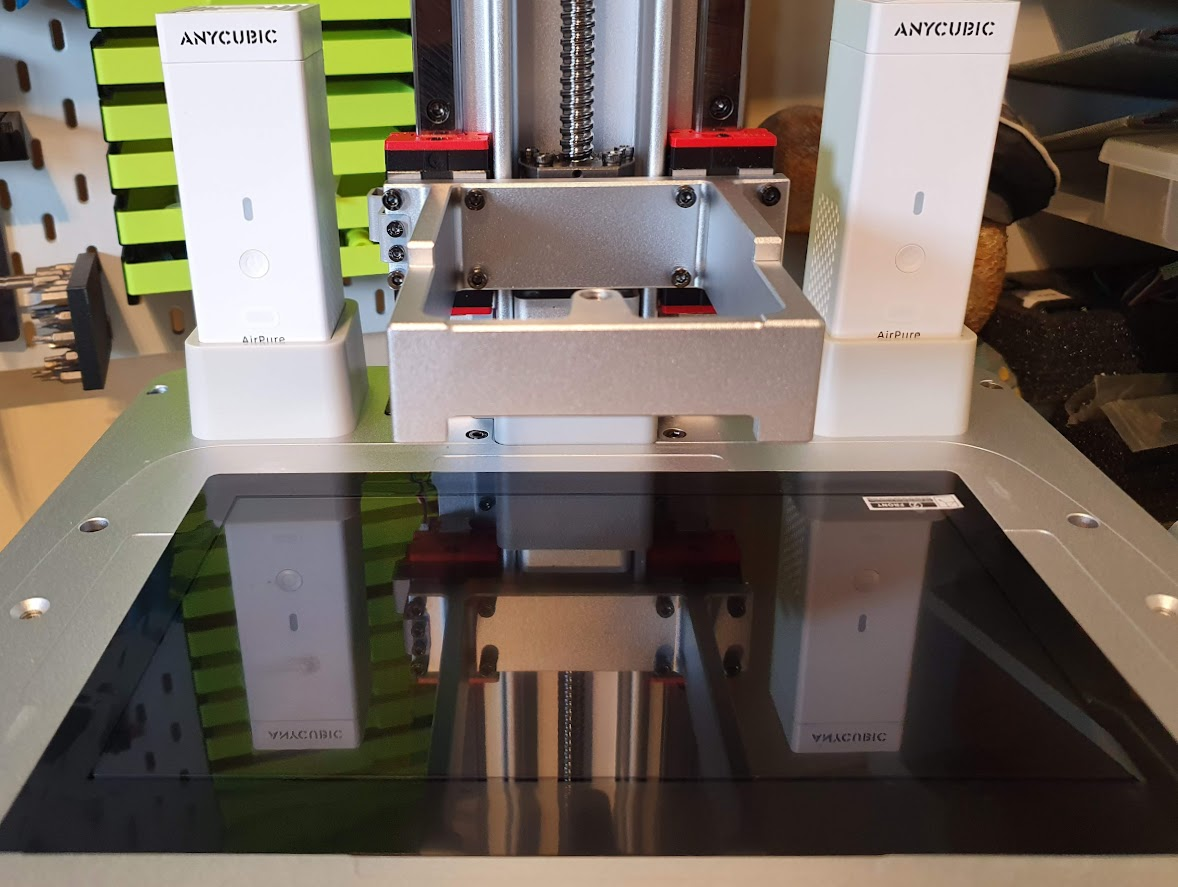
Entering the optical part we find a 10.1” 8K monochrome screen with a resolution of 7680 x 4320 pixels with a pixel size of 28.5 μm along with a contrast ratio of 380: 1. In addition, this is protected by a protector that gives us some peace of mind against resin leaks since in the contact part with the VAT it simply has a screen protector.
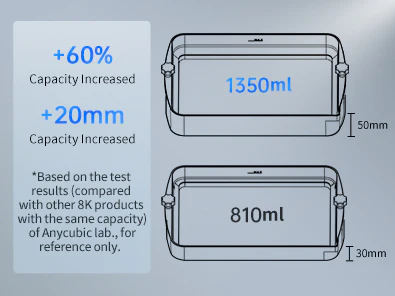
Another aspect that we liked is the capacity of the VAT mounted on this Anycubic Photon M3 Premium which will allow us to launch prints taking advantage of the large print size and reducing the risk of running out of resin or having to fill it during printing.
On the other hand and related to the optical part we have the new LighTurbo 2.0 system that provides improvements in the distribution of light. We are going to make a small point to explain why the UV light source is so important in our prints and why the LighTurbo 2.0 technology makes a difference.
Anycubic LighTurbo 2.0 uses a COB UV light source technology, UV light is emitted through a concave mirror improving the distribution and alignment of the light beam providing great improvements. The space for this new type of optical system is reflected in the imposing size of the base of this Photon M3 Premium.
The UV system is automatically cooled by two generous fans that are quite quiet and with automatic speed adjustment to ensure the optimum temperature of the optical system, thereby increasing the life of the assembly.
Especially impressive is the mechanical kinematics system of the Z axis which apart from two very robust linear guides highlights the movement rod with double ball bearing.
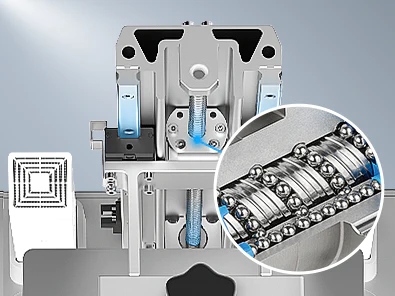
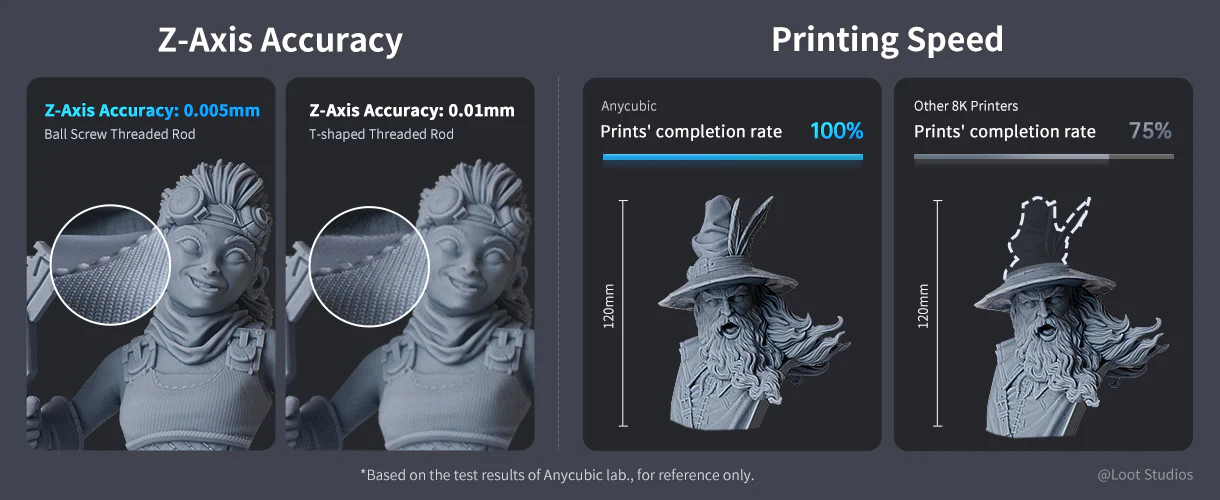
The use of this type of rod allows an accuracy of 0.005 mm, they also give a greater structural consistency to the set, in addition to reducing the resistance in the movements making the typical layer marks in our figures significantly reduced and allowing higher speeds in movements of the axis.
Another interesting aspect is the inclusion of a double AirPure activated carbon air cleaning system that helps significantly reduce the smell of the resin, interesting the option of being able to control the on-off both physically from the button or from the screen, although in this aspect more options are missing such as being available these controls during printing or enabling them to turn on automatically while we are printing.
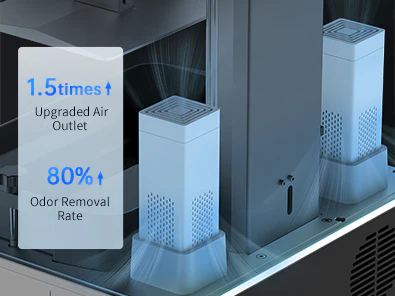
We remind you that the filtering system uses activated carbon filters which, depending on the use, it is advisable to replace them every 3 months approximately.
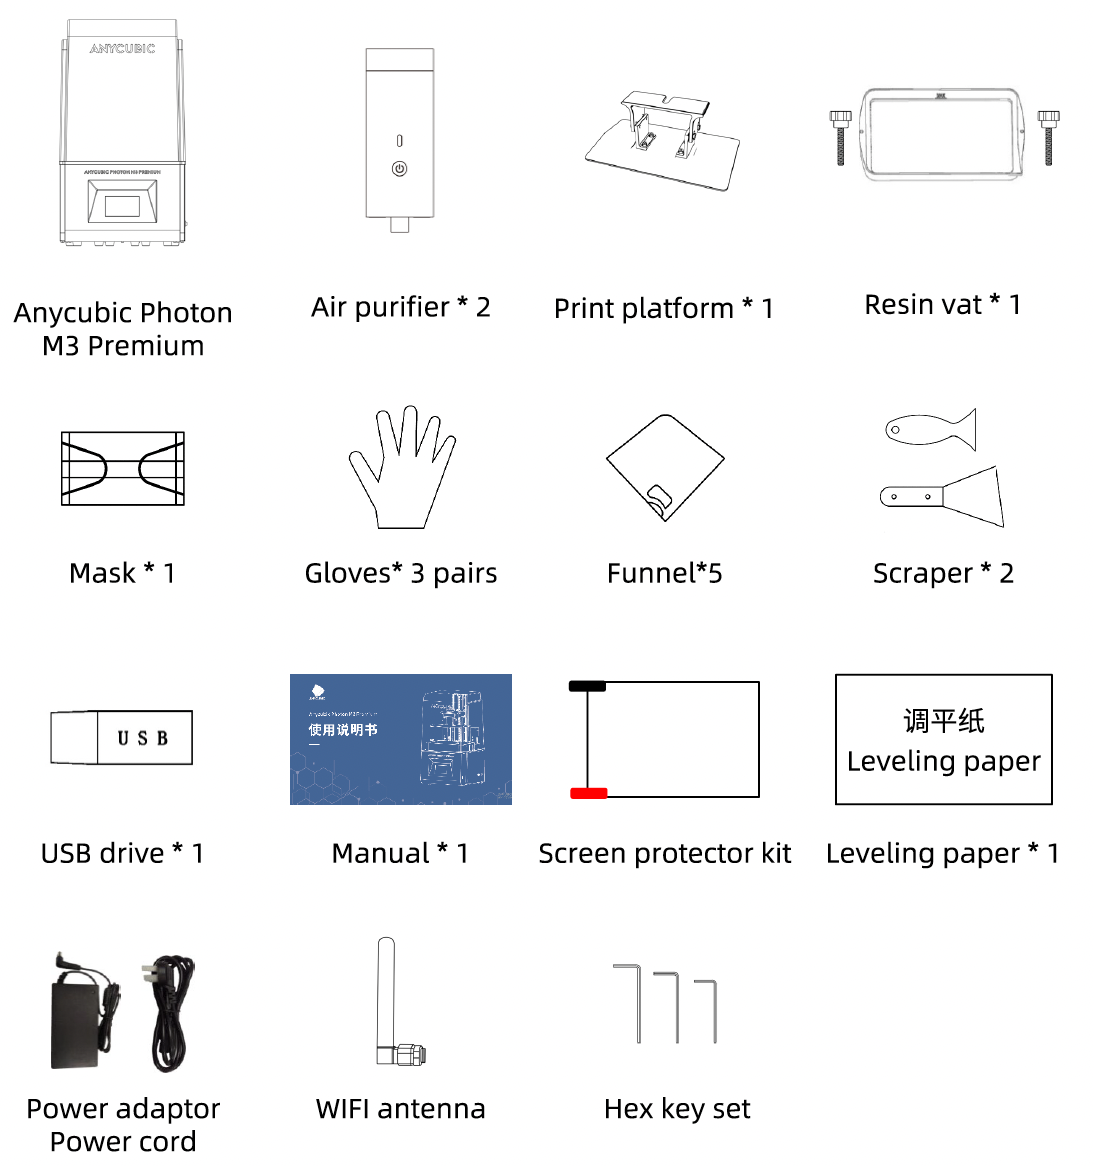
Also included are accessories such as a tool kit(spatulas; wrenches for screws and nuts; mask; nitrile gloves and filters for resin), a pen drive with software, and manuals including a quick start guide.
First steps
The commissioning process of the Anycubic Photon M3 Premium is extremely easy to follow as well as being well-detailed in its instruction manual.
IMPORTANT NOTE:
If you do not know resin printers, it is a technology that allows you to obtain incredible detail compared to other technologies such as filament extrusion.
On the other hand remind you that the resins used by this type of printer are or can be potentially dangerous given their toxicity either in contact with the skin or eyes or the inhalation of gases so it is essential to take all appropriate safety measures such as the use of masks for quality air filtration, gloves, glasses and work in well-ventilated rooms.
Finally, we would also like to remember that this type of technology needs post-processing of our pieces such as cleaning and curing of these and that we have to manage the waste generated by its use properly.
Once we take our Photon M3 Premium out of the box, we just have to follow these simple steps:
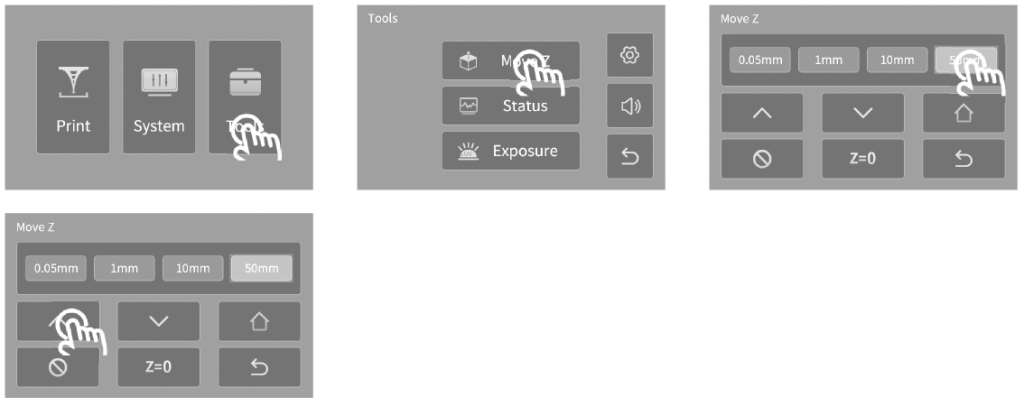
- We will start the machine with the ignition switch on the right side, we will remove the VAT by loosening the screws on its sides, and then using the screen inside Tools / Move we will move the Z axis up to leave the gap to install the printing platform
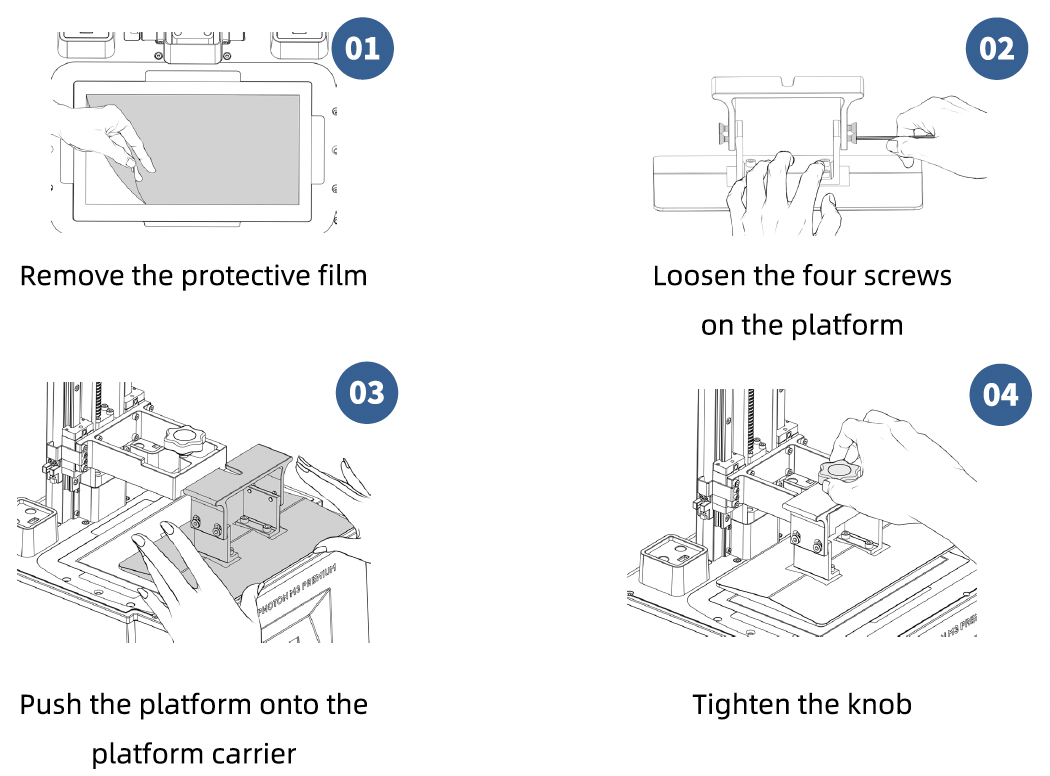
- We will then proceed by removing the security protector of the screen and its protector (1), we will take the printing platform and loosen the screws of the vertical anchor so that it is free (2) and from this page, we will place it and anchor it in the arm of the Z axis (3 4).
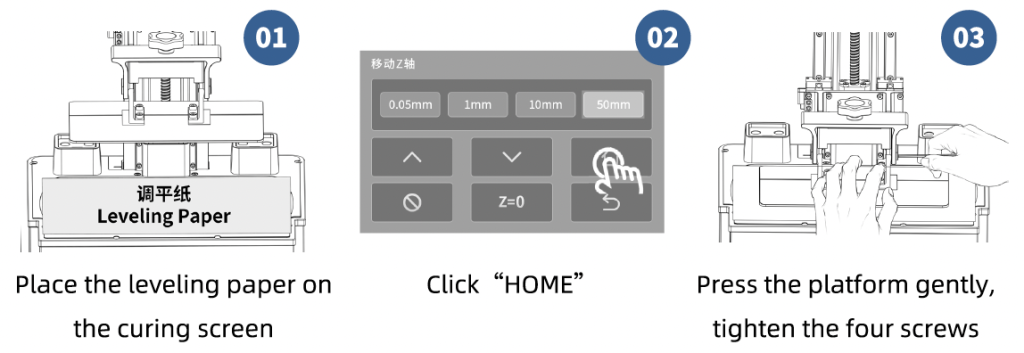
- We will place the level sheet (1) included by clicking then on the Home icon (2), and wait for the Z axis to descend and stop automatically. Using our fingers we will press lightly on the printing platform so that it presses the leveling sheet evenly by tightening the fixing screws of the printing platform (3).
IMPORTANT!!!
Since it is probably the first time you check the machine it is advisable to perform this home process being attentive and with your hand on the off switch in the case of any problem the limit switch does not work to avoid any major damage to the printer.
- Returning to the screen we will go to the Tools menu and click on Z = 0 to store position 0 of our printer, press Enter twice to accept Z = 0, and lift the printing platform to allow us to remove the leveling sheet.

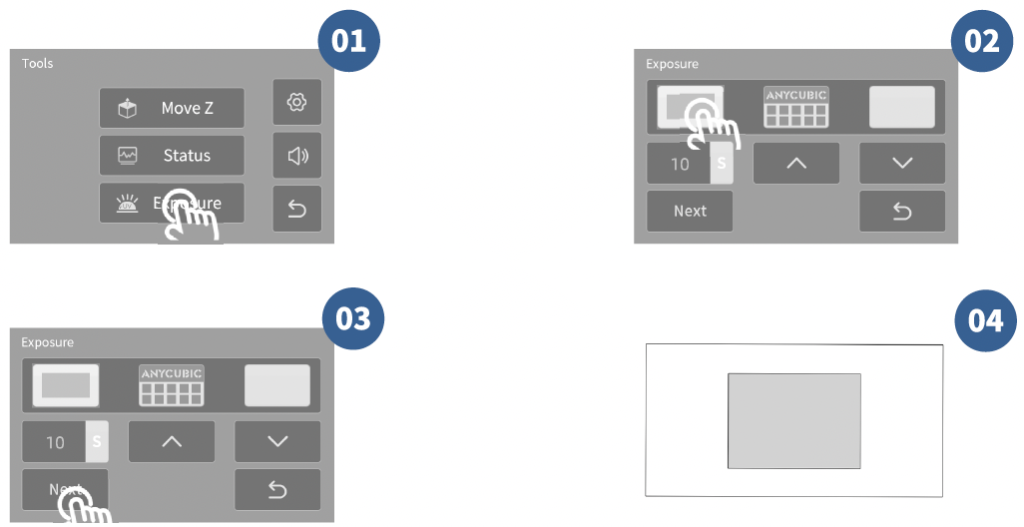
- It is advisable as a next step to perform a projection test to check that our optical system works correctly. To do this we will go to Tools/Exposure (1) and select any of the three test images (2 3)… If all goes well we will see how in our projection area you can see that test image (4).
- As a next step we will install the VAT by sliding it into position and tightening the fixing screws firmly (1 2)

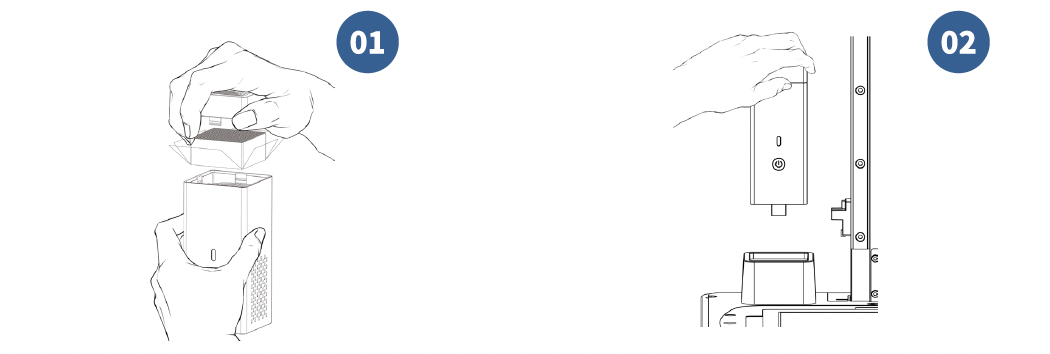
- We will install the air purification system by first removing the protective film from the activated carbon (1) and placing the purifiers in their socket (2).
- We can now fill the VAT with our resin… Make sure you have your gloves, mask, and safety glasses on… we will slowly fill out the VAT making sure that we do not exceed the MAX mark of it.
It is advisable that we have the air purifiers turned on during the process.


- We already have the machine ready, we will connect the USB included in the kit and we can launch the print test.

Normally the USB included in the kits may not be very reliable so we advise you to make a backup copy of it.
If we want to use another USB it is advisable that it does not exceed 8G capacity, formatted in FAT / FAT32 and that our print files are at the root of it.
- Once the test printing is finished, we will leave the resin to drain from the printing platform for a few minutes and, again with all the security measures recommended to handle resin, remove the platform and with the plastic spatula if possible so as not to damage the surface of our printing platform we will remove the piece and carry out the post-processing process cleaning with IPA and curing the piece with UV.
It is advisable to verify that there has been no solidified resin in the VAT, for this we can use a typical kitchen silicone spatula to verify that there is no rest or if we want to be sure to filter the VAT content.
- We are ready for the next step which is to find our optimal exposure value for our resin that we detail in the next section.
For those of you who like to see the process in the video below you can see the official unboxing of Anycubic.
R.E.R.F. Exposure Test
Anycubic greatly facilitates the process to find the correct exposure of our resin for our machine and printing conditions through its R.E.R.F. test.
Basically, the R.E.R.F. test (abbreviation of Resin Exposure Range Finder), which is included in the USB of the printer, allows us through 8 figures that include different tests placed by sectors in our printing base and that thanks to the firmware allows each of these sectors to have a different exposure time.
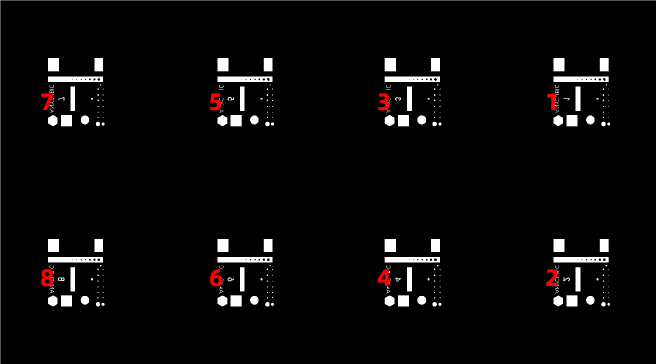
Normally and the test included in the USB has a base exposure time of 1.5s so we can find out the exposure time of each test by adding 0.25s to each test. We add the following table to make it clearer.
| Base Exposure | #1 | #2 | #3 | #4 | #5 | #6 | #7 | #8 |
|---|---|---|---|---|---|---|---|---|
| 1.5s | 1.5s | 1.75s | 2s | 2.25s | 2.5s | 2.75s | 3s | 3.25s |
We can create our own R.E.R.F. test.
Using our laminator, put in the different sectors the test that we like the most and our base exposure time although normally 1.5s is the most optimal or we can adjust it during printing and once generated put it on our USB with the name R_E_R_F.pm3r
In the following video, you can see the process https://youtu.be/yF-87TmHzog
Once the test is printed we remove it from the printer and once clean we will review each of the tests and take the number of tests/exposure time that we see that, together, all the tests came out as best as possible comparing between them.
As a quick and easy reference we will look at:
- Circular/rectangular hollow tests, the more visible holes More definition in details

- Supports test, this test helps determine if the resin settings are adequate to develop the tensile strength and adhesion of the layer.
Underexposure of your print will result in defective or deformed hammers due to the increased tensile force of FEP combined with polymerized resin.

The test also includes other interesting tests such as bridges, chessboard tests, and texts on different axes, pillars, and angular surfaces where we can compare in more detail the most complete exposure test and from there find our optimal exposure time.

It is important to remember that although this test comes out correctly later either due to environmental conditions, not forgetting that chemical processes act, or because of the topology of our piece, exposure times may require extra adjustment.
You can find a wide variety of exposure tests in our case and especially in the start-up or when we use a resin that we have not had the previous experience we advise you to perform an exposure test that includes different tests closer to the pieces we print as the Anycubic R.E.R.F, the 3DRS Starship, Ameralabs, the Siraya or those of the colleague Dennys Wang that we have very good specific tests.
Flat tests such as Phrozen XP Finder are, perhaps, more suitable for a quick test check with known resins.
In any case and as a reference we leave you some values recommended by Anycubic for its resins:
Perform a VAT cleanup
We strongly advise you to clean the VAT once the R.E.R.F test has been carried out since it is very likely that some resin particles from the tests could remain in the VAT and cause potential damage to the FEP or even the screen.
In the case of our Anycubic Photon M3 Premium we have a function that facilitates the process using the exposure test or screen check. In the following screenshot you can see how to do it:

Once done we can remove the thin layer created trying not to use tools or processes that can damage the FEP. To facilitate the removal of the cured layer we can use support from another print and leave it inside the VAT during the process to be able to use it as a “handle” to remove the cured cleaning layer.
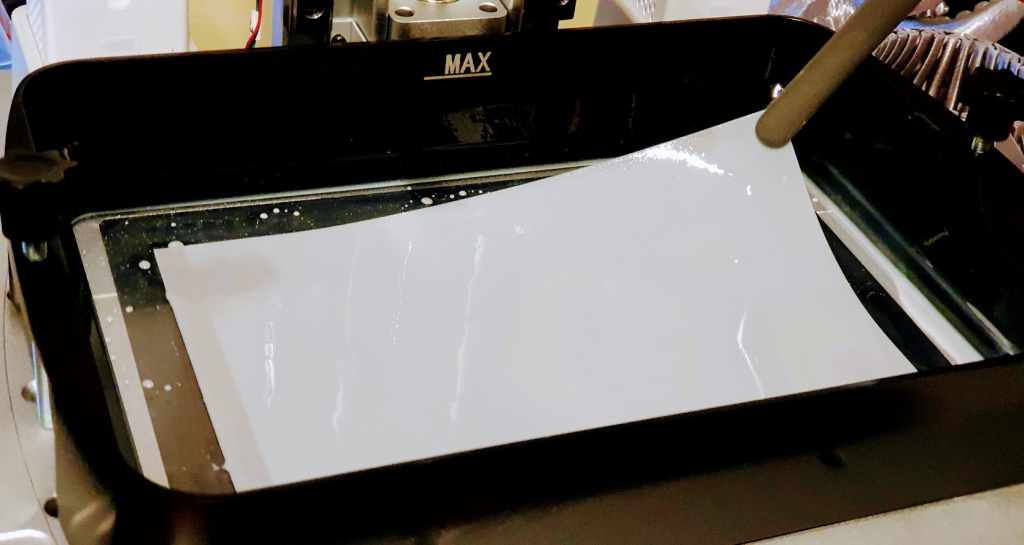
We can do this process always we think a solid part could rest in our VAT.
Review and user experience
The tests we have carried out with the Photon M3 Premium have been of all kinds, from different exposure tests, minis, and busts that occupied about 90% of the printing area we have not had any problem with it obtaining well-defined pieces and without remarkable artifacts except for some micropillars that did not appear in the preview and about which we will talk later.
We remind you that always, for a review, we use the default profiles/configurations adjusting only the most appropriate exposure value for our resin to simulate the use of a normal user.
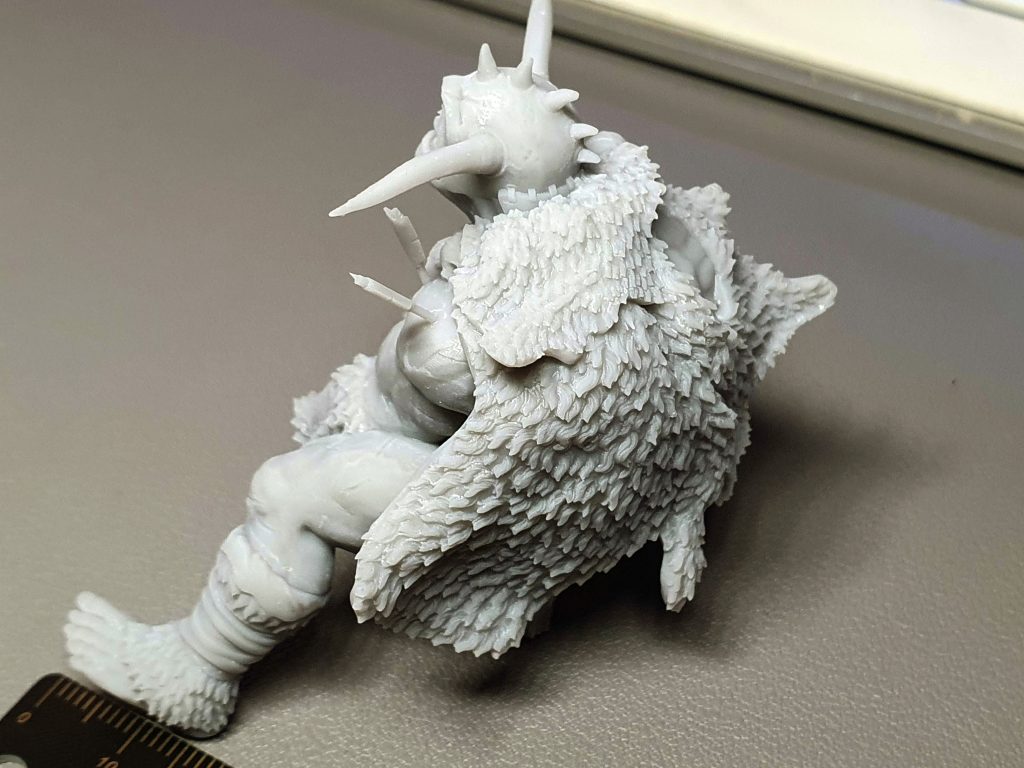
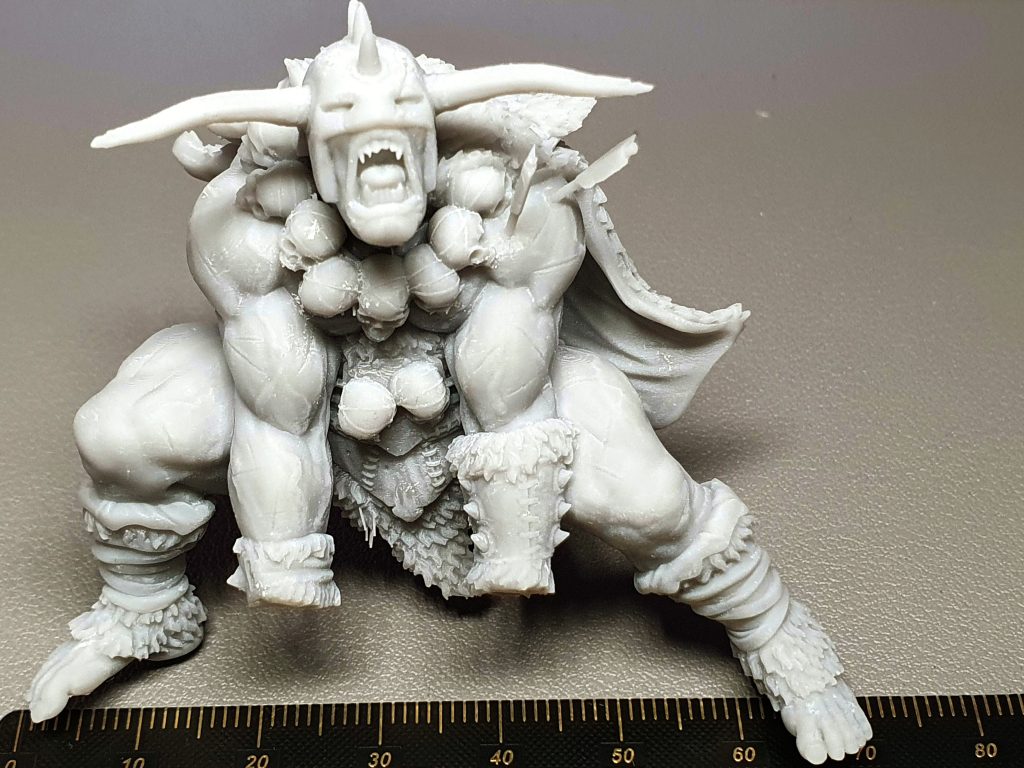
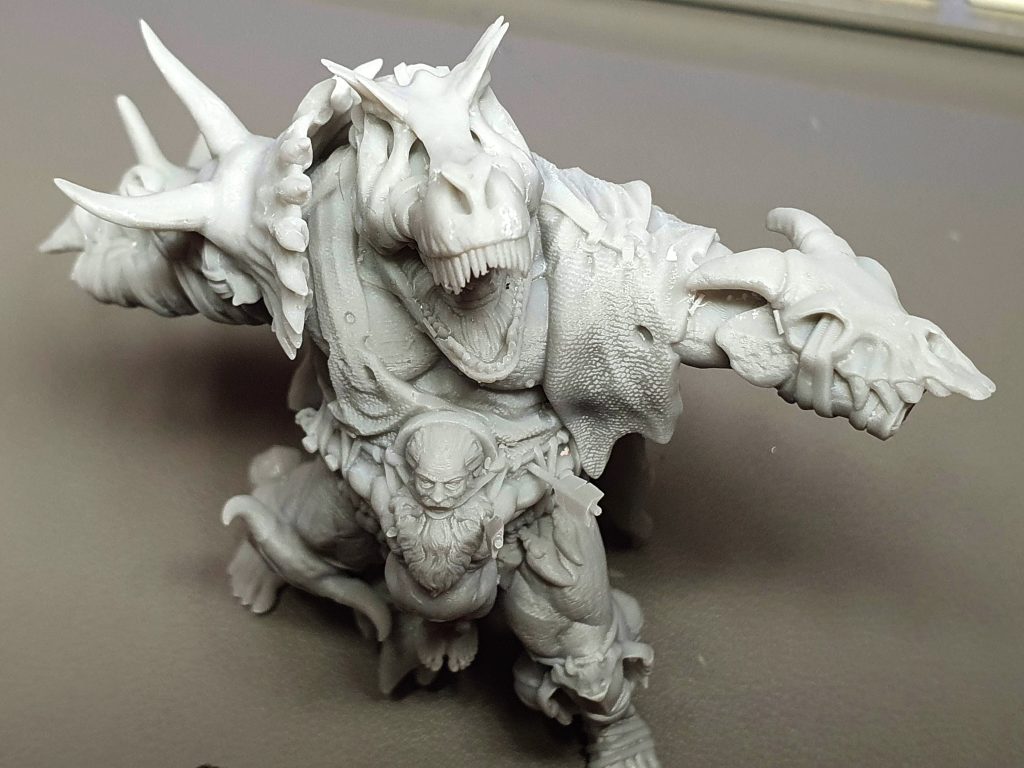
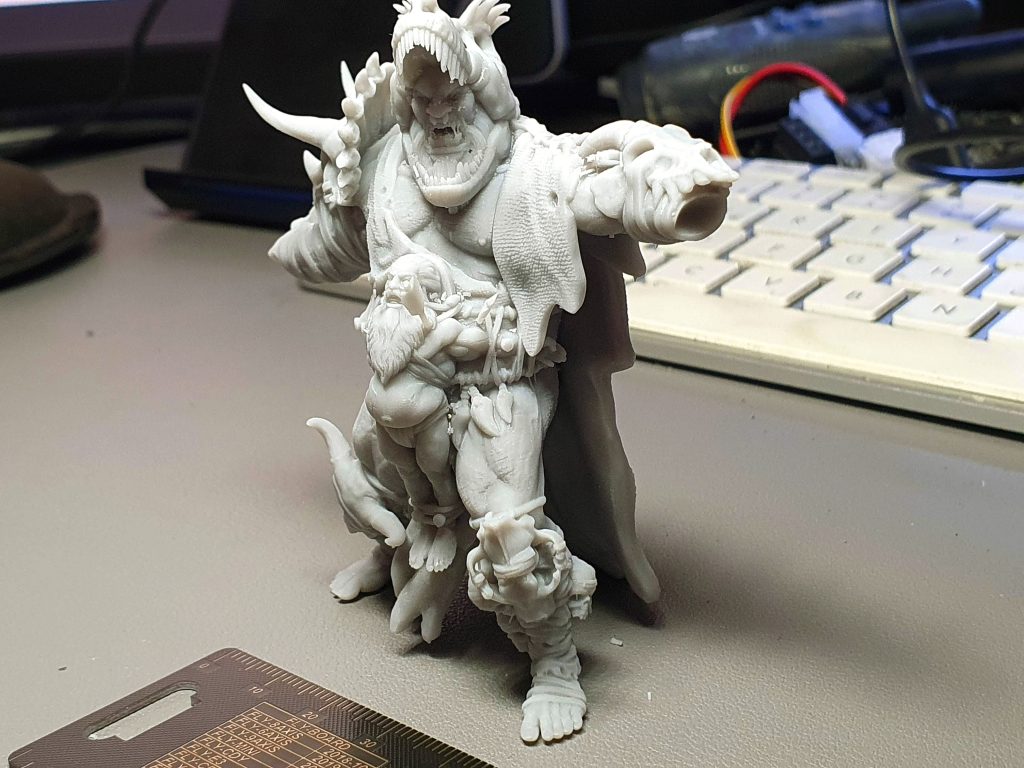
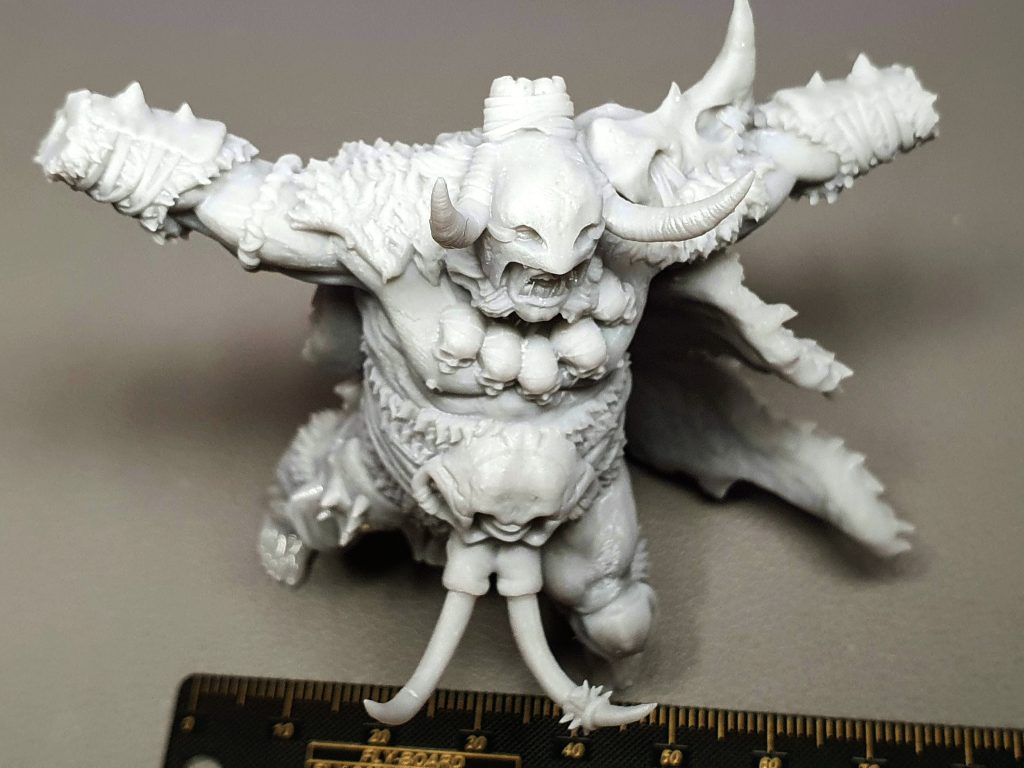
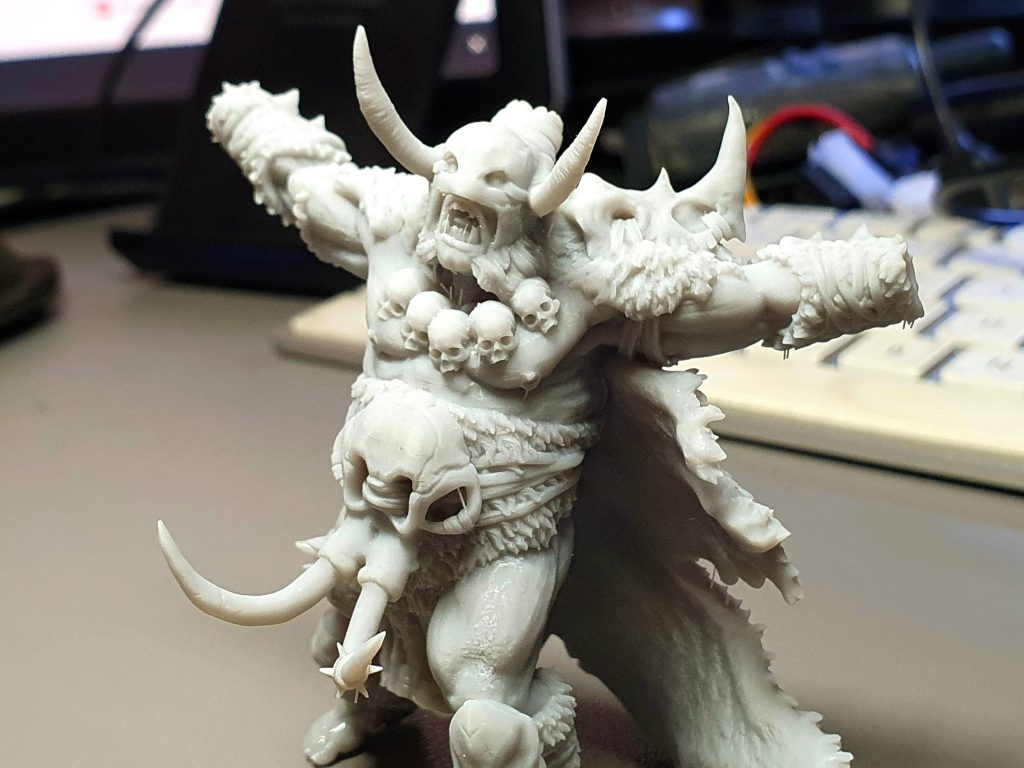
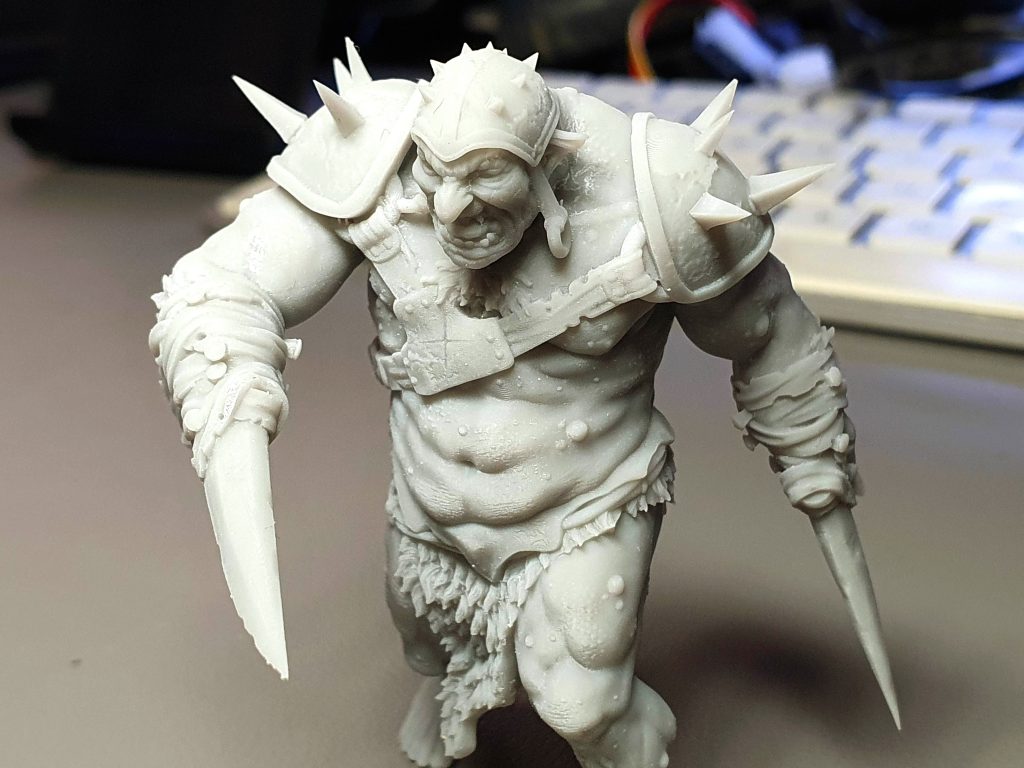
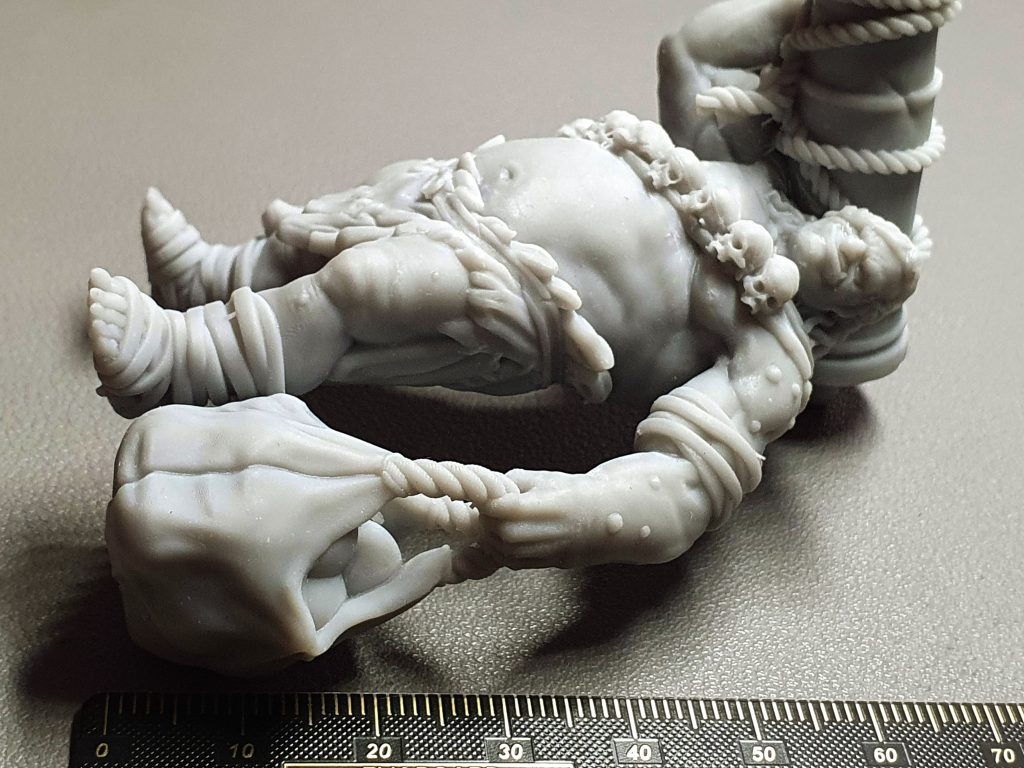
We continue to test larger figures and other resins that we will add later.
Also, and compared to other similar printers, we have been surprised by the speed and general operation of the machine… Especially in the aspect of noise during the operation where the rod system with bearings and the ventilation system makes a clear difference.
Also and although it is improving with each version Anycubic should strive more in the compatibility of its printers at launch with other laminators, Photon Workshop follows a few steps behind Lychee Slicer or ChiTuBox which often forces it to slice in a limited way or fails to use other laminators and perform a tedious export process and not lacking problems in some situations.
In our case, most of our tests were based on Lychee Slicer and ported to Photon Workshop for laminating having better results in this way.
General 3D resin printing tips
To have a certain percentage of success in our impressions we give you some small advice of aspects to take into account that can significantly affect our impressions:
- Using quality resins, resins are not cheap and sometimes we tend to buy any type of resin based on its cost than on its quality.
Sometimes it is not usually a saving but quite the opposite since the % of correct impressions is lower, the detail of our pieces is less and the durability of the pieces over time is lower
- Ambient temperature, resin 3D printing is based on chemical processes and therefore ambient temperature is important for the process.
Normally and for normal resins manufacturers advise an ambient temperature of 25-30º or higher.
Condition this value normally at the beginning of our prints since a posteriori the heat generated by the printer itself will maintain or increase the temperature.
There are different methods to adjust the temperature… from a bottle warmer to heat the resin, a hair dryer, or more complex systems of heaters with thermostats or even USB reflex entity heaters that are coupled to the VAT
- Display/screen always clean, that our screen is completely clean and free of residues is very important since it is the one that allows the printing process.
We will carry out the cleaning of this always following the instructions of our manufacturer without using certain products and always try to use a screen protector to protect it from residues that can leak.
- Speed, generally 3D printing does not get along well with speed and specifically with 3D printing where chemical processes act where any variable can ruin our impressions we must be a little conservative in this aspect or in any case not start modifying values related to speed if we are not 100% sure of what we are doing.
- Angle our pieces, a basic rule not written in 3D printing is to angle our pieces. Printing angled parts in position will mean less probability of failure, better print quality as well as avoiding the number of supports and often the contact surface of the part in the FEP reducing stresses.
- Overload of pieces in our printing, as we mentioned with the speed sometimes we tend to overload our prints with pieces to take advantage of the printing something that sometimes can be the opposite since we increase the % of chances of it failing.
Especially if you start in 3D resin printing we advise you to gradually load your printing base, understand how your machine works and the printing process, and add and distribute the figures in the best way on your printing platform to optimize time, cost, and % of a satisfactory printing.
- Maintaining the FEP, that our FEP is in perfect condition will allow us to reduce failures in our prints, resin leaks, and even major problems such as damaging our screens.
Check it periodically for damage, adjust the tension if necessary, apply a little dry PTFE lubricant to maintain its characteristics and protect it or even change it when we see any damage in it will allow us to keep our machine in optimal condition.
- Leveling the printing platform, as with the FEP having correctly calibrated our printing platform is very important as well as being a quick and simple process. We also have tests that can help us identify leveling problems such as those of comrade Dennys Wang.
- Kinematic maintenance, resin printers have mechanically speaking a very simple system usually using linear guides, a rod anchored to a motor to move the clamping system of the printing platform.
It is important to keep these parts clean and oiled for optimal functioning.
Common resin 3D printing problems
We recommend some solutions to the most common problems that we can find in our impressions:
- Parts do not adhere to the print platform and remain in the FEP
- Incorrect print platform leveling
- SIt is usually a symptom that our exposure time in the first layers (Bottom Exposure Time) is insufficient and we must increase it.
- The contact area between the piece and the platform is small we must add “raft” to them
- Layer separation or general delamination
- Ensure a stable and movement-free base during printing
- Check the tightening of the print platform anchors or VAT
- Review the FEP, its tensioning and in any case, replace it
- Upload/download speeds can be too aggressive
- Separating layers into a part
- It usually indicates a lack of supports, that these are insufficient or failed
- Upload/download speeds can be too aggressive
Final Assessment
Despite only a few days with it, we can say that it meets the expectations we had amply, offering high-quality prints at the height of the expected of this machine with premium components and technologies.
As negative aspects, we will highlight the absence of information on the use and configuration of WiFi. From Anycubic they told us that it will be launched shortly and together with the new Anycubic Smart Cloud Service (Q1 2023) we can finally monitor our printers in addition to more functions.
In any case, something that has worried us more has been to see random artifacts as micro supports that we assume are related to the Anycubic Workshop laminator. We were a little reassured to see that even in Anycubic’s promotional videos they also appear. One more reason for manufacturers to coordinate the launch of machines with the support of rolling mills such as Lychee/Chitubox.


Despite the issue of WiFi and artifacts, which will surely be solved by Anycubic, we have to say that this Anycubic Photon M3 Premium will give us everything you need to enjoy with it either making minis or really large figures with a simple and reliable user experience.
We loved the new LighTurbo 2.0 lighting system along with its kinematics improvements bring speed, reliability, and quality to our prints. Adding the VAT of about 2L and the dual AirPure system as excellent interesting details.
The details and sharpness thanks to the 8K panel make Anycubic with this machine raise the level again in machines of this type and market.







Déjanos un comentario