We have always followed QIDI and its printers closely but, at least officially, we had not been able to have the option of being able to analyze them in-depth, and what better way than with the QIDI X-Max 3.
Speaking with QIDI they explained to us that they had some problems during the original release temporarily halting the distribution until the problems were fixed. In our case, the machine we have used and analyzed has these improvements from QIDI.
As always before continuing with the article, remind you that you can join 3DWork on our Telegram channel full of 3D printing derangers, or on our social networks Instagram, YouTube, TikTok, TwitterandFacebook,.
QIDI X-Max 3
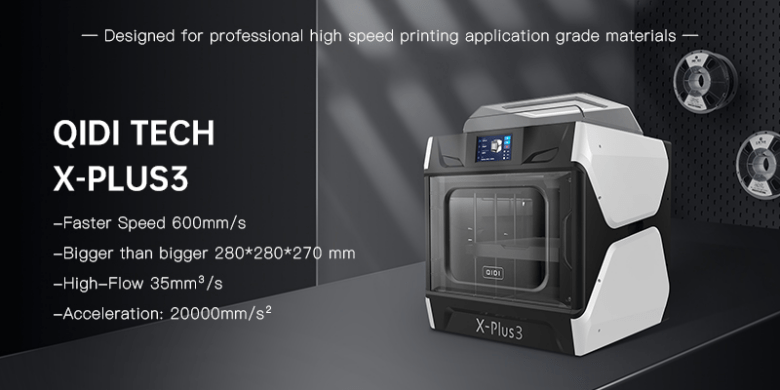
The new QIDI X-Max 3 does not come alone and also, within the 3 series, it has the X-Plus 3 that have many features in common and some interesting differences between them.
Starting with the similarities between both models, we find printers prepared to print at high speeds of up to a theoretical 600 mm/s with accelerations of 20000 mm/s2, of course to be able to reach these speeds the extrusion system has to be up to the task and for this they mount one with a theoretical flow of 35 mm³/s. Interestingly, QIDI includes two hotends, one for the use of non-technical/abrasive filaments such as PLA/TPU and another for more technical filaments that will allow temperatures of up to 350 °C, theoretically allowing us to print materials such as PET-CF, PAHT-CF, ABS/ASA, and other similar materials.

Reaching these speeds requires robust, precise, and reliable kinematics, so QIDI has built these printers using CoreXY kinematics. Mechanically speaking, QIDI has used axial linear guides that will allow fast movements, reducing inertia that affects our prints.

Continuing with the mechanical part, we find in both cases an “All-metal” structure that will provide us with great structural stability, especially taking into account the dizzying speeds that it promises to reach.

Also noteworthy is the print volume of both models, where the X-Max 3 has 325*325*315 mm and the X-Plus 3 280*280*270 mm. It should also be noted that it has a 6 mm thick printing platform.
The QIDI X-Max 3, and the X-Plus 3, have a function that is going to be very interesting or in some cases essential if we want to work with some technical filaments… Heated enclosure. This heated enclosure will allow the printing area to be maintained up to about 65 °C, avoiding the effect of lack of adhesion to the platform (warping) or adhesion problems between layers.

We also have support for our hermetically sealed filament spools that allow us to install desiccants to keep moisture at bay, especially useful when working with moisture-sensitive filaments.
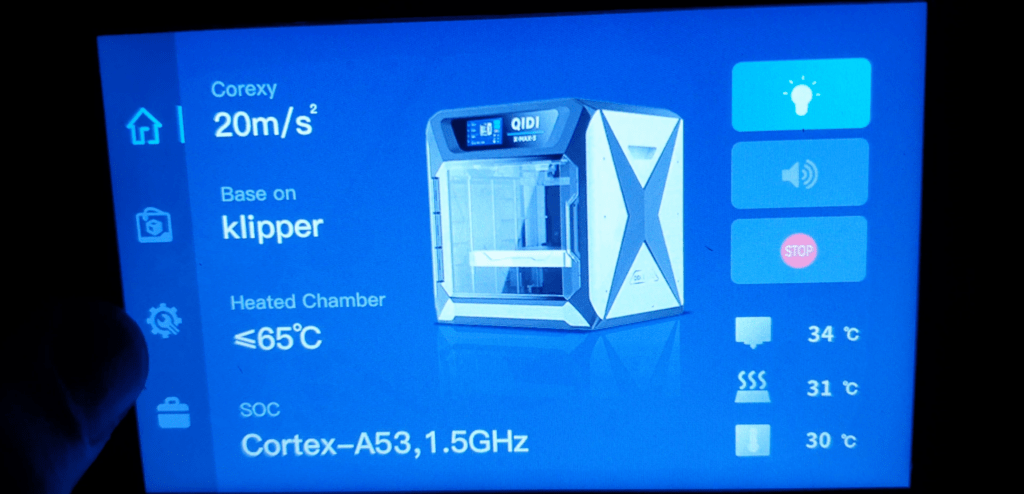
Finally, it should be noted that the machine is managed by Klipper, currently a version customized by QIDI and that we will talk about later in detail, which will allow you to get the most out of these machines.
Ahora pasaremos a revisar las especificaciones específicas de cada modelo que básicamente se diferencian en el tamaño de impresión y en las capacidades del sistema de calefactado del cerramiento:

The QIDI X-Max 3 has been designed for production environments where print volume and technical material handling are the main requirements.
As we mentioned in previous points, the X-Max 3 has a printing surface of 325*325*315 mm which will allow us to carry out large projects.
The inclusion of a heating system for the enclosure, equipped with an extra air circulation fan with an activated carbon filtration system, will allow working with technical filaments to be a little easier, improving adhesion with the printing platform and between layers, keeping the temperature at up to about 65 °C.

The QIDI X-Plus 3 has also been designed for production environments where print volume would not be the main requirement, but where working with technical materials would be.
Tal como os adelantamos en puntos anteriores, la X-Plus 3 cuenta con una superficie de impresión de 280*280*270 mm que nos va a permitir realizar proyectos de gran tamaño.
Show at the next table specifications from both models:
| Model | X-Max 3 | X-Plus 3 |
|---|---|---|
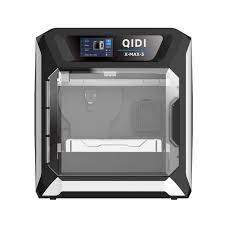 | 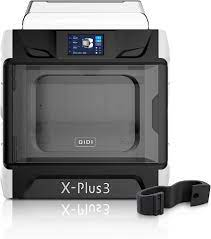 | |
| Build Volume (W×D×H) | 325*325*315 mm | 280*280*270 mm |
| Dimensions (W×D×H) | 553*553*601 mm | 511*527*529 mm |
| Net weight (kg) | 30.2 | 24.3 |
| Printing Speed | ≤600 mm/s | ≤600 mm/s |
| Extruder Flow: | 35 mm³/s @PLA Matte(Model:150*150 mm single wall; Material: PLA Rapido Matte; Temperature: 240℃) | 35 mm³/s @PLA Matte(Model:150*150 mm single wall; Material: PLA Rapido Matte; Temperature: 240℃) |
| Extruder Temp | ≤350° C | ≤350° C |
| Hotend (Included) | Copper alloy nozzle hotend For Common materialsHardened steel nozzle hotend For Abrasive materials | Copper alloy nozzle hotend For Common materialsHardened steel nozzle hotend For Abrasive materials |
| Hotbed | 24v with dedicated 450 W power supply6 mm aluminium base≤ 120 °C | 24v with dedicated 450 W power supply6 mm aluminium base≤ 120 °C |
| Auxiliary Part Cooling Fan | ✔ | ✔ |
| Chamber Temperature Control | 65 °C Independent Chamber HeatingChamber Circulation Fan With Activated carbon air filter | 65 °C Independent Chamber HeatingChamber Circulation Fan Only |
| Screen | 5.0 inch 800*480 touch screen | 5.0 inch 800*480 touch screen |
| 800*480 touch screen | 480*272 touch screen | 480*272 touch screen |
X-Max 3 Kit content
The X-Max comes in a really large package, not surprisingly with the size of the printer, plus it weighs close to 40 Kg.
As usual, all components as well as the printer are properly protected to prevent damage during transport.

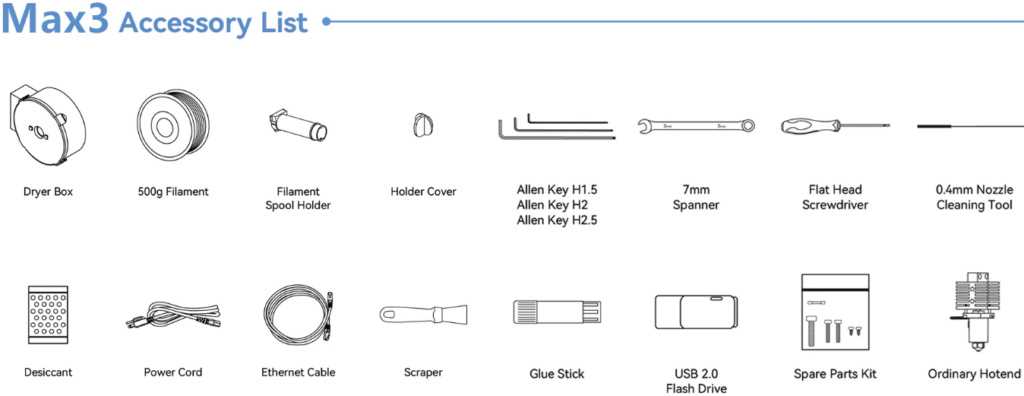
In the kit we can find everything you need to carry out the assembly, first tests since we have a PLA Rapido coil, and basic maintenance of the machine. It is interesting to find a reel box to use during printing, which we will talk about later.
Anti-vibration rubber feet are also included, as well as a second hotend for working with technical materials.
QIDI X-Max 3 Initial Installation
Once we remove the packaging machine we see how imposing it is, and it probably won’t be appreciated well by the photographs but it is big… very large… Something like almost half a washing machine :).

As a personal opinion, taking into account the volume of printing, we believe that it is too bulky and we advise you to measure the measurements of the area where you plan to place it so as not to run out of space.
The X-Max 3 has a bold design that you can more or less like with a seemingly good quality plastic casing, as well as the front hatch and upper cupola, to protect the interior CoreXY chassis.
Continuing with the unboxing process, we have everything well stored inside the printing compartment and all the moving parts well anchored to avoid accidents during transport.

Once we have everything out of the cabin, we turn on the printer and follow the instructions on the screen. The first step will be to cut the flanges that fix all the kinematics of the XY axis:
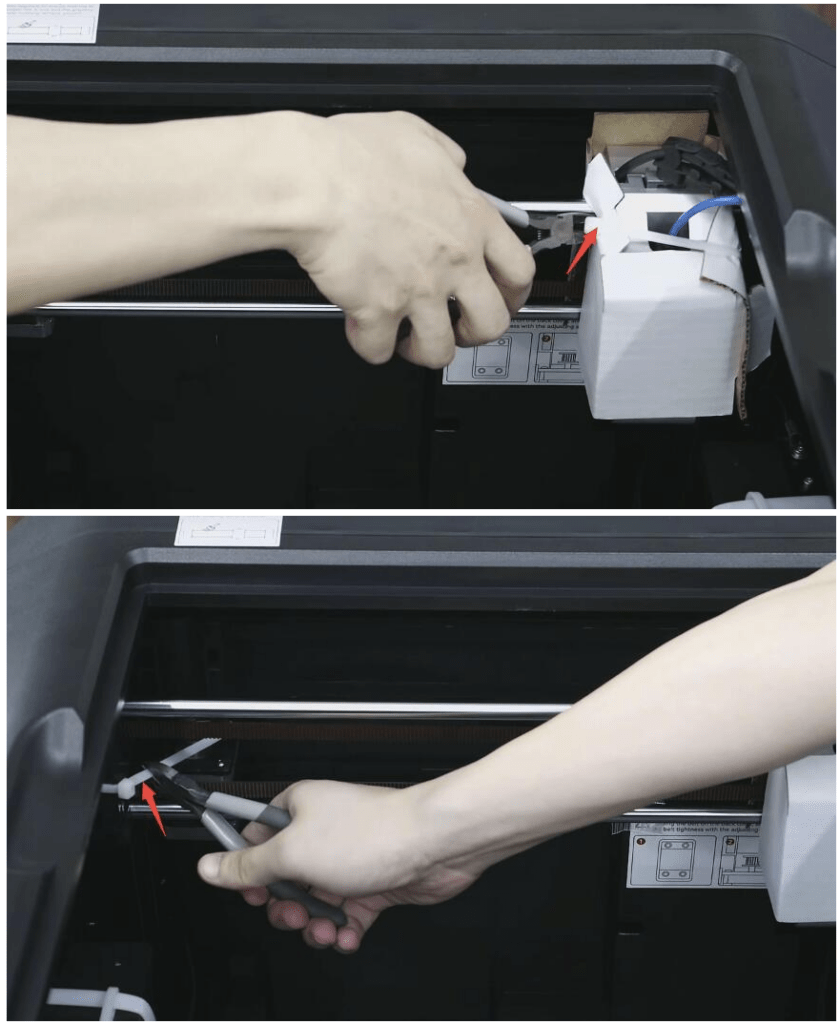
Let’s continue with the ones that hold the Z axis:

The next step that the printer start-up wizard will suggest will be the removal of the screws that anchor the bed to the chassis, we have 4 of those screws, two on each side of the base of the printing platform:

The wizard will instruct us to remove the foam we have under the printing platform and we will begin the leveling process. It will start heating the bed and, using the included calibration sheet, we will proceed to adjust the ZOffset by going up or down with the screen controls until our nozzle exerts some pressure on the calibration sheet:

Once the ZOffset adjustment process is finished, the assistant will automatically mesh our bed:

The next step will be the loading of our filament, for which we will place the bobbin holder on the back of the machine, if… The process of replacing filaments is not going to be very comfortable, and we will pass the filament through the sensor so that it enters the PTFE that goes to the print head until we notice a little resistance:

Then, from the screen, we will click on the load button (arrow) and if we have correctly driven the filament to the head, it will begin to extrude filament:

We also have the following video with the whole process:
We now have our printer ready to start printing!!
Components & Mechanics
Before we get into printing, we would like to review some parts of the machine that we think are important to know beforehand and that will help us learn about our machine and its possibilities.
Kinematics
One of the highlights of this QIDI X-Max 3 is the use of a CoreXY kinematics mounted on a robust structure, which will allow high printing speeds with few vibrations in them.

We can highlight the use of robust radial linear guides, together with a generously sized belt and powerful motors that will ensure a powerful and firm response in any situation.
With respect to the Z axis, it only has a single motor that is responsible for synchronizing both sides of the printing platform with rods and radial linear guides through a system of straps at the bottom of the printer.
Extrusion system, printing platform and heating system in enclosure
The X-Max 3 comes with two hotends that will allow us to print a wide range of filaments. From the factory, it mounts a hotend with copper nozzle to print conventional filaments such as PLA, PETG or TPU due to its excellent heat transfer capacity to the filament.

On the other hand, we have a second hotend with steel nozzle designed for use with more technical and abrasive filamentssuch as PC, ABS/ASA with additives, PET-CF, Nylon or those containing CF (carbon fiber).
The printhead that mounts an extruder motor that directly supplies filament to the hotend, mounts a gear system with a ratio of 9.5:1, allowing to maintain of a theoretical flow of 35 mm3/s, which is essential considering the speeds promised by this X-Max 3.
The hotend is very compact and easy to access, simply by removing the protective layer that has no screws. The ceramic heater that, like its nozzle, has a Volcano format that will ensure a good filament flow, of about 35mm³/s depending on the type of filament, as well as being able to work up to 350ºC. The seeming use of nozzles of a proprietary QIDI size can make us dependent on them and limit the options to use.

One negative, which we’ve seen during our testing and which we’ll talk about later, is the hotend’s cooling system. We think it’s insufficient, or it could have been better designed… The fan is of a small size in an area with low airflow and on top partially covered by the leveling sensor, for this machine in depending on the printing conditions generating some jams if we are not careful with our settings.
In the same way, and according to our tests, using the filaments with which we normally work, the extrusion flow has not reached the promised values even with the PLA Rapido filament itself included, always remaining around 25mm³/s.
Continuing with the extrusion system part, we have an auxiliary layer ventilation system that will allow us to support the mounted on the print head for those filaments that need high airflow, especially when printing at high speeds.

Finally, and in reference to the bed or printing base, we have a 6mm aluminum base that helps our printing area not to have major deviations.
The bed heater, 24v that will allow us to reach about 120ºC, and that has a dedicated power supply for it and another for the electronics and other components, each of an adequate 450W.

Perhaps we would have preferred a 220v heater system as for certain temperatures it takes quite a long time to reach them. On the other hand, and probably at that 6mm aluminum base, the temperature transfer feels very homogeneous throughout the entire printing surface.
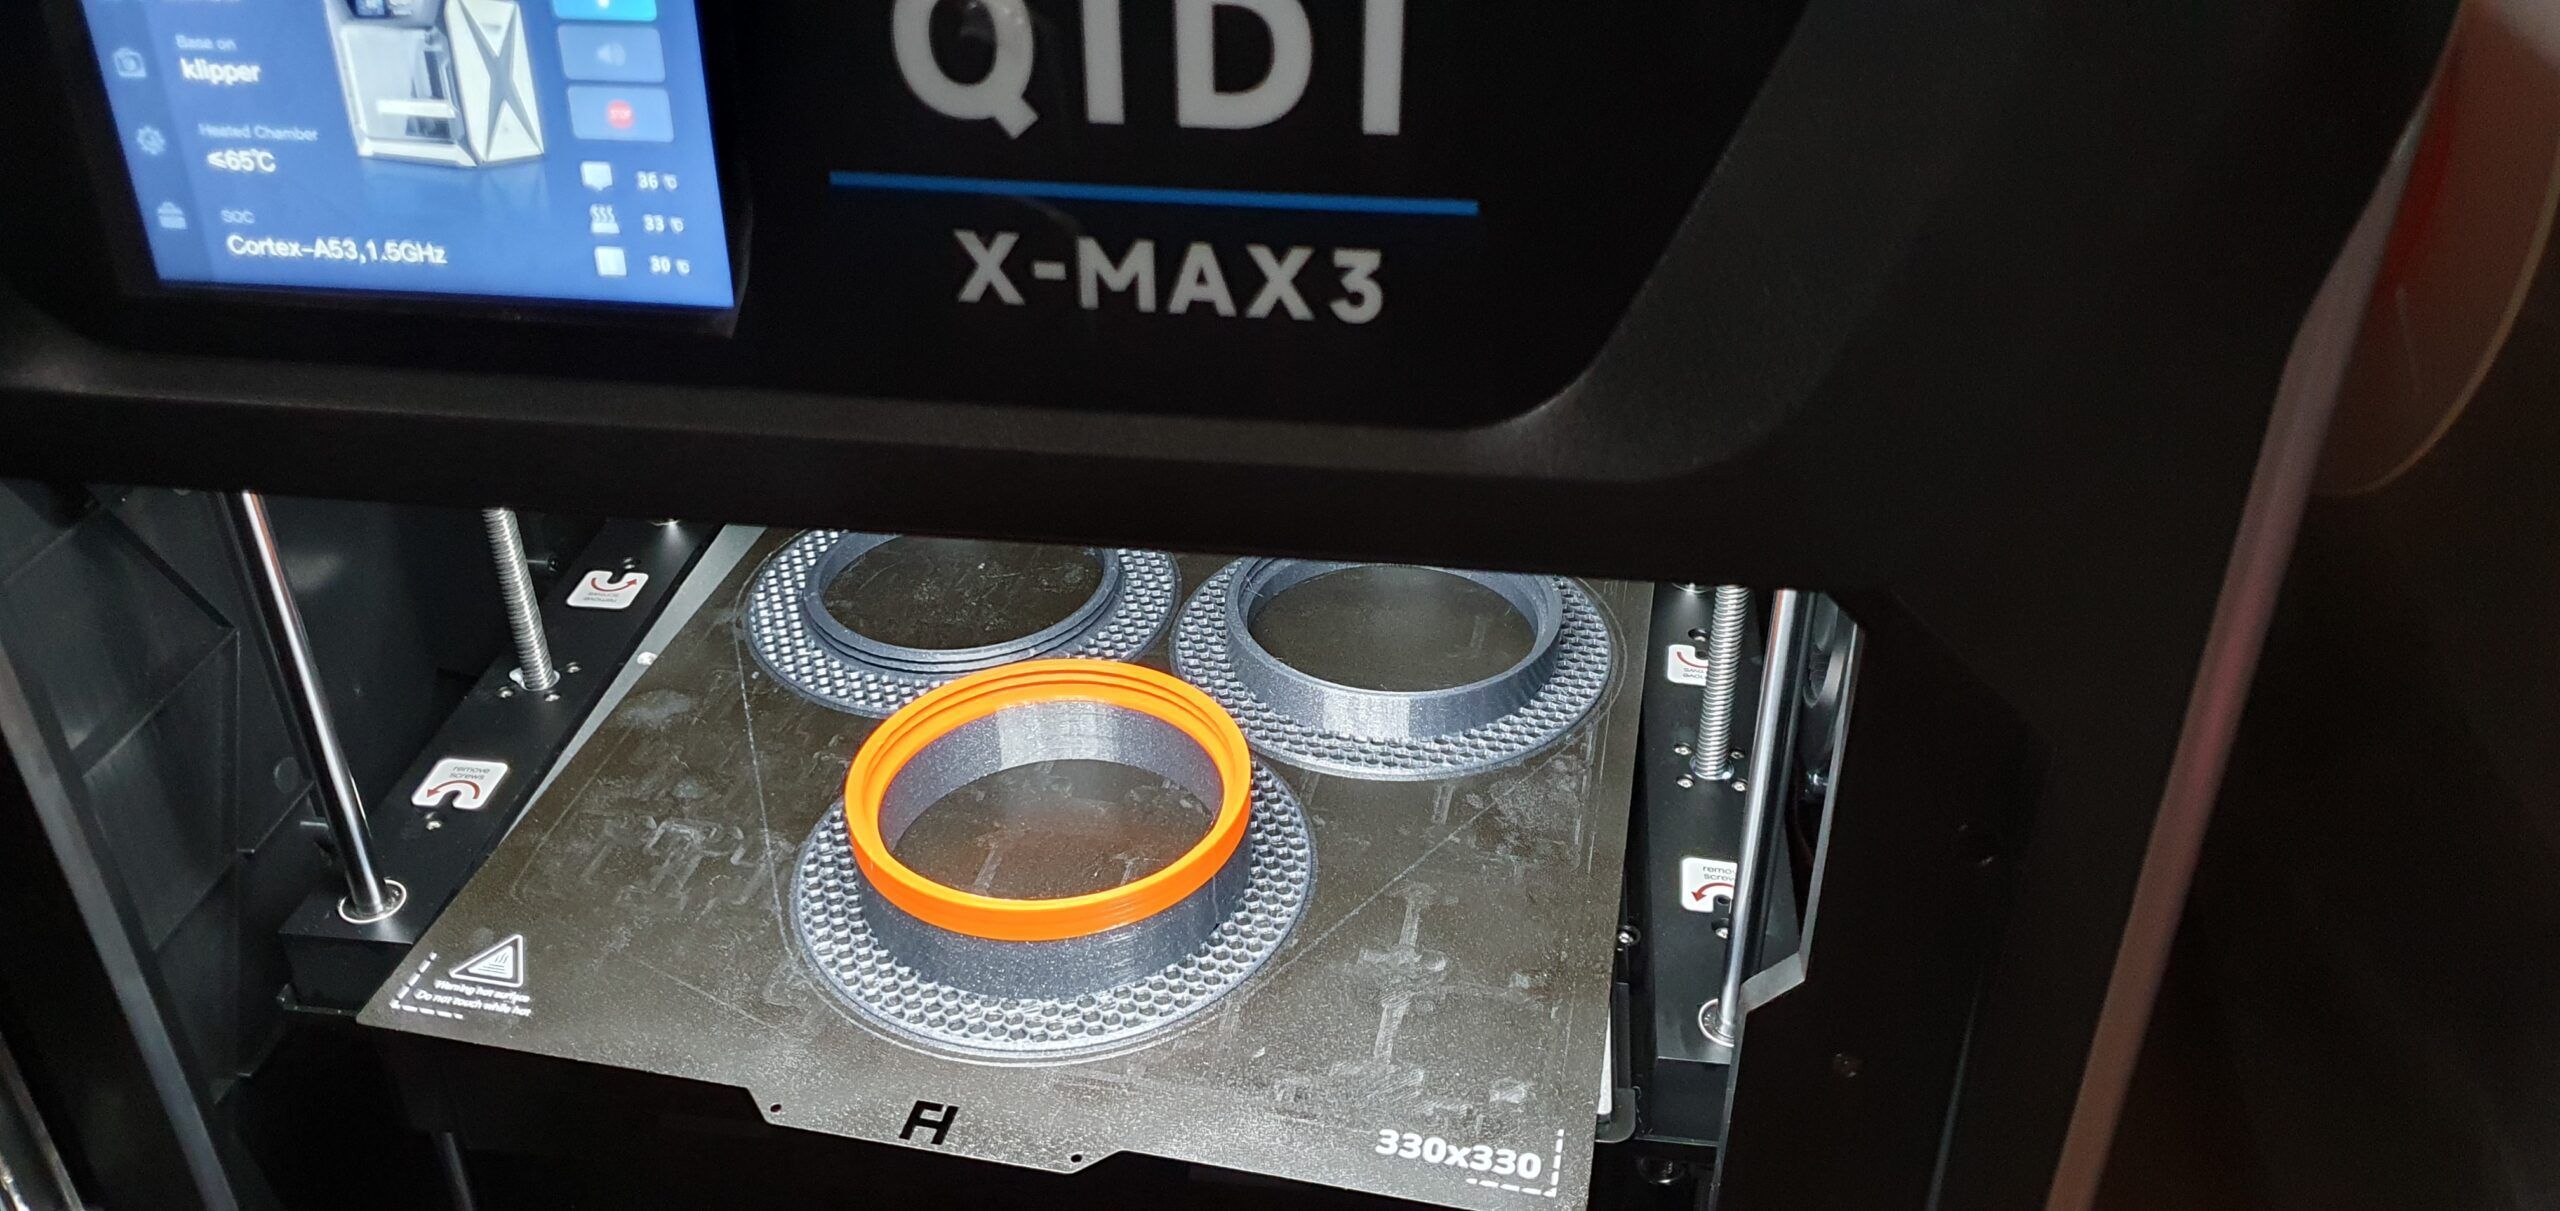
On top of this, the printing platform, we have an HF strap that theoretically improves adhesion, prevents warping and facilitates the removal of the parts at the end.

Also, as we have mentioned before, we have a temperature management and heating system of the printing chamber fed directly from the electronics. A PTC of 24V and 300W of power that will allow us to maintain our enclosure up to about 65ºC.
Those who have worked with technical filaments will know how to value having it to avoid the dreaded warping in them, as well as significantly improving the adhesion between layers.

We also have an air recirculation system with a carbon filter, which will allow us to safely filter out toxic vapors that some filaments produce during printing.

To finish with the extrusion system, it should be noted that we have a traditional filement sensor, mechanical with a pushbutton, on the back that does its job, although the system could manage it better.

We have found that several times, probably by refusing to place the roll of filament on the side, that the PTFE when inserting the filament comes out quite easily.
Electronics
In the electronics section, the X-Max 3 we find an all-in-one electronics from MKS, where we have the Klipper host part and the electronics for managing motors, sensors, etc… The electronics are located on the back of the printer, easily accessible and feature a generous fan to maintain the correct temperature.
The X-4 v1.1 model electronics look like it was designed by MKS for QIDI and mount a 64b Cortex-A53 processor at 1.5Mhz, 1GB DDR3 of RAM, and 8GB of EMMC storage for the operating system and related files… so we will have no problem working the firmware of the printer although it may be limited in the storage section, something that QIDI has already taken into account and we have spare EMMC modules/expansion. In any case, we have USB ports that we can use as well.

We also found 3 TMC2209 drivers for the X, Y and Z axes along with the rest of the connections that, we had to say, seem a bit poorly organized in general for a machine of this type. We will also be able to observe an external MOSFET that we will talk about later.

As a reference, we attach the pinout diagram of the electronics since it can be of help for future modifications:

We have other control electronics (MCU) in the printhead which connects to the main electronics via a single USB cable, taking advantage of Klipper’s options in managing multiple electronics, thus simplifying wiring and lightening/improving kinematics.
Thanks to these electronics in the print head, we simplify wiring and we have extra sensors such as an integrated accelerometer that will facilitate the process of adjusting Input Shaper.

On the electrical side we have two independent power supplies, one for the heated bed and the other for the electronics and the heater of the enclosure.

We have a large 5″ full-color resistive touchscreen with a resolution of 800×480 pixels. As for the interface, it’s a bit sober but functional and with plenty of options to adjust our machine, either with general machine settings or during printing.
In this aspect, we would have liked a more KlipperScreen-style interface, although QIDI’s work in this area has been quite good. In any case, we found some things to improve, such as the preview images.
Something we miss is the inclusion of a default camera in this model for monitoring, if… We can find it as an accessory on the QIDI website but we think that a machine with these characteristics should include this accessory by default. In any case, if we have purchased our kit with it, we have a video with the installation process:
Firmware Klipper
We enter into one of the aspects that, for us, has created the most controversy with this machine. QIDI mounts Klipper, but a custom distribution with certain limitations that we will talk about in more detail in the final part of the review.
The good news is that QIDI has allowed us access to the web interface, Fluidd in this case, and that we can access it through our web browser using http://<IP_QIDI>:10088 (where <IP_QIDI> will be the IP that we get when connecting the X-Max 3 to our network), for the management of the printer as well as allowing us to send our prints directly from the laminator, something really convenient.

They have also integrated KAMP into their Klipper layout for the X-Max 3, which undoubtedly improves the leveling experience and accuracy in this by dynamically adjusting to the print area of the part.

Another aspect that we can improve about this QIDI X-Max 3 is the Klipper configuration. QIDI has a fairly complete configuration file but, from our point of view, it is quite poorly organized and does not take advantage of Klipper’s functions to have a modular configuration that allows us to have a greater order and simplicity in the configuration files.

When we started working on reorganizing everything we found the excellent work of CL Performance published in Printables and that will make this part much easier if, like us, we like to have everything well organized. You can find all the information in the following link.
QIDI has information about the firmware of its printers in its Github repository.
Printing and usage tests of the X-Max 3
QIDI has created its own laminator, QIDI Slicer based on PrusaSlicer 2.6, and it has a custom interface, some extra options and the interesting Guides section.

As we like challenges, we start by using our favorite laminator, OrcaSlicer, which has both machine and filament profiles for QIDI machines.
We started testing using PLA and hotend for this type of filament mounted by default. With the default options and settings of our OrcaSlicer profile we obtained excellent results, but remembering to open the dome and/or gate since in PLA, TPU or similar filaments with low melting temperature if the enclosure gets warm it is very likely that you can get stuck.
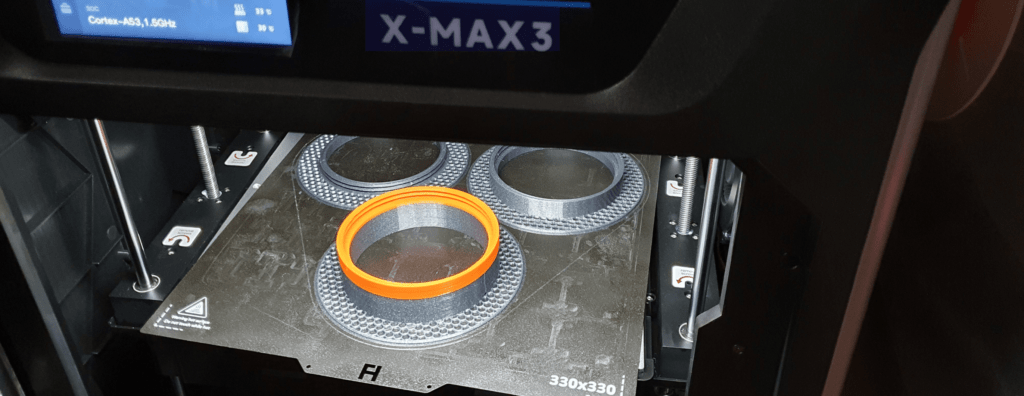
With all of the above explained, and in our tests, we have obtained good results without extrusion problems up to about 300 mm/s… Obviously, depending on the type of fialment, the type of part and the line to be extruded, these values must be adjusted to obtain optimal results.
The manual filament change process worked correctly, by adjusting our laminator correctly we can automate it or improve the available macros to add an M600.
We continued our tests by switching to PETG, a filament that is relatively easy to print and has good durability characteristics and withstands medium temperatures quite well. We have to be honest and say that we had a hard time printing better with the copper hotend than with the technical one.


Due to its viscosity, it adhered to our nozzle, leaving randomly burnt globs of filament in our print. We use a protective additive for the nozzle, considerably reducing these artifacts.
We moved on to more technical filaments and, as advised by QIDI, we changed the hotend for the high-temperature steel one. You can see a video of the process below, the process is quite simple and we have all the tools included in the kit:
ABS/ASA was our next type of filament and we have to say that the result with this type of filament was excellent from minute one. Having a heated enclosure to maintain the temperature improves adhesion to the print surface as well as between layers giving sensational results.


Other filaments tested:

- PCTG, being a slightly viscous filament like PETG we had the same “problems” but after some fine adjustments of temperatures, flow and ventilation the results were excellent.
- HIPS, we got a really good result with this filament again by making a few basic adjustments.
- NYLON PA12, with some initial adhesion problems after adding an additive to improve that adhesion and fine tuning, we got some very good test tests.
- PA CF, another filament that with a few tweaks and tests we got some sensational pieces
We have probably melted about 10Kg of different filaments and, except for the adjustments mentioned and aspects to be taken into account in each case, we have had excellent results as a general rule.

Even doing the Input Shaping tests we have seen on many occasions vibrations/ghosting in our prints that we try to minimize by adjusting belt tensions, speeds and accelerations improving the result.
Also and on a general level, adjusting as we have been commenting in each case, we have loved the extrusion performance of the QIDI X-Max 3 with constant lines and no deficiencies… By carrying out proper tests and adjustments, we can obtain parts of excellent quality.
Finally, in relation to the use and maintenance of the machine, QIDI has many videos on its Youtube channel that we advise you to review and subscribe.
Final review QIDI X-Max 3
The QIDI X-Max 3 is aimed at a very demanding user, and perhaps that approach is one of its biggest problems on the other hand.
The large size of the printing area, prepared to work with technical materials thanks to its hotend, enclosure and integrated heater as well as the performance of its CoreXY kinematics make it a great machine.
Regarding the chassis, you may like it more or less aesthetically, which is also quite bulky and it is important that you take it into account when locating your machine, using apparently good quality plastics and protecting a robust metal chassis… as a good CoreXY machine should have.
It is a machine with a great performance that with a good fit we can work with a multitude of technical filaments in a reliable way… But there again are some of its shortcomings since some components such as the extrusion system penalize that experience leaving very little margin in the printing settings and these affect the result/failures during the print.
In our case, working with filaments with a certain viscosity such as PETG or PCTG has been laborious for us to find the right configuration point. However with PLA, ASA/ABS, PA-CF, and other similar filaments it has been a delight.
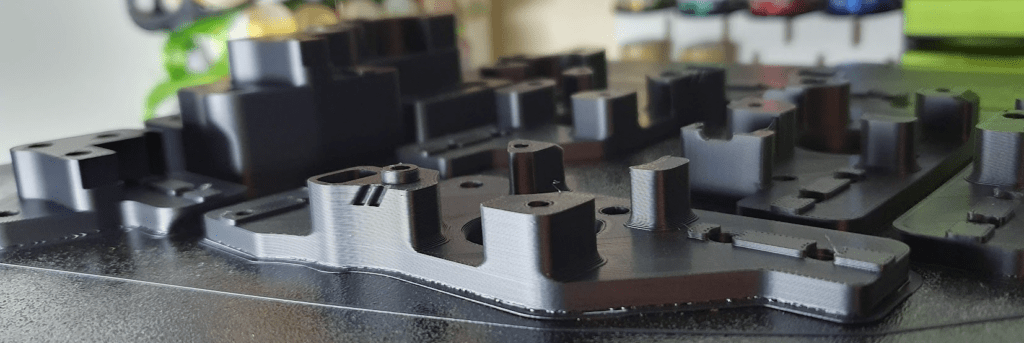
Another aspect that, always talking about the approach of the machine for production environments and working with technical materials, as we already mentioned, has given us headaches has been the hotend/printhead that tends to produce jams if we do not fine-tune the configuration well.
Improving the size or quality of materials in the heatsink and/or fan and the airflow that cools it would likely be the solution to these problems.
The design of the hotend cover, the size of the fan, and the location of the leveling sensor blocking airflow don’t help. In any case, it is usually a problem that can be minimized with the fine adjustment for each filament since it is a closed machine, which sometimes we need to keep the temperature of the enclosure high along with the melting temperature of the filament and the quality/type of this can make finding its “sweet” point for this type of machine requires some time in testing.
Also the PEI/HF used has been somewhat rough with adhesion, always needing an additive to improve its adhesion in our case.
We also found that, on very large parts, sometimes the contraction stress of the filament led to the HF peeling off the build platform minimally but enough to ruin our print… We have to clarify that it happened to us on a couple of occasions only.

The location of the filament spool holder as well as the airtight box at the rear of the machine is not the most convenient from our point of view. Yes, we understand that the filament is not handled constantly but when it is required it is a more cumbersome process considering the size/weight of the machine.
In any case, and thanks to the community, we have mods to be able to place this one on the side. We provide you with the link to the collection of mods that we have seen interesting.
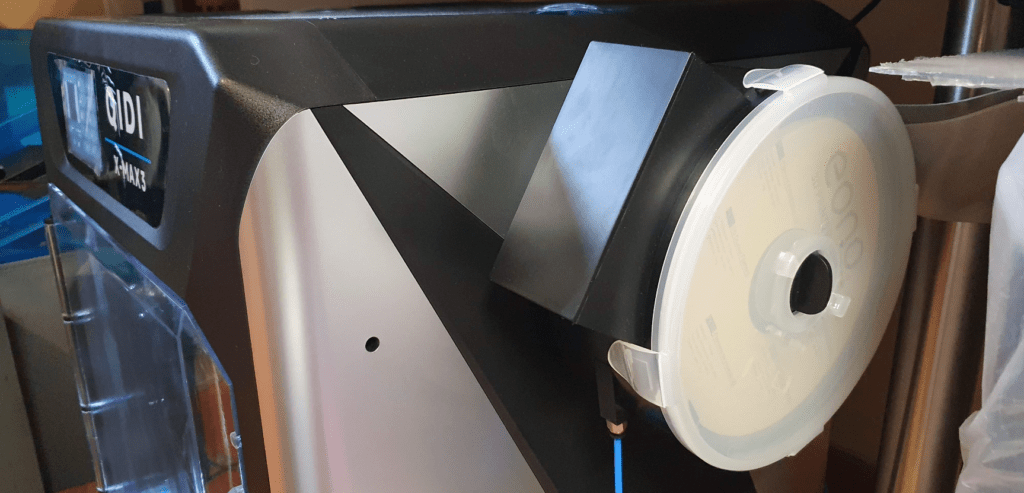
Continuing with the hermetic box for the filament we have also had problems with it in certain cases, in addition to the fact that the system does not seem to us the best or most functional, although on the other hand and for certain technical filaments it is perfect that we have it to keep humidity at bay.

Talking about the electronic part, we found that the wiring was not “optimized/ordered” for a machine of this approach, it should not be any problem in the operation of it but we believe that it is a detail of quality and detail.
The use of a Bltouch-style leveling sensor can give the feeling of a weak point of the machine, but clarifying that it is focused on printing technical filaments at high temperature, this type of sensors are usually the best because they are not affected so much by the temperature in their readings.

We believe that the location of the bed cable would have been a better option if it were not located next to the heating system of the enclosure and in the long run it could be damaged.
In the same way, and this is not only in these QIDI models but a general trend in current printers, we have an auxiliary layer fan that is great for certain filaments and speeds… But only assembling one on one of the sides often ends up affecting the final finish, especially with large pieces where one of the sides tends to cool down much more and we are more likely to fail the adhesion due to faster drying.
Although QIDI has done a great job on the simple and multi-choice machine management interface, it is still limited in some options if we compare it to a “pure” Klipper by using KlipperScreen or a theme for this customized by QIDI we think it would have been a better option… even penalizing the installation process with on-screen visual aids which we think is very successful and simplifies the process. Although it moves with ease, the interface in the menus we found that when loading the preview of the file to be printed, it was done slowly and line by line. Again, it doesn’t matter for use but they are quality details that leave a certain bad taste in your mouth.
And it is in that aspect, the Klipper firmware, where we find more problems or limitations to these machines by having a version customized by QIDI.
Manufacturers in general without talking specifically about QIDI, either because of the possibilities or because of fashion, are making the leap to Klipper and this is something that has its advantages and disadvantages for both manufacturers and users.
From the manufacturer’s side, they want to have control to minimize problems with their machines since a low-level control such as Klipper provides, which on the one hand is an advantage, can turn into a disaster in certain scenarios such as users without a Klipper base or trying to change configurations… And in the end, the normal thing is not to think that it is our fault as a user but to complain to the manufacturer. But on the part of the medium/advanced users who see how their powerful machines are limited in functions that they could have and depend on the manufacturer to give good support and follow-up to their Klipper implementations, something that in the medium/long term and due to the experience of many years we doubt that it will be so. Sticking with a very capable machine, limited and outdated in options with respect to what it could have.

For example, we tried to integrate our QIDI with our Spoolman filament management system supported by Moonraker for a few versions and it was impossible for us because of the versions we have in the QIDI version.
Perhaps Spoolman is not something critical for most users, it is just an example of how a personalized and outdated distribution by a manufacturer can affect us when it comes to having all the improvements that Klipper can bring us. Let’s hope, as other manufacturers are beginning to do, that they release or facilitate the use of official versions for Klipper that, although they invalidate the warranty, will allow us to have our machines updated in the long term and provide the appropriate means to be able to restore if official versions occur.
On the other hand, QIDI, a point for them, have integrated KAMP into their Klipper distribution for the X-Max 3 which undoubtedly improves the leveling experience and accuracy in this by dynamically adjusting to the printing area of the part.
An aspect that we also liked is that we have support for several laminators and we are not limited to the QIDI Slicer, a fork of PrusaSlicer, choosing OrcaSlicer and adjusting the default profile to our liking and taking as a base the filament profiles of QIDI that were of great help and quite well adjusted by default.

In addition, a machine with these characteristics has a sensational price, making it, from our point of view and taking into account the above, a highly recommended machine for environments where the size and materials to be carried out are technical, as well as users who control the settings and configurations to be able to get the most out of the machine with these characteristics.
Where to buy the QIDI X-Max/X-Plus 3?
QIDI has its own online store where you can buy directly the X-Max/X-Plus 3 as well as its accessories and spare parts.
In any case, we provide you with some links to other reference stores:











Perfecto, como siempre, buenas pruebas , y opiniones reales .
Yo he visto problemas serios de refrigeracion, haciendo carcasas nuevas delanteras , y mejorando la entrada al ventilador .