A few months ago, Anycubic launched its Photon Ultra, the first accessible DLP printer that can be an alternative/improvement over the current MSLA.
With the Photon D2 Anycubic has again done an excellent job improving the weak points that his Photon Ultra had making this Photon D2 a possible turning point in resin 3D printing.
As always before continuing with the article remind you that you can join 3DWork in our Telegram channel full of disturbed by 3D printing, or on our social networks Facebook, Twitter, and Instagram.
DLP vs MSLA
Before going into details about the new Anycubic Photon D2 we would like to make a brief description to explain the differences between a DLP type printer, such as the Photon D2, and MSLA which are usually the most widespread today.
Without going into much technical detail about that can-bore resin 3D printers are based on using a light source that is used to solidify a photopolymer, the liquid resin they normally use, we usually find technologies such as SLA, DLP, or MSLA as the most common.
The main difference is precisely in the technology used in the light source. While an SLA printer uses a laser to solidify each layer of resin, DLP uses a projector and MSLA uses a Masked Stereolithography Apparatus (MSLA) via an LCD screen...

Resolution/Definition DLP vs MSLA
We’re going to cover a topic that creates a bit of controversy and that’s why manufacturers tend to compare DLP printers to MSLA technology printers of, theoretically, higher resolution..
The most widespread technology in consumer or domestic resin printers is undoubtedly MSLA, a reliable technology with affordable component costs that provides us with high quality.
As we mentioned before, MSLA printers are based on the use of an LCD to mask the rays of the UV LEDs that will form the layers of our figure. This LCD tends to suffer what is called “blur” or blurred at the edges which translates into a reduction in the details/definition of our figures.
On the other hand, DLP technology does not use a screen but a projector, in the case of DLP technology with thousands of tiny mirrors (DMD), direct to a mirror so that this “blur” effect is practically non-existent which will allow us to obtain figures with a great definition and for which the brands make that type of comparisons with MSLA machines of higher resolution.

On the other hand, this extra definition has as a counterpart that you can get to notice more the lines between layers in certain geometry of a figure something that the “blur” effect helps to disguise in the MSLA.

The Photon D2 has a double enhancement algorithm. The first focuses on the uniformity of delivery of UV light with an improvement of 92% over the previous generation the second is the improved anti-aliasing algorithm.
Anycubic has done an excellent job with the improvements introduced in the Photon D2 compared to the Photon Ultra in order to minimize that effect on the layers and we can say that the result is excellent in that aspect.
Anycubic Photon D2 Printer

Just a few months ago, Anycubic presented the Photon Ultra, the first printer with affordable home DLP technology.
As we explained before, DLP printers, unlike MSLAs, do not use a UV light source masked by an LCD screen using a Texas Instruments projector that is responsible for transferring the “slice” of the piece to be printed to our VAT.
The advantages of DLP technology over MSLA are several such as greater durability (up to x10), a considerably lower power consumption (1/5 compared to LCD), and a higher resolution/definition ratio in the details in addition to significantly reducing the noise during the normal operations is to about 35db since this technology does not necessarily need fans for cooling.
Compared to its sister Anycubic Photon Ultra la Photon D2 improves the volume of printing, something much criticized in the Photon Ultra since it limited the number of projects that could be carried out, which increases by 62% reaching 1.58 L. It also improves the XY printing area by increasing it by 55% to 95.32cm2.

Another improved aspect is the pixel size that is reduced, at a lower point more resolution/detail, from 80μm in the Photon Ultra to 51 μm in the Photon D2 … something that will be quite noticeable in the final quality of our pieces.
Below you can compare the characteristics of both:
| | Photon D2 | Photon Ultra |
| Screen size | 5.9″ | 4.6″ |
| Screen resolution | 2560 x 1440 pixels | 1280 x 720 pixels |
| Pixel size | 0,051 mm (51 µm) | 0,080 mm (80 µm) |
| Screen resolution | 498ppi | 319ppi |
| Build Volume (XYZ) | 130,56 x 73,44 x 165 mm | 102,4 x 57,6 x 165 mm |
Where can I buy the Anycubic Photon D2?
Being Anycubic a reference brand in 3D printing, you can find most of its products in countless online stores. However, here are some links where you can buy the Photon D2.
It is our duty to inform you that they are affiliate links. If you use them, the price of the product will be the same as if you access it regularly, but 3DWork will have a small commission that will help maintain the website.

Finally, you can use our search engine called Markets.sx. In this way you will literally search different online Marketplaces in one click (Amazon, Aliexpress, Gearbest, etc.) and it will show you the results in a single search.
Kit contents and Components
As usual in Anycubic machines, they arrive in perfectly protected and compact packaging, preventing both the printer and the accessories/components included from being damaged during transport.
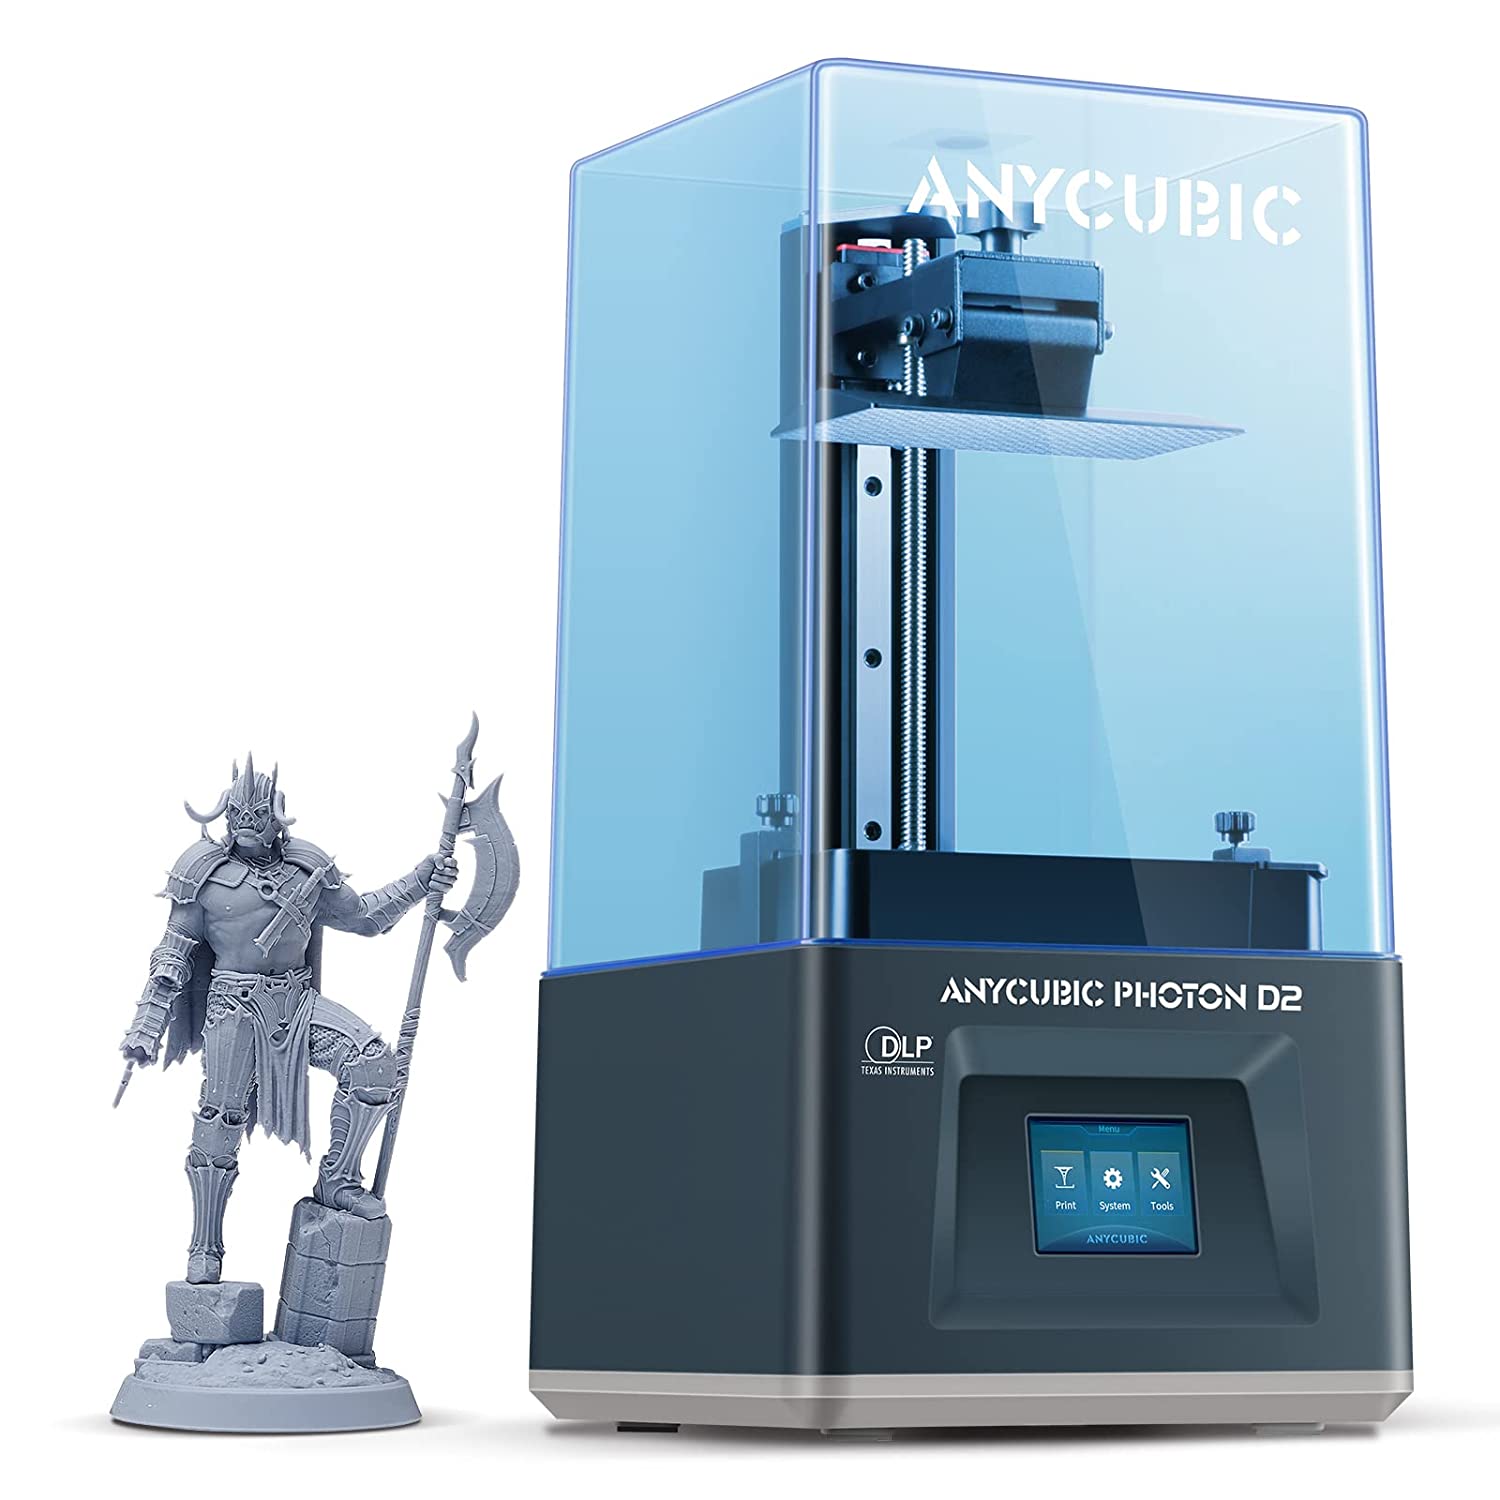
As for the aesthetics of the Anycubic Photon D2, we find the typical design of the brand which does not change in shape, color, and materials with respect to the Photon Ultra with square shapes and the typical blue UV dome of the range.

On the front, we find a 2.8-inch touch screen that together with its functional interface will help us control the printer in a simple and fast way.
On the right side we can find the power switch and the USB port, in our case it seems more comfortable and functional that both the switch and the USB are on the front. Finally, in the back, we can find the power connector and some ventilation slots.

Entering the optical part we find a DLP projector from Texas Instruments with a resolution of 2560 x 1440 pixels (2K) with a pixel size of 51 μm to obtain about 498ppi. As we have already mentioned, the use of DLP will give us an excellent resolution/definition in addition to being a more durable optical source than the typical LCD multiplying its useful life x10 and reducing energy consumption … In addition, not having an LCD gives us some peace of mind against resin leaks since in the contact part with the VAT it simply has a screen protector.

It also includes the power supply, a tank or VAT for the resin, and the printing platform. Something we loved about its printing platform has a laser-engraved pattern that significantly improves adhesion.

Also included are accessories such as a tool kit (spatulas; screw and nut wrenches; mask; nitrile gloves and resin filters), a pen drive with the software, and manuals including a quick start guide.
First steps
The commissioning process of the Anycubic Photon D2 is simply the same as that performed on any resin printer.
Once we take our Photon D2 out of the box we just have to follow these simple steps:
- We will start the machine with the switch on the back and then using the screen inside Tools/Move we will move the Jan Z up to leave the gap to install the printing platform

- We will use the leveling sheet to protect the screen and install the printing platform securing it well (1 2 3)

- We will place the included leveling sheet by clicking below on the Home icon, wait for the Z axis to descend and stop automatically

- Using our fingers we will press slightly on the printing platform so that it presses the leveling sheet evenly by tightening the fixing screws of the printing platform

- Returning to the screen we will go to the Tools menu and click on Z=0 to store the position 0 of our printer, we will press Enter twice to accept Z=0 and lift the printing platform to allow us to remove the leveling sheet

- It is advisable as a next step to perform a projection test to check that our optical system works correctly. To do this we will go to Tools/Detection and select any of the three test images… if everything goes well we will see how in our projection area you can see that test image.

- As the last step we will install the VAT

We already have our printer ready to print, inside the USB we have a typical test to verify that everything is correct.
Once we have our test done we advise you to start performing the exposure tests to adjust the times of our resin for our Anycubic Photon D2.
Analysis and user experience
Although we have been with our Anycubic Photon D2 for a few days, to be honest, and after reading a diversity of opinions about its younger sister the Photon Ultra we were interested in the work by Anycubic in improving those negative aspects that we find in the Photon Ultra … we can tell you that we are delighted with it.
The tests we have carried out with the Photon D2 have been of all kinds, from different exposure tests, minis, and busts that occupied about 80% of the printing area we have not had any problem with it obtaining well-defined pieces without artifacts.
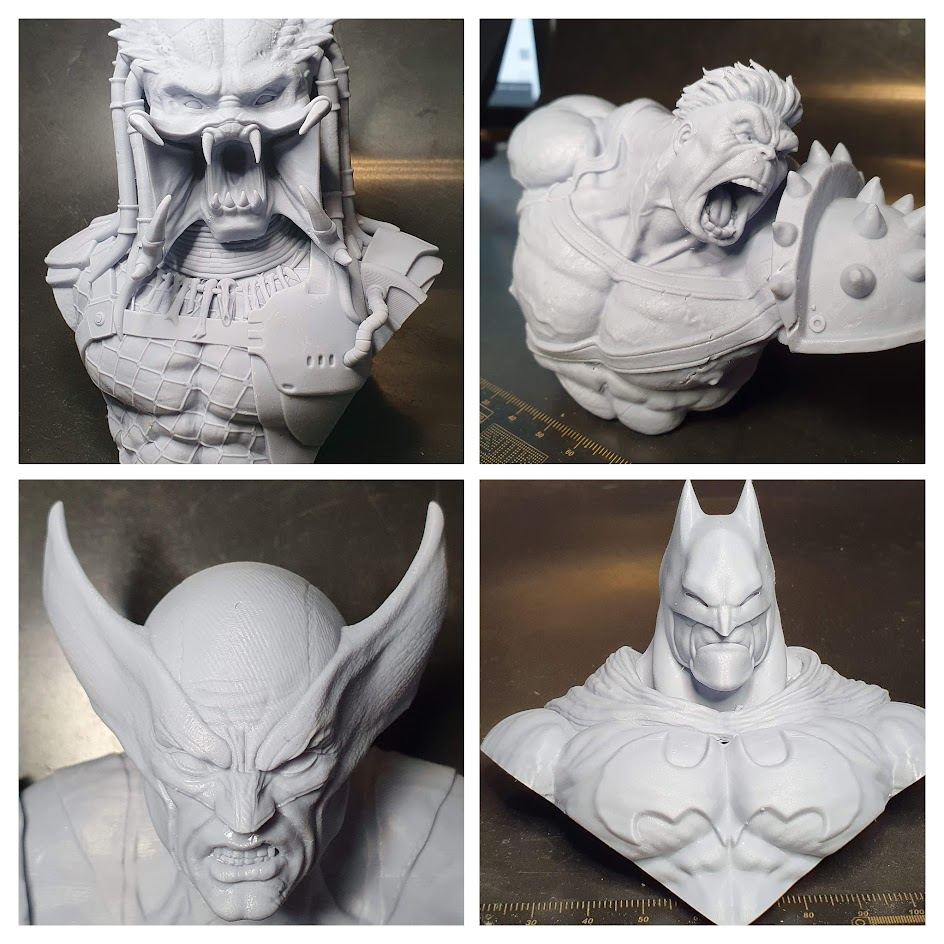

On the other hand, remembering the theme used by brands when comparing DLP with MSLA of higher resolutions. We have made prints using the same figures between our Photon D2 and other MSLA with 4K resolution with 35 μm and 8K with 28μm, while our Photon D2 has 51 μm based on the manufacturer’s specifications.


Here our analysis would be that we have not found visible differences between one or the other, it is more of the different tests carried out we would probably stay with the Photon D2 if we take into account the definition obtained!!! We also have to say that the Photon D2 is slightly slower printing compared to the MSLA.

We have also tried to reproduce the problems that apparently had its older sister where according to which figures the layers were visible sometimes affecting the final appearance of the figures … We have tested with different layer heights from 0.05mm, through 0.03mm to 0.025mm and we have not found those artifacts.

Also did tests with different types of resin, although Anycubic gave us a bottle of Anycubic DLP Craftsman gray we were interested in trying with other theoretically non-specific DLP resins. For this, as always we rely on iki3D resins of our own formulation (from our friend Mario from Electrobits Web / Telegram) that give an excellent result as well as being a local product.
Both with the DLP Craftsman and with the iki3D Standard or ABS-Like we obtained excellent results even the iki3D in certain complex test pieces gave us a better final finish.

We have also been pleasantly surprised by the low noise during the use of the machine that in some of the other models are notoriously higher reaching to bother in according to what conditions.
Final assessment
As we have commented in the previous point we had certain doubts that the Anycubic Photon D2 really made that leap to DLP technology and especially the aspects to improve on its predecessor the Photon Ultra.
Despite only taking a few days with it we can say that it meets the expectations we had more than offering high-quality prints even above others with theoretically better technical specs. Anycubic has done a great job of improving the photon Ultra’s weak points by making this Photon D2 a turning point in home resin printers regarding the use of DLP technology…
Using DLP has a series of advantages discussed above such as low consumption, great durability of its optical section, and a high level of definition and detail in our prints.
As aspects to improve would be two aspects that although they are not critical would help to reach some users such as the print size as well as improve printing times with respect to MSLA.
Also and although it is improving with each version Anycubic should strive more in the compatibility of its printers at the launch with other laminators, Photon Workshop follows a few steps behind Lychee Slicer or ChiTuBox which often forces to laminate in a limited way or fails to use other laminators and perform a tedious export process and not lacking in problems in some situations.
In our case, most of our tests were based on Lychee Slicer and ported to Photon Workshop for laminating having better results in this way.
Although it is also possible to use ChiTuBox since version 1.9.4 was released a few hours ago it is compatible with our Photon D2.
And for now this is all, we hope that the article Anycubic Photon D2: Fully affordable DLP printing technology has been to your interest.
Don’t forget to visit other articles at 3DWork.io:
- TwoTrees TTS-55 (Review): Versatile and very easy to use laser engraver
- Ratrig V-Minion: Analysis, guide and configuration of this great little DiY beast
- ELEGOO Neptune 3: An excellent option to start in 3D printing
- Anycubic Kobra Plus: A great size for a great printer
- ELEGOO Saturn 2: Large size and higher resolution resin printer
- ELEGOO Mars 3: The new beast in 4K for resin prints
- Revopoint POP2: Quality, affordable, high-accuracy 3D Scanning
- SKR PICO: Analysis and complete guide of this great little controller
- Anycubic Mono X 6K: New Anycubic Mono X Printer Review
- Voron 0.1 Kit FYSETC: Analysis and configuration of this versatile/reduced 3D printer
- Slice Engineering Mosquito: A Spectacular Hotend for High-Performance 3D Printers






Déjanos un comentario