Today at 3DWork we are going to analyze a new integral extruder called BIQU H2 that the Chinese company BIQU has developed for its new BIQU BX printer. In case you are not aware, this new printer was successfully financed through the famous Crowdfunding platforms Indiegogo and Kickstarter recently.
This new type of “integral” extruder, as I like to call it, allows you to connect the heater block directly to the extruder without the need to add any heatsink in between, as is the case with the BMG or Titan extruders. With the added benefit of eliminating unnecessary components, reducing size and weight.
However, although this extruder has been designed specifically for the BIQU BX printer, it will be available for sale as another product in its catalog in mid-January. Initially the 24V version of the same and approximately 1 month later the 12V version will be launched, following the roadmap established by BIQU.
Before continuing I would like to remind you that we have a large community in our Telegram channel, where we share all our doubts and experiences. If you want to be part of it, have no qualms about joining.
Brief introduction
For some time now, different extruders have been appearing on the market that include fully integrated hotends, facilitating their subsequent mounting in printers and offering us truly spectacular performances.
A clear example – and a pioneer in this type of extruder – is the well-known Hemera extruder from the company E3D, of which we prepared an article some time ago that you can read in the next link.
This extruder entered the market strong and showed us a new way of approaching extrusion + hotend systems (integral). However, the Hemera extruder was not without problems that the company itself recognized some time ago and that they are still correcting for future productions (more information at this link).
Fortunately, and thanks to our friends at BIQU/BigTreeTech, we at 3DWork have gotten a BIQU H2 extruder beforehand to play with. And by the way, analyze a little its main characteristics and operation. I hope this article can be of use to you.
As a curiosity to indicate that the name of the H2 extruder refers to the chemical element of hydrogen. I personally hated chemistry, we were completely incompatible, but surely some of you already know that hydrogen is the lightest element in the periodic table (1.00784 u). And extrapolating the idea, it is still a fairly accurate analogy 🙂
Opening the package (Unboxing BIQU H2)
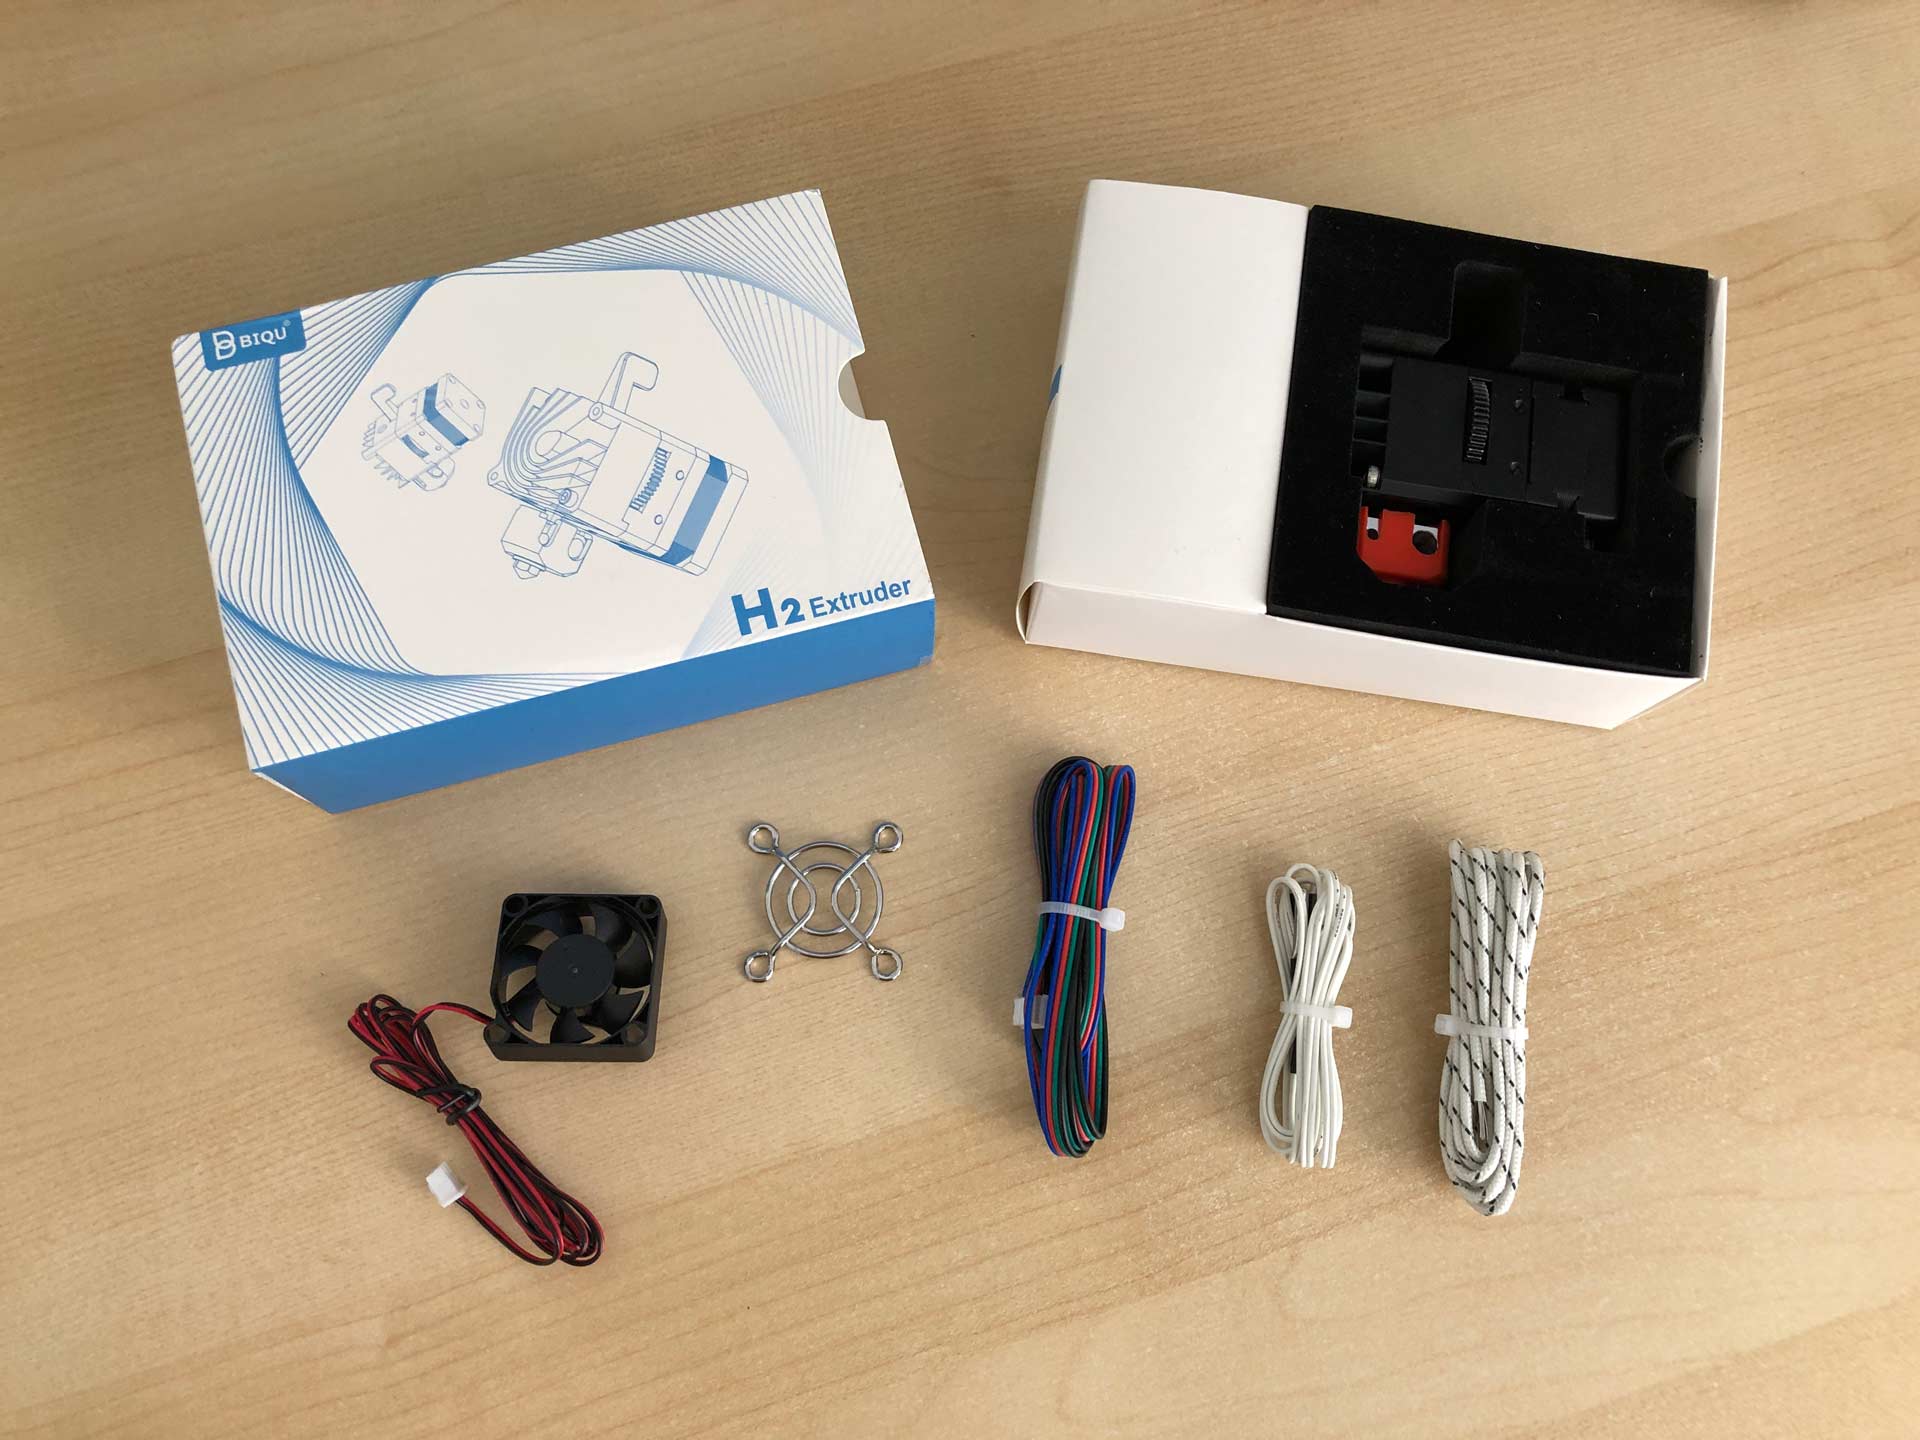
Leaving behind the chemistry, we can see that the BIQU H2 extruder is presented to us in a small box, completely protected and with a small instruction manual inside.
As usual in all components of this type, the pack includes the Thermistor, the thermal resistance for the block, the NEMA14 motor cable and the 3510 fan with its metal protector.
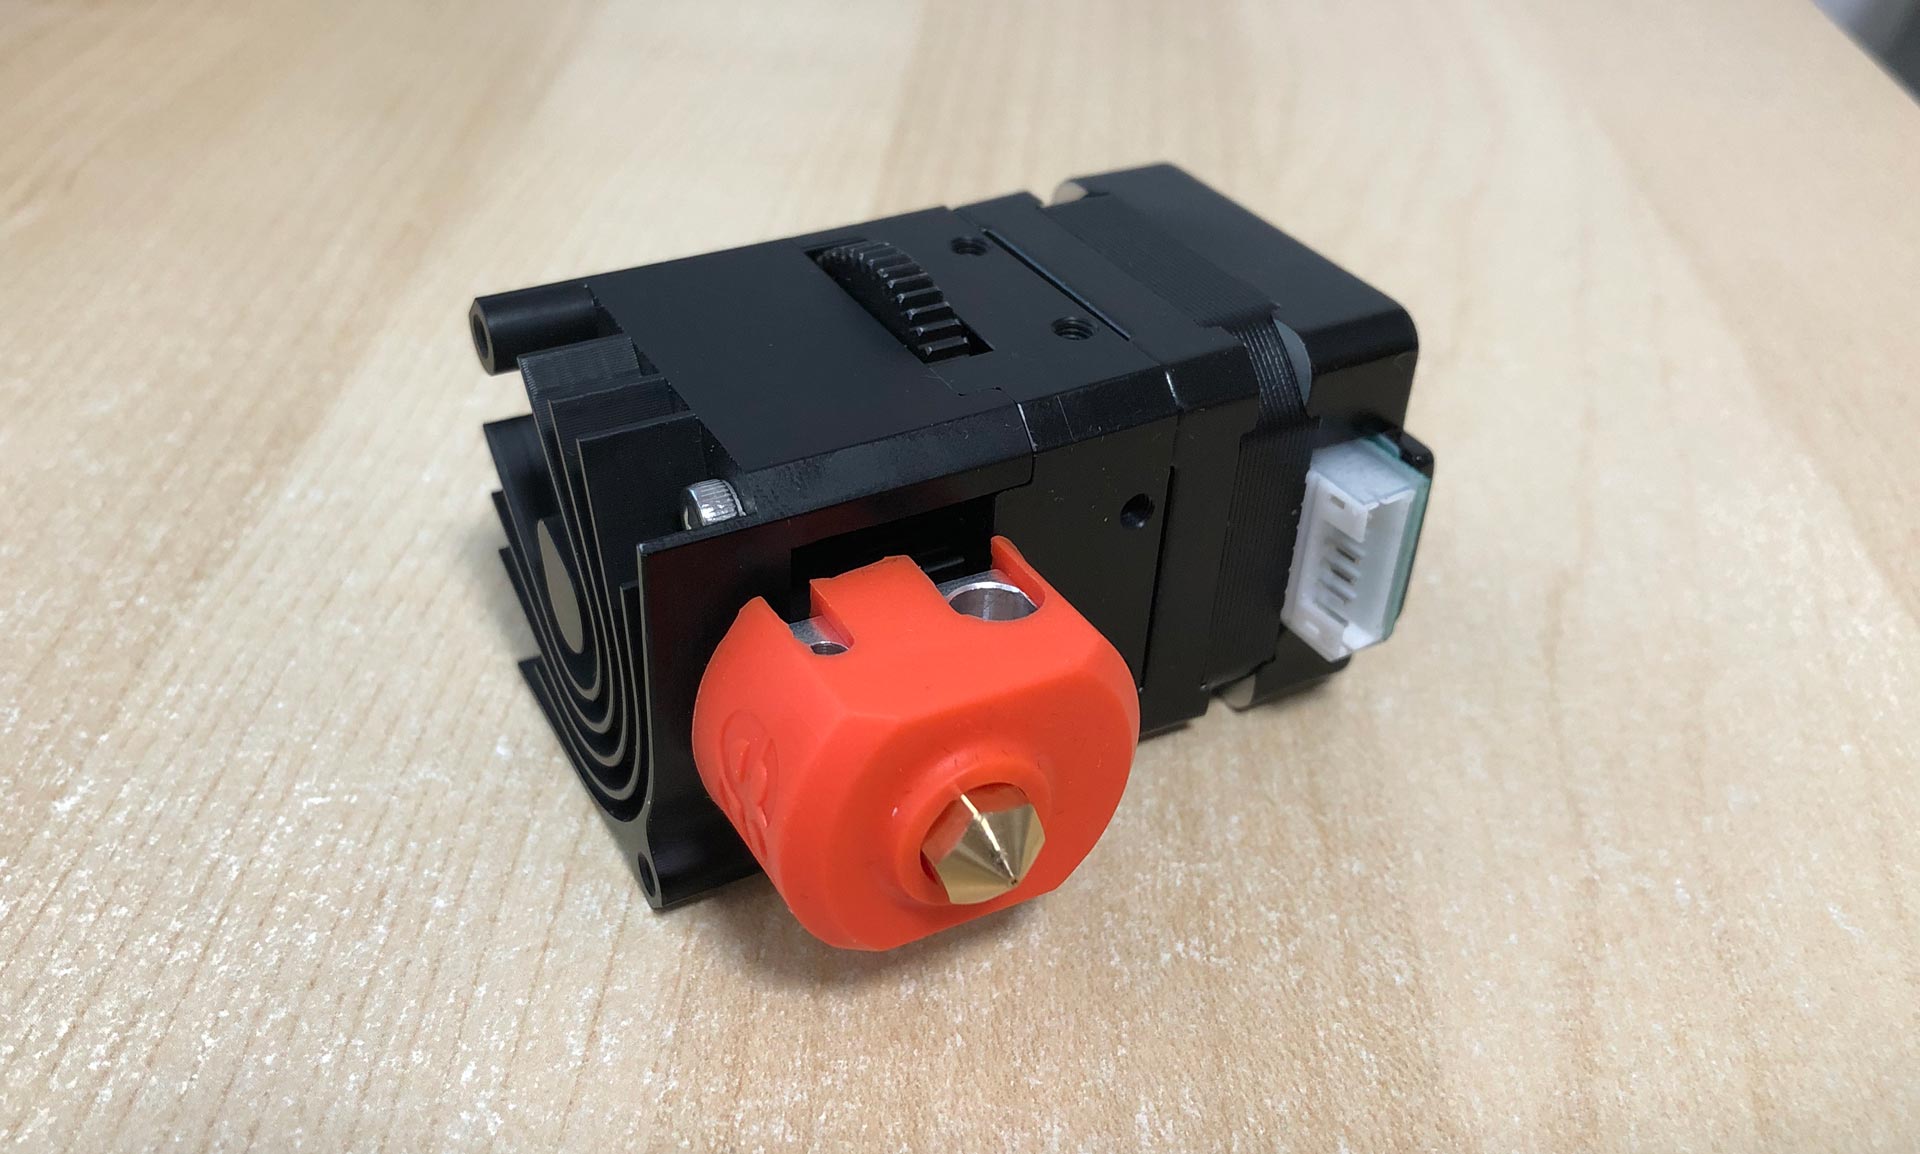
Already mounted on the hotend, we can see a silicone “sock” with the logo of Phaetus giving us a clue as to who is the manufacturer of the block and nozzle.
This “sock” will act as a protection function and will help to partly avoid heat losses during the printing process.
BIQU H2 General features
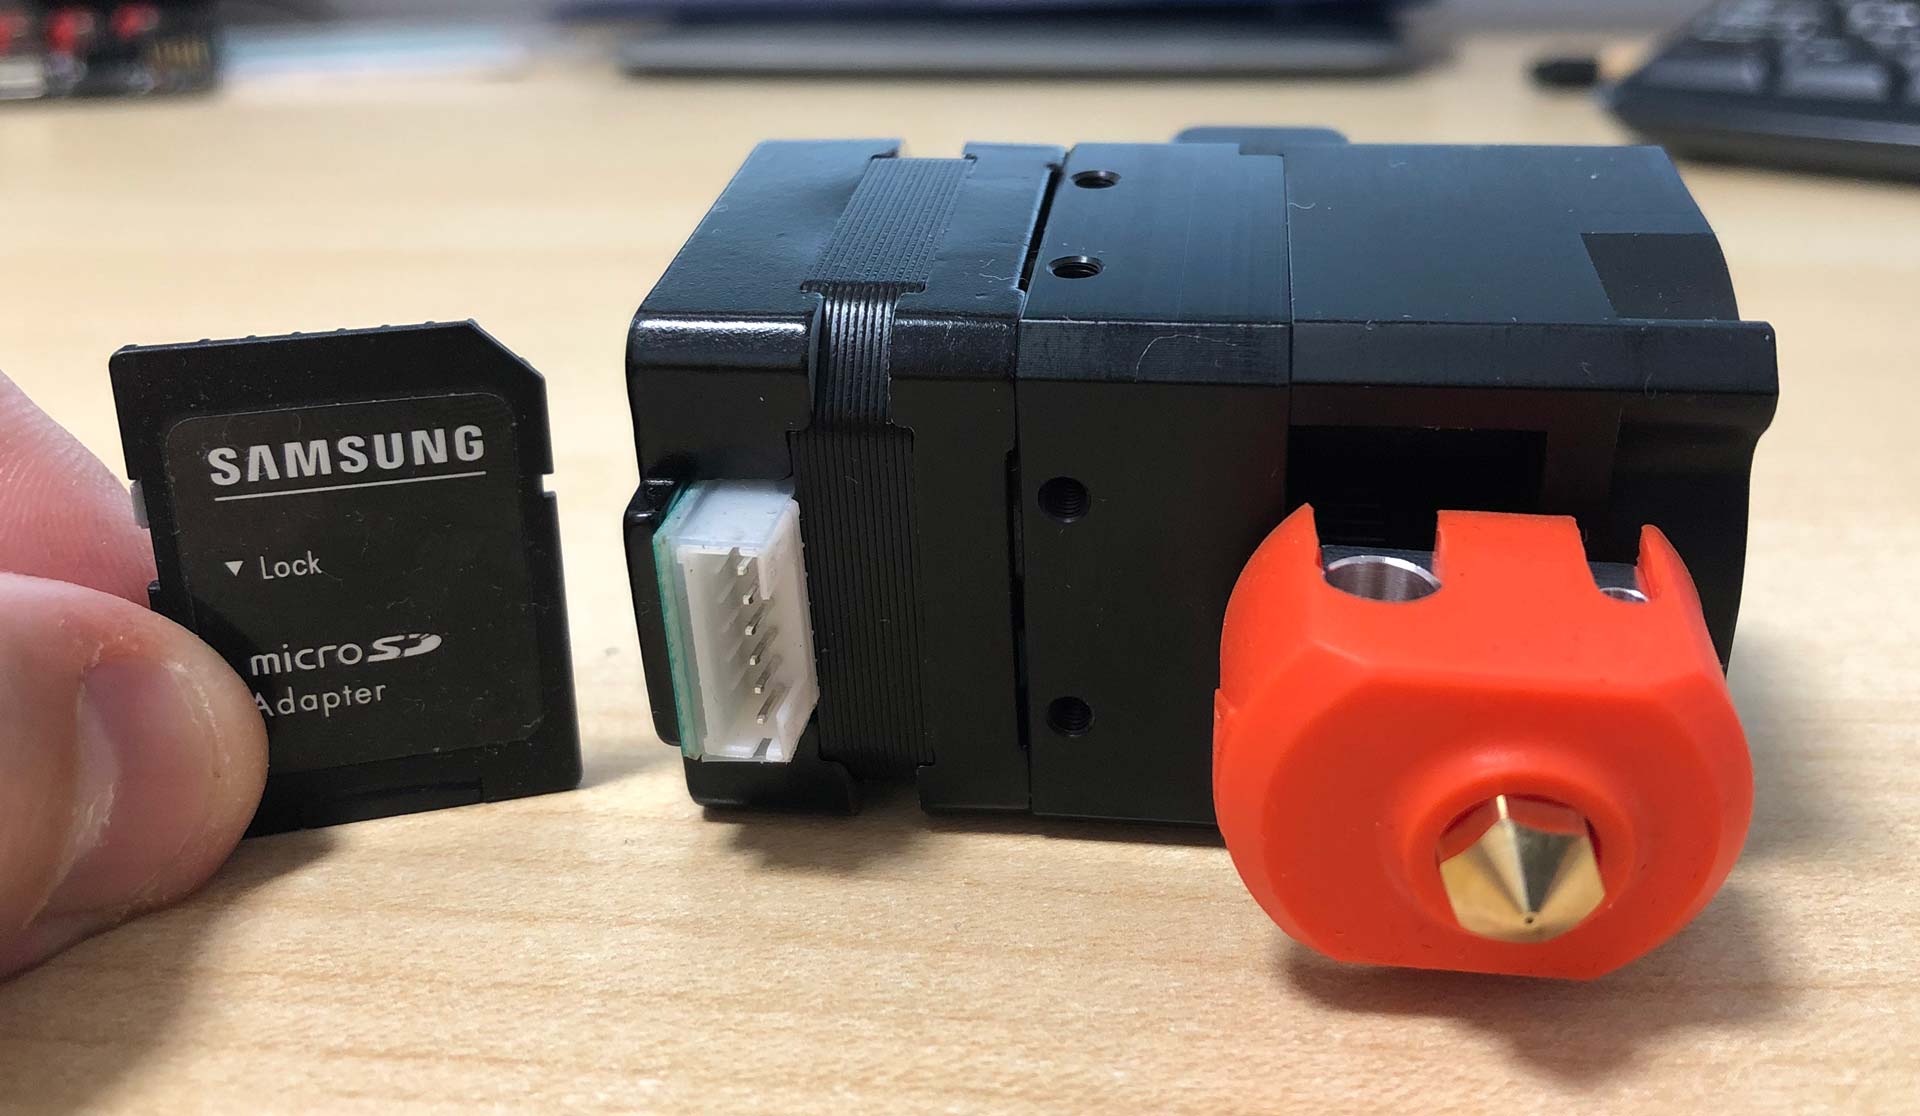
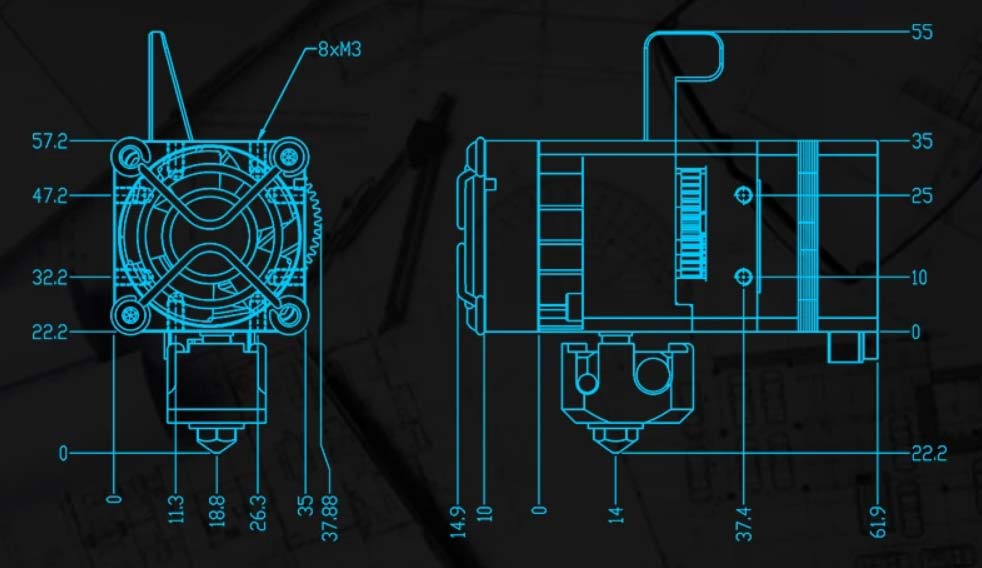
The BIQU H2 Extruder offers us the power of a double gear system but with a spectacular size (60x35x35mm). Which makes it one of the lightest on the market, something that will delight any user who works with high speeds.
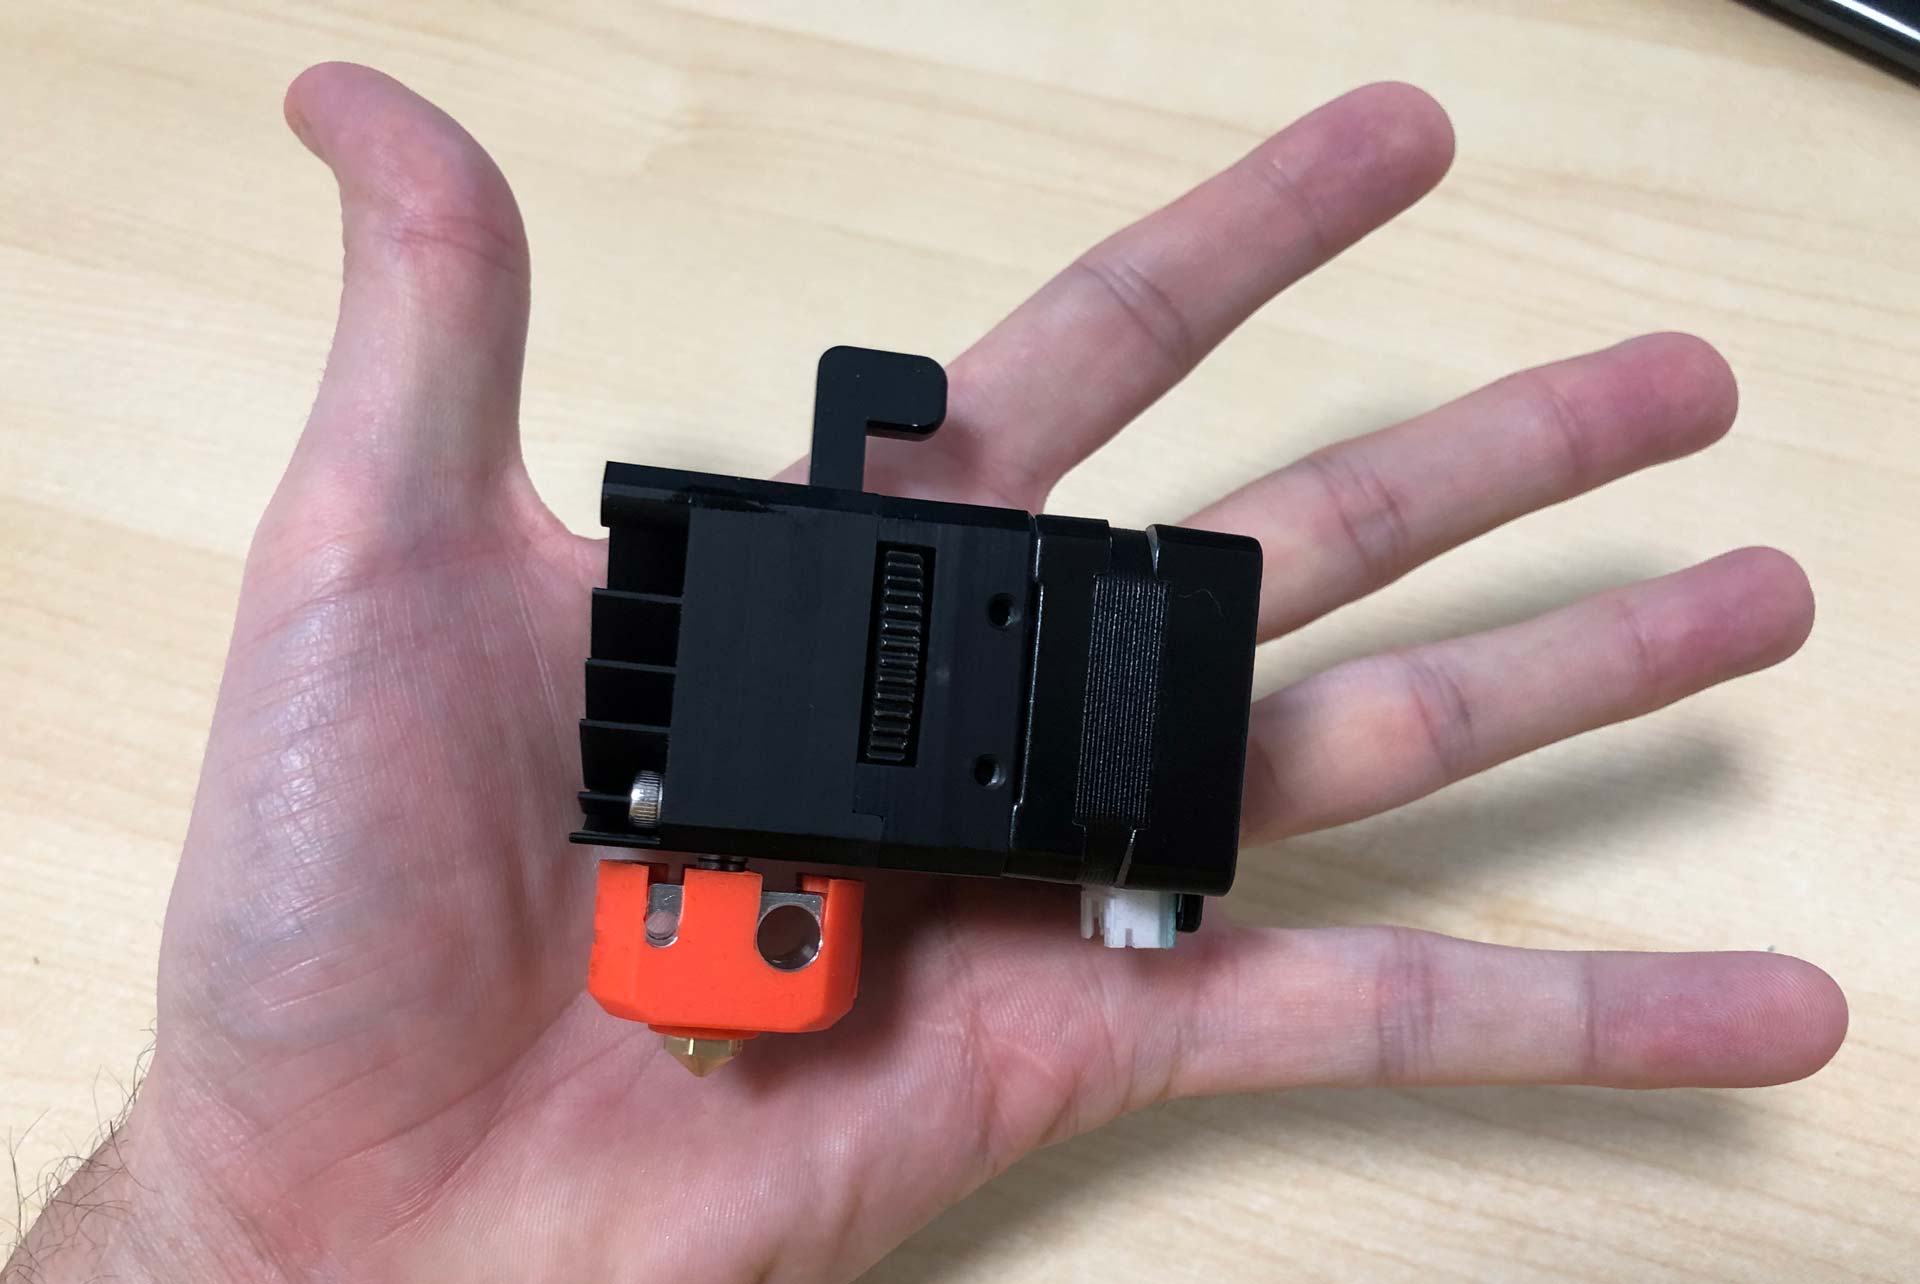
The size, as you can see in the image above, is extremely compact. By putting it in the palm of your hand you can see the incredible reduction in size to which it has been subjected, offering us only 219g. of weight.
For this they have had to use a stepper motor reduced to the minimum expression and adjust the extruder body to the same extent, something that they have achieved without any problem. In the image above you can see a memory card next to the engine for reference.
Another feature to highlight is that can print any type of material, always clearly within its operating temperature range. This means that materials such as PLA, ABS, ASA, PETG, TPU/TPE, Nylon, HIPS, PVA and a long etcetera are completely suitable for handling.
In addition, the inside of the barrel and nozzle have been polished with a surface quality of 0.4Ra (Roughness Average). Something that will notably help prevent possible jams in our filaments.
However, you should always pay special attention to the configurable parameters. Filaments such as ABS, TPU/TPE or Nylon itself require specific parameters and conditions to be printed correctly (it does not depend solely on the extruder). So it is always important to keep that in mind.
Weight and size
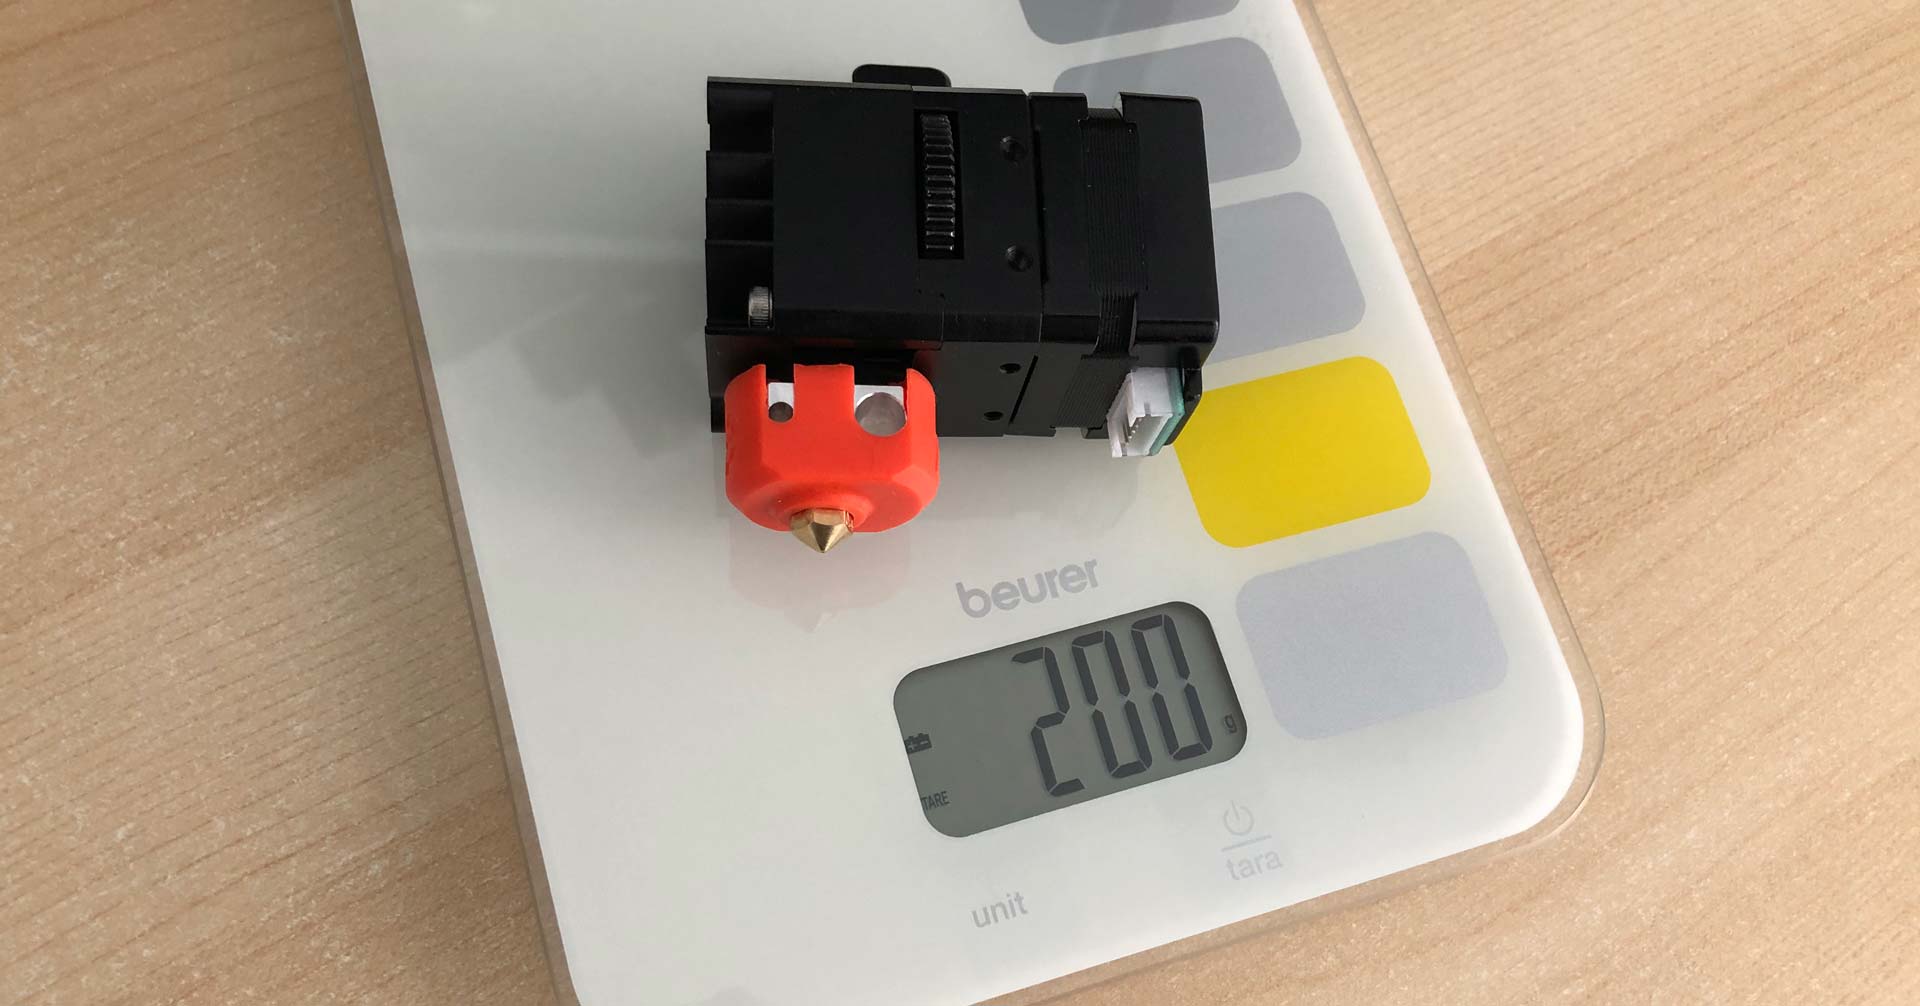
We are facing an ultra-small mini-extruder (60x35x35mm) and very light. If we compare it with other current extruders in the same segment, the BIQU H2 extruder brings us a drastic reduction in weight.
It weighs approximately 219 grams, an astonishing and noteworthy fact. If we compare it with any of its direct competitors, such as the Hemera from the manufacturer E3D (388 grams) or the Matrix from TriangleLabs (357 grams), we will see that it is quite far from them in this regard.
 The weight of the head in our 3D printers is a value to take into account, since it is directly related to the print quality due to the inertia that the weight can generate.
Having an extrusion system like the H2 extruder with this weight and its direct extrusion is something great.
However, we must always bear in mind that to operate with very high speeds not only the weight of the head is a determining factor to take into account.
 If you have a “Prusa” type printer, the biggest problem with inertia is not going to be your head, but the weight of your bed or printing surface.
Many users obsess over header weights of 200-300 grams. when they have beds of 750 grs. or more.
As you will understand, the speed limit in this type of “Prusa” structures will not be set by the header itself, but by your printing surface.
That is why it is advisable to use other types of 3D printers (or rather structures) for extremely high speeds and where it is not the bed that moves in the X axis and moves in the Z axis.
A clear example can be seen in the Ultimaker 3 printers (in the image above), where the part is produced on a bed that is descending on the Z axis throughout its printing.
Extrusion Power (Double Gear)
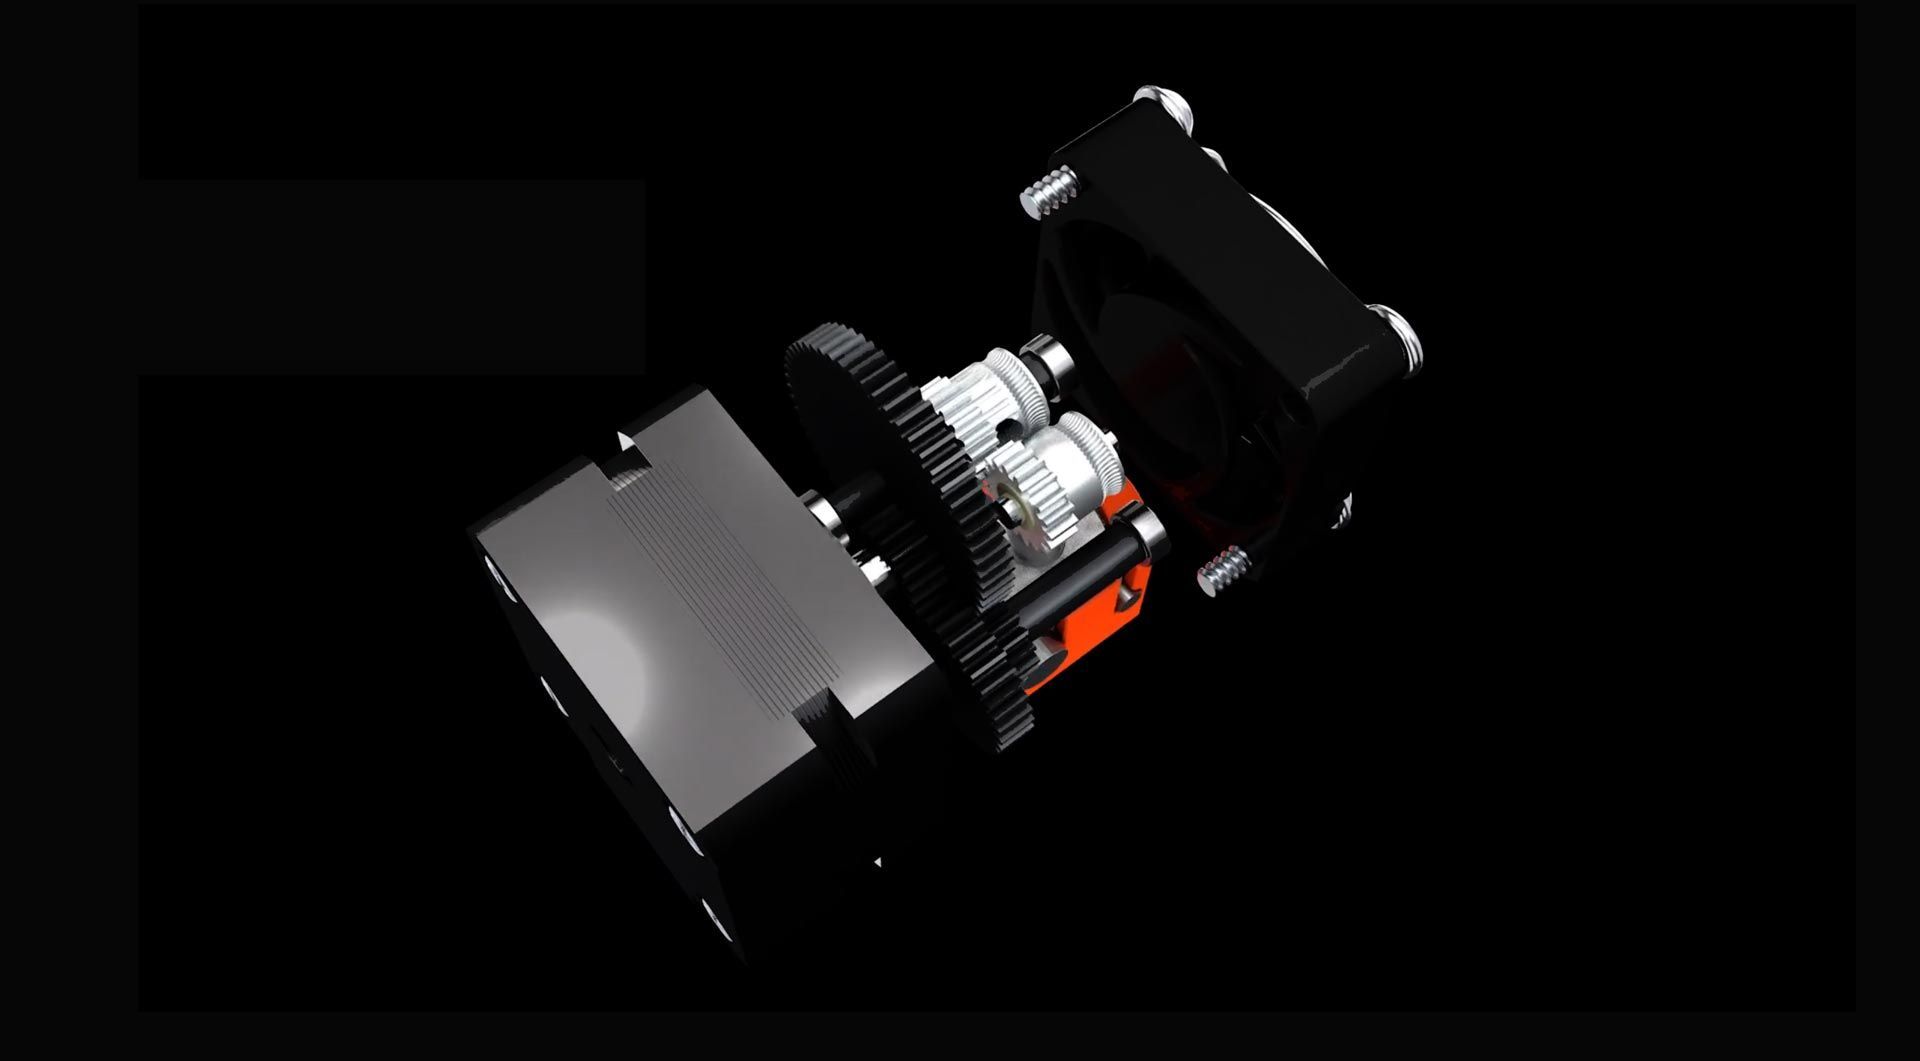
The torque and ratio offered by the design of its gears is 7:1 and 770mN.m, which means enough power to move our coils without any problem.
This gives the system a completely fluid extrusion, something very important – or vital – for a correct production of parts. And above all so that the union between layers is uniform.
Printing temperature
The BIQU H2 extruder can reach a maximum temperature of 260ºC, which is more than enough for the majority of current filaments (and not of an industrial nature). This is due to the fact that inside we have a small Teflon tube (PTFE) that could degrade at higher temperatures.
However, if we need to print at a higher temperature we can update it without any problem. For this task we must first replace the extruder fan, obviously with a more efficient one with greater air flow, capable of dissipating the considerable increase in temperature (450ºC or 500ºC).
And then we will need to change the barrel for an “all metal” one, as well as the Nozzle for one resistant to high temperatures. All these components can be purchased through the same BIQU store without any problem.
Heat sink
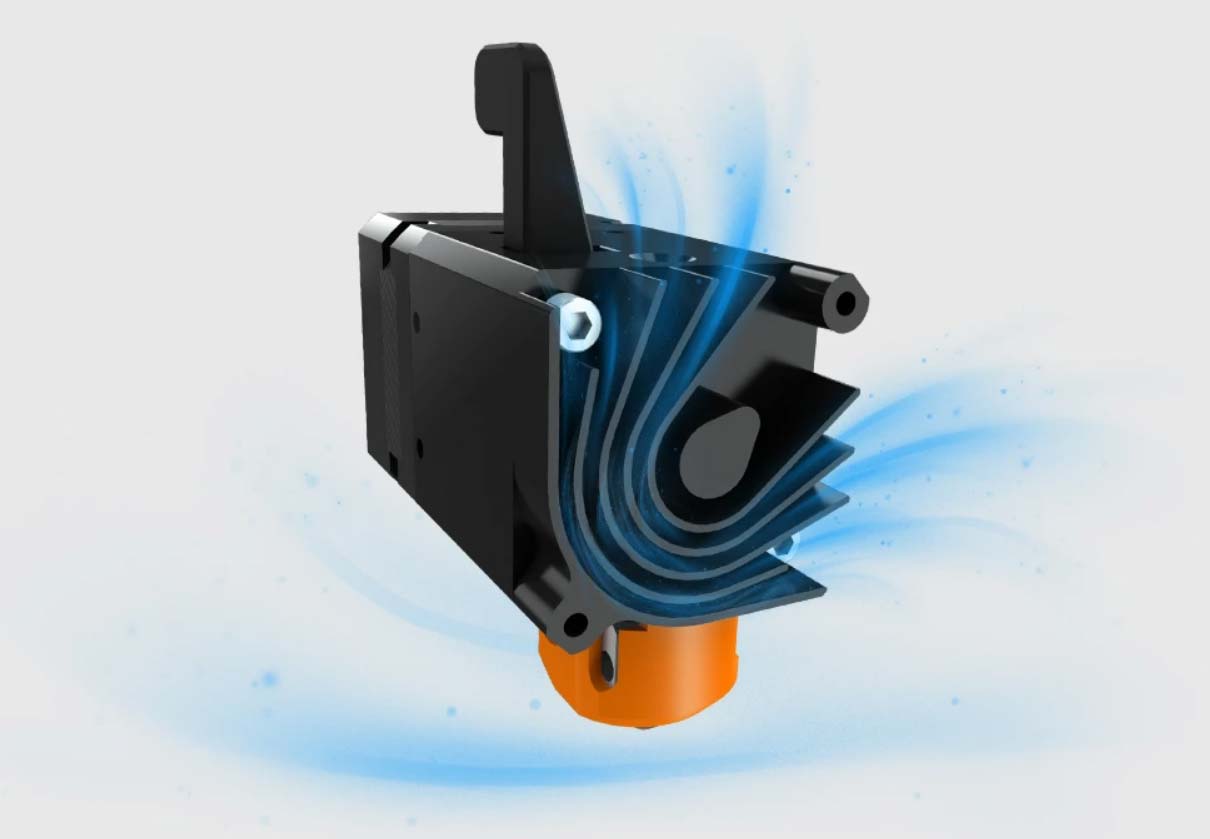
To prevent the heat from rising through the hotend to the aluminum body where the gears and the stepper motor are located, the BIQU H2 extruder makes use of a 3510 fan (fan).
This directly projects a frontal air flow that cools the machined block, which has a kind of “rails” that project the flow at 45º degrees upwards to prevent it from influencing the printing surface and avoid possible .
Filament pressure regulator
As you can see in the images, the extruder has a metal lever that you must press to insert the filament. These kind of levers usually have a pressure regulation screw.
In this case, BIQU has chosen not to add a pressure regulator on the filament. In 3DWork we have previously analyzed a high-performance extruder without any type of tightening regulation, in the article DyzeXtruder Pro: Analysis of a high-performance extruder for professional-environments, and the results were more than favorable.
This characteristic does not mean any deficiency or impediment, but that they are already factory set with the optimum pressure and preventing the user from incorrectly adjusting the tightening (and marking or damaging the filament).
At this point, BIQU has validated the optimal tension with innumerable filaments and tests (simulations), avoiding that we have to take care of that calibration, very correctly in my opinion.
Where can I buy the BIQU H2 Extruder?

The BIQU H2 extruder recently went on sale this Wednesday, January 13, so it is now available in case you are interested. Here I leave you a link to Aliexpress and Amazon where you have it available (at this time on offer).
These links are from affiliates, that means that if you make a purchase through them, 3DWork will receive a small commission that will help maintain the website. And of course, this does not entail any price increase on the item.
| Extrusor BIQU H2 |
In addition, some time ago at 3DWork we developed the platform Markets.sx, a search engine for 3D printing products with which you can save time and carry out simultaneous searches in different online stores (Amazon, Gearbest, Aliexpress, etc.).
If you want to try it, you can click on the following banner and it will also help keep the project alive.
Comparison of extruders (BIQU H2 / Hemera / Matrix)
In this table you can see all the main characteristics of the BIQU H2 extruder. As a reference, I have taken the liberty of including the most direct competitors, so that you can get a global idea of all their characteristics:
BIQU H2 Extruder |
Hemera E3D |
Matrix |
|
| Company | BIQU BigTreeTech | E3D | TriangleLabs |
| Extrusion type | Dual gear + Tensor | Dual gear + Tensor | Dual gear + Tensor |
| Ratio / Torque | Ratio 7:1 Torque 770mN.m |
Ratio 3.32:1 Holding torque 3.2 kgcm Detent torque 0.12 kgcm |
Ratio ~3:1 Holding torque 29Ncm |
| Weight | 219 grs. (direct) | 388 grs. (direct) 327 grs. (bowden) |
357 grs. (direct) |
| Size | 60x35x35mm |
77×44×83mm (direct)
67×44×76mm (bowden)
|
66.7x44x78.7mm |
| Maximum Temp. | 260ºC Upgradeable to 500ºC |
285ºC Upgradeable to 500ºC |
285ºC Upgradeable to 500ºC |
| Pushing force | 7,5 Kg. | 10 Kg. | 8,6 Kg. |
| Fan | 3510 fan | 4010 fan | 4010 fan |
| Voltage | 24V | 12V / 24V | 12V / 24V |
| Stepper Motor | NEMA14 Motor 1.8º degrees |
NEMA17 Motor 1.8º degrees / 1.33A |
NEMA17 Motor 1.8º degrees / 1.3A |
| Thermistor | NTC 3950 100k Thermistor |
PT100 Thermistor |
Semitec 104NT-4 R025H42G |
| Heatblock | Phaetus / 24V | V6 E3D / 24V 30W | V6 / 24V 40W |
| Nominal Steps | 932 steps/mm (16x) | 409 steps/mm (16x) | 335,4 steps/mm (16x) |
| Review 3DWork | – | (Enlace directo) | – |
Installing the BIQU H2 extruder
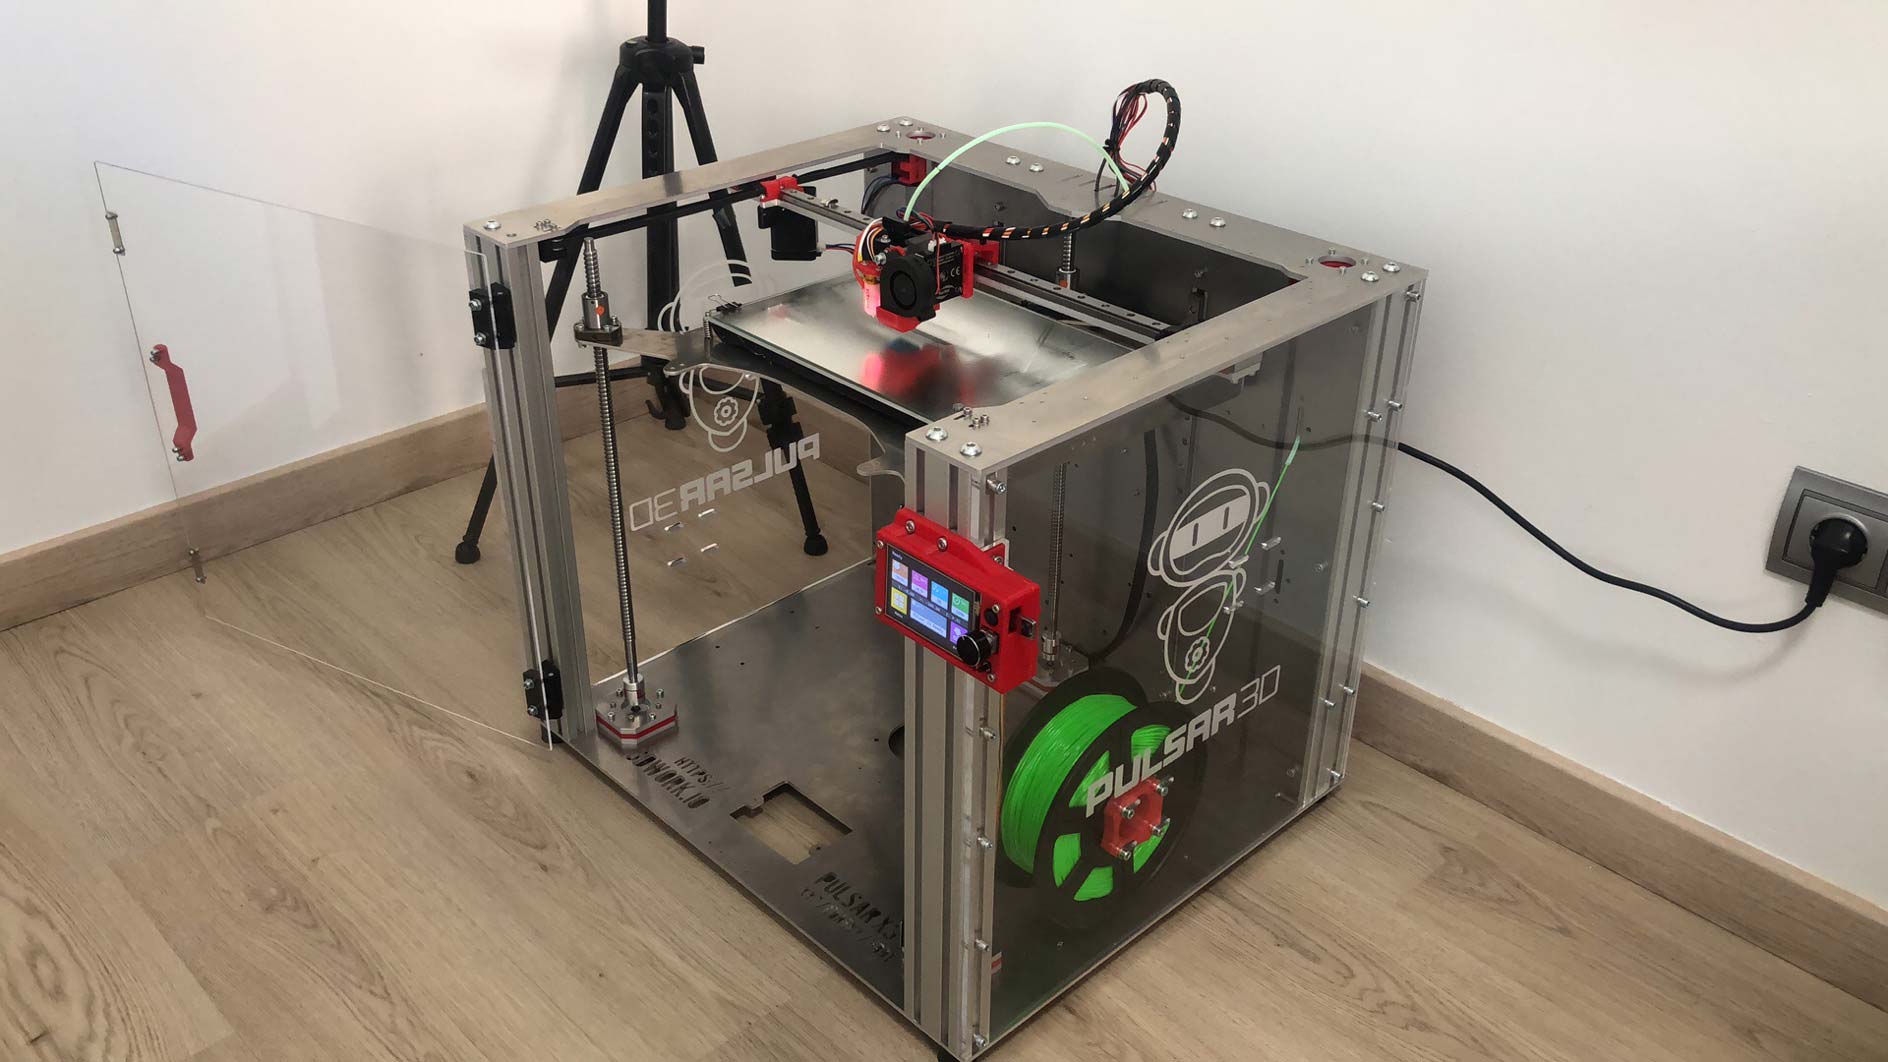
For the installation of the BIQU H2 extruder I had to design my own support for my Pulsar X3 printer, since being so recent I hardly found any available parts.
I was able to locate a fan support from the user eight_heads in Thingiverse, but did not have BLTouch, leveling sensor that I usually mount on each and every one of my printers.
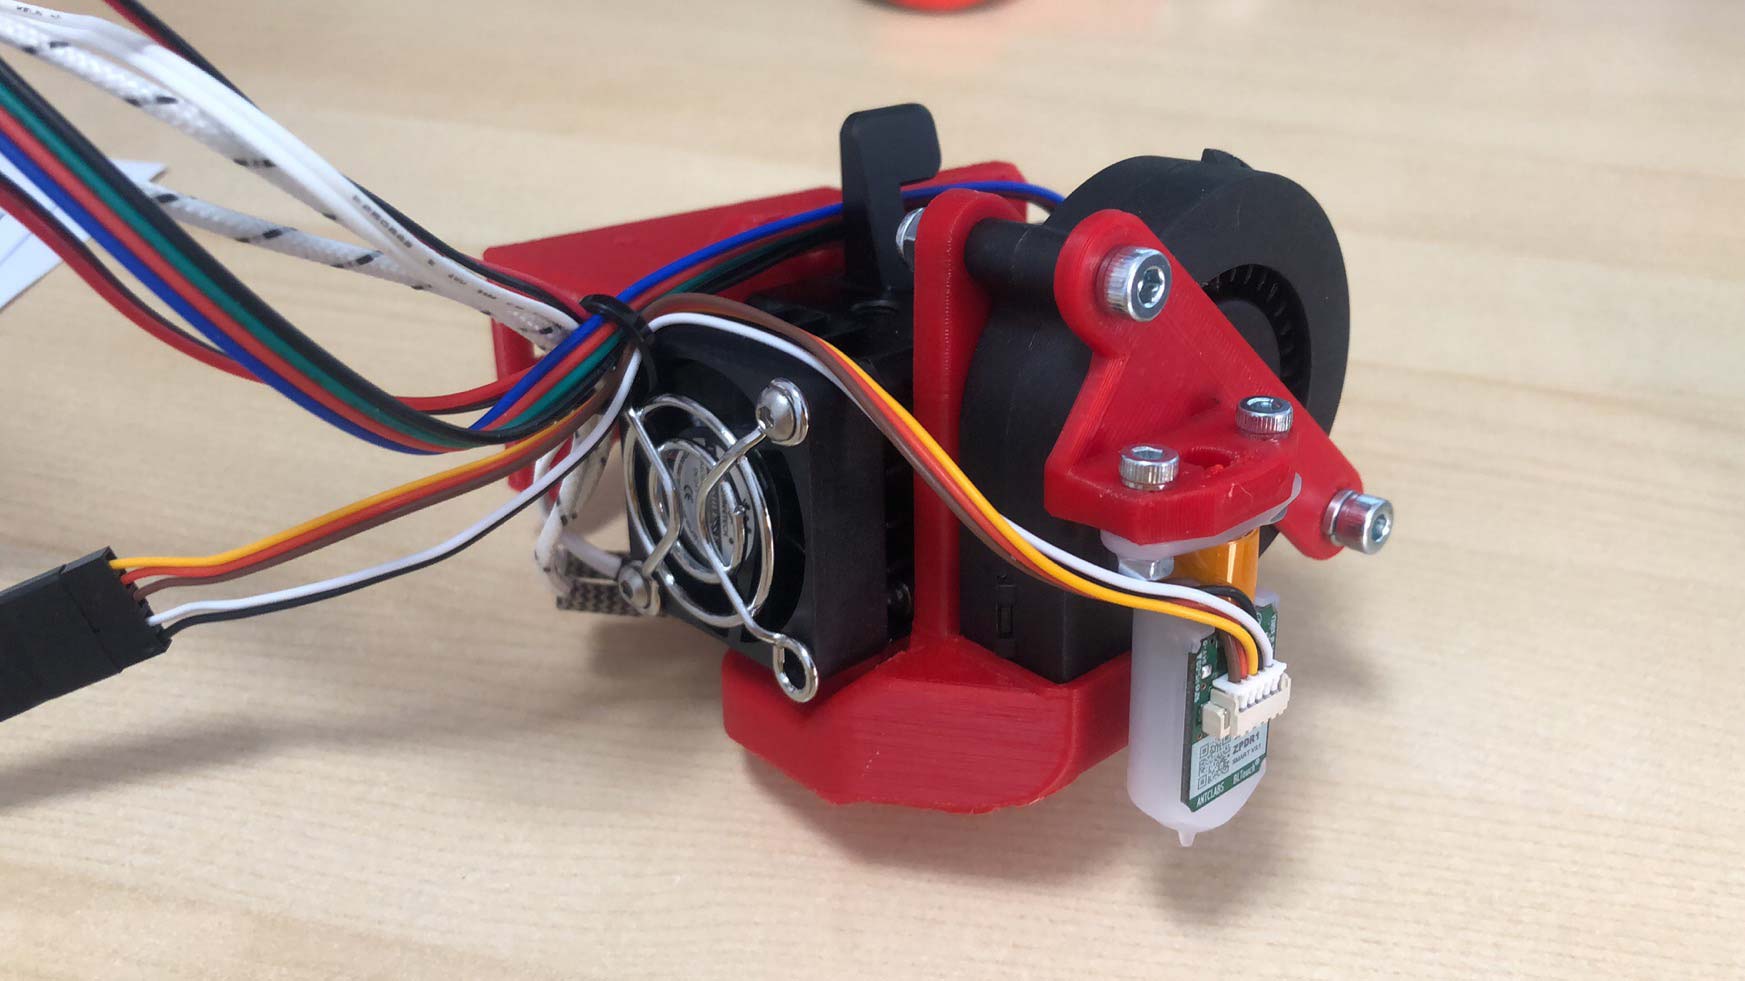 So I got down to work and made a custom one adapted to my machine. I have to confess that I did it in a hurry and running so don’t expect to see any study of flows or similar things.
You can download the two pieces from the following link from my account on Thingiverse. The good thing about it is that both components (Fan 5015 + BLTouch) are anchored directly from the extruder itself, being compatible for the vast majority of 3D printers.
However, I will do a review shortly and upload a new model. So if it works for you for now, you have it available for download at your entire disposal.
Configuring BIQU H2 extruder in Marlin 2.x
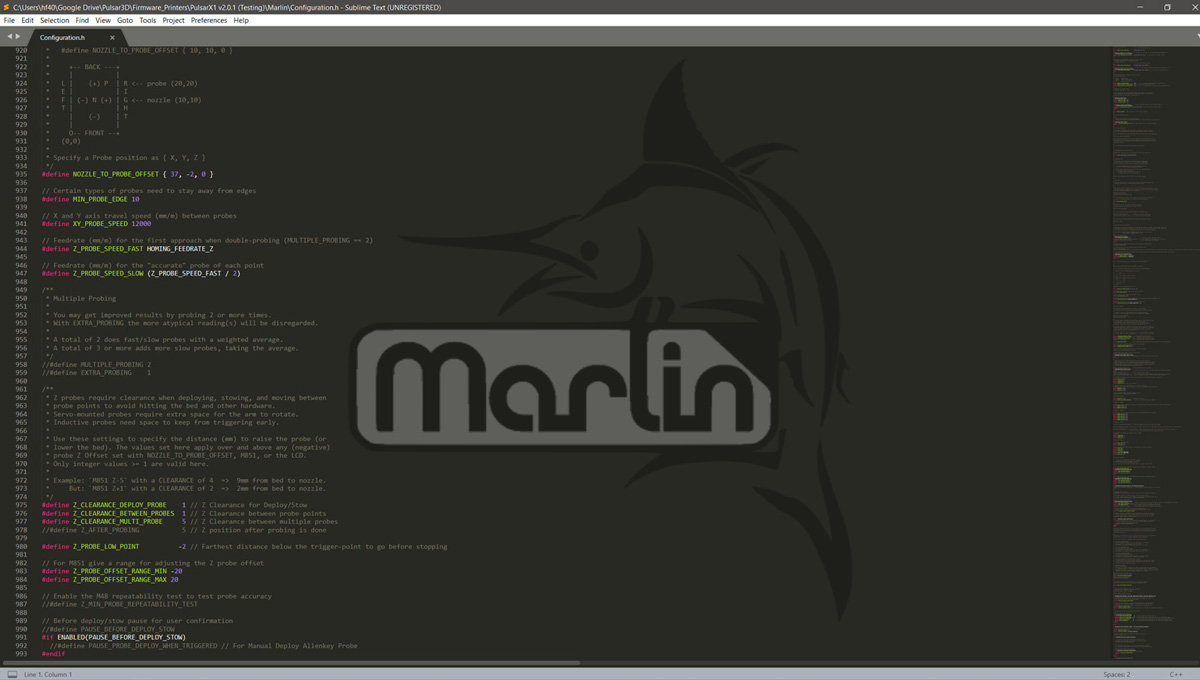
Setting up the BIQU H2 extruder in Marlin should not present excessive problems, since it is a very simple operation. You will simply have to modify some parameters, compile the firmware again and update your board with it.
However, if you are not familiar with modifying and compiling Marlin firmwares, I highly recommend that you read a very interesting article I wrote some time ago called Complete guide: Configure Marlin 2.0.x from scratch and not die trying.
And to close the circle, nothing better than to use Visual Studio Code just as I show you in this other article Configure and update your 3D printer using Visual Studio Code and Platform.io.
Returning to the changes to make, the first thing you should do is go to the “THERMAL SETTINGS” section and modify the value of the head temperature sensor (or thermistor).
In the case of the BIQU H2 extruder, you must select the value 5, so in Marlin it would be configured as follows:
#define TEMP_SENSOR_0 5    // Valor del thermistor Hemera
#define TEMP_SENSOR_1 0
#define TEMP_SENSOR_2 0
#define TEMP_SENSOR_3 0
#define TEMP_SENSOR_4 0
#define TEMP_SENSOR_5 0
#define TEMP_SENSOR_6 0
#define TEMP_SENSOR_7 0
#define TEMP_SENSOR_BED 1
#define TEMP_SENSOR_PROBE 0
#define TEMP_SENSOR_CHAMBER 0
Now the ideal would be to verify that the thermal protection for your hotend is fully enabled. Just look for the following lines and verify that the first one is configured as follows:
#define THERMAL_PROTECTION_HOTENDS // Enable thermal protection for all extruders
#define THERMAL_PROTECTION_BED     // Enable thermal protection for the heated bed
#define THERMAL_PROTECTION_CHAMBER // Enable thermal protection for the heated chamber
The next step will be to calibrate the PID Tuning corresponding to this new hotend that we have just installed. The PID is an algorithm that Marlin uses that is in charge of managing the temperature of our hotend.
The values will have to be manually extracted by ourselves with a short test. I leave you directly a link where you can see how to extract them, simply by doing click here .
And to finish configuring the BIQU H2 extruder in Marlin, we only need to modify the extruder steps per mm in its corresponding section of the firmware. Specifically where the E0 field appears, which is the extruder value.
The new value to add will be 932 steps, which is the value provided by the BIQU manufacturer, and always having our drivers configured at 16 microsteps. It would look something like this:
/**
 * Default Axis Steps Per Unit (steps/mm)
 * Override with M92
 *                                      X, Y, Z, E0 [, E1[, E2...]]
 */
#define DEFAULT_AXIS_STEPS_PER_UNIT   { 160, 160, 800, 932 }
Printing tests with BIQU H2 Extruder
For the printing tests I have used a couple of spools from our friends at Fillamentum, a company from the Czech Republic that develops premium quality filaments which I always recommend.
Specifically, the filaments of this brand that I used were CPE HG100 “Caramel Brown Metallic”, a PETG variant with better features, and ASA Extrafill “Traffic Yellow” (Acrylonitrile styrene acrylate), a filament that is on the rise these days.
 In addition, I also used another generic Red PLA (unknown brand) and a TPU from SUNLU somewhat problematic, since it is about 5 years old.
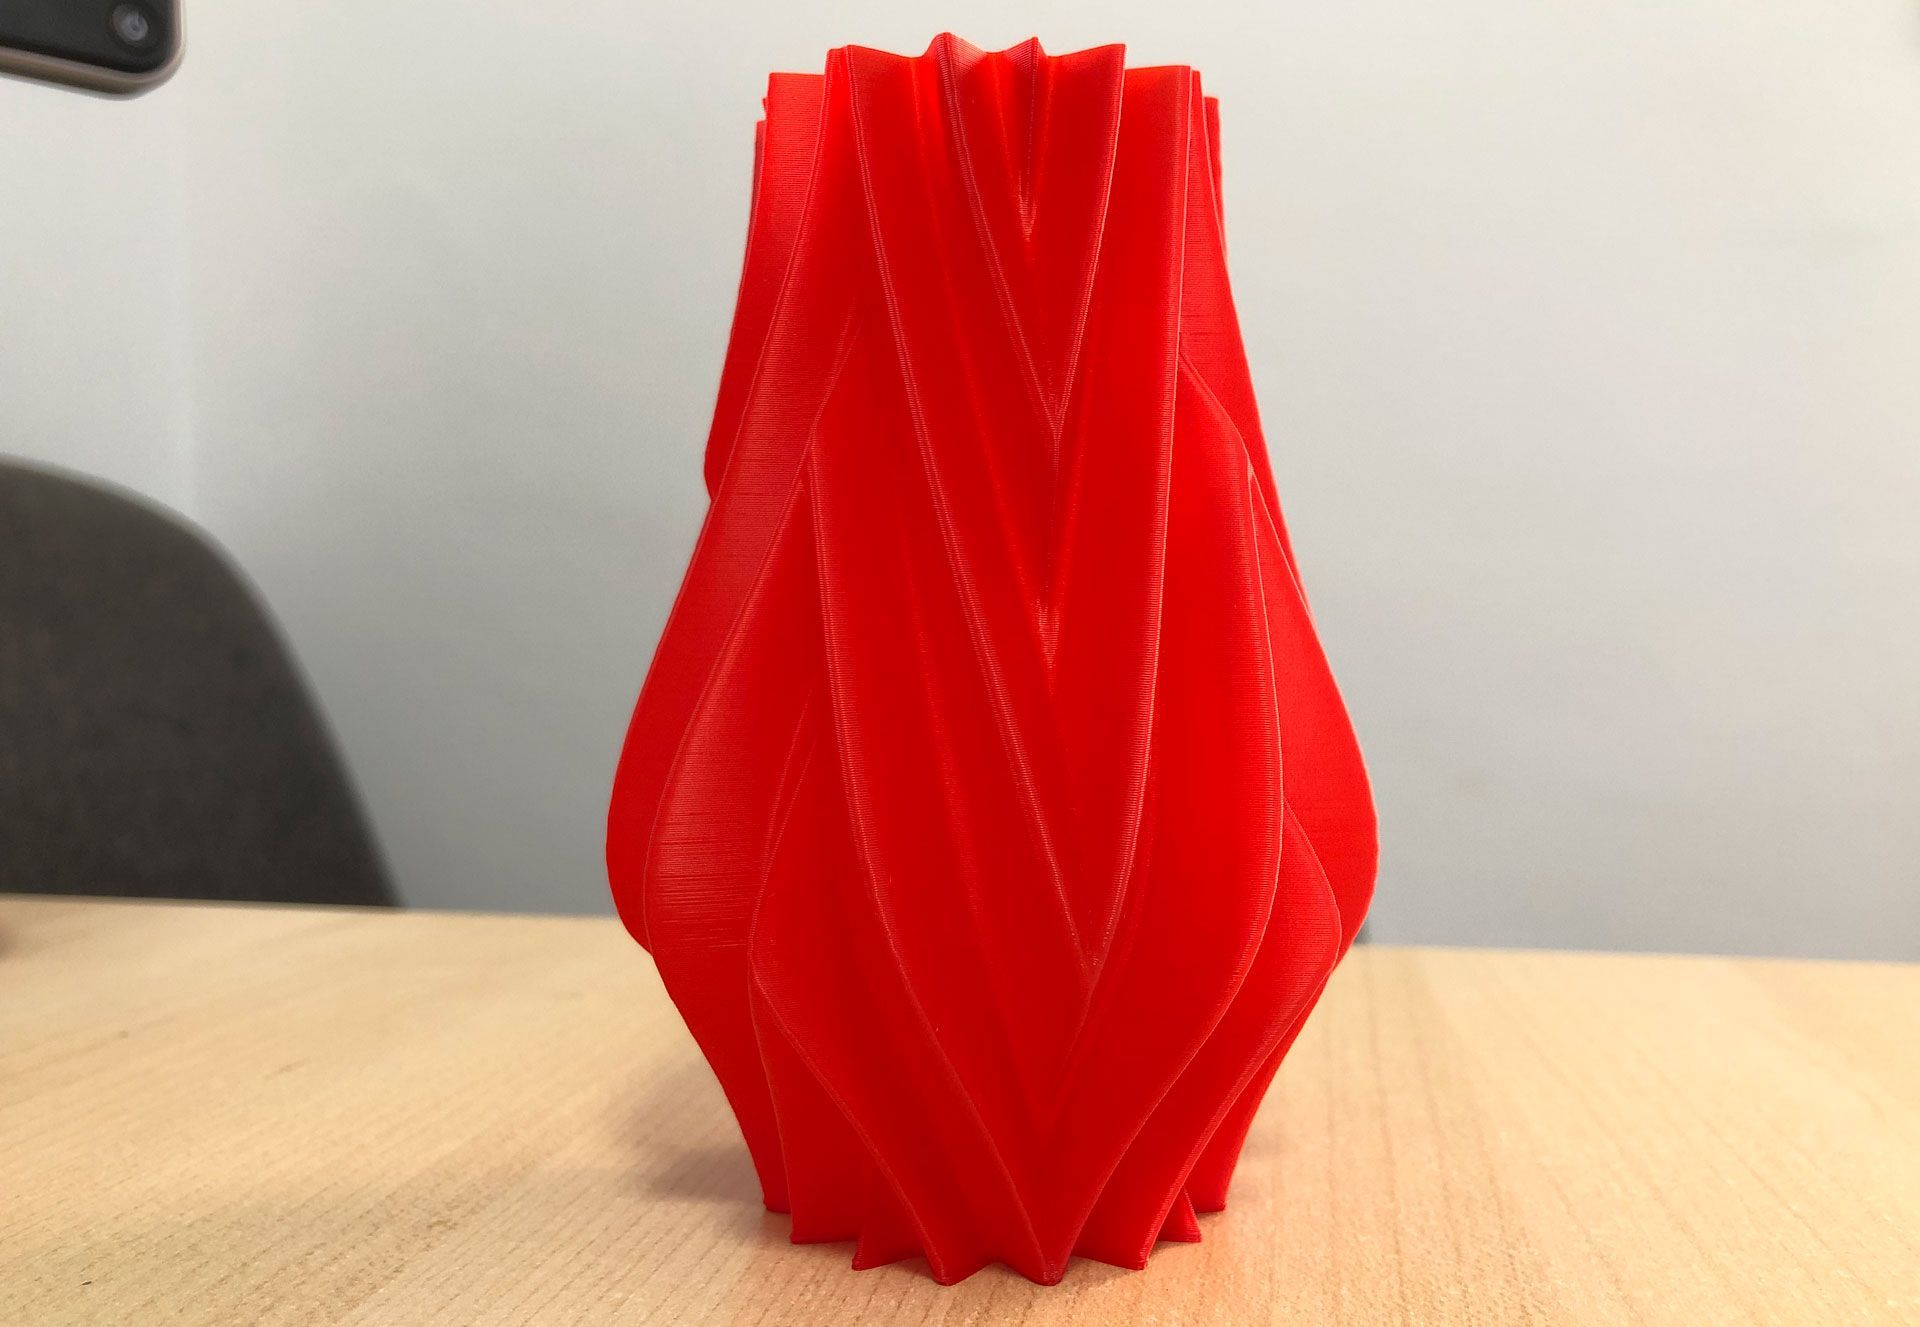
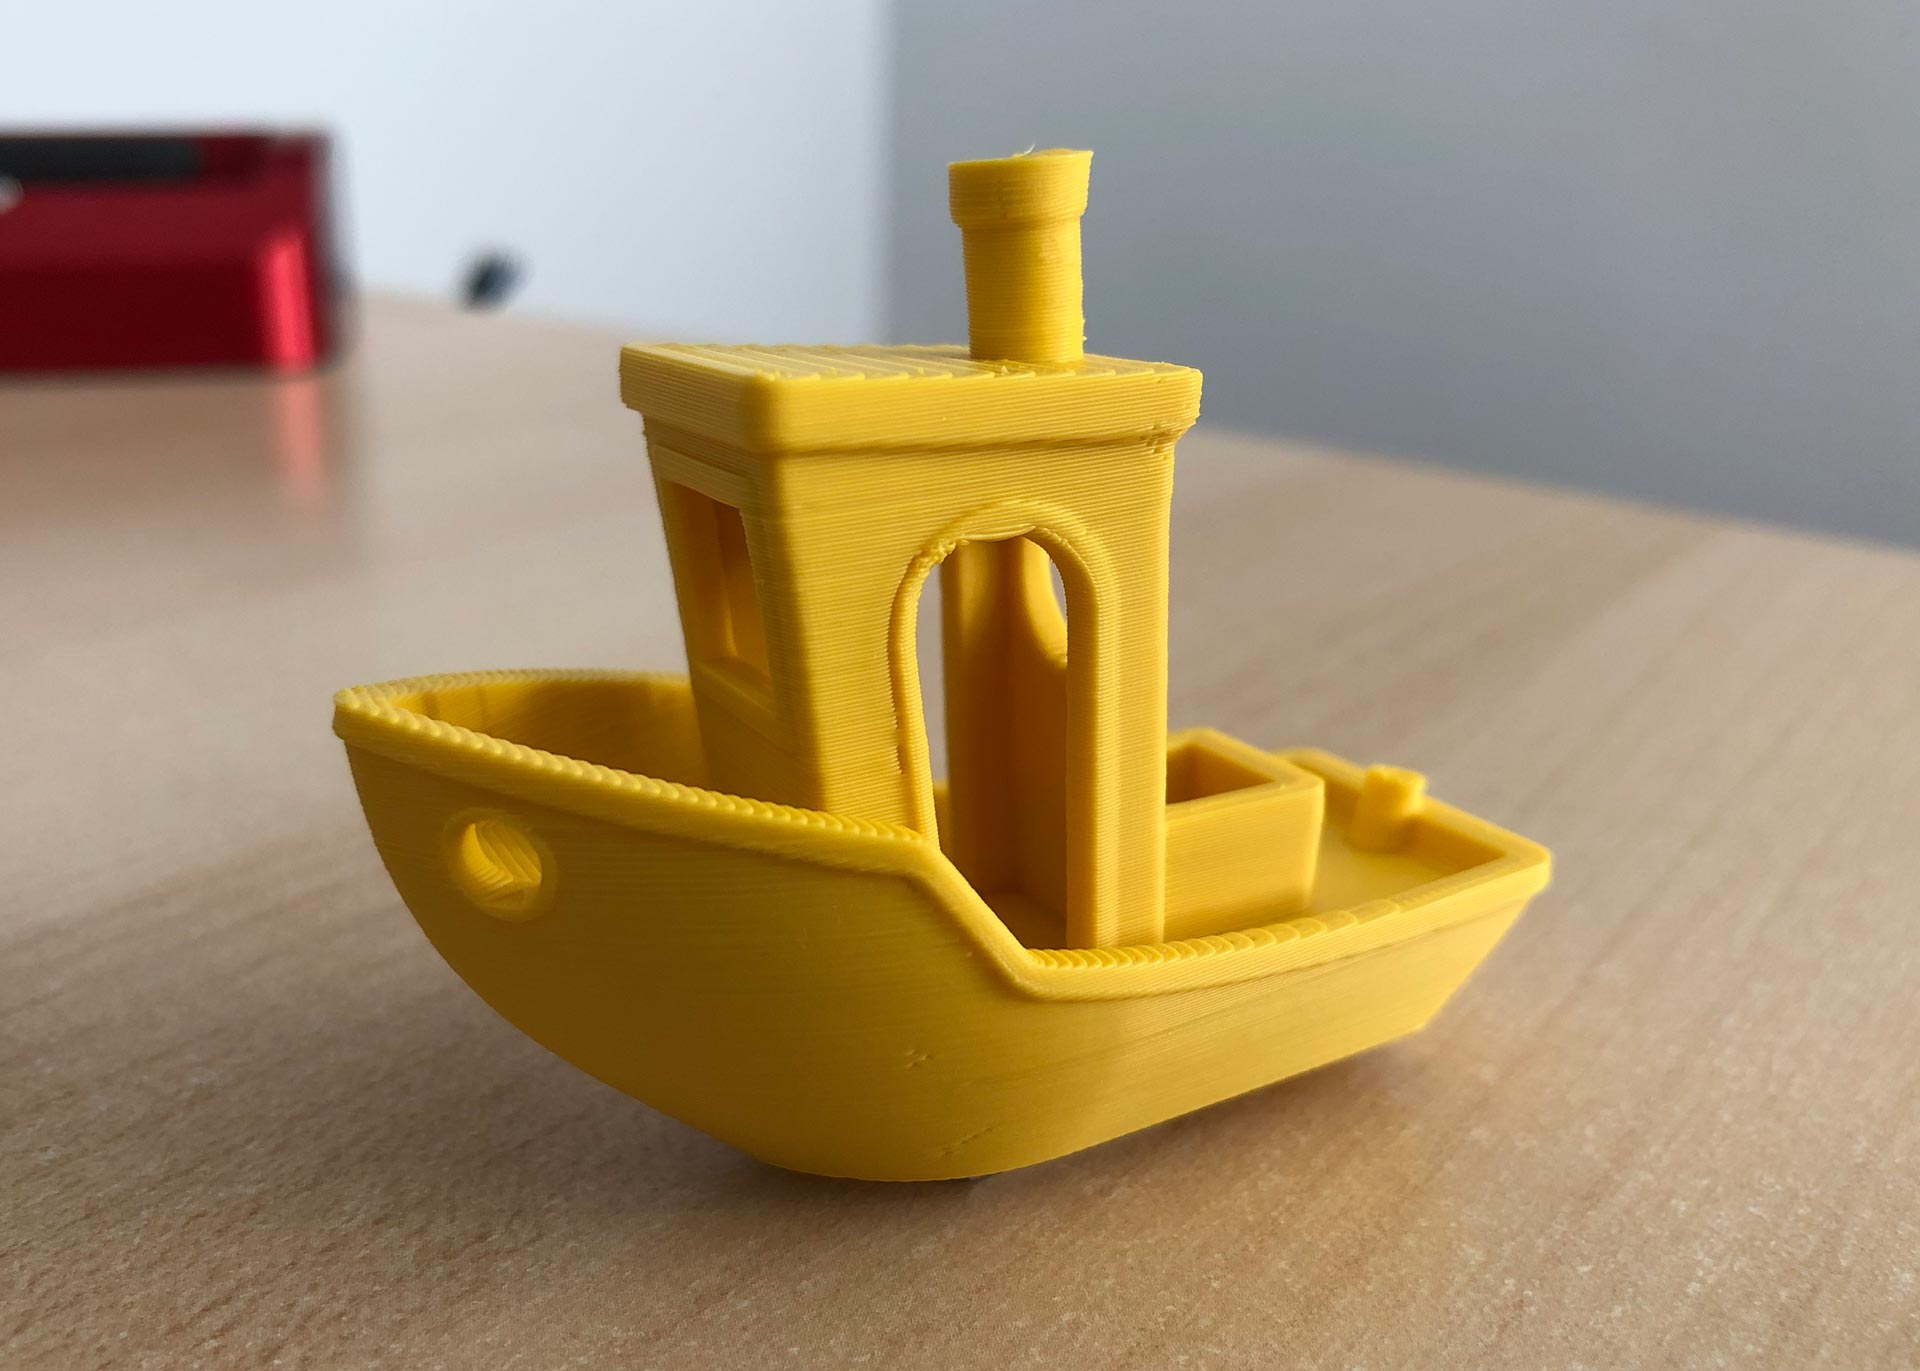
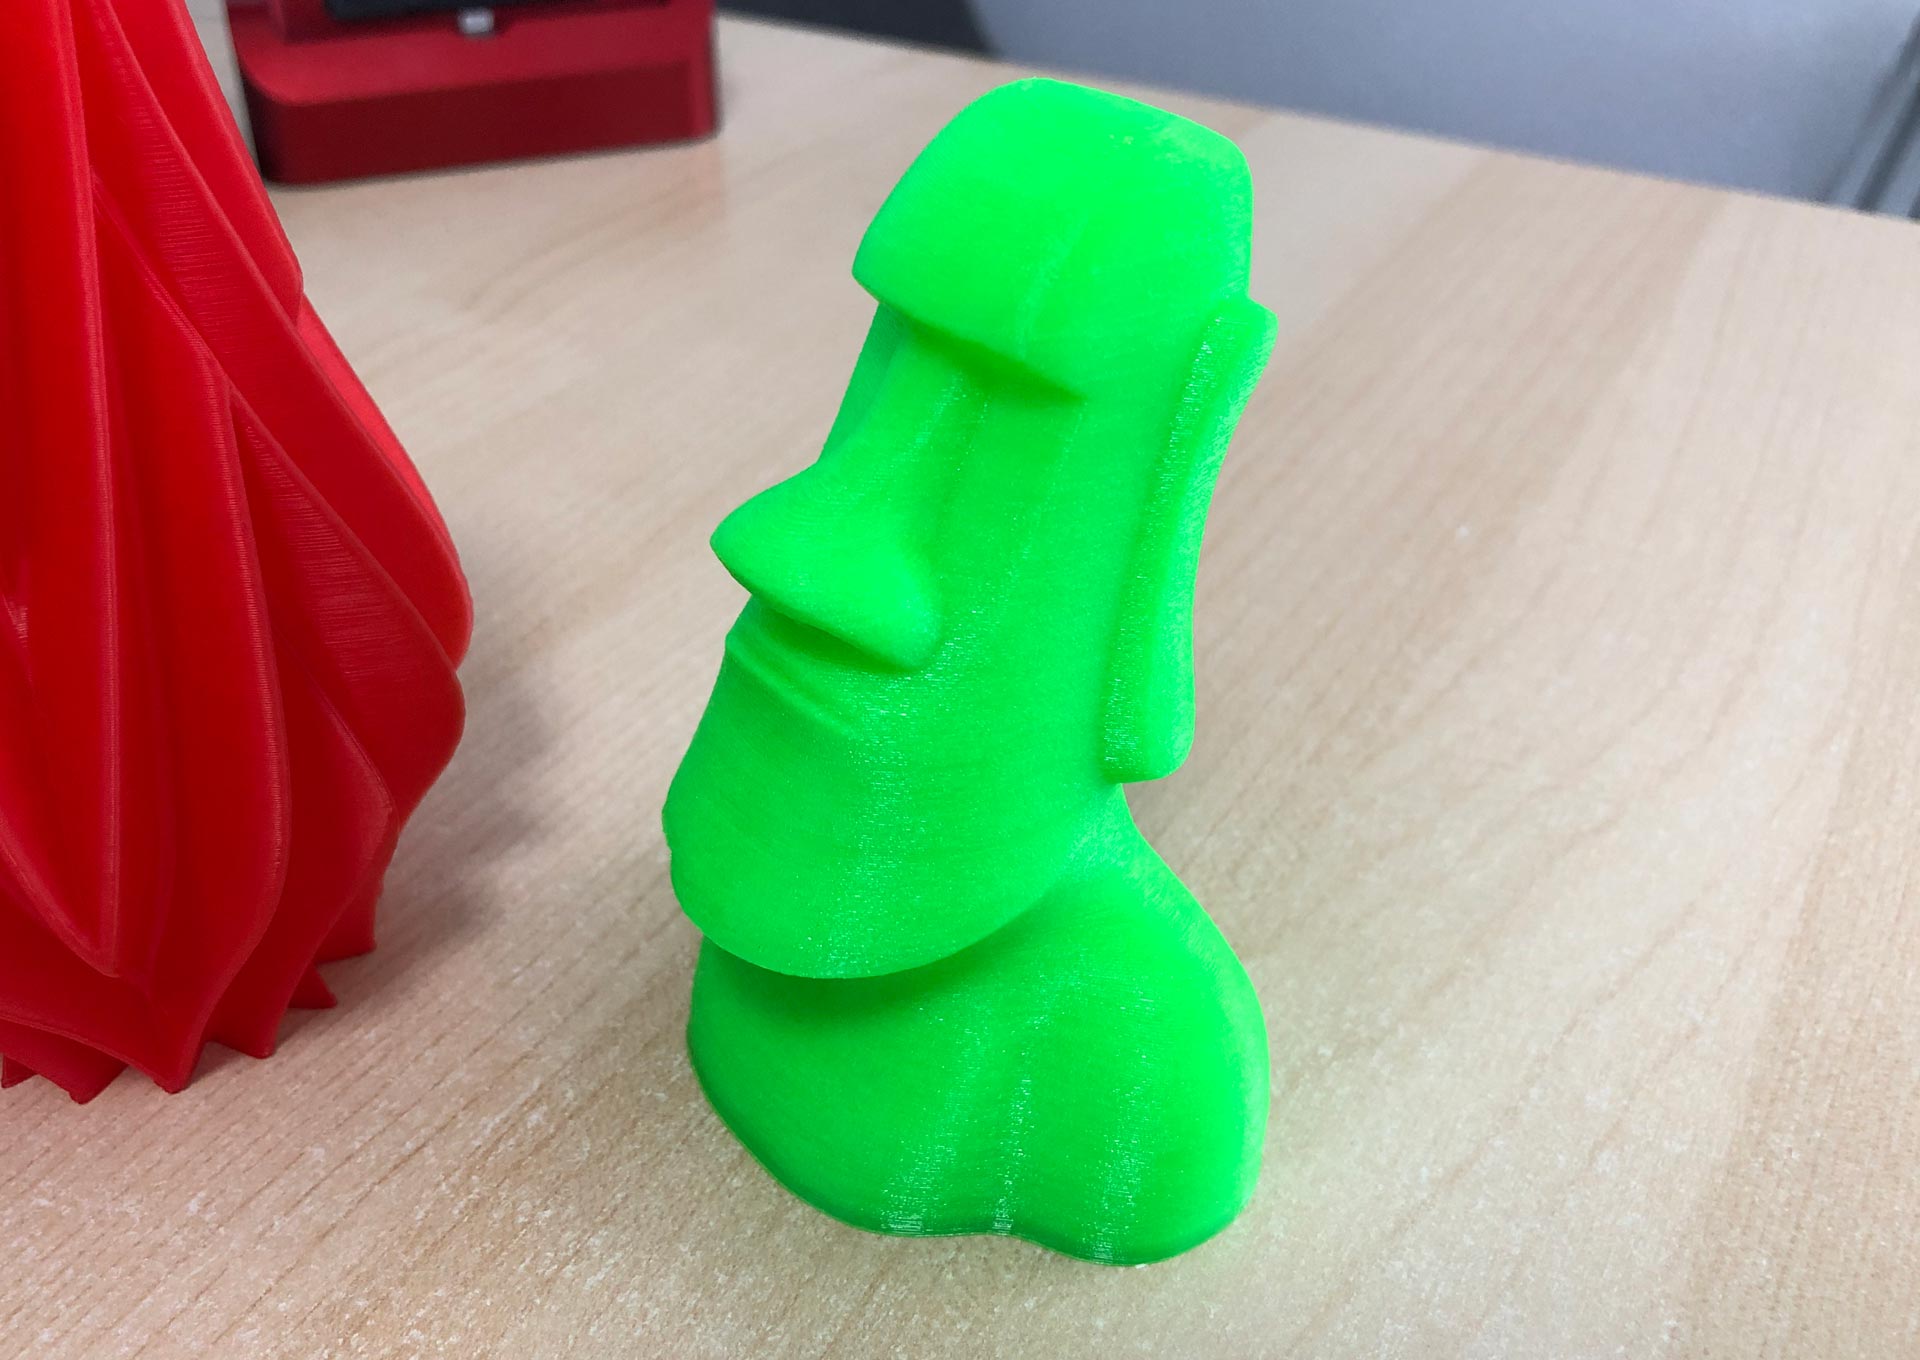
Here below are some photographs of various printed pieces and a detailed photo of a small vase in “vase mode”.
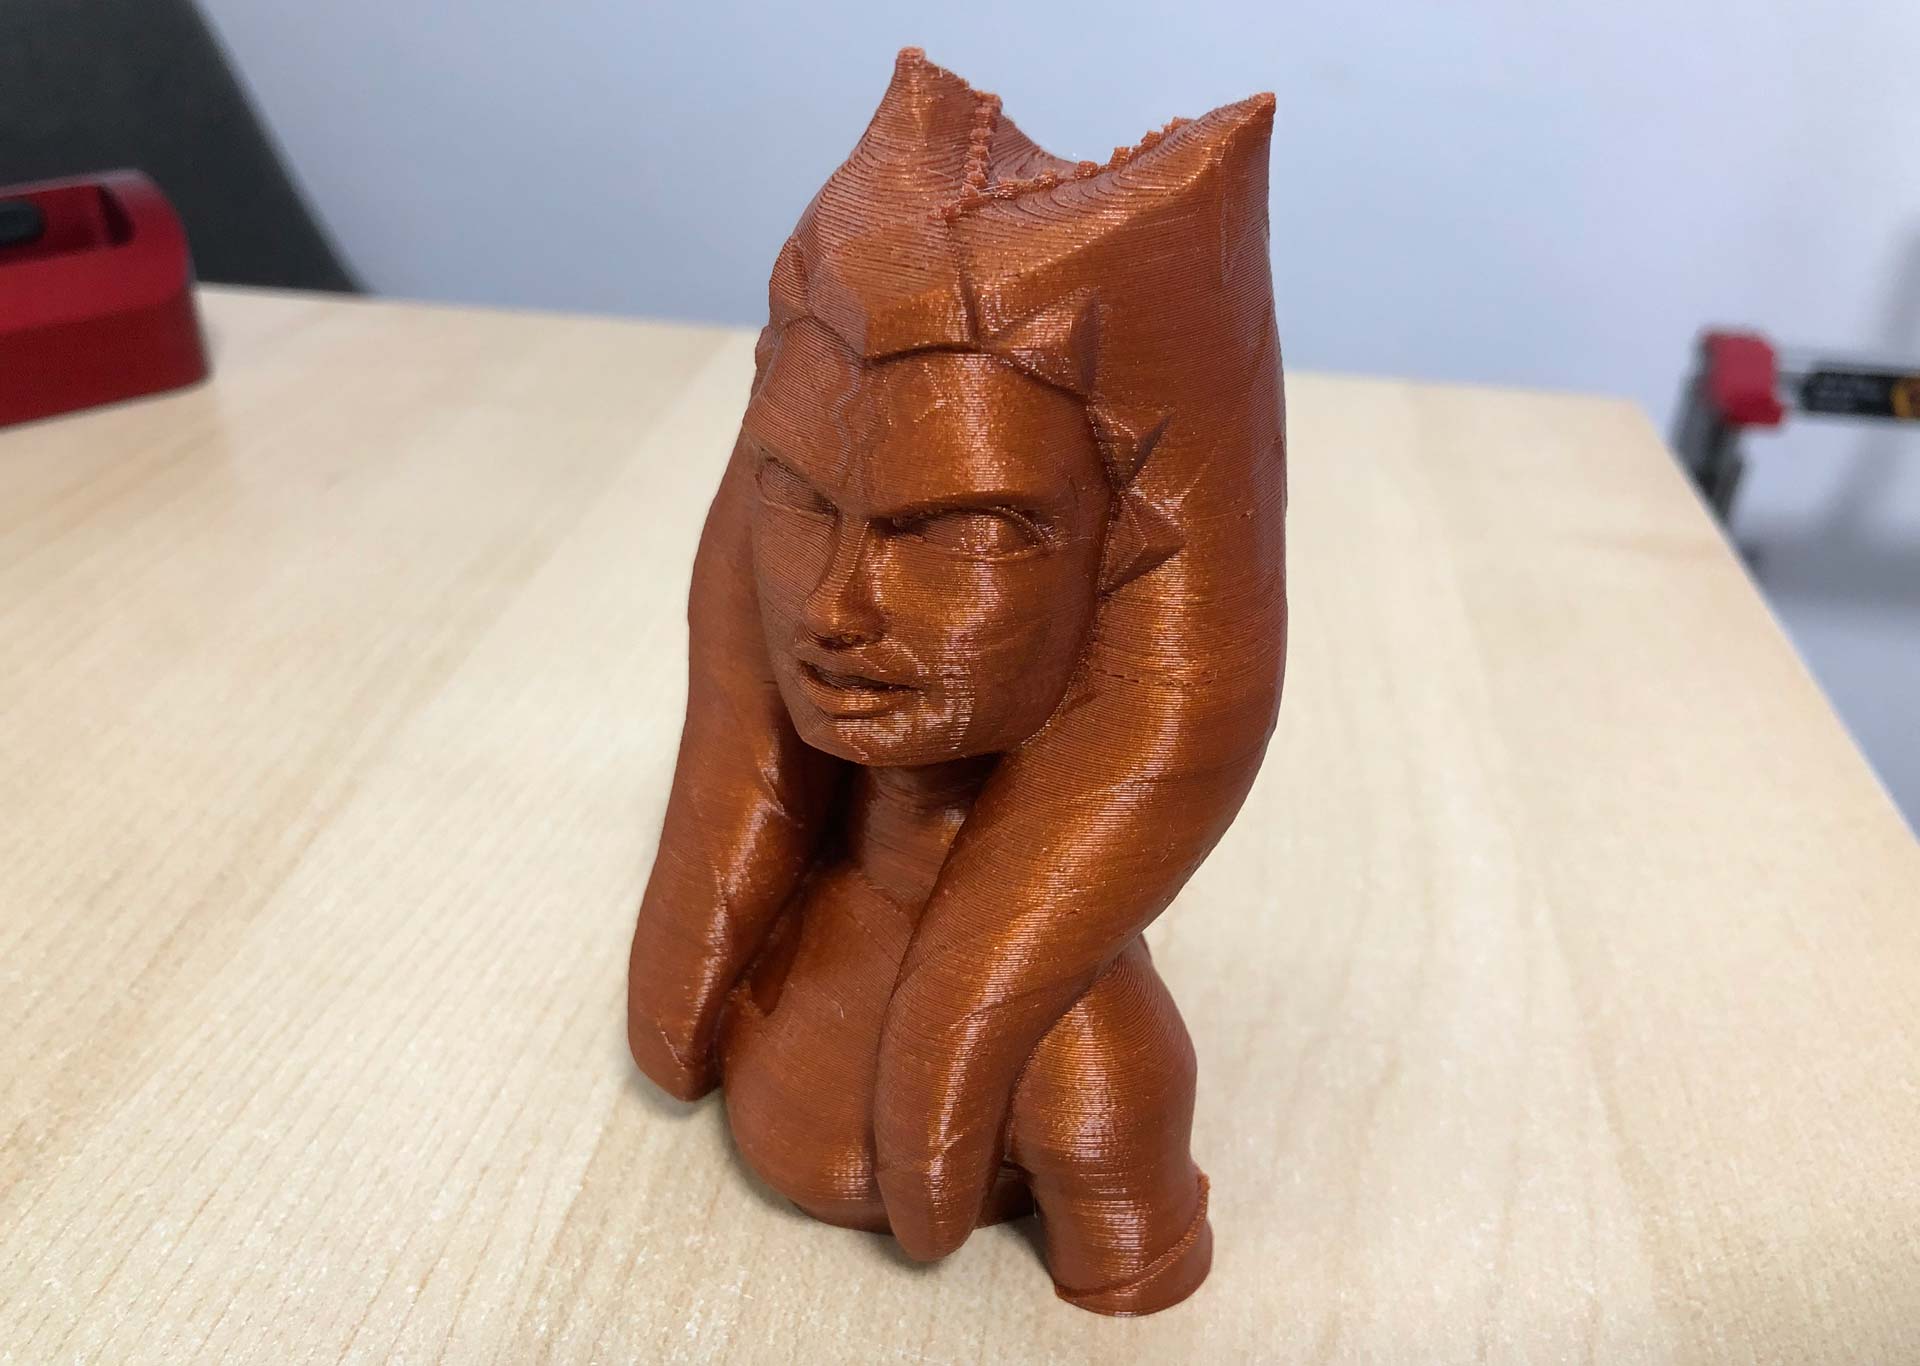
In this way you will be able to observe the great union between layers that a continuous flow offers us, something that is really amazing, and one of the most important characteristics of any extruder, as well as its power and weight.
You can click on all the images to view them in more detail:
| 3D Model | Vase #339 by _Steve |
| Filament type | Bobina PLA Genérico (desconozco marca) |
| Parameters | Spiral vase, 45mm/s, 205ºC/50ºC |
| 3D Model | Ahsoka Tano Bust Support Free by iczfirz |
| Filament type | CPE HG100 “Caramel Brown Metallic” |
| Parameters | 60mm/s, 260ºC/80ºC, infill 7% |
| 3D Model | 3DBenchy by CreativeTools |
| Filament type | ASA Extrafill “Traffic Yellow” |
| Parameters | 30mm/s, 240ºC/80ºC, infill 20% |
| 3D Model | Moai by ET-Huang |
| Filament type | TPU de SUNLU (Verde) |
| Parameters | 30mm/s, 230ºC/50ºC, infill 4% |
Final conclusion
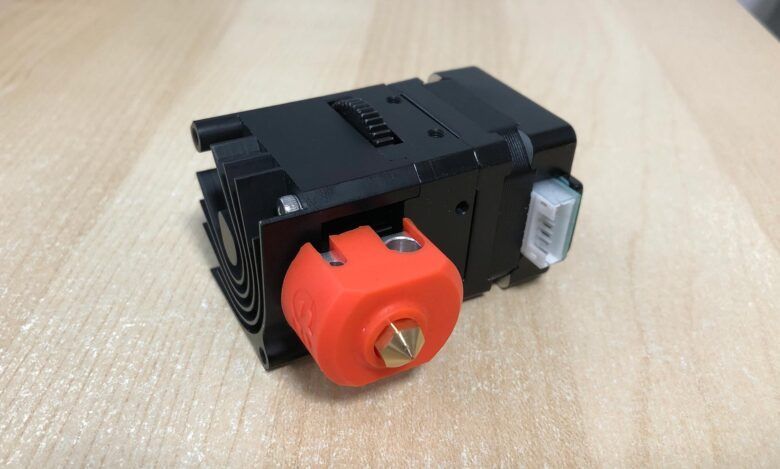
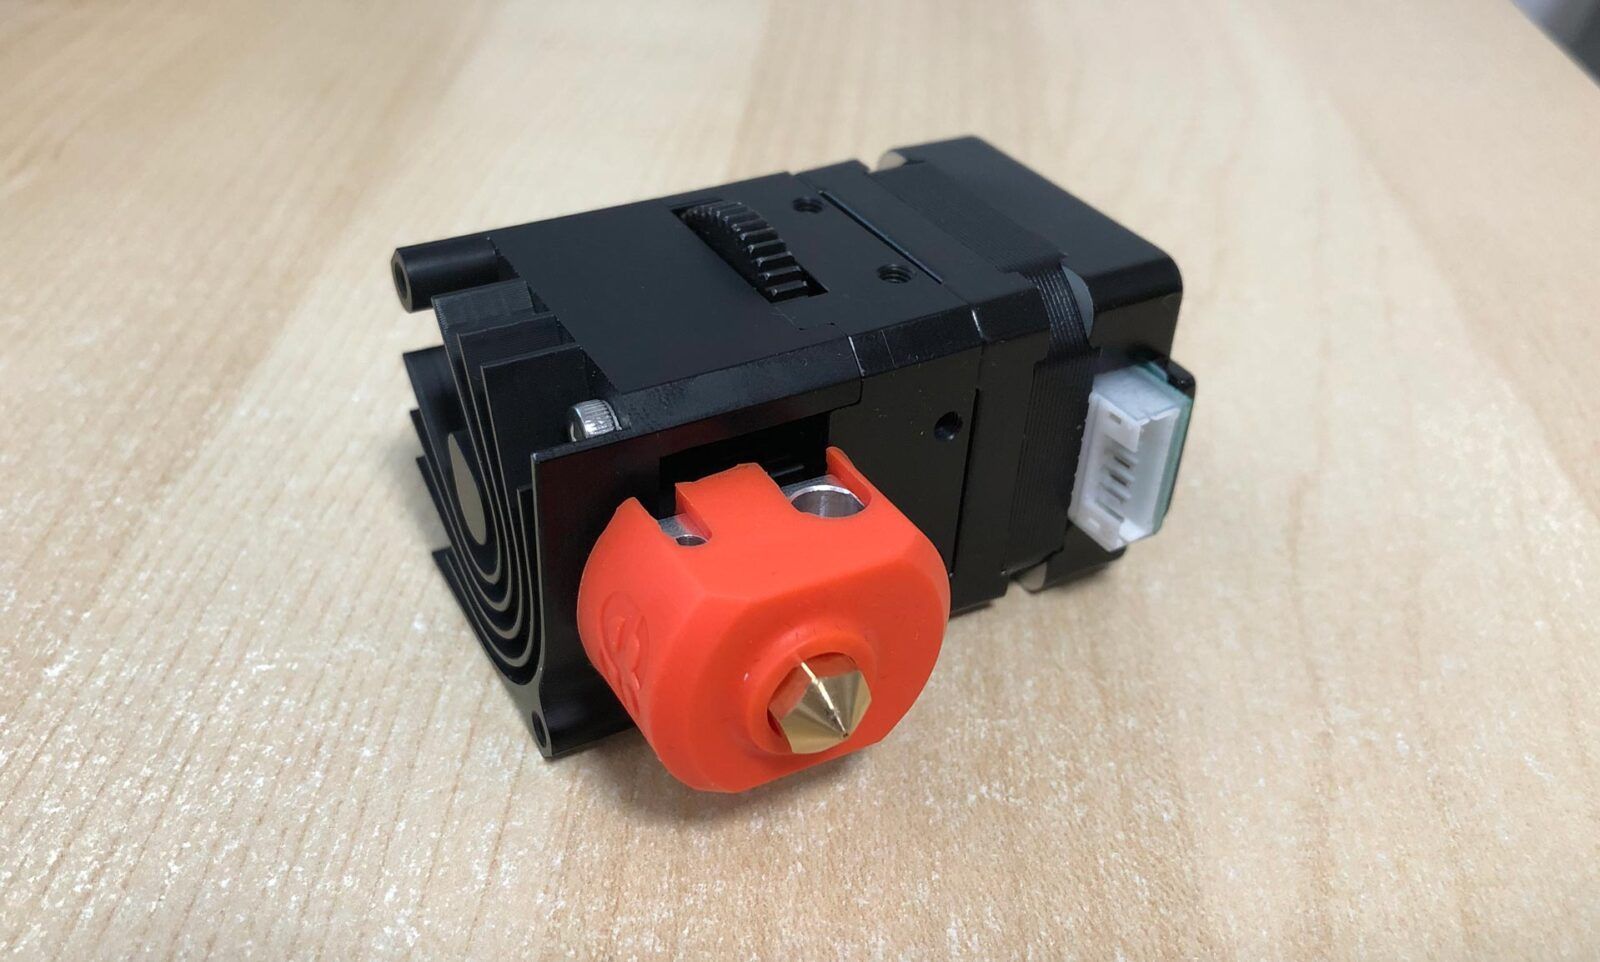
BIQU takes a step forward and tries to position itself in the market for extrusion systems with a high-performance extruder and with a weight not previously seen in this type of integral components (Extruder + Hotend).
Obviously it seems indisputable that weight is one of the strongest points of the BIQU H2 Extruder, but we can not forget that it brings a powerful torque (7:1 and 770mN.m), an excellent thermal dissipation and a block + nozzle that comes from Phaetus, recognized manufacturer of high quality hotends and nozzles such as the Dragon series and DragonFly.
It is also worth highlighting the versatility or flexibility offered by the BIQU H2 extruder to install it in any 3D printer on the market. Having up to 8 M3 threaded holes offers us many possibilities in this regard as you can imagine.
And not only for the assembly of the extruder itself, but to add other necessary elements later, such as leveling sensors (BLTouch, Pinda2, IR, inductive, etc.), layer fans (fan) or even neopixels (led strips).
With all these points in its favor, and the experience of use that I have had with it in the printing tests carried out, this extruder proves to be an excellent option to be assembled in any type of printer.
And especially if your main objective is to print at extremely high speeds, being able to replace bowden systems (more problematic in my opinion) for the BIQU H2 extruder, and sacrificing very few grams of weight along the way.
In short, if you are looking for a compact and high-performance extruder that also offers you the possibility of operating at very high printing speeds, BIQU H2 extruder is an excellent option to keep in mind.
So nothing more, I say goodbye wishing that this reading could have been of interest to you. Other cool articles from 3DWork.io:
- Expiration date in filaments. Utopia or something that we should demand from all manufacturers?
- QIDI TECH X-Plus: Industrial-grade, high-performance 3D printing for your desktop
- Phrozen Shuffle XL Lite: Large-scale printing, with 2K resolution and ParaLED technology
- SKR GTR V1.0: Complete analysis and configuration with TMC22xx drivers and Sensorless (Marlin 2.0.x.x)
- Adding filament sensor in SKR electronics (MINI E3, v1.3, v1.4 and v1.4 Turbo)
- Hygroscopy: Moisture issues in 3D Printing Filaments
- Post-processing of 3D parts: Much more resistant and airtight with heat and salt
- Marlin Builder: Update with support for version v2.0.6.1 and factory preconfigured firmwares
- Monoprice Cadet: Safe 3D printing for kids and beginners








Very interesting. LIGHT direct extruder (with direct drive). I was considering a Zesty Nimble (direct extruder with remote motor) for a new CoreXY printer build, yet the H2 could be another option to consider in an all-metal direct extrusion configuration.
The only things that bugs me is the nozzle style, yet I guess it can be replaced with V6-style ones.
Hello.
Very good guide and review for the H2 extruder. I’m also installing the same extruder on a ender 5 Pro, and was looking at your marlin settings. Didnt you have to make changes to your nozzle offset, or does that not matter?