Being able to have a 3D scanner at your disposal is something very interesting. Especially if you must regularly reproduce and print organic models, since drawing them can be a real nightmare.
A 3D scanner allows you to digitally capture the shape of any physical object, either using laser light or by photogrammetry. Basically you will create a point cloud made up of a set of vertices in a three-dimensional coordinate system (X, Y and Z). This will precisely form the outer surface of the object in question.
Today in 3DWork.io, I desire to show you an interesting way of how to build a 3D scanner with Arduino and photogrammetry. The only thing you will need is an Arduino UNO board, a 3D printer and some extra components, in this way you can prepare your own inexpensive and fully functional 3D scanner.
So let’s get to it …
3D scanner with Arduino and photogrammetry
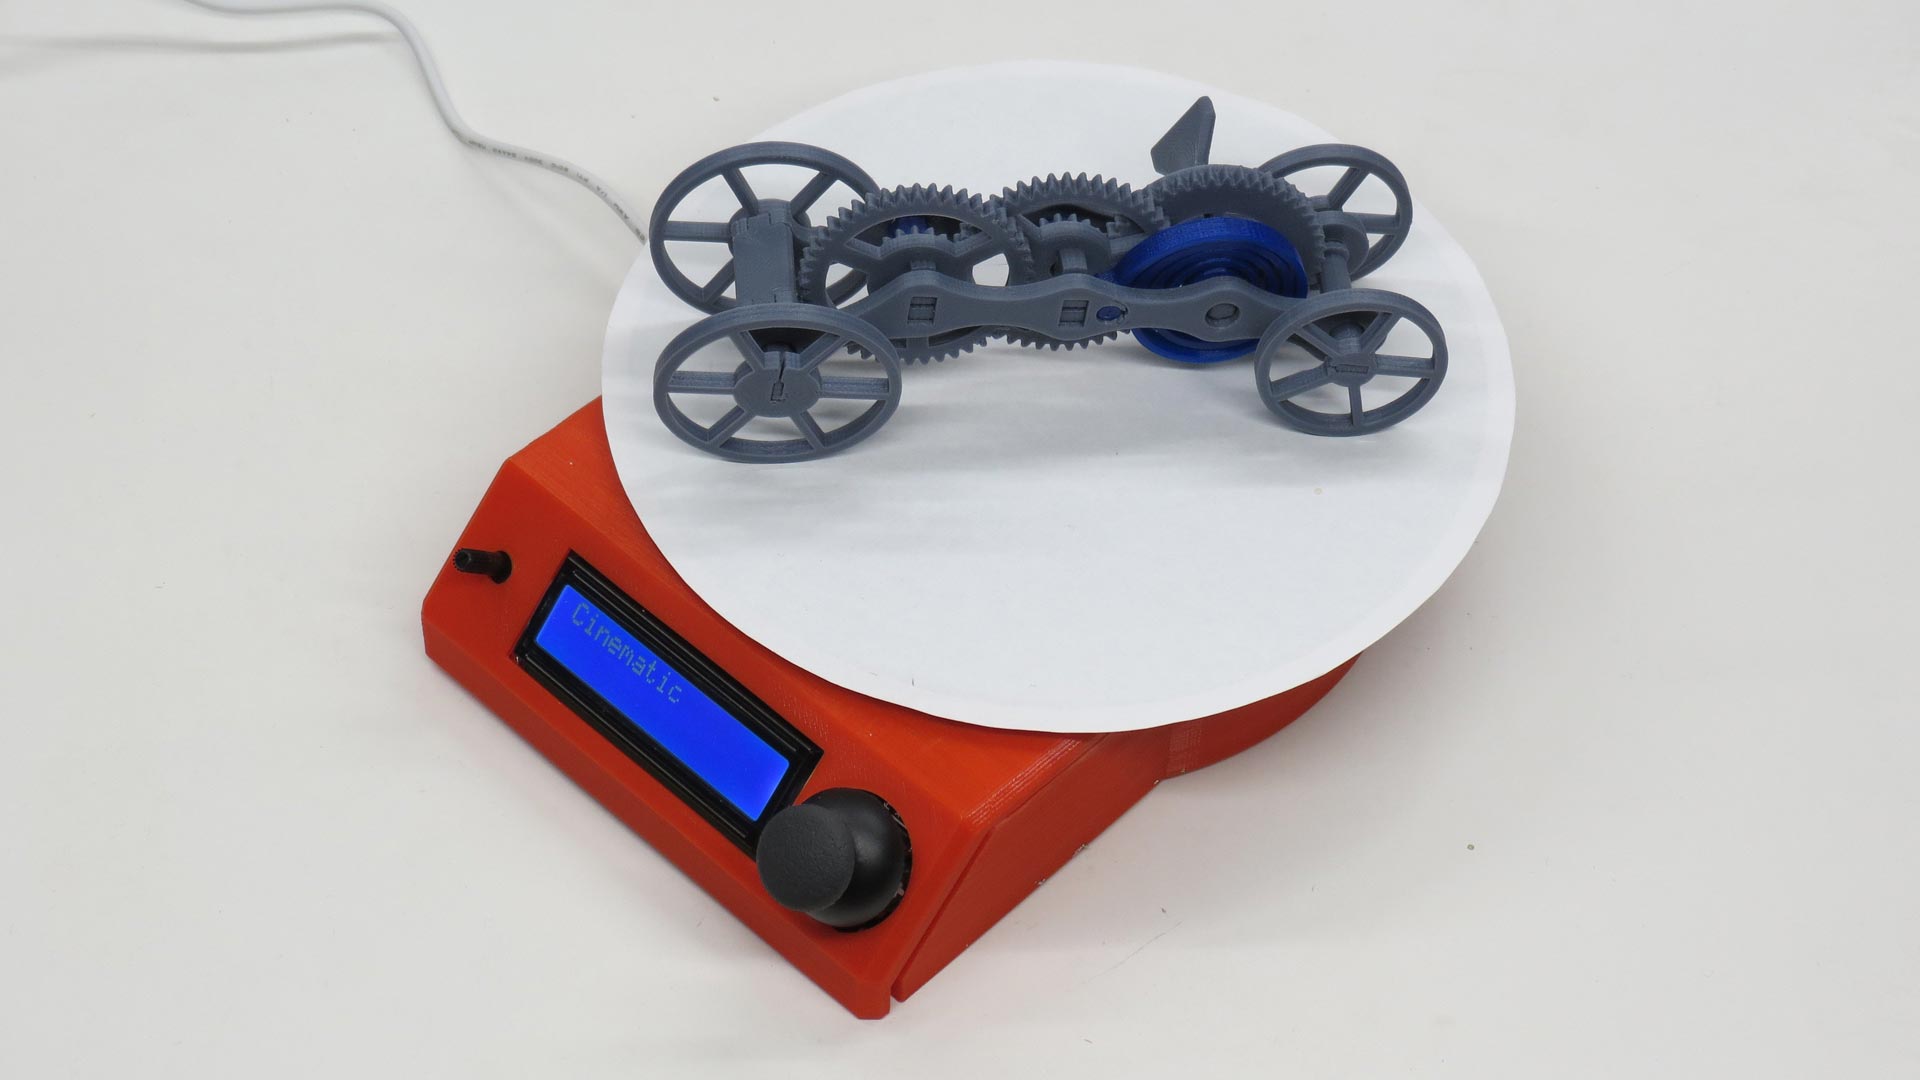
Its operation is based on photogrammetry, a technique used by some 3D scanners to generate 3D objects from photographs taken on a model. It would actually be something like “measuring” photos, if it could be called that 🙂
This 3D scanner has been made by the user Bribro12 , and is a new and improved version of a previous existing design of yours on Thingiverse, but this time fully automated and with Bluetooth connectivity to smartphones.
A single 3D scanner, but 3 functionalities available
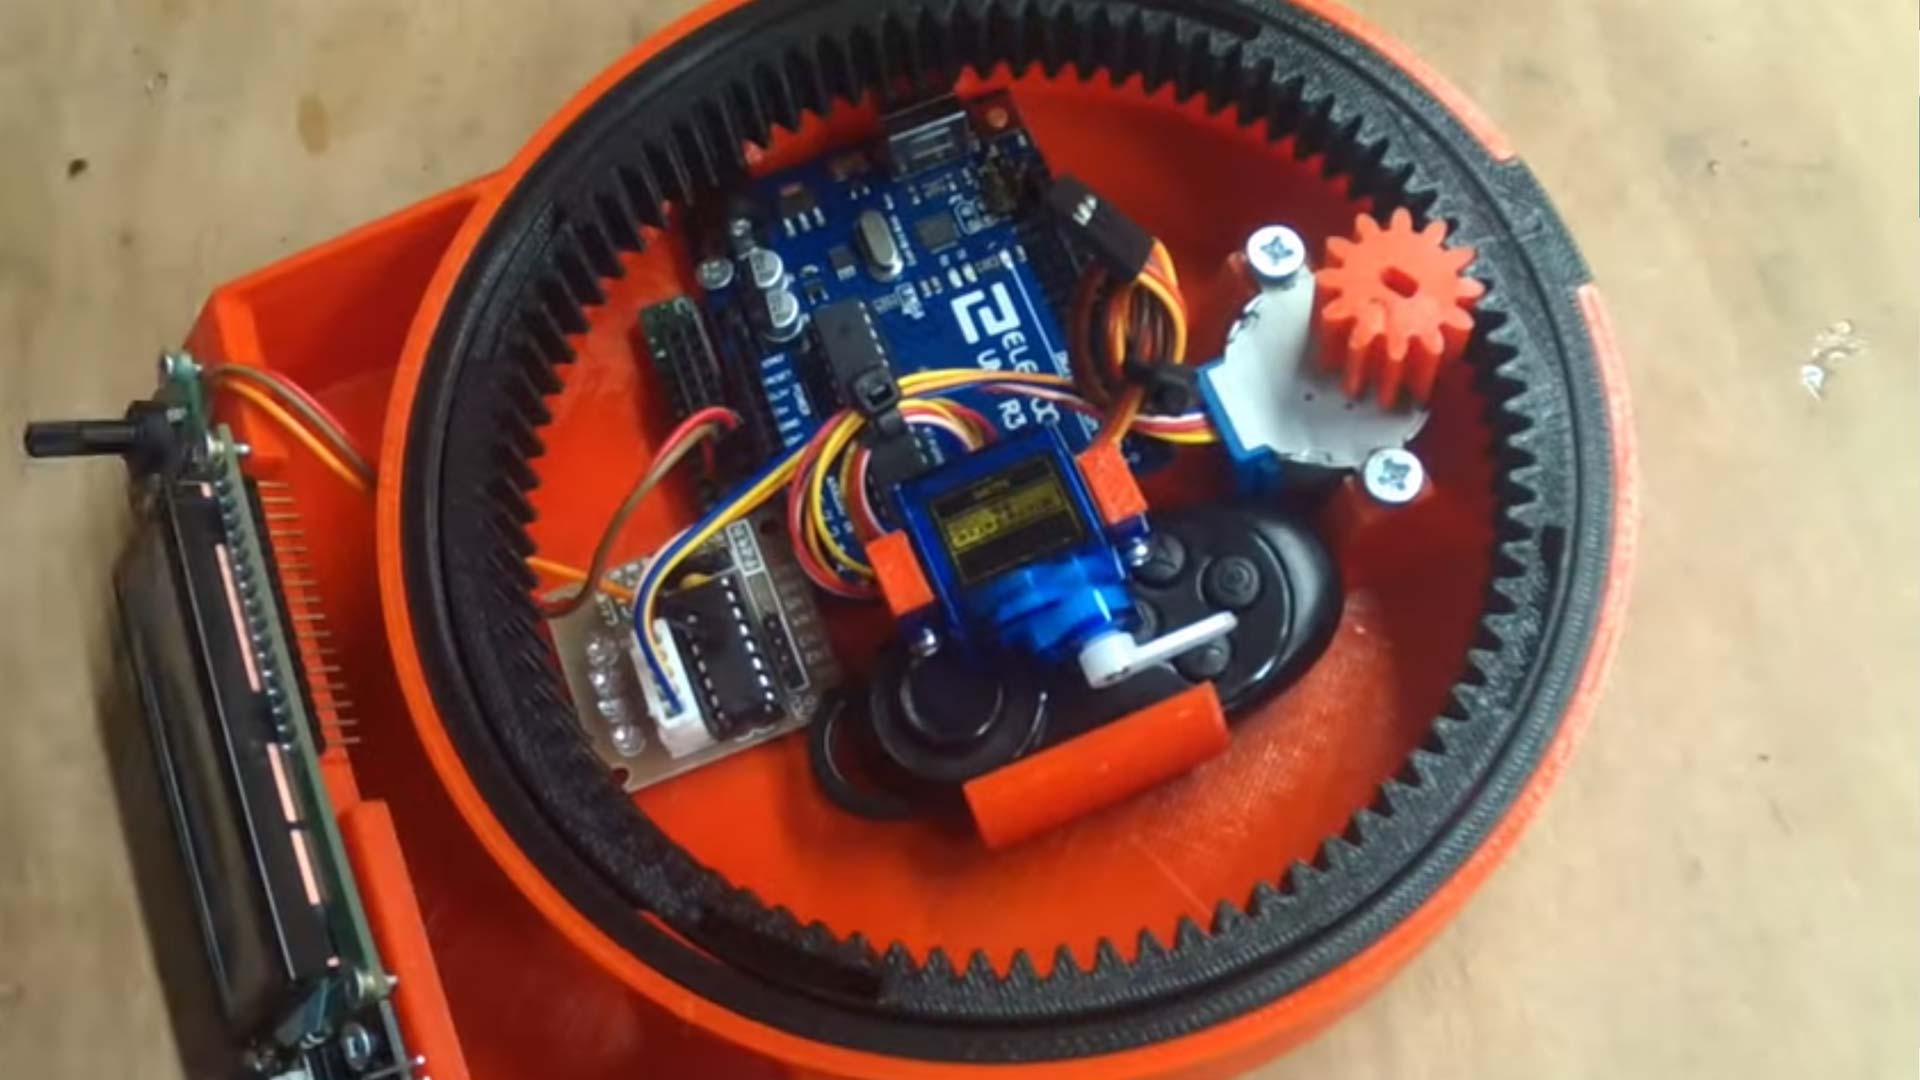
The design presented by Bribro12 is not just another turntable as it might seem. This 3D scanner captures 360º photos of the object with a mobile phone connected to Bluetooth, all managed by a Bluetooth remote control that makes small advances in the platform.
It also allows us to define the number of photos to take, from 2 to 200, simply configuring from the same Arduino program. You can then convert all these photos into a 3D model using any available photogrammetry software, such as Autodesk Recap Photo.
It also offers us the possibility of using it to take photos or cinematographic shots of objects by setting the rotation of the platform at a certain speed. This can vary between 1RPM and 17RPM, which are the speeds of the stepper motor.
A third option would allow us to manually control the turntable, being able to bring it to the desired position and at the preferred speed. As you can see, it is a fairly complete application.
In the video you can see the complete process of the design and construction of the turntable, the servo drive for the advance of the platform and much more. The truth is that it is a very interesting project, everything must be said.
Required components
This is a list with the components that appears in today’s article. It is my duty to inform you that they are affiliate links to different internet online stores.
If by chance you use them, the price of the product will be the same as if you access them regularly. And 3DWork will have a small commission that will help maintain and give continuity to this website.
Project files
| Enlaces de descarga | ||
| Required STL files | direct link | |
| Wiring diagram arduino (Electric scheme) | direct link | |
| Camera Turntable Arduino (Software) | direct link | |
We hope that this short project to make a 3D scanner with Arduino from scratch has been useful for you. If so, do not hesitate to indicate it in your comments at the end of the article. You can find more information about it on Thingiverse by clicking on this same link.
Finally, I would like to remind you that we have a great community in our Telegram channel.
Finally, you can find more interesting articles here:
- Post-processing of 3D parts: Much more resistant and airtight with heat and salt
- Marlin Builder: Update with support for version v2.0.6.1 and factory preconfigured firmwares
- Monoprice Cadet: Safe 3D printing for kids and beginners
- New review of electronic BTT SKR MINI E3 V2.0 for your Ender 3 printer
- Closed-Loop Motors: Makerbase MKS Servo42b (Brief analysis)
- Complete guide SKR v1.4 / v1.4 Turbo with TMC2209 Sensorless drivers and Display TFT35 V3.0
- DyzeXtruder Pro: Analysis of a high-performance extruder for professional environments
- MKS TFT35 Display: Latest updates v106 and v107 available
- The Spaghetti Detective: Monitoring Octoprint from the Internet safely









Déjanos un comentario